Home>Production & Technology>Music Video>How Can I Make A Music Video

Music Video
How Can I Make A Music Video
Published: November 15, 2023
Learn how to make a music video with step-by-step instructions and professional tips. Start creating your own captivating visuals today.
(Many of the links in this article redirect to a specific reviewed product. Your purchase of these products through affiliate links helps to generate commission for AudioLover.com, at no extra cost. Learn more)
Table of Contents
- Introduction
- Step 1: Planning Your Music Video
- Step 2: Choosing a Concept and Storyline
- Step 3: Preparing the Equipment and Location
- Step 4: Gathering Your Crew and Cast
- Step 5: Shooting the Music Video
- Step 6: Editing and Post-Production
- Step 7: Adding Visual Effects and Graphics
- Step 8: Choosing the Right Music and Sound Effects
- Step 9: Final Touches and Color Grading
- Step 10: Publishing and Sharing Your Music Video
- Conclusion
Introduction
Welcome to the exciting world of music videos! In today’s digital age, music videos have become a crucial component in the success of musical artists. They provide a visual representation of the song, allowing artists to connect with their audience on a deeper level. Whether you’re an aspiring musician, a filmmaker, or simply someone who wants to create a music video for fun, this article will guide you through the process of making your own music video.
In this comprehensive guide, we will explore the step-by-step process of planning, shooting, and editing a music video. From conceptualization to post-production, we will dive into the key elements that make a music video visually captivating and engaging. Along the way, we’ll provide valuable tips and insights to help you optimize your video for search engines and reach a wider audience.
Creating a music video is an artistic endeavor that requires careful planning, creativity, and coordination. It’s an opportunity to showcase your musical talent and express your unique vision. Whether you’re aiming for a high-budget production or working with limited resources, this guide will provide you with the knowledge and tools to bring your music video ideas to life.
Get ready to unleash your creativity and embark on a journey that combines the power of music and visuals. Let’s dive into the world of music video production and discover how you can make your mark in this dynamic and ever-evolving industry.
Step 1: Planning Your Music Video
Before diving into the production of your music video, it’s crucial to lay a strong foundation through careful planning. This step will help you clarify your vision, determine your budget, and establish a timeline for the project.
Here are some key aspects to consider when planning your music video:
- Song Selection: Choose a song that resonates with your intended audience and matches the overall tone and message you want to convey. Consider the genre, tempo, and lyrics of the song.
- Concept Development: Brainstorm ideas for your music video concept. Think about the story, themes, and visual aesthetics that would complement the song. Consider whether you want a narrative-driven video, a performance-based video, or a combination of both.
- Budgeting: Determine your budget based on your resources and the scale of your vision. Consider costs for location scouting, equipment rental, props, costume design, and any necessary permits or licenses.
- Timeline: Create a realistic timeline for the pre-production, production, and post-production phases. Factor in any external deadlines, such as the release date of the song.
- Storyboarding: Create a visual storyboard or shot list that outlines the sequence of shots in your music video. This will serve as a roadmap during the filming process and help you communicate your vision to the cast and crew.
- Location Scouting: Scout for suitable locations that align with your concept. Consider the logistics, accessibility, and aesthetics of each potential location.
- Casting: Decide whether you want to feature yourself as the main artist or if you’d like to include other performers or actors in your music video. Hold auditions or reach out to talent agencies to find the right individuals to bring your vision to life.
- Collaboration: Surround yourself with a talented and dedicated team who share your vision. This may include a director, cinematographer, editor, production designer, and other key crew members. Building a strong collaborative team will enhance the quality of your music video.
Remember, effective planning sets the stage for a successful music video. Take the time to carefully consider each aspect and make adjustments as needed. By doing so, you’ll be well-prepared to move forward with the production process and bring your creative vision to life.
Step 2: Choosing a Concept and Storyline
Now that you have laid the groundwork in the planning phase, it’s time to delve into the creative process of choosing a concept and storyline for your music video. This step will shape the overall narrative and visual aesthetics of your video.
Here are some tips to help you choose a compelling concept and storyline:
- Song Analysis: Dive deep into the lyrics and mood of your song. Identify the key themes, emotions, or messages that the song conveys. This will serve as the foundation for your concept.
- Visual Inspiration: Look for visual inspiration from various sources, such as music videos, films, art, photography, or even everyday life. Create a mood board or a collection of references that capture the atmosphere and visual style you envision for your music video.
- Embrace Originality: Strive for originality and uniqueness in your concept. While it’s okay to draw inspiration from existing works, put your own twist on it to create something fresh and memorable.
- Consider Your Target Audience: Keep your target audience in mind when crafting your concept. Ensure that your storyline and visuals will resonate with your intended viewers and enhance their connection to the song.
- Balance Creativity and Feasibility: While it’s essential to be creative, also consider the feasibility of executing your concept within your budget and resources. Ensure that your chosen concept is realistic and achievable.
- Narrative or Performance: Decide whether you want your music video to be narrative-driven, telling a story that complements the song’s lyrics, or performance-based, focusing on capturing compelling visuals of the artist(s) performing the song.
- Symbolism and Metaphors: Explore the use of symbolism and metaphors to add depth and layers to your storyline. This can enhance the overall impact and leave a lasting impression on the viewers.
- Collaborate with Your Team: Involve your team in the concept development process. Collaborate with the director, cinematographer, and other creative minds to get different perspectives and ideas. This will enrich the concept and bring diverse expertise to the table.
The concept and storyline of your music video will be the driving force behind its success. Take your time to brainstorm, experiment, and refine your ideas until you land on a concept that is unique, engaging, and aligns perfectly with the song’s essence. This is your opportunity to showcase your creativity and leave a lasting impression on your audience.
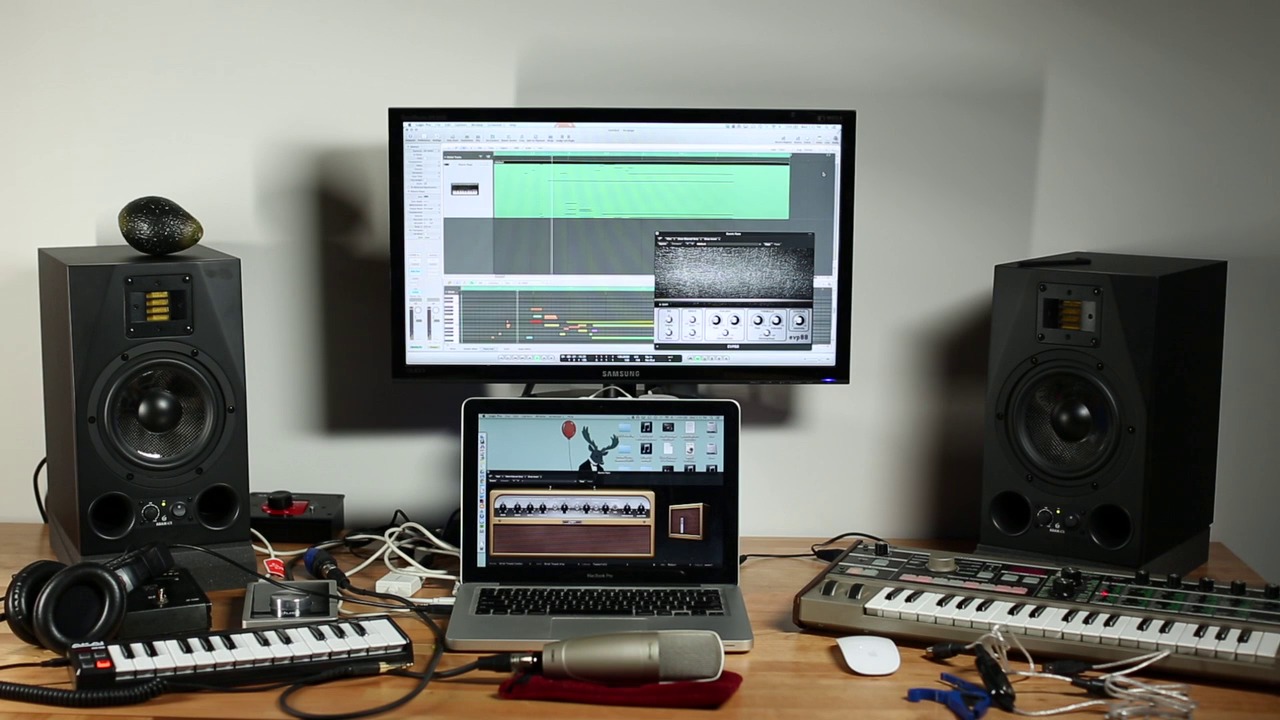
Step 3: Preparing the Equipment and Location
Once you have finalized the concept and storyline for your music video, it’s time to start preparing the necessary equipment and securing the ideal location(s) for your shoot. This step is vital to ensure a smooth production process and capture high-quality footage.
Here are some key considerations when preparing the equipment and location for your music video:
- Evaluation of Equipment Needs: Assess the equipment requirements based on your concept and desired visual style. Determine whether you need professional cameras, lenses, lights, stabilizers, microphones, or any other specialized gear. Rent or borrow equipment if needed.
- Test Equipment: Prior to the shoot, familiarize yourself with the equipment and conduct test shots to ensure everything is functioning properly. This will help you troubleshoot any technical issues in advance.
- Location Scouting: If you haven’t already, embark on the process of scouting for suitable locations that align with your concept. Consider factors such as aesthetics, logistics, and permits required for each location. Visit potential locations in person or use online tools to gather information.
- Obtain Permits: If your chosen location requires permits or permission for filming, make sure to acquire them well in advance. This will help you avoid any legal issues and ensure a smooth and uninterrupted shoot.
- Prepare the Set: If shooting indoors or on a controlled set, ensure that the space is clean, organized, and ready for filming. Set up any props, decorations, or special arrangements according to your storyboard or shot list.
- Communicate with Location Owners: If you are shooting on private property or in a public space, it’s essential to communicate with the owners or authorities. Obtain their approval and discuss any specific instructions or rules to follow during the shoot.
- Weather Considerations: Keep an eye on the weather forecast leading up to the shoot day. Adjust your plans accordingly if adverse weather conditions are expected. Consider having backup locations or postponing the shoot if necessary.
- Collaboration with the Team: Communicate and coordinate with your team regarding the equipment and location requirements. Ensure that everyone is on the same page and has the necessary details to execute their roles effectively.
By properly preparing the equipment and location for your music video, you will set the stage for a successful shoot. This step is crucial to ensure that you have the right tools at your disposal and a suitable environment that enhances your concept and vision. Take the time to plan, organize, and communicate effectively to make the production process as seamless as possible.
Step 4: Gathering Your Crew and Cast
As you move forward with your music video production, assembling a talented and dedicated crew, as well as selecting the right cast members, is crucial to bringing your vision to life. The success of your music video will heavily rely on the collaborative efforts and skills of these individuals.
Here are some important considerations when gathering your crew and cast:
- Director: Your director will be responsible for translating your vision into visual storytelling. Look for a director who shares your artistic sensibilities and has experience in music video production.
- Cinematographer: A skilled cinematographer will play a key role in capturing visually stunning footage. Focus on finding someone with a strong understanding of lighting, composition, and camera movement.
- Production Team: Depending on the scale of your music video, you may need a production manager, production assistants, and other crew members to handle logistics, scheduling, and coordination.
- Art Directors and Set Designers: If your concept involves elaborate set designs or requires specific props, consider hiring art directors and set designers to bring your vision to life.
- Makeup and Wardrobe: Engage makeup artists and wardrobe stylists who can enhance the visual appeal of your cast members and ensure they align with the overall concept of the music video.
- Choreographers/Dancers: If your music video includes dance sequences, consider working with experienced choreographers and talented dancers to execute the moves seamlessly.
- Cast Members: Whether you’re featuring yourself as the main artist or need additional actors, casting the right individuals is essential. Look for performers who can embody the emotions and energy of the song.
- Open Calls and Auditions: Hold open calls or auditions to find talent for your music video. Advertise the casting calls through social media, industry networks, or talent agencies to attract a diverse pool of performers.
- Communication and Collaboration: Ensure effective communication and collaboration with your crew and cast members. Clearly communicate your expectations, provide necessary information, and foster a supportive and creative working environment.
Remember, the crew and cast members you assemble will contribute significantly to the quality and success of your music video. Take the time to carefully select individuals who are passionate about their craft and share your vision. A collaborative and dedicated team will bring out the best in your concept and deliver a standout music video.
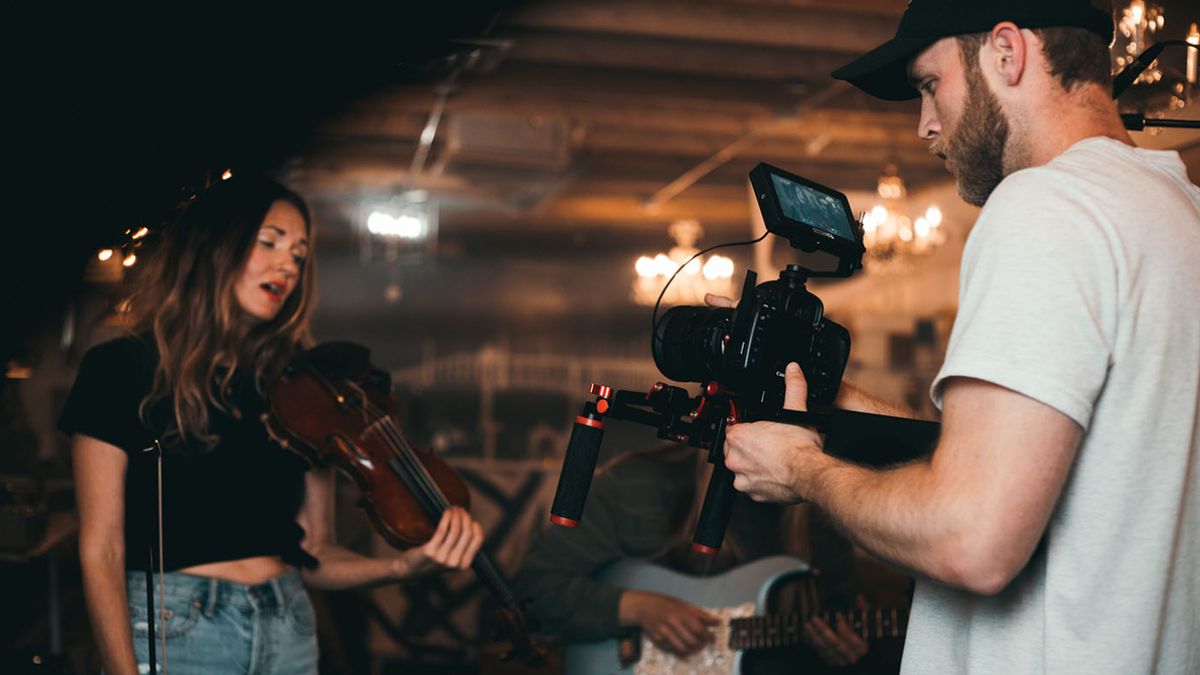
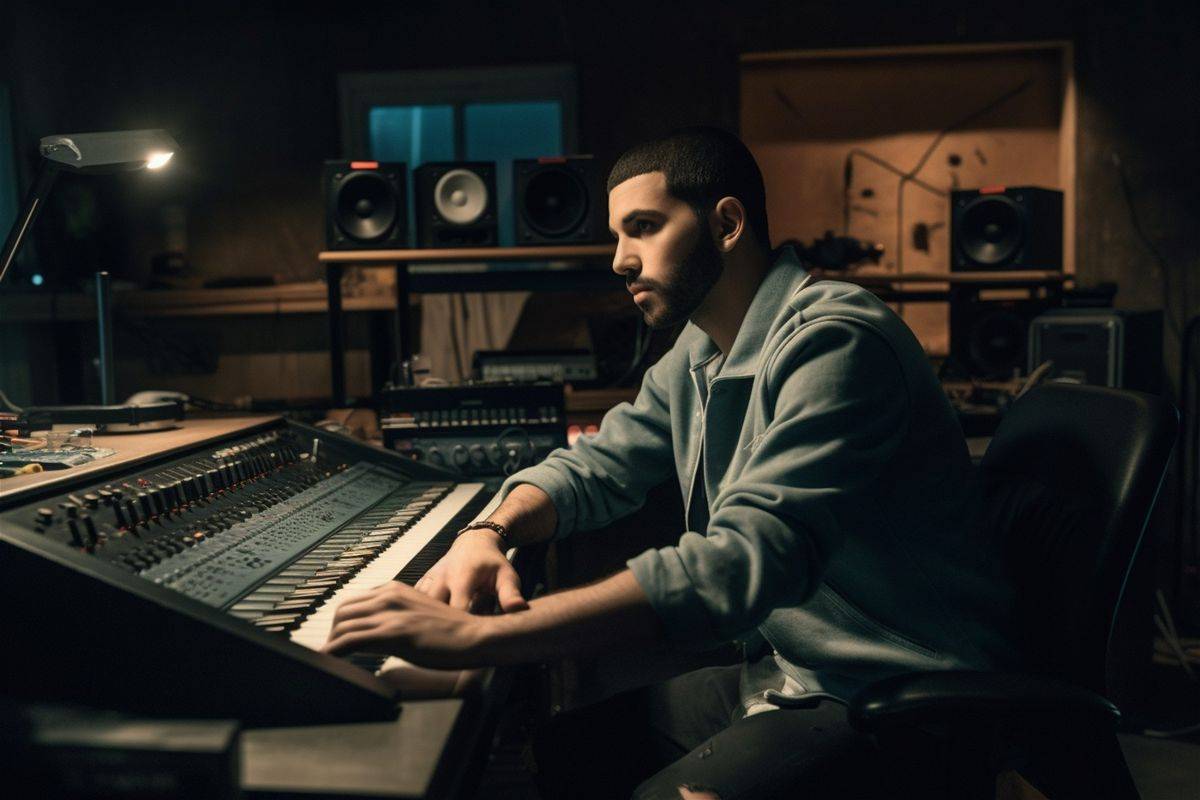
Step 5: Shooting the Music Video
With the pre-production phase complete and your crew and cast assembled, it’s time to bring your concept to life by shooting the music video. This step is where the magic happens as you capture the visuals that will accompany the music.
Here are some essential tips to consider during the shooting process:
- Stick to the Shot List: Refer to your storyboard or shot list to ensure that you capture all the necessary shots. This will help you stay organized and ensure that you capture all the essential moments.
- Effective Communication: Maintain clear communication with your crew and cast during the shoot. Provide direction, clarify expectations, and address any concerns or questions that may arise.
- Focus on Lighting and Composition: Pay attention to lighting and composition in each shot. Experiment with different angles, camera movements, and lighting setups to create visually captivating frames.
- Perform with Conviction: If you’re the artist performing in the video, deliver your performance with conviction and authenticity. Connect with the emotions of the song and convey them through your expressions and body language.
- Capture B-Roll Footage: In addition to the main shots, capture supplementary footage, also known as B-roll, to add variety and enhance storytelling in the editing process. This can include close-ups, details, or behind-the-scenes shots.
- Allow Room for Creativity: While it’s important to stick to your plan, allow room for spontaneity and creativity on set. Be open to ideas and suggestions from your crew and cast members that may enhance the overall visual impact of the video.
- Pace Yourself: Shooting a music video can be a tiring process, so make sure to schedule breaks and provide refreshments for the crew and cast. Pace yourself to maintain energy and enthusiasm throughout the shoot.
- Review Footage: Periodically review the footage you’ve captured during the shoot. This will allow you to identify any technical issues, make adjustments, or reshoot certain scenes if necessary.
- Collaborate and Adapt: Continue fostering a collaborative and supportive atmosphere on set. Be open to feedback and adapt as needed to ensure the creative vision is being realized.
- Capture Extra Coverage: Whenever possible, capture additional takes or angles of each shot. This will provide more flexibility during the editing process and allow you to choose the best footage.
Shooting the music video is an exciting and dynamic process. Remember to stay focused, remain flexible, and have fun throughout the shoot. By following these tips and utilizing the skills and expertise of your crew and cast, you’ll capture compelling visuals that bring your music and concept to life.
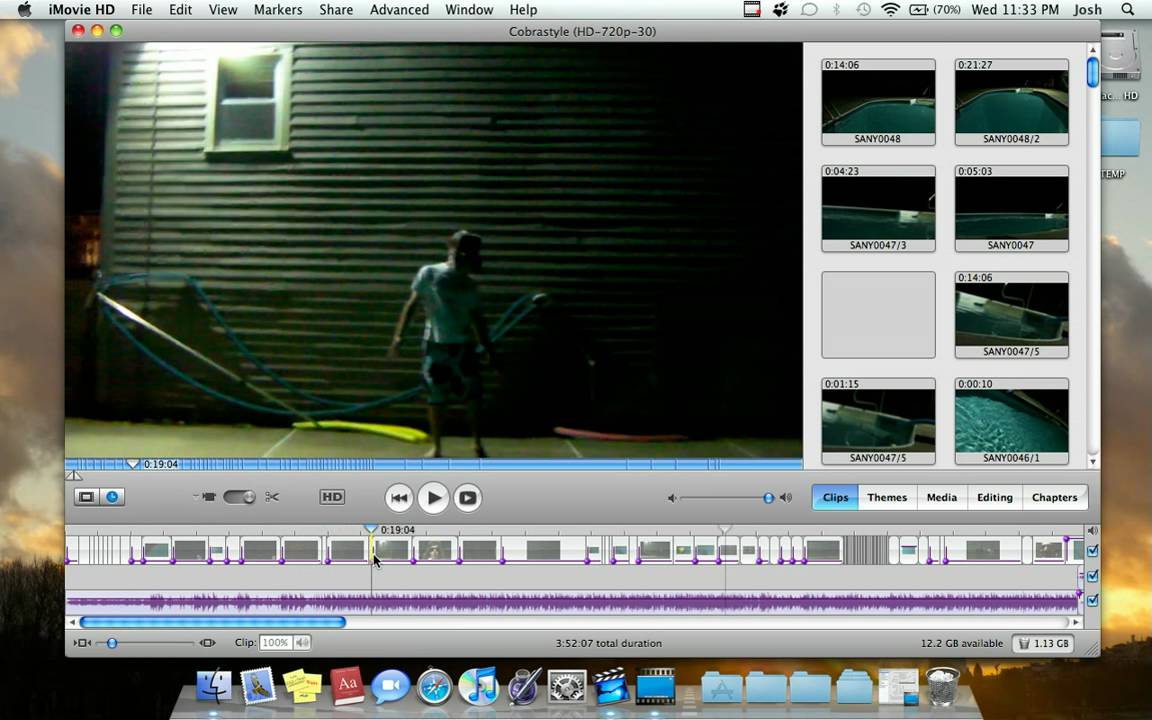
Step 6: Editing and Post-Production
After the exhilarating process of shooting your music video, it’s time to dive into the world of editing and post-production. This step is where you shape the raw footage into a cohesive and engaging visual story that complements the music.
Here are the key steps to consider during the editing and post-production process:
- Import and Organize Footage: Begin by importing all the footage into your editing software and organizing it in a logical manner. Create folders or bins to separate different scenes or shots for easy access.
- Create a Rough Cut: Start by assembling a rough cut of your music video using the selected shots from your shot list. Arrange the footage in the desired order and begin to get a sense of the pacing and flow of the video.
- Trim and Refine: Once you have a rough cut, go through the footage again and fine-tune the edit. Trim unnecessary parts, adjust timing, and ensure that each shot seamlessly transitions to the next.
- Add Transitions and Effects: Enhance the visual appeal of your music video by adding transitions, such as fades, dissolves, or wipes, between shots. Experiment with effects and visual enhancements to elevate the overall production value.
- Sync and Mix the Audio: Ensure that the audio track syncs perfectly with the visuals. Fine-tune the audio levels, adjust the sound mix, and make any necessary tweaks to optimize the music and dialogue.
- Color Grading: Apply color grading techniques to enhance the mood and aesthetics of your music video. Adjust the color balance, saturation, contrast, and other parameters to achieve the desired look and feel.
- Add Title and Graphics: Introduce title cards, subtitles, or graphics to display song lyrics, artist names, or any additional information. Make sure that the typography and design are in line with the overall concept and tone of the video.
- Visual Effects: If your music video requires visual effects, such as greenscreen compositing or CGI elements, implement them during the post-production phase. Ensure that the effects seamlessly integrate with the footage.
- Preview and Review: Once you’ve completed the initial edit, preview the music video in its entirety. Seek feedback from trusted individuals or your creative team. Make necessary adjustments based on their input.
- Finalize and Export: Make final tweaks and adjustments as needed. Once you’re satisfied with the result, export the music video in the desired format, resolution, and aspect ratio suitable for your distribution platform.
Editing and post-production allow you to refine and polish your music video, bringing out its full potential. Take your time to experiment, fine-tune, and seek feedback to ensure that the final product aligns with your creative vision. Through skillful editing and attention to detail, your music video will come to life and captivate your audience.
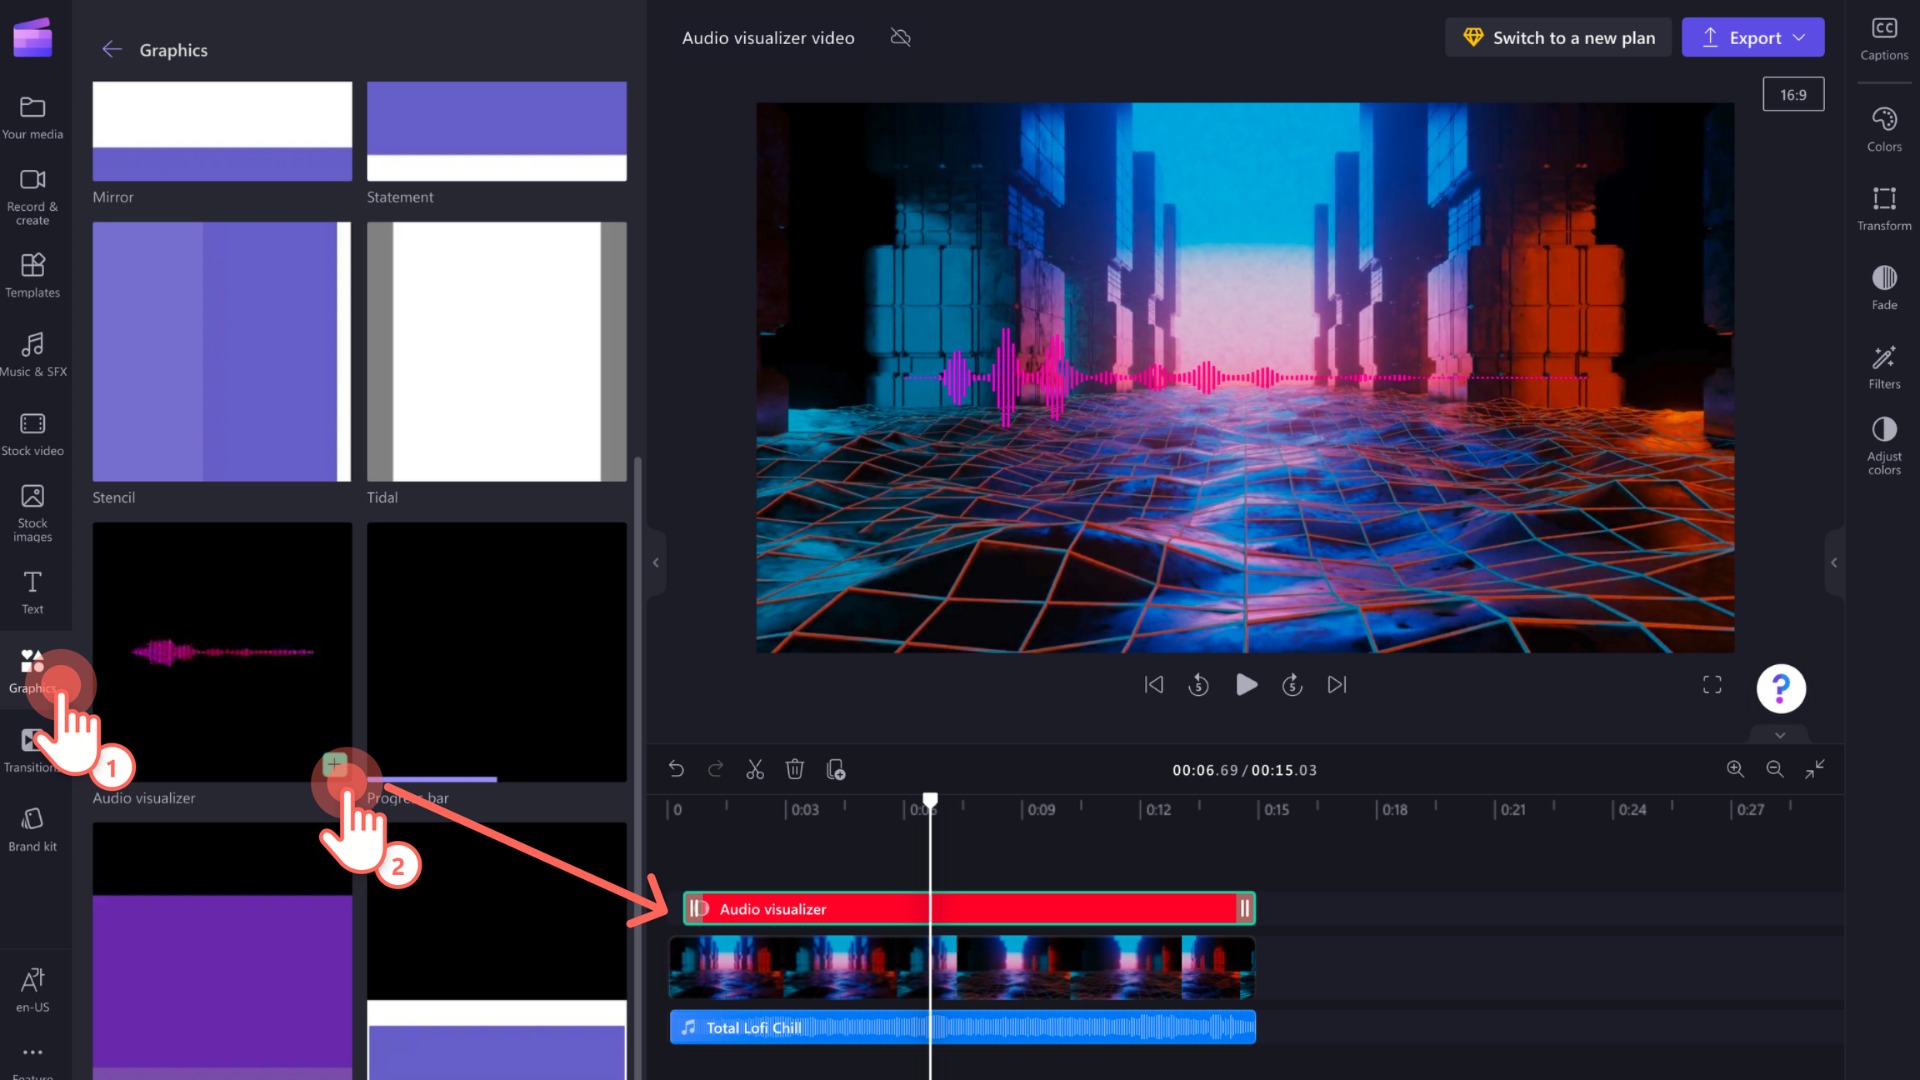
Step 7: Adding Visual Effects and Graphics
In the digital age of music videos, visual effects and graphics play a significant role in enhancing the overall impact and storytelling. This step allows you to add that extra layer of visual creativity to your music video.
Here are some key considerations when adding visual effects and graphics:
- Identify the Purpose: Determine the specific purpose of adding visual effects and graphics. Are you aiming to create a surreal atmosphere, convey a specific message, or enhance certain elements of the video?
- Plan Ahead: During the pre-production phase, identify the scenes or shots that may require visual effects or graphic elements. This will help you allocate the necessary time and resources for their creation.
- Collaborate with a Visual Effects Artist: If your budget allows, collaborate with a visual effects artist who specializes in video production. They will have the expertise to bring your creative ideas to life and achieve professional results.
- Enhancing Realism: If you’re aiming for realistic visual effects, pay attention to details such as lighting, shadows, and reflections. This will help seamlessly integrate the effects with the existing footage.
- Complement the Story and Mood: Visual effects and graphics should enhance the story and mood of the music video. Ensure that they align with the overall concept and reinforce the intended emotions or message.
- Choose the Right Software: Utilize industry-standard software, such as Adobe After Effects or Autodesk Maya, to create and composite visual effects. Familiarize yourself with the tools and techniques required to achieve your desired effects.
- Experiment and Iterate: Don’t be afraid to experiment with different visual effects and graphic elements. Create multiple iterations and seek feedback to refine and improve the effects until they meet your artistic vision.
- Graphic Design: If you’re adding graphics, such as text, logos, or animated elements, pay attention to typography, color schemes, and overall design aesthetic. Ensure that the graphics enhance the visual appeal and readability of the video.
- Test and Review: Once you’ve added the visual effects and graphics, conduct thorough testing and review sessions. Pay attention to the seamless integration and overall impact of the effects. Make necessary adjustments based on feedback.
- Optimize for Different Platforms: Keep in mind the platforms where your music video will be shared, such as YouTube or social media. Consider any format requirements or size limitations for the visual effects and graphics.
Adding visual effects and graphics allows you to enhance the visual storytelling and immerse your audience in a captivating visual experience. By carefully planning, collaborating with experts, and paying attention to details, you can elevate the overall quality and creativity of your music video.
Step 8: Choosing the Right Music and Sound Effects
Musical accompaniment and sound effects are essential elements in creating an immersive and engaging music video. This step focuses on selecting the right music and sound effects that complement your visuals and enhance the overall viewing experience.
Consider the following factors when choosing the right music and sound effects:
- Genre and Mood: Select music and sound effects that align with the genre and mood of your video. Ensure that they evoke the intended emotions and enhance the overall atmosphere you want to create.
- Original Music or Licensed Tracks: Decide whether you want to use original music composed specifically for your video or license existing tracks. Original music allows for a unique and custom-tailored experience, while licensed tracks can bring recognition or a specific vibe.
- Collaborate with Musicians and Composers: If you opt for original music, collaborate with musicians or composers who understand your vision and can create music that perfectly complements your visuals.
- Timing and Sync: Ensure that the music and sound effects sync seamlessly with the visuals. Pay attention to timing, rhythm, and any key moments in the music that align with specific shots or actions in your video.
- Avoid Copyright Infringement: If you choose to include licensed music, make sure you have the necessary permissions or licenses to avoid potential copyright infringement. There are various platforms that offer royalty-free music options for use in your videos.
- Incorporate Sound Effects: Sound effects can add depth and realism to your video. Consider including sound effects that match the actions or visuals on screen, such as footsteps, door slams, or ambient sounds.
- Balance Music and Dialogue: If your video includes dialogue or vocals, ensure that the music and sound effects do not overpower or distract from the main audio. Find the right balance to maintain clarity and enhance the overall audio experience.
- Test and Review: During the editing process, test different music and sound effects options to see how they enhance the visuals and impact the overall mood. Seek feedback from trusted sources to ensure you’re making the right choices.
- Optimize Audio Quality: Pay attention to the quality of the audio. Ensure that the music and sound effects are free from distortion, unwanted noise, or imbalances in volume. Adjust the levels and make necessary enhancements for optimal audio quality.
- Consider Accessibility: Keep in mind any accessibility considerations, such as closed captions or audio descriptions, to ensure that your video can be enjoyed by a wider audience.
Choosing the right music and sound effects is a critical step in creating an immersive music video experience. Carefully select audio elements that enhance your visuals, match the mood and genre, and create a cohesive and impactful audio-visual journey for your viewers.
Step 9: Final Touches and Color Grading
As you approach the final stages of your music video production, it’s important to focus on the final touches and color grading. This step will add the finishing touches and polish to your video, ensuring a cohesive and visually appealing result.
Consider the following steps when applying final touches and color grading:
- Review and Fine-tune the Edit: Take a final review of the edited video to ensure that it flows smoothly and captures the essence of your concept. Make any necessary adjustments to the pacing, transitions, and overall structure of the edit.
- Color Grading: Color grading is the process of adjusting and enhancing the colors in your video to achieve a specific look or mood. Experiment with different color palettes, contrast, saturation, and brightness to create the desired aesthetic. Pay attention to consistency across all shots.
- Adjust Exposure and Contrast: Balance the exposure and contrast levels across different shots. Ensure that details are visible in both the brighter and darker areas, creating a visually pleasing and balanced image.
- Correct White Balance: White balance ensures that the whites appear neutral and colors are accurate. Adjust the white balance settings to match the lighting conditions during the shoot, giving your video a natural and consistent look.
- Create a Mood: Consider the mood and atmosphere you want to convey with your music video. Adjust the colors and tones to reinforce the emotions and enhance the storytelling. Warmer tones can create a cozy and nostalgic vibe, while cooler tones can evoke a more clinical or futuristic feel.
- Pay Attention to Skin Tones: Ensure that skin tones appear natural and flattering. Adjust the color grading to maintain skin tones that look healthy and lifelike, without appearing too warm or cool.
- Experiment with Filters and Effects: Apply filters or effects to add a unique touch to your music video. This can include adding a vintage film look, creating a dreamy atmosphere, or applying a specific visual style that aligns with your concept.
- Consistency Across Shots: Maintain consistency in color grading and visual style across all shots. Aim for a cohesive look that enhances the overall narrative and ensures a smooth viewing experience.
- Test and Review: After applying color grading and final touches, test the video on different screens and devices to ensure that it translates well across various platforms. Solicit feedback from trusted sources and make adjustments as necessary.
- Export and Save: When exporting your final video, make sure to use appropriate settings and codecs to maintain the highest quality. Save a master copy of the video for future reference and potential re-edits.
The final touches and color grading stage is where your music video truly comes to life. By paying attention to details, enhancing the overall visual aesthetic, and ensuring consistency, you can create a visually stunning and compelling music video that captivates your audience.
Step 10: Publishing and Sharing Your Music Video
Congratulations! You have now reached the final step of the music video production process – publishing and sharing your creation with the world. This step focuses on making your music video widely accessible and promoting it to reach your target audience.
Consider the following steps when publishing and sharing your music video:
- Choose the Right Platform: Determine the best platform for showcasing your music video. Popular options include YouTube, Vimeo, and social media platforms like Facebook, Instagram, and TikTok. Select a platform that aligns with your target audience and caters to your video’s genre.
- Create an Engaging Thumbnail: Design an eye-catching and compelling thumbnail image for your video. This is the first thing viewers will see, so make it visually appealing and representative of the content.
- Write a Captivating Title and Description: Craft a descriptive and engaging title for your music video that grabs attention and accurately represents the content. Write a compelling video description that includes relevant keywords and a brief synopsis of the video.
- Optimize for Search Engines: Incorporate relevant keywords and tags in your video title, description, and tags to improve its visibility in search engine results. This will help potential viewers discover your music video more easily.
- Share on Social Media: Leverage your social media channels to promote your music video. Share teaser clips, behind-the-scenes footage, or still images to generate excitement and anticipation. Engage with your audience by responding to comments and encouraging shares.
- Contact Music Blogs and Influencers: Reach out to music blogs, online publications, or influencers in your genre to showcase your video. Submit your music video for features or reviews, or collaborate with influencers to reach their followers.
- Collaborate with Other Artists: Collaborate with other musicians or content creators to cross-promote each other’s work. This can expand your reach and attract new viewers who may be interested in your music and style.
- Engage with Your Audience: Respond to comments, messages, and feedback from your viewers. Build a rapport with your audience and cultivate a community around your music video. Encourage viewers to like, comment, share, and subscribe to your channel.
- Utilize Advertisements: Consider using paid advertising methods, such as YouTube ads or social media ads, to reach a wider audience. Strategically target your desired demographic based on age, location, and musical preferences.
- Analyze and Adjust: Monitor the performance of your music video by analyzing metrics such as view count, watch time, engagement, and audience demographics. Use this data to make informed decisions and adjust your promotional strategies as needed.
Publishing and sharing your music video is an exciting and crucial step in gaining exposure and building your audience. By utilizing the power of online platforms and engaging with your viewers, you can maximize the reach and impact of your music video, ultimately achieving your desired goals and connecting with your target audience.
Conclusion
Congratulations on reaching the conclusion of this comprehensive guide on making a music video. You have learned the step-by-step process from planning and concept development to shooting, editing, and sharing your creation with the world.
Creating a music video is a creative and collaborative journey that combines the power of music, visuals, and storytelling. By following the steps outlined in this guide, you have gained valuable insights into the key elements that make a music video impactful and engaging.
Remember, careful planning and organization are crucial in the pre-production phase. Choosing the right concept, assembling a talented crew and cast, and preparing the necessary equipment and locations will lay a solid foundation for your video.
The shooting process is where you bring your concept to life, capturing compelling visuals that align with the mood and message of the song. Effective communication, attention to detail, and collaboration with your team are key to a successful shoot.
In the post-production phase, editing, color grading, and adding visual effects and graphics will enhance the overall quality and aesthetics of your music video. Choosing the right music and sound effects will elevate the emotional impact, while preparing your video for publication and sharing will ensure it reaches your target audience.
As you embark on your music video journey, remember to stay true to your vision and continually explore and push the boundaries of your creativity. Embrace the opportunities presented by digital platforms and use them to showcase your talent and connect with your audience.
By following the steps discussed in this guide, and infusing your own unique style and voice, you are well on your way to creating a remarkable music video that resonates with listeners and makes a lasting impression.
Now it’s time to put your newfound knowledge and skills to work. So grab your camera, gather your team, and start turning your musical vision into a captivating music video that will captivate and inspire viewers around the world.