Home>Production & Technology>Music Video>How To Make A Music Video For Free
Music Video
How To Make A Music Video For Free
Published: November 12, 2023
Learn how to create stunning music videos for free with our step-by-step guide. Capture your artistic vision and showcase your musical talent to the world.
(Many of the links in this article redirect to a specific reviewed product. Your purchase of these products through affiliate links helps to generate commission for AudioLover.com, at no extra cost. Learn more)
Table of Contents
Introduction
Music videos have become an essential part of the music industry, allowing artists to visually express their songs and connect with their audience on a deeper level. In today’s digital age, making a music video has become more accessible than ever before. With the right knowledge and tools, you can create a compelling music video that captures the essence of your song and resonates with viewers.
In this article, we will guide you through the process of making a music video for free. You don’t need a big budget or fancy equipment to create something remarkable. All you need is a clear concept, proper planning, and some creativity.
Whether you’re an aspiring musician, a band member, or just someone who wants to explore their artistic side, making a music video can be a fun and rewarding experience. It not only allows you to showcase your talent but also gives you the opportunity to visually express your ideas and emotions.
While professional music videos often involve a team of experts and high-end equipment, you can still achieve impressive results with minimal resources. With the help of smartphones, affordable video editing software, and a little bit of creativity, you can create a music video that stands out.
Throughout this article, we will cover various aspects of making a music video, including choosing a concept, planning the shots, gathering equipment, finding locations, assembling a crew (if needed), setting up the shots, capturing the footage, editing the video, adding music and effects, and finalizing and exporting the video.
So, if you’re ready to dive into the world of music video production, let’s get started!
Choose a Concept
Before you start making your music video, it’s important to have a clear concept in mind. The concept will be the foundation of your video and will guide the overall look, feel, and message you want to convey.
Begin by brainstorming ideas that align with the theme of your song. Think about the emotions, story, or visual elements that can enhance the overall impact of your music. Consider the genre of your music and the target audience to ensure your concept resonates with them.
Once you have a few ideas, narrow them down to one concept that best represents your song. It could be a narrative-driven story, a performance-based video, or even an abstract visual representation. The key is to choose a concept that complements your music and helps to captivate the audience.
When choosing a concept, consider the resources you have available. You don’t want to create a concept that requires elaborate sets or expensive props if you don’t have access to them. Instead, opt for a concept that can be executed with the resources at hand.
Furthermore, think about the visual style you want for your video. Do you prefer a gritty, raw aesthetic or a polished, cinematic look? Research music videos that you find inspiring and analyze their visual techniques to gather ideas for your own video.
Remember, the concept should be unique and compelling, but it should also be feasible within your constraints. Collaborate with your bandmates or trusted friends to bounce ideas off them and gather their perspectives. Don’t be afraid to experiment and think outside the box. The more innovative and authentic your concept is, the more chances it has to stand out.
Once you have chosen the concept, it’s time to move on to the next step: planning the shots.
Plan the Shots
Planning the shots for your music video is crucial to ensure a smooth production process and a visually appealing end result. This step involves determining the specific camera angles, movements, and compositions that will bring your concept to life.
Start by creating a shot list, which is a detailed breakdown of all the shots you want to include in your music video. Consider the different scenes or sequences that will be part of your concept and list the specific shots required for each. This could include wide shots, close-ups, tracking shots, or any other creative shots that align with your vision.
When planning your shots, think about how they will contribute to the storytelling or visual impact of your music video. Each shot should serve a purpose and help convey the emotions or message of your song. Experiment with different camera angles and perspectives to add depth and visual interest.
Storyboarding is another helpful step in the shot planning process. Sketch out or create visual representations of each shot in sequence to create a rough visual storyboard. This will give you a better idea of how the shots will flow together and allow you to make any necessary adjustments before filming.
In addition to shot planning, consider the lighting and color schemes that will enhance the mood of your music video. Lighting can dramatically change the look and feel of a scene, so experiment with different lighting setups to achieve the desired atmosphere.
Keep in mind any props, costumes, or set designs that will be integral to your concept. Make a list of the specific items needed for each shot and ensure you have access to them before the shoot.
If you have access to a location, visit it before the shoot and plan how each shot will be framed within that space. Take note of any interesting angles or unique features that can be incorporated into your shots.
Lastly, communicate your shot plans with your team or crew members, if applicable. This will ensure everyone is on the same page and can contribute their expertise to achieve the best possible outcome.
By carefully planning your shots, you can streamline the production process and have a clear roadmap for filming. This preparation will ultimately save you time and make the shooting experience more efficient and enjoyable.
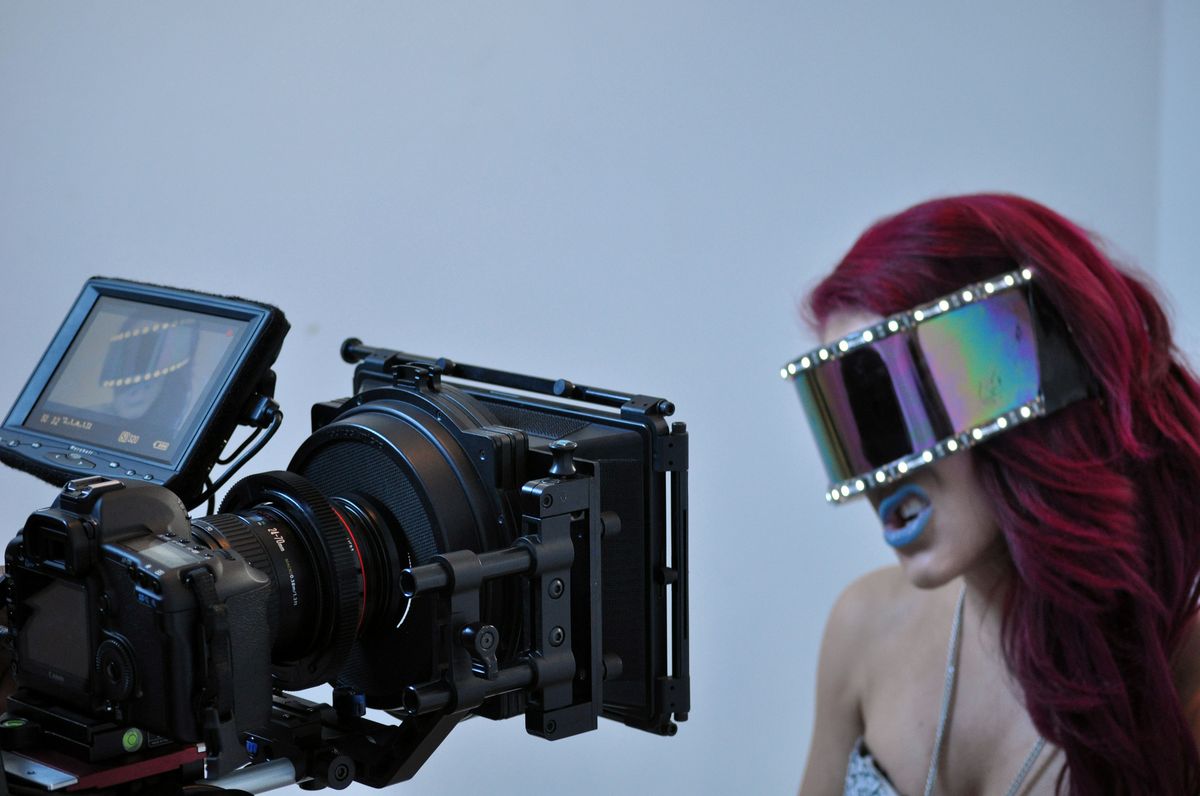
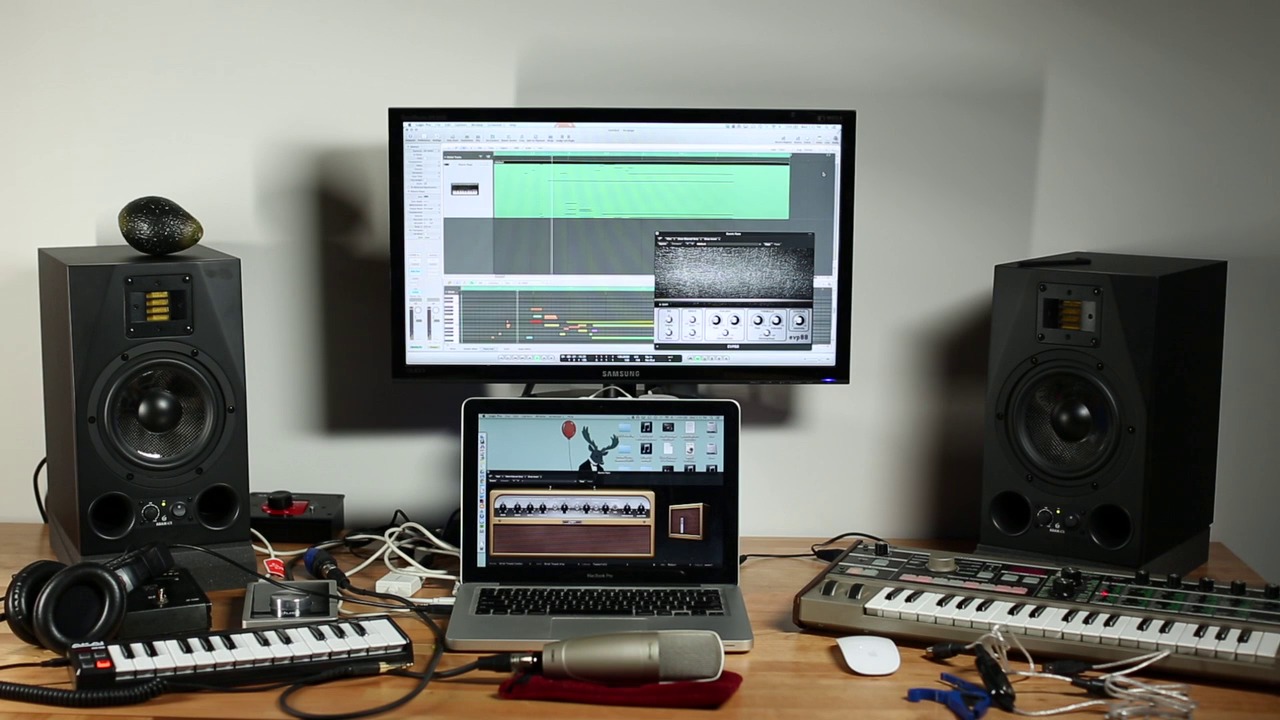
Gather Equipment
Gathering the necessary equipment for your music video production is an essential step in ensuring a high-quality result. While you may not have access to professional-grade gear, there are still several tools and resources you can utilize to capture great footage.
First and foremost, consider your primary filming device. While a dedicated camera can provide better image quality, many modern smartphones have advanced cameras that can produce impressive results. If you do use a smartphone, ensure it has sufficient storage space and consider investing in additional accessories like a stabilizer or lens attachments to enhance the filming capabilities.
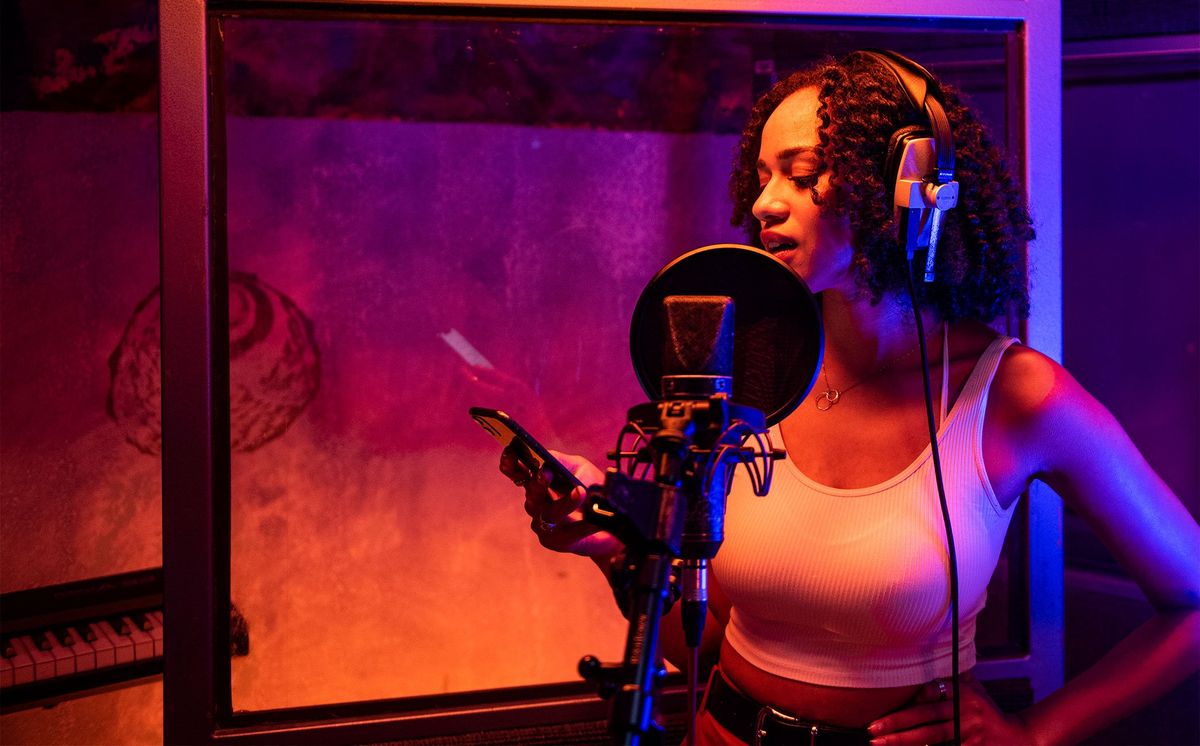
Next, consider the audio equipment. Good sound quality is crucial for a music video, so invest in a decent external microphone that can capture clear and crisp audio. There are various options available, ranging from shotgun microphones to lavalier mics. Choose one that suits your needs and budget.
Lighting equipment is another consideration. While natural light can work well in some situations, having control over the lighting can greatly improve the visual quality of your music video. Look into affordable options such as LED panel lights or portable light kits to enhance the lighting conditions during your shoot.
Additional equipment to consider includes tripods or stabilizers for steady shots, extra batteries and memory cards for extended filming, and a laptop or computer with video editing software for post-production.
If you have a limited budget, consider reaching out to local community centers, schools, or even friends who might have access to equipment you can borrow or rent. You can also explore online marketplaces or rental platforms that offer cost-effective equipment solutions for filmmakers.
Remember, while having high-quality equipment can enhance the production value of your music video, it’s ultimately your creativity, storytelling, and execution that will make the biggest impact. Focus on making the most of the resources you have and prioritize capturing compelling visuals and audio.
Once you have gathered your equipment, you’re ready to move on to the next step: finding locations.
Find Locations
Finding the right locations for your music video can significantly enhance the visual storytelling and overall atmosphere. The locations you choose should align with your concept and help to convey the desired emotions or message.
Start by brainstorming potential locations that resonate with the theme or mood of your music. Consider both indoor and outdoor spaces that can provide interesting backdrops for your shots. If your concept is narrative-driven, look for locations that can serve as settings for the story you want to tell.
Utilize your surroundings and think outside the box. Look for unique or unconventional locations that can add visual interest to your music video. Abandoned buildings, parks, urban landscapes, or even your own backyard can serve as compelling settings for certain types of music videos.
Consider the logistics of each location. Are you allowed to film there? Will there be any noise or accessibility issues? Take into account any permits or permissions required for shooting in public or private spaces to avoid any legal complications.
Visit each potential location before the shoot to assess its suitability. Pay attention to lighting conditions, background elements, and any potential challenges you might encounter during filming. Take test shots at different angles to determine how the location will translate on camera.
If you’re unable to find the ideal location or encounter limitations, consider alternative options. Explore the possibilities of creating sets or using green screens to simulate the desired environments. With clever editing and visual effects, you can transform any location into what you envision.
Collaborate and communicate with your team or crew (if applicable) to gather their input and insights. They might have suggestions for unique locations based on their expertise or local knowledge.
Remember, the locations you choose should serve your concept and enhance the overall visual experience of your music video. Aim for a balance between practicality, aesthetics, and the desired impact. With the right locations, you can elevate your music video to another level.
Once you have finalized the locations, it’s time to move on to assembling a crew (if needed) and setting up the shots.
Assemble a Crew
Assembling a crew for your music video production can help streamline the process and ensure that each aspect of the video is executed smoothly. While you can certainly create a music video on your own, having a dedicated team can greatly enhance the overall quality and efficiency of the production.
Consider the roles needed for your music video and identify individuals who can fulfill those positions. Some key roles to consider include a director, cinematographer, editor, production coordinator, and lighting technician. Depending on the complexity of your concept, you may also need additional crew members, such as art directors, makeup artists, or choreographers.
If you have a limited budget or are just starting out, you may need to rely on friends or fellow musicians who are willing to contribute their skills and time to the project. Reach out to those who have experience or a strong interest in filmmaking, as they will bring valuable expertise and enthusiasm to the production.
Communication and collaboration are key when working with a crew. Clearly outline your vision and expectations for the music video and ensure that everyone is on the same page. Encourage open dialogue and creative input from each crew member, as their ideas and insights can greatly enhance the final result.
Assign specific responsibilities to each crew member and establish a schedule or timeline to keep the production organized. This will help ensure that each task is completed within the allocated time frame.
Additionally, don’t forget about the importance of fostering a positive and respectful working environment. Provide clear directions, offer support, and express gratitude for the hard work and dedication of your crew members. A harmonious and collaborative atmosphere will not only make the production process more enjoyable but also yield better results.
If you’re unable to gather a crew for your music video, don’t fret. It is still possible to create a captivating video on your own or with the help of a few friends. It may require additional effort and wearing multiple hats, but with the right planning and execution, you can still achieve your vision.
Once you have assembled your crew, it’s time to move on to setting up the shots and capturing the footage.
Set Up the Shots
Setting up the shots for your music video is a crucial step in bringing your concept to life and capturing visually compelling footage. It involves determining the camera angles, compositions, and movements that best convey your desired message or emotions.
Start by reviewing your shot list and storyboard to familiarize yourself with the planned shots. This will help you visualize how each shot will fit into the overall sequence of the video.
Consider the technical aspects of each shot. Determine the camera angle that best showcases the subject or scene, whether it’s a low-angle, high-angle, or eye-level shot. Experiment with different framing techniques, such as close-ups, wide shots, or variations in the rule of thirds, to add visual interest.
Be mindful of movement within the shots. Determine whether you want to incorporate camera movements, such as pans, tilts, or tracking shots, to add dynamism and energy to the video. If using a smartphone or a camera without built-in stabilization, consider using a tripod or stabilizer to ensure steady footage.
Consider the composition within each frame. Pay attention to the placement of subjects, objects, or elements within the shot to create a visually pleasing and balanced composition. Use leading lines or points of interest to guide the viewer’s eye and create a sense of depth.
Take into account the lighting conditions in each shot. Use natural light or artificial lighting techniques to create the desired mood or atmosphere. Experiment with different lighting setups to emphasize certain elements or create interesting shadows and highlights.
Collaborate with your cinematographer or camera operator to discuss the technical details of each shot. Communicate your vision and goals for the music video, and be open to their suggestions and creative input.
During the shoot, take the time to set up each shot carefully. Test different angles, compositions, and lighting setups to ensure you capture the best possible footage. Don’t be afraid to make adjustments and try new things on the spot. Sometimes, the spontaneous moments can result in the most memorable shots.
Remember to communicate with your team or crew (if applicable) during the setup process. Coordinate their actions and ensure everyone is aware of their roles and responsibilities for each shot.
Setting up the shots is a crucial step in the production process, as it determines the visual language and impact of your music video. Take your time, be patient, and pay attention to the details. The effort you put into setting up each shot will be reflected in the final result.
Capture the Footage
Once you have set up the shots for your music video, it’s time to start capturing the footage. This is where your concept comes to life and where all the planning and preparation pay off.
Before you begin filming, make sure you have enough storage space on your recording device and that your batteries are fully charged. It’s also a good idea to have spare batteries and memory cards on hand to avoid any interruptions during the shoot.
When recording, pay attention to the technical aspects of capturing high-quality footage. Ensure that your shots are properly exposed, meaning they are not too bright or too dark. Take test shots and review them on the camera’s playback screen to make any necessary adjustments to the exposure settings.
Focus on capturing steady shots. If you’re using a handheld device, try to keep it as stable as possible or use a stabilizer rig or tripod to eliminate camera shake. Smooth and steady shots will contribute to the professional look of your music video.
Take multiple takes of each shot to give yourself options during the editing process. Experiment with different angles and compositions to add variety to your footage. Use different focal lengths or lens settings to achieve different perspectives and visual effects.
While capturing the footage, don’t forget to pay attention to the performances. If your music video involves performances, make sure to capture them with the right energy and emotion. Communicate with your talent and guide them to deliver their best performances for the camera.
Take advantage of the environment and incorporate any interesting elements or props into your shots. Be aware of the lighting conditions and utilize them to enhance the mood of your video. Don’t be afraid to get creative and explore different ways to visually represent your concept.
During the shoot, review the footage periodically to ensure you’re getting the desired results. Look for any technical issues or inconsistencies and make adjustments as needed. Trust your instincts and be open to improvisation and spontaneous moments that can add authenticity to your music video.
Lastly, make sure to communicate and collaborate with your crew or team throughout the filming process. Ensure everyone is aware of their roles and responsibilities, and provide clear instructions and feedback to ensure a cohesive production.
Remember, capturing the footage is an exciting and dynamic process. Enjoy the experience, stay focused, and trust in your creative vision. The footage you capture will be the foundation of your music video and will ultimately shape its final form.
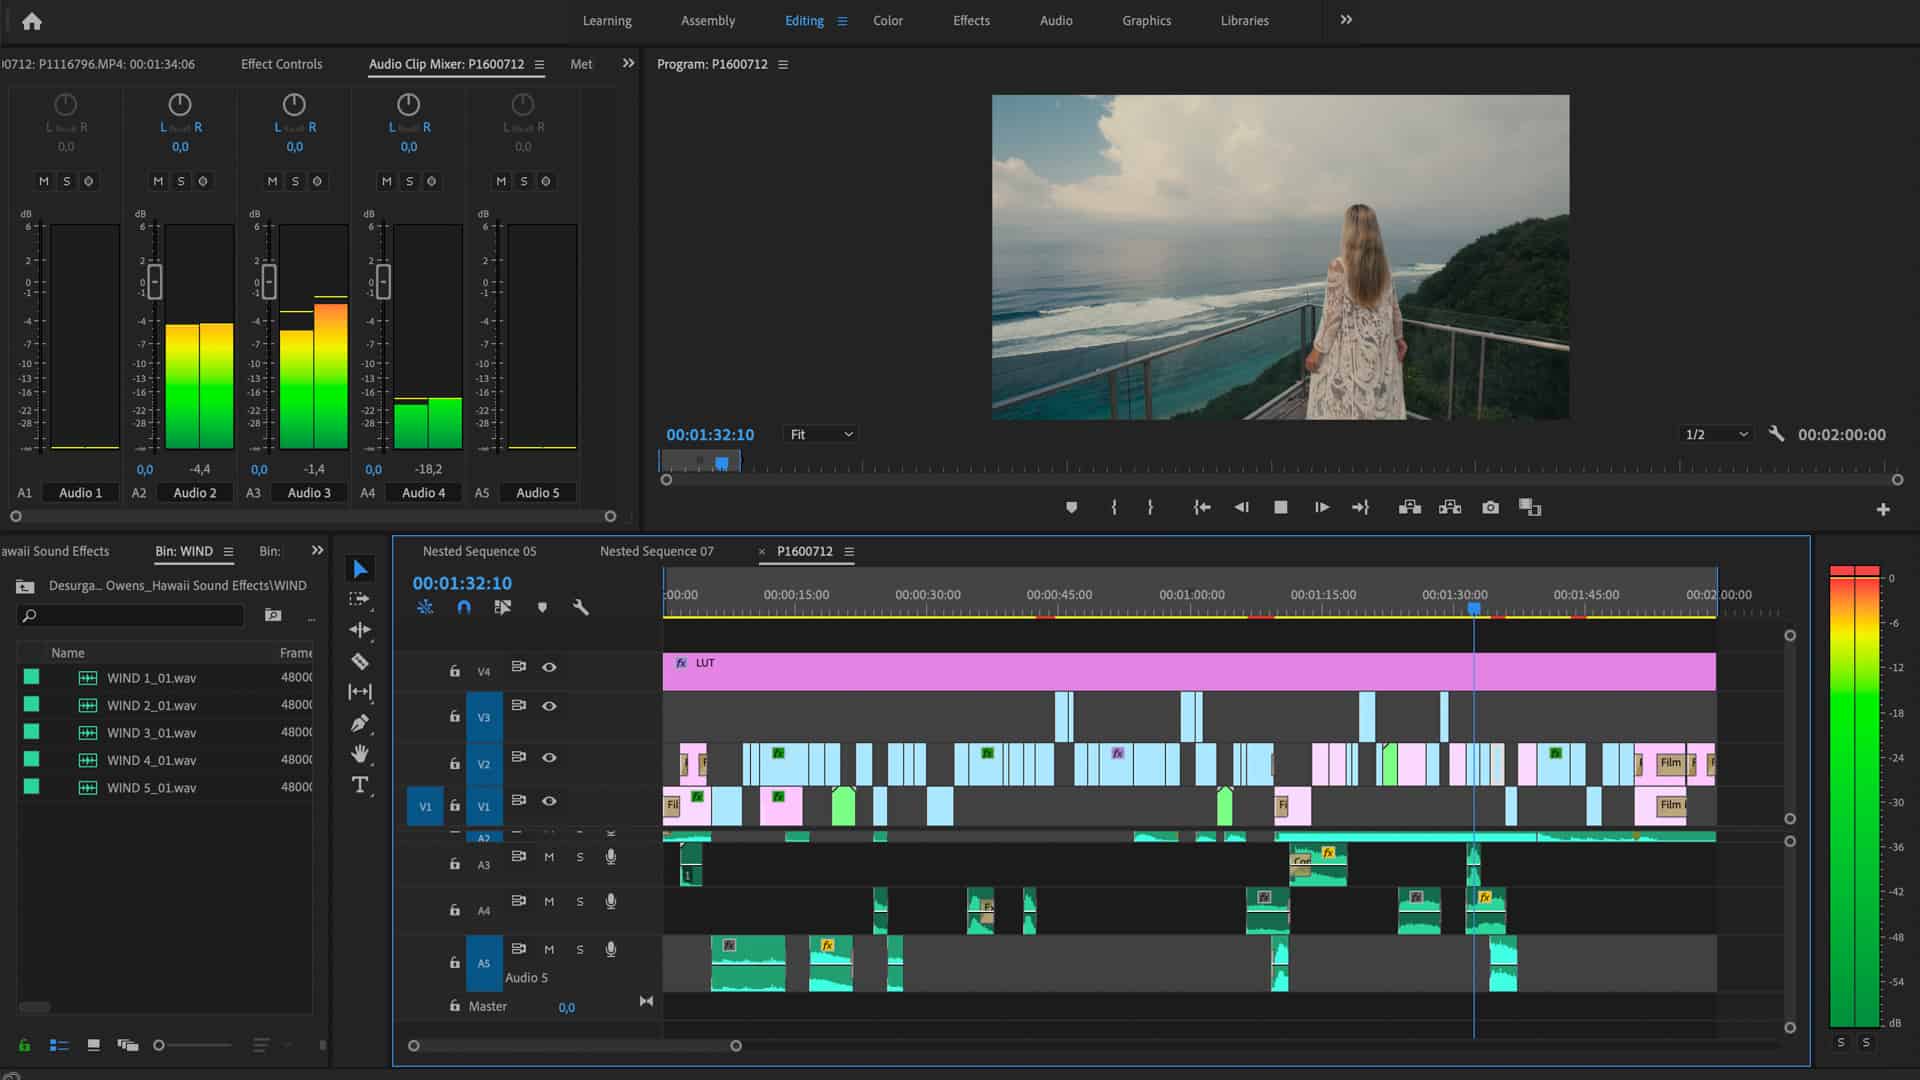
Edit the Video
After capturing the footage for your music video, the next step is to edit it into a cohesive and engaging piece. Editing is where you bring all the elements together and shape the narrative and visual flow of your video.
Start by organizing your footage and importing it into a video editing software of your choice. Familiarize yourself with the editing tools and features available to you. These may include trimming clips, rearranging the sequence, adjusting the color and exposure, adding transitions, and incorporating visual effects.
Review your shot list and storyboard to guide the editing process. Start by selecting the best takes and moments from your footage and assembling them into a rough timeline. Focus on creating a compelling visual narrative that complements the music and concept of your video.
Consider the pacing and timing of your video. Pay attention to the rhythm and energy of the song and synchronize the visuals accordingly. Use cuts, transitions, and effects to enhance the dynamic impact of the video and maintain the viewer’s attention.
Experiment with different editing techniques to add visual interest. This can include fast cuts, slow-motion shots, split screens, overlays, or any other creative effects that align with your concept. Keep in mind that the editing should enhance and support the story you want to tell, rather than distract from it.
As you edit, make sure the audio is synchronized properly with the visuals. Adjust the volume levels, add any necessary sound effects, and ensure that the music is mixed well with any dialogue or performances in the video.
Pay attention to color grading and post-processing. Adjust the colors, contrast, and saturation levels to create a consistent and visually appealing look. This can help set the mood and atmosphere of your music video.
Take breaks during the editing process to get a fresh perspective. Step away from the project for a while and come back with a renewed eye. This will allow you to identify any areas that can be improved or refined.
Once you have a rough cut of your music video, watch it multiple times to make tweaks and adjustments as necessary. Seek feedback from trusted friends or fellow musicians to gather different perspectives and make any final refinements.
Keep in mind that editing is a subjective process, and there is no right or wrong way to approach it. Follow your artistic intuition and trust your creative instincts. Ultimately, the goal is to create a music video that effectively captures the essence of your song and resonates with your audience.
Once you are satisfied with the final edit, it’s time to move on to adding music and effects to enhance the overall production.
Add Music and Effects
Adding music and effects to your music video is the final touch that can elevate the overall production and create a more immersive and impactful viewing experience. This step allows you to enhance the emotions and storytelling of your video, creating a cohesive audio-visual experience.
Start by selecting the appropriate music for your video. Choose a song that aligns with the mood, tempo, and message of your video. If you are an artist or part of a band, you may already have your own music to use. Otherwise, consider exploring royalty-free music libraries or collaborating with other musicians to create original compositions.
Ensure that the music matches the pacing and timing of your video. Trim or rearrange the music track as needed to align it with the visual sequences. Consider using instrumental sections or bridge sections of the song to accentuate specific moments or build up to climactic scenes.
In addition to music, consider incorporating sound effects to enhance specific moments or actions in your video. These can include footsteps, door slams, applause, or any other sounds that add depth and realism to the visuals. Use sound effects sparingly and strategically to avoid overpowering the music or distracting from the main focus.
Experiment with different audio effects and mixing techniques to create a polished and well-balanced sound. Adjust the EQ, volume levels, and panning to ensure that the music and sound effects blend seamlessly with the visuals.
Add visual effects to enhance certain scenes or moments in your video. This can include color grading, filters, overlays, or any other effects that align with your concept and enhance the visual impact. However, be cautious not to overuse effects and distract from the main focus of the video.
Consider incorporating text or subtitles to add context or convey lyrics or messages within your video. This can help viewers connect with the lyrics or understand the narrative of your music video more effectively.
While adding music and effects, regularly preview your video to ensure that the audio and visuals are synchronized properly. Make any necessary adjustments to the timing or placement of music or effects to create a seamless audio-visual experience.
Once you are satisfied with the final result, play the video in its entirety to ensure that all elements are working together harmoniously. Seek feedback from others and make any final refinements as needed.
Adding music and effects is the final step before exporting and sharing your music video with the world. It allows you to create a polished and immersive audio-visual experience that captures the essence of your song and resonates with your audience.
Finalize and Export
After all the hard work you’ve put into creating your music video, it’s time to finalize and export the project. This step involves making any final adjustments, ensuring technical specifications are met, and preparing the video for distribution.
Firstly, review your video from beginning to end, paying attention to the pacing, visuals, and audio. Check for any errors, inconsistencies, or areas that need improvement. Make any necessary tweaks to ensure your video is the best it can be.
Consider seeking feedback from trusted friends, fellow musicians, or even professionals in the industry. Their fresh perspectives can help identify areas that may need further refinement or improvement.
Once you’re satisfied with the final version of your music video, it’s important to optimize it for online platforms. Consider the aspect ratio, resolution, and file format that is most suitable for the platform you intend to share it on. Common video formats include MP4, MOV, or AVI.
Ensure your video meets the technical requirements of the platform. This may include adhering to specific file size limitations or video length restrictions. Keep in mind that different platforms may have varying guidelines, so be sure to double-check the requirements of each platform.
Before exporting, make sure to add any necessary metadata to your video file. This can include the title, artist name, description, and relevant tags or keywords that will help optimize its visibility in search results or related content.
When exporting your video, choose the appropriate settings to maintain the best possible quality while balancing file size. Opt for a higher bitrate and resolution if you have the option, but be mindful of the file size limitations of the platform you are sharing it on.
Once exported, preview the final version to ensure that everything looks and sounds as intended. Check for any audio or visual glitches or artifacts that may have occurred during the exporting process.
Finally, consider creating a thumbnail or cover image that accurately represents your music video. This image will be the visual representation of your video and can greatly impact its click-through rate and engagement on various platforms.
With the video finalized and exported, you’re now ready to share it with the world. Upload it to your preferred platforms, such as YouTube, Vimeo, or social media channels, and promote it to your audience. Engage with viewers’ feedback and monitor the performance of your video to gauge its impact.
Congratulations! You’ve successfully completed the process of making a music video for free. It’s an achievement that showcases your artistic vision and creativity, and can serve as a powerful tool for promoting your music and connecting with your audience.