Home>Production & Technology>Music Video>How To Make A Music Video On IMovie
Music Video
How To Make A Music Video On IMovie
Published: November 20, 2023
Learn how to create a captivating music video using iMovie. Step-by-step instructions and tips for making your music come alive visually.
(Many of the links in this article redirect to a specific reviewed product. Your purchase of these products through affiliate links helps to generate commission for AudioLover.com, at no extra cost. Learn more)
Table of Contents
Introduction
Music videos have become an integral part of the music industry, allowing artists to visually express their songs and connect with their audience on a deeper level. With the advancements in technology, creating a music video has become more accessible than ever before. One of the most popular tools for editing music videos is iMovie, a user-friendly software available on Apple devices.
Whether you’re a musician looking to showcase your talent or a creative individual wanting to delve into the world of music video production, this article will guide you through the process of making a music video using iMovie. From gathering the necessary equipment and resources to exporting and sharing your final product, each step will be covered in detail.
However, before we dive into the technical aspects, it’s important to note the significance of a well-crafted music video. In a highly visual and digital age, music videos have the power to captivate and engage viewers, creating a lasting impact. A carefully planned and executed music video can elevate your song to new heights, reaching a wider audience and leaving a memorable impression.
Furthermore, music videos provide an opportunity for artistic expression and storytelling. Whether through abstract visuals or narrative-driven storytelling, a music video allows you to complement the emotions and themes of your song with captivating visuals. It’s a chance to visually communicate your message and evoke a deeper connection with your audience.
In the following sections, we’ll cover everything you need to know about creating a music video on iMovie. From gathering the necessary equipment and planning your video to editing and adding effects, you’ll learn the step-by-step process of bringing your vision to life. So, let’s get started on this exciting journey of music video production!
Gathering Equipment and Resources
Before you begin the process of making a music video on iMovie, it’s essential to ensure you have the necessary equipment and resources at your disposal. While you don’t need an elaborate setup like a professional production studio, having the right tools will greatly enhance the quality of your video. Here are some key items to consider:
- Camera: One of the most critical components of any music video is a good quality camera. While smartphones can capture decent footage, if you want to take your video to the next level, consider using a dedicated camera like a DSLR or mirrorless camera. These cameras offer higher resolution, better low-light performance, and more manual control over settings.
- Tripod or Stabilizer: To ensure steady shots, especially for static or tracking shots, it’s advisable to use a tripod or stabilizer. This will help eliminate shaky footage and give your music video a polished and professional look.
- Lighting Equipment: Proper lighting can make a significant difference in the overall look of your video. Invest in affordable lighting equipment, such as softboxes or LED lights, to ensure well-lit scenes and avoid harsh shadows.
- Props and Costumes: Depending on the concept and storyline of your music video, gather any necessary props or costumes to enhance the visual narrative. This could include instruments, clothing, decorations, or any other items that will add depth and creativity to your video.
- Locations: Think about the locations where you want to shoot your music video. Ensure that you have access to these spaces and obtain any necessary permissions or permits if needed. Consider both indoor and outdoor locations, and account for any specific requirements or constraints of each setting.
- Storyboard and Shot List: To stay organized and ensure a smooth filming process, create a storyboard and shot list. This will help you visualize the scenes and shots you want to capture, making the editing process much easier later on.
- Music and Audio: Of course, you’ll need the music track or song for your video. Make sure you have a high-quality audio file to synchronize with your footage. Additionally, if you plan on recording any live audio during the shoot, consider using external microphones or audio recorders for better sound quality.
Remember, the equipment and resources you gather may vary depending on your budget, the complexity of your music video, and your specific artistic vision. Take the time to assess your needs and make thoughtful decisions to achieve the desired outcome.
Now that you have the necessary equipment and resources, let’s move on to the next step: planning your music video.
Planning Your Music Video
Planning is a crucial stage in the music video production process. It sets the foundation for the entire project and ensures that you have a clear vision of what you want to achieve. Here are some important steps to consider when planning your music video:
- Define Your Concept: Begin by brainstorming ideas and concepts that align with the theme and vibe of your song. Consider the emotions you want to portray and the story you want to tell. This will help guide the creative direction of your music video.
- Create a Moodboard: Visualize your ideas by creating a moodboard. Collect images, sketches, and references that capture the aesthetic and style you envision for your music video. This will serve as a visual reference for the entire production team and help ensure a cohesive look and feel.
- Write a Treatment: A treatment is a written document that outlines the concept, storyline, and visual style of your music video. It provides a detailed description of each scene, shot, and visual element. Writing a treatment will not only help you solidify your ideas but also serve as a communication tool when collaborating with others.
- Plan Your Shots and Choreography: Break down the song into sections and determine the shots and camera movements that will best complement each part. Consider the use of different angles, camera techniques, and choreography if applicable. Create a shot list or storyboard to visualize the sequence of shots for each scene.
- Consider Budget and Resources: Assess your budget and resources to ensure feasibility and practicality. Determine what is achievable within your means and make any necessary adjustments to the concept or scale of the production.
- Assemble Your Team: Identify the key roles needed for your music video production, such as a director, cinematographer, editor, and any additional crew members. Collaborate with individuals who share your creative vision and have the skills and experience to bring it to life.
- Rehearse and Prepare: If your music video involves performances or choreography, allocate time for rehearsals and practice sessions. This will help ensure that everyone is prepared and comfortable in front of the camera, resulting in a polished final product.
By dedicating time to careful planning, you set yourself up for success and minimize potential setbacks during the production process. Keep in mind that creativity and flexibility are essential, and adjustments may need to be made along the way. With a solid plan in place, you can now move forward to setting up iMovie and beginning the editing process.
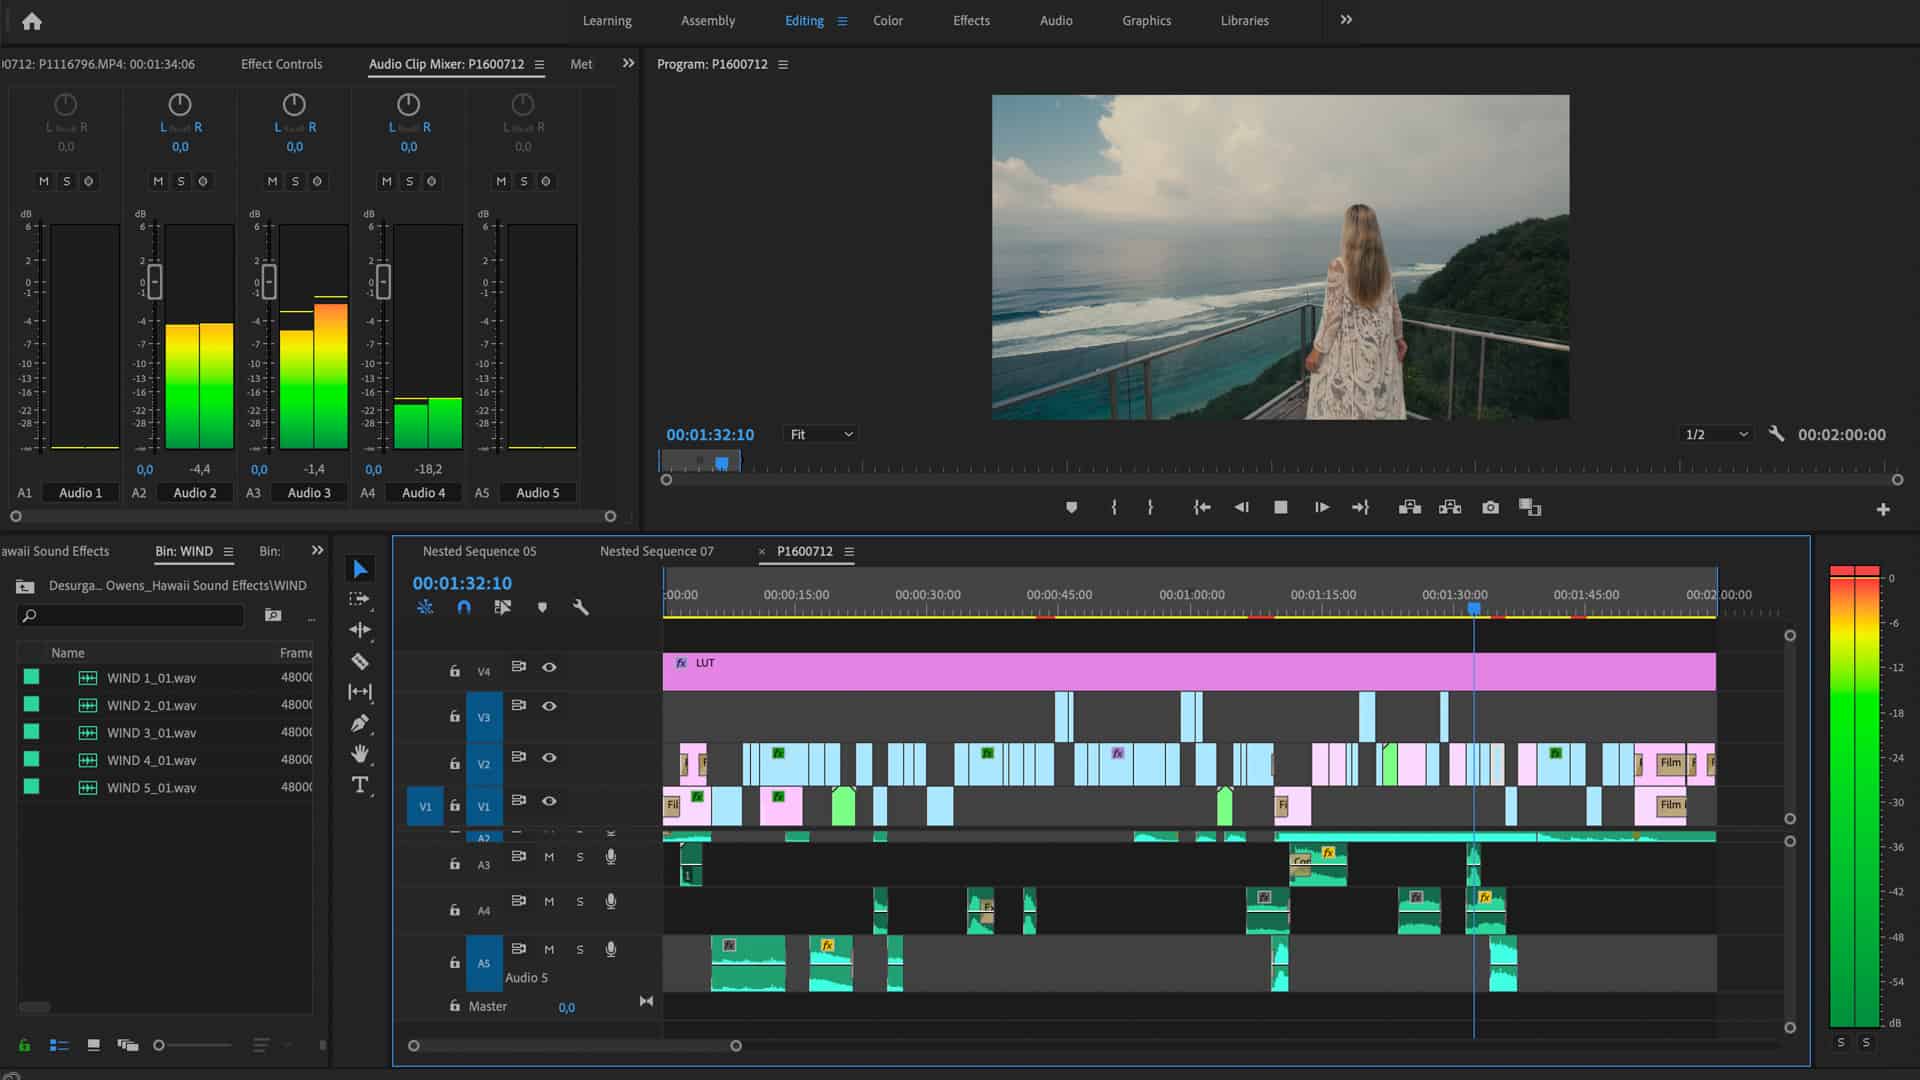
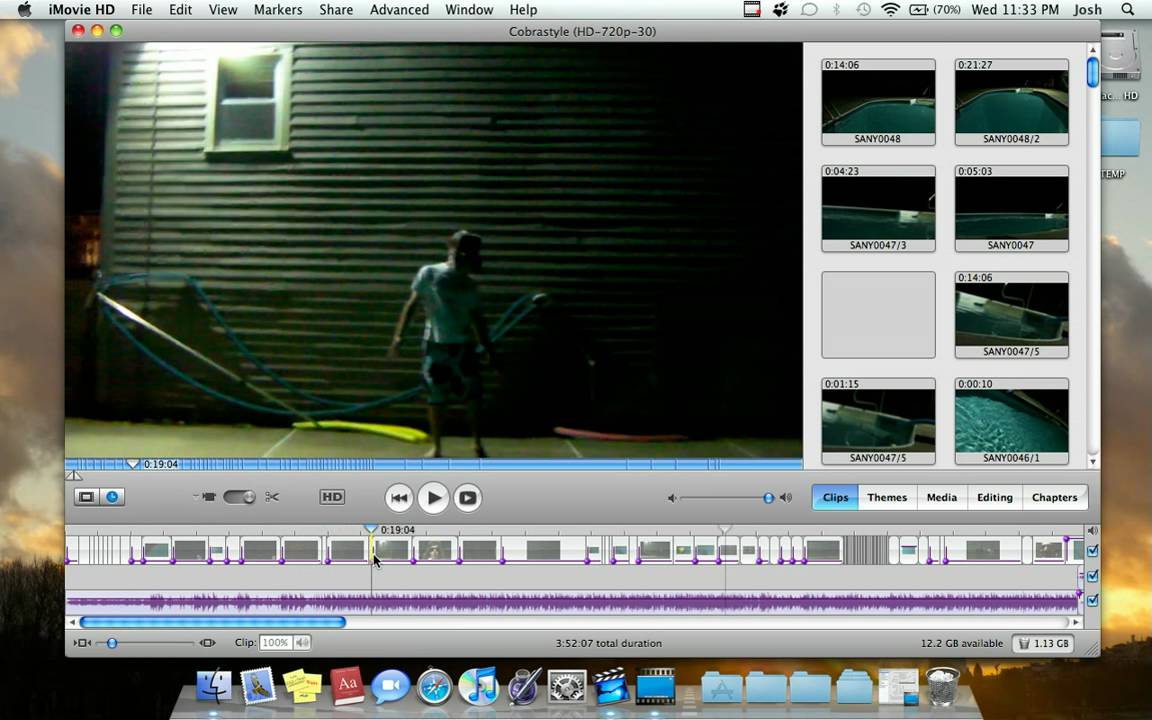
Setting up iMovie
Once you have your footage and resources ready, it’s time to set up iMovie and prepare it for the editing process. Follow these steps to get started:
- Import Footage: Connect your camera or device to your computer and import the footage into iMovie. You can do this by opening iMovie and selecting “Import” or by simply dragging and dropping the video files into the iMovie interface.
- Create a New Project: Click on “Create New” in the iMovie project selection screen. Enter a name for your project and choose the appropriate aspect ratio and resolution based on your footage’s settings.
- Select Theme (optional): iMovie offers various built-in themes that can add a professional touch to your music video. If you want to use a theme, select it during the project creation process. However, if you prefer a more customized look, you can choose the “No Theme” option.
- Adjust Project Settings: Before diving into the editing process, take a moment to review and adjust some key project settings. This includes frame rate, audio settings, video transitions, and project properties like background color or aspect ratio.
- Organize Your Media: Now that your project is set up, it’s important to organize your imported footage. Place video clips and audio files into the appropriate sections of the iMovie timeline to keep everything well-organized and easily accessible during the editing process.
- Familiarize Yourself with iMovie Tools: Take some time to explore and familiarize yourself with the various editing tools and features of iMovie. This includes trimming clips, splitting or merging video segments, adjusting audio levels, adding effects, and transitions, and more. Understanding these tools will help you efficiently manipulate your footage and create the desired visual effects.
- Save and Back up Your Project: Regularly save your project as you work on it to prevent any potential loss of progress. Additionally, consider creating backup copies on external drives or cloud storage to ensure the safety of your data.
Setting up iMovie properly ensures a smooth and efficient editing process. By organizing your media, adjusting settings, and familiarizing yourself with the tools, you’ll be ready to dive into the creative process of editing your music video. In the next section, we will explore the steps involved in importing and organizing your footage in iMovie.
Importing and Organizing Footage
Once your project is set up in iMovie, it’s time to import and organize your footage. Follow these steps to ensure a well-structured and efficient editing process:
- Importing Footage: Connect your camera or device to your computer and open iMovie. Click on the “Import Media” button to browse and select the video clips you want to import. You can import multiple clips at once by holding down the Command key (⌘) while selecting the files.
- Creating Events: iMovie organizes your imported clips into events. Events are containers that hold related footage. Create events based on the different shooting sessions or categories of your footage. For example, you could have an event for “Performance Footage” and another for “Behind-the-Scenes” clips.
- Organizing Clips in the Event Library: Once you’ve created your events, you can further organize your clips within each event. Arrange them in a logical order based on the scenes or shots they represent. You can use drag-and-drop functionality to rearrange clips.
- Using Keywords and Ratings: iMovie provides options to add keywords and ratings to your clips. This can be helpful for categorizing and identifying specific types of footage, making it easier to locate and use in the editing process. Assign keywords and ratings to your clips based on their content or quality.
- Creating Smart Collections: iMovie allows for the creation of Smart Collections, which automatically group clips that meet specific criteria. Utilize Smart Collections to quickly find specific types of footage, such as all clips with a certain keyword or rating. This can save you time when searching for specific shots during the editing process.
- Previewing Clips: Before adding clips to your timeline, use the preview function in iMovie to review and select the best parts of each clip. Skim through the footage to identify the segments you want to use, and trim or split clips as necessary to capture the desired moments.
- Deleting Unwanted Clips: As you review your footage, delete any unnecessary or unusable clips to declutter your Event Library. This will make it easier to focus on the clips you intend to use in your music video and help streamline the editing process.
- Syncing Audio: If you recorded separate audio during the shoot or plan to use a separate music track, sync it with the video footage in iMovie. The software provides options to match audio clips with the corresponding video clips, ensuring perfect synchronization.
By carefully importing and organizing your footage in iMovie, you’ll have a structured and easily navigable workspace for the editing process. Take the time to review and trim your clips, utilize keywords and ratings for categorization, and delete any unnecessary footage. With your clips ready to go, it’s time to dive into editing your music video in iMovie.
Editing Your Music Video
Now that your footage is imported and organized, it’s time to dive into the exciting process of editing your music video in iMovie. With the intuitive editing tools and features available, you can bring your vision to life. Here are the key steps involved in editing your music video:
- Perform Rough Cuts: Begin by placing your selected clips onto the iMovie timeline in the desired order. Create rough cuts of the video segments, aligning them with the beats and rhythm of the music. This will give you a general idea of the flow and pacing of your music video.
- Refine the Edit: Fine-tune your edits by adjusting individual clips. Trim or extend the duration of clips to match the timing of the music and create a seamless visual experience. Experiment with different transitions between clips to enhance the visual flow.
- Add B-Roll Footage: Consider incorporating additional footage, known as B-roll, to complement the main performance shots. B-roll can add depth and visual interest to your music video. Look for relevant shots that enhance the storytelling or create visual juxtapositions.
- Experiment with Visual Effects: iMovie offers various visual effects that can enhance the look and mood of your music video. From color adjustments and filters to effects like slow motion or picture-in-picture, explore different options to achieve the desired visual style. But remember, moderation is key. Use effects sparingly to avoid distracting from the main content.
- Utilize Transitions: Smooth transitions between clips can enhance the overall cohesiveness of your music video. iMovie provides a range of transition options, such as fades, dissolves, and slides. Experiment with different transitions to create a visually appealing flow between scenes.
- Add Text and Titles: Consider adding text overlays, titles, and captions to provide context or highlight certain elements of your music video. iMovie offers various text options, allowing you to customize the font, size, and style to match your artistic vision.
- Sync or Edit the Audio: Fine-tune the audio elements of your music video. Adjust the volume levels of the music track and any additional audio recordings to ensure a balanced sound mix. If needed, sync specific clips or moments with the beats of the music for added impact.
- Apply Color Correction: Enhance the visual aesthetics of your music video through color correction. Adjust brightness, contrast, saturation, and other color parameters to achieve the desired mood and tone. Consistency in color grading can help create a cohesive visual experience.
- Review and Refine: Once you have completed the initial edit, review your music video as a whole. Take note of any areas that may require further refinement or adjustments. Make necessary tweaks to timing, transitions, or effects to create a polished final product.
Remember, editing is a creative process, so give yourself the freedom to experiment and let your artistic vision guide you. Take breaks when needed, step away from the project, and return with fresh eyes to make objective assessments. With each refinement, you’ll move closer to transforming your raw footage into a captivating music video.
Now that your music video is edited and refined, it’s time to add the finishing touches. In the next section, we’ll explore how to add effects, transitions, and other visual enhancements to elevate your music video even further.
Adding Effects and Transitions
Adding effects and transitions to your music video can elevate its visual appeal and create a more engaging viewing experience. iMovie provides a range of options to enhance your video. Here’s how you can incorporate effects and transitions into your music video:
- Effects: iMovie offers a variety of video effects that you can apply to specific clips or the entire project. Experiment with effects like slow motion, instant replay, or picture-in-picture to add visual interest and enhance the overall mood of your video. However, be mindful not to overuse effects and maintain a balance that complements your artistic vision.
- Transitions: Smooth transitions between clips can create a seamless flow in your music video. iMovie provides a range of transition options, including fades, dissolves, wipes, and more. Choose transitions that align with the style and atmosphere of your video. Be creative and use transitions strategically to visually transition between scenes or shots.
- Titles and Text: Consider adding titles, captions, or text overlays to provide context, lyrics, or other textual information in your music video. iMovie offers a variety of customizable text options, allowing you to choose fonts, sizes, colors, and animations. Place text strategically in your video to enhance storytelling or convey a specific message.
- Picture-in-Picture: Use the picture-in-picture feature to overlay a secondary image or video on top of your main footage. This is especially useful if you want to showcase multiple perspectives or highlight specific details within your music video. Experiment with different sizes, positions, and opacity levels to achieve the desired effect.
- Green Screen Effects: With iMovie’s green screen effect capabilities, you can replace a green or blue background with a different image or video. This opens up creative possibilities to transport your subjects to various locations or settings. Ensure you have properly shot your green screen footage with good lighting for the best results.
- Audio Effects: Alongside visual effects, iMovie also provides audio effects to enhance the sound in your music video. Adjusting audio levels, applying equalization, or adding reverb or echo can create a more immersive audio experience. Use these effects sparingly and thoughtfully to enhance the overall impact of your video’s sound.
As you explore and experiment with different effects and transitions, keep in mind that they should serve the purpose of enhancing your music video, not overpowering it. Maintain consistency in your creative choices and ensure that any effects used align with the mood and style you want to convey.
Remember, it’s important to review and preview your video with added effects and transitions to ensure they contribute positively to the overall visual and auditory experience. Fine-tune your selections as needed and don’t hesitate to make adjustments until you achieve the desired final result.
With your music video enhanced by effects and transitions, it’s time to address another critical aspect: adjusting the audio elements. In the next section, we’ll explore how to finesse the audio in your music video for optimal sound quality.
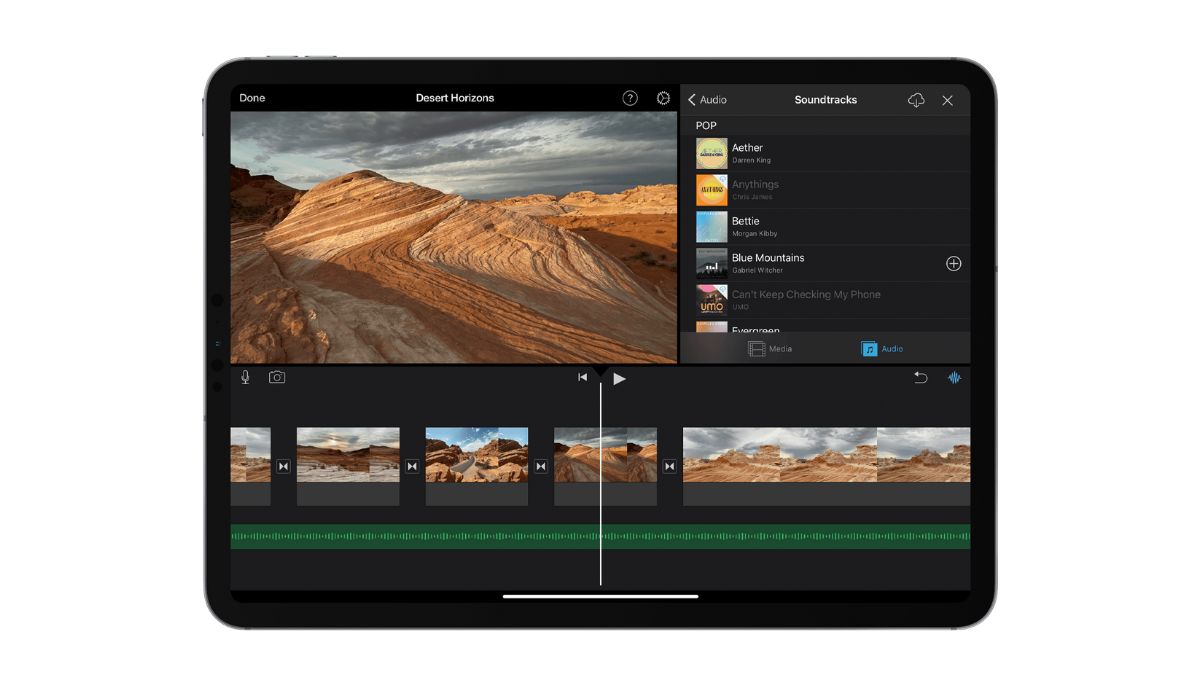
Adjusting the Audio
Adjusting the audio in your music video is a crucial step in creating a captivating and immersive viewing experience. Properly balancing the sound elements ensures that your music and any additional audio recordings are clear, well-mixed, and synchronized with the visuals. Here’s how you can finesse the audio in iMovie:
- Music Track: Start by adjusting the volume level of your music track. In iMovie, you can adjust the audio volume using the audio overlay on the timeline. Ensure that the music is loud enough to be heard clearly but not overpowering, allowing other audio elements to be heard effectively.
- Additional Audio Recordings: If you’ve recorded separate audio, such as vocals or instrumental performances, adjust their volume levels to complement the music track. Make sure they blend harmoniously with the background music and are not excessively louder or softer.
- Ambient Sound and Effects: Consider the inclusion of ambient sound or sound effects to enhance the overall audio experience of your music video. These could be natural sounds, environmental noises, or specific effects that add depth and immersion to certain scenes or transitions. Adjust their volume levels to balance with the other audio components.
- Vocal Enhancement: If your music video includes vocals, ensure they are clear and intelligible. Make adjustments to the audio levels to prevent vocals from being drowned out by the background music. Additionally, consider applying effects like equalization or compression to enhance the vocal performance and improve overall clarity.
- Audio Transitions: Smoothly transition between different audio segments to avoid abrupt volume changes or audio clipping. iMovie provides options to fade in or fade out audio, creating seamless transitions between different parts of your music video.
- Audio Effects: Overusing audio effects can negatively impact your music video. However, judicious use of effects like reverb, equalization, or panning can enhance the audio experience, especially during specific moments or scenes. Experiment with different effects to find the right balance and make artistic choices that align with the mood and style of your video.
- Preview and Fine-tune: Continuously preview your music video with the adjusted audio to ensure that the sound elements are balanced and synchronized with the visuals. Make necessary adjustments as needed until you achieve a cohesive and immersive audio experience.
Remember, the ultimate goal of adjusting the audio in your music video is to create a harmonious blend of the music track, additional audio recordings, and any ambient sound or effects. Strive for a well-rounded and professional sound mix that enhances the overall impact of your video.
With the audio elements finely tuned, you’re almost ready to share your music video with the world. In the next section, we’ll explore how to add titles, credits, and any final touches to complete your music video in iMovie.
Adding Titles and Credits
Titles and credits play an important role in providing context, enhancing storytelling, and giving credit to the individuals involved in the creation of your music video. With iMovie, adding titles and credits is a straightforward process. Here’s how you can incorporate them into your music video:
- Title Placement: Determine where you want to place your titles within your music video. Common placements include the beginning of the video to introduce the song title or at specific sections to highlight key lyrics or moments. Consider the visual composition and ensure that the titles are readable and visually appealing.
- Select a Title Style: iMovie provides various title styles, including simple text overlays, animated titles, and predefined templates. Choose a style that complements the overall aesthetic of your music video and aligns with your artistic vision. Customize the font, size, color, and animation settings to suit your preferences.
- Title Content: Decide what text to include in your titles. This can range from song titles, lyrics, credits, or even additional information related to the video. Ensure that the text is concise, relevant, and readable to viewers. Consider using different title styles for different purposes, such as using a more elegant style for credits and a bold style for song titles.
- Credit Roll: At the end of your music video, create a credit roll to acknowledge the individuals or entities involved in the production. Include the names of the musicians, directors, editors, cinematographers, and any other contributors who played a significant role. iMovie offers options to customize the appearance and scrolling speed of the credit roll.
- Subtitle Tracks: If your music video includes multiple languages or subtitles, utilize the subtitle feature in iMovie to add translations or captioning. This ensures a broader reach for your video and accessibility for viewers who may not understand the primary language used.
- Preview and Fine-tune: Always preview your music video with the added titles and credits to ensure they fit seamlessly within the visual composition and timing. Make any necessary adjustments in terms of size, placement, or timing to maintain a cohesive and visually engaging end product.
Titles and credits not only provide essential information but also contribute to the overall aesthetics and professionalism of your music video. Thoughtfully incorporate them to enhance the narrative, highlight significant moments, and give credit where it’s due.
With titles and credits added, you’re ready to export and share your completed music video. In the final section, we’ll cover the steps to export your video in iMovie and explore options for sharing it with the world.
Exporting and Sharing Your Music Video
After all the hard work you’ve put into creating your music video in iMovie, it’s time to export and share your final masterpiece with the world. iMovie offers several options for exporting your video in different formats and qualities. Here’s how you can export and share your music video:
- Choose an Export Format: In iMovie, navigate to the “File” menu and select “Share”. Choose the format in which you want to export your music video. iMovie provides options such as MP4, MOV, or even direct uploads to platforms like YouTube or Vimeo.
- Specify Export Settings: Depending on your chosen export format, you may have additional options to customize the quality, resolution, and compression settings of your video. Consider the target platform or device on which you plan to share your video and adjust the settings accordingly.
- Select a Destination: Choose where you want to save or export your music video. Select a location on your computer, external drive, or cloud storage that has sufficient space to accommodate the exported video file.
- Export and Wait: Click on the “Next” or “Export” button, and let iMovie process and export your video according to the selected settings. The export time will depend on the length and complexity of your music video, as well as the capabilities of your computer.
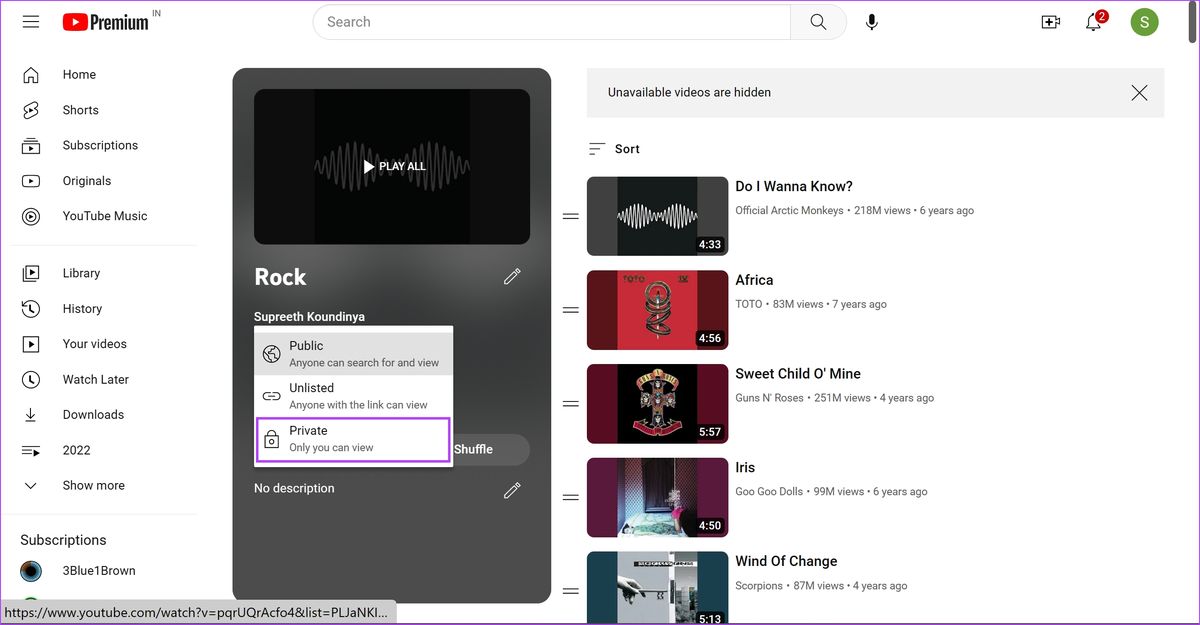
- Sharing Options: Once your music video is exported, you have various options for sharing it. You can upload it to popular video-sharing platforms such as YouTube, Vimeo, or social media platforms like Instagram or Facebook. Alternatively, you can share it directly with friends, fans, or collaborators by sending them the video file.
- Promotion and Distribution: Consider creating a promotional plan to maximize the exposure of your music video. Share it through your social media channels, email newsletters, or personal website. Collaborate with music blogs, media outlets, or playlist curators to feature your video and reach a wider audience.
- Monitor and Engage: Once your music video is out in the world, monitor its performance by analyzing views, comments, and engagement metrics. Interact with viewers, respond to comments, and thank them for their support. Actively promote and share your music video to ensure continued exposure.
Remember, the process of exporting and sharing your music video is just as important as the production itself. Take the time to choose the right export settings and platforms to reach your intended audience effectively.
By exporting and sharing your music video, you have the opportunity to connect with fans, gain new supporters, and showcase your creative talent. Embrace the journey and enjoy the fruits of your labor as you share your music video with the world!
As a final note, keep in mind that iMovie is constantly evolving, so it’s essential to stay updated with the latest software versions and features. Continue learning and experimenting with new techniques to push the boundaries of your music video productions. Best of luck on your musical and visual endeavors!
Conclusion
Congratulations on completing your music video in iMovie! You have successfully navigated the process of gathering equipment, planning, editing, and adding the finishing touches to create a captivating music video. Through careful organization, creative choices, and attention to detail, you have transformed your vision into a visually stunning and engaging piece of art.
Remember, the process of making a music video is a blend of technical skill and artistic expression. iMovie provides a user-friendly platform to edit and enhance your footage, allowing you to bring your music to life visually. By utilizing the various tools, effects, transitions, and audio adjustments offered by iMovie, you have been able to craft a professional-looking music video.
As you continue your music video journey, keep refining your skills and exploring new techniques. Learn from your experiences, listen to feedback, and embrace opportunities for growth. Each music video you create is an opportunity to evolve as an artist and tell your unique story through visuals.
Lastly, don’t forget to promote and share your music video with the world. Utilize online platforms, social media, and your personal network to gain exposure and connect with your audience. Engage with your viewers, respond to comments, and leverage the power of digital marketing to expand your reach.
Creating a music video is a labor of love and dedication, but the end result is worth the effort. So, celebrate your accomplishment and share your music video with pride. Whether it’s a small project or a stepping stone towards a larger production, each music video you create is an opportunity to express yourself, connect with your audience, and leave a lasting impression.
Thank you for joining us on this music video-making journey. We hope that this article has provided you with valuable insights and guidance to create your own stunning music videos using iMovie. Now, it’s time to let your creativity shine and explore the endless possibilities of visual storytelling through music!