Home>Production & Technology>Music Video>How To Make A Music Video On The Cheap

Music Video
How To Make A Music Video On The Cheap
Published: November 11, 2023
Learn how to create a high-quality music video without breaking the bank. Discover budget-friendly tips and techniques for making your own music video on a tight budget.
(Many of the links in this article redirect to a specific reviewed product. Your purchase of these products through affiliate links helps to generate commission for AudioLover.com, at no extra cost. Learn more)
Table of Contents
- Introduction
- Finding a Suitable Location
- Gathering the Equipment
- Choosing the Right Camera
- Lighting and Composition Techniques
- Selecting Props and Costumes
- Storyboarding and Shot Planning
- Directing the Performers
- Filming and Capturing the Footage
- Editing and Post-production
- Adding Effects and Visual Enhancements
- Adding Sound and Music
- Finalizing and Exporting the Music Video
- Conclusion
Introduction
Music videos have become an essential part of the music industry, allowing artists to showcase their creativity and reach a larger audience. However, the process of creating a high-quality music video can often be expensive and time-consuming. Many musicians find themselves with limited resources, making it challenging to produce the visual accompaniment their music deserves.
Fortunately, with a little creativity, planning, and resourcefulness, it is possible to create a compelling music video on a tight budget. This article will guide you through the process of making a music video on the cheap, providing tips and tricks to achieve professional-looking results without breaking the bank.
Whether you’re a solo artist or a band, this guide will help you maximize your resources and create a captivating visual representation of your music. From finding a suitable location to selecting the right camera and from directing the performers to adding post-production effects, we’ll cover all the essential steps to help you create an engaging music video that resonates with your audience.
Don’t let budget constraints hold you back. With a little ingenuity and a dash of DIY spirit, you can take your music to the next level and bring your creative vision to life. So let’s roll up our sleeves and dive into the world of affordable music video production.
Finding a Suitable Location
When it comes to creating a music video, location plays a crucial role in setting the tone and enhancing the visual impact of your video. Finding the right location can make all the difference in creating a professional-looking music video, even on a limited budget.
Consider the aesthetic and theme of your music. Is it upbeat and energetic, or does it have a more intimate and introspective feel? The location should align with the mood and message of the song to create a harmonious visual representation.
Here are a few tips for finding a suitable location on a budget:
- Look for free or low-cost options: Start by exploring public spaces such as parks, beaches, and urban landscapes that offer interesting backdrops. These locations often require little to no permitting fees, making them ideal for budget-conscious musicians.
- Think outside the box: Don’t limit yourself to traditional indoor settings. Consider unique and unconventional locations that can add a distinctive touch to your music video. Abandoned buildings, graffiti-covered walls, or even your own backyard can provide visually captivating backdrops.
- Utilize natural lighting: Look for locations with abundant natural light. Shooting outdoors during the golden hour (the period shortly after sunrise or before sunset) can create a beautiful and cinematic ambiance. Take advantage of the soft, warm light to enhance the overall visual quality of your video.
- Collaborate with local businesses: Approach local businesses, such as cafes, art galleries, or small theaters, and propose a collaboration. Many businesses are open to supporting local artists and may be willing to let you film on their premises in exchange for promotion or credit in the video.
- DIY sets: If you have access to a large empty room or garage, consider creating your own set using props and decorations. With a little creativity and resourcefulness, you can transform a plain space into an atmospheric setting that complements your music.
Remember to obtain any necessary permissions or permits when shooting in public or private spaces. Research local regulations to ensure you’re compliant and avoid any legal issues down the line.
By scouting unique locations, collaborating with local businesses, and utilizing natural lighting, you can find a suitable location that enhances the visual appeal of your music video, all without breaking the bank.
Gathering the Equipment
Creating a music video on a budget doesn’t mean compromising on the quality of your footage. While professional-grade equipment can be expensive, there are cost-effective alternatives available that can help you achieve professional-looking results.
Here are some tips for gathering the necessary equipment without breaking the bank:
- Borrow or rent equipment: Reach out to friends, fellow musicians, or local film clubs to see if they have any equipment you can borrow or rent. Many people own DSLR cameras, tripods, and lighting kits that they may be willing to lend for a music video project. This can save you the cost of purchasing or renting equipment.
- Consider smartphone cameras: Nowadays, smartphones are equipped with impressive cameras capable of capturing high-quality video. If you have a newer smartphone model, it may be sufficient for your music video needs. Just make sure to stabilize it with a tripod or gimbal for smoother footage.
- Invest in essential equipment: If you have some budget to spare, prioritize investing in a few key pieces of equipment that will have the most significant impact on your video quality. A decent microphone for capturing clear audio, a tripod for steady shots, and basic lighting equipment can go a long way in improving the overall production value.
- DIY equipment hacks: Get creative and explore DIY solutions for equipment needs. For example, you can create diffusers for softening light using shower curtains or construct camera stabilizers using household materials. Online tutorials and forums are great resources for finding innovative DIY equipment hacks.
- Use natural lighting: If your budget is extremely limited, consider utilizing natural lighting instead of investing in professional lighting equipment. Position your subjects near windows or shoot outdoors during the golden hour. With proper planning and utilizing the right angles, you can achieve visually pleasing results using natural light alone.
Remember, the equipment you use is important, but it’s not the sole determinant of a great music video. Focus on storytelling, composition, and capturing genuine emotions to create a compelling visual experience. Don’t let limited resources discourage you – creativity and resourcefulness can lead to remarkable results.
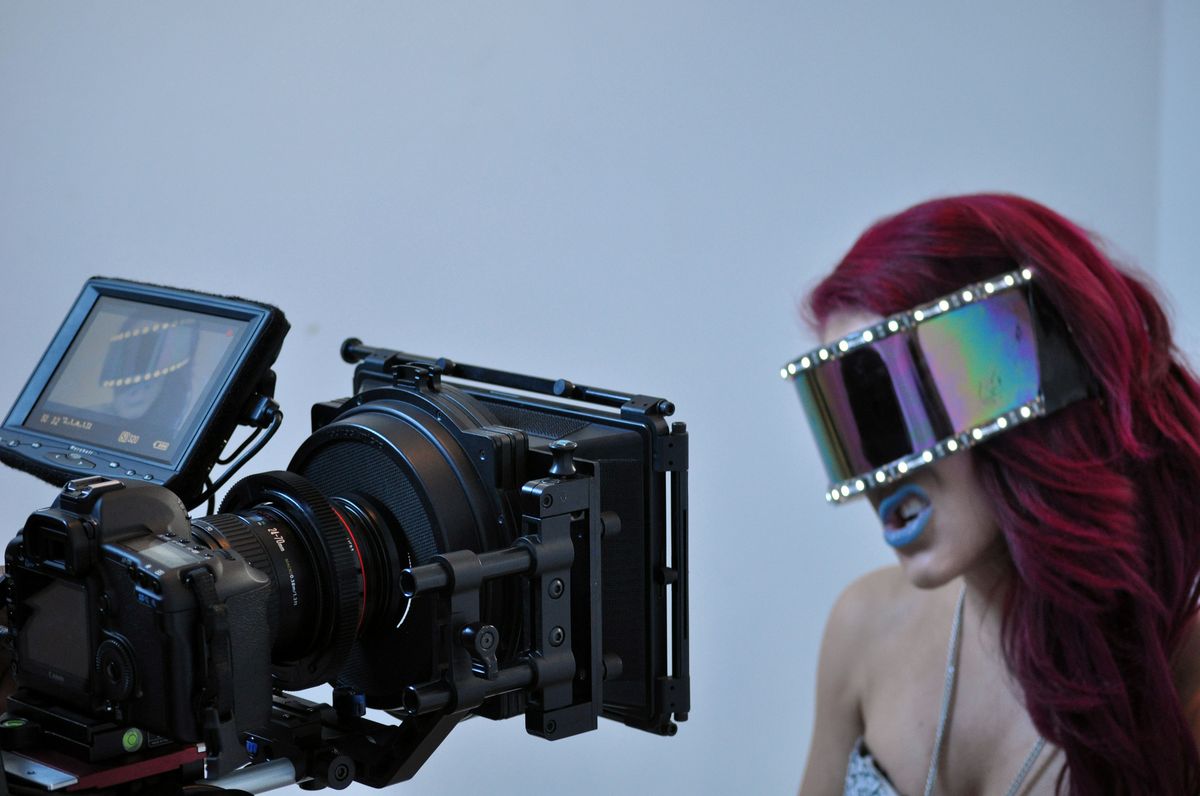
Choosing the Right Camera
Choosing the right camera is essential for capturing high-quality footage for your music video. While professional-grade cameras can be expensive, there are affordable options available that can still deliver impressive results.
Consider the following factors when selecting a camera:
- Budget: Determine your budget for purchasing or renting a camera. Set a realistic spending limit and research options within that price range.
- Resolution: Look for cameras that can shoot at a minimum of 1080p resolution. This ensures that your footage will be crisp and detailed.
- Low light performance: Pay attention to the camera’s low light capabilities, especially if you plan to shoot in dimly lit locations. Cameras with larger sensors generally perform better in low light conditions.
- Interchangeable lenses: Consider cameras that offer interchangeable lenses. This allows you to experiment with different focal lengths and achieve a variety of cinematic looks.
- Image stabilization: Look for cameras that have built-in image stabilization or consider investing in a stabilized lens or gimbal. This helps minimize shaky footage and ensures smoother shots.
- Audio capabilities: While capturing great visuals is important, don’t overlook the importance of clear audio. Look for a camera with a microphone input or consider using an external recorder for better sound quality.
- User-friendly interface: Opt for a camera that is user-friendly and intuitive, especially if you’re new to videography. You want to spend more time focusing on capturing the perfect shots rather than struggling with complex settings.
If you’re on a tight budget, consider using a smartphone with good camera capabilities. As mentioned earlier, modern smartphones can capture high-quality footage and are convenient to use. Just ensure you stabilize the smartphone with a tripod or gimbal for steady shots.
Remember, the camera is just a tool. The most important aspect of a music video is the story and how it’s visually conveyed. Focus on composition, lighting, and capturing authentic emotions, and even a budget-friendly camera can produce impressive results.
Lighting and Composition Techniques
Proper lighting and composition are crucial elements in creating a visually appealing music video. Even with limited resources, you can still utilize effective lighting techniques and composition principles to enhance the overall aesthetic of your video.
Consider the following tips for lighting and composition:
- Utilize natural light: If possible, take advantage of natural light sources such as windows or shoot outdoors during the golden hour. Natural light can create a soft and flattering appearance, adding a cinematic touch to your video.
- DIY lighting: If additional lighting is needed, explore DIY lighting solutions. Use household lamps, work lights, or affordable LED light panels to create cost-effective lighting setups. Experiment with different angles, intensities, and colors to create the desired atmosphere.
- Three-point lighting: When using artificial lighting, consider the classic three-point lighting setup. This includes a key light (the primary light source), a fill light (to soften shadows), and a backlight (to add depth and separation). This technique can elevate the production value of your video.
- Composition: Compose your shots thoughtfully to create visually pleasing frames. Consider the rule of thirds, leading lines, and symmetry to guide the viewer’s eye and bring focus to the subject. Experiment with various angles and perspectives to add interest and variety to your video.
- Depth and layers: Create depth in your shots by incorporating foreground, middle ground, and background elements. This can add visual interest and make your video feel more dynamic. Utilize props, set pieces, or the environment to create layers and depth within the frame.
- Movement: Consider adding movement within your shots. Use tracking shots, pans, or tilts to add energy and fluidity to your video. Just make sure the movement is intentional and serves the purpose of the narrative or visual appeal.
- Color palette: Establish a consistent color palette or mood for your video. This can be achieved through lighting choices, set design, costumes, and color grading in post-production. A cohesive color scheme can enhance the overall look and feel of your music video.
Remember to always strive for balance and visual harmony in your shots. Experiment with different lighting and composition techniques to find what works best for your music video. It’s all about being creative and utilizing the resources available to you to create a visually stunning and engaging music video.
Selecting Props and Costumes
Props and costumes play a crucial role in enhancing the visual storytelling of your music video. They help set the mood, convey the concept, and add depth and layers to your video. Even on a limited budget, it’s possible to select props and costumes that align with your vision and elevate the overall aesthetic of your music video.
Consider the following tips when selecting props and costumes:
- Define your concept: Start by identifying the overall concept and theme of your music video. This will guide your prop and costume choices and ensure they are cohesive with the message and atmosphere you want to convey.
- Budget-friendly options: Look for affordable or DIY alternatives for props and costumes. Thrift stores, flea markets, and online marketplaces can be treasure troves for unique and budget-friendly items. Get creative and repurpose everyday objects into props or incorporate unconventional items that add an interesting or symbolic element to your video.
- Visual impact: Choose props and costumes that have a strong visual impact and contribute to the overall aesthetics. Consider the colors, textures, and shapes that will complement your music and enhance the visual storytelling.
- Consider practicality: Ensure that the chosen props and costumes allow the performers to move comfortably and do not hinder their ability to perform. Balance visual appeal with practicality to ensure a smooth and effective execution of your music video.
- Coordinated outfits: If you have multiple performers, aim for outfits that coordinate or complement each other. This creates a cohesive and visually pleasing look on screen. It doesn’t necessarily mean matching outfits, but rather a harmonious overall appearance.
- Test and adjust: Before filming, do a test run of the props and costumes to see how they look on camera. Make necessary adjustments to lighting, colors, or styling to ensure everything blends well and looks as intended.
Keep in mind that props and costumes should serve the purpose of enhancing your music video, but they should never distract from the central focus, which is the music and the performers. Strike the right balance between the visual elements and the music, ensuring that they work harmoniously to create an engaging and captivating experience for the viewers.
Storyboarding and Shot Planning
A music video is a visual representation of your music, and careful planning is essential to ensure a cohesive and engaging final product. Storyboarding and shot planning help you to visualize your ideas, organize your shots, and effectively communicate your vision to your team and performers.
Here are some steps to consider when storyboarding and planning your shots:
- Listen to the music: Start by thoroughly listening to the song and getting a sense of its structure, mood, and lyrics. Pay attention to the emotional peaks and key moments that can be translated visually.
- Create a shot list: Break down the song into different sections and create a shot list for each part. Determine the key moments, locations, camera angles, and movements you want to capture. This will serve as a guide during the shooting process.
- Storyboard your ideas: Sketch out your shot ideas in a storyboard format. You don’t have to be an artist – simple stick figures or rough sketches will suffice. Include notes about camera movements, framing, and any specific visual elements you want to incorporate.
- Consider transitions: Think about how you want to transition between shots. Smooth transitions can help create a seamless flow and enhance the overall storytelling. Whether it’s a cut, dissolve, or unique transition effect, plan the transitions to match the pace and feel of the music.
- Explore camera movements: Determine if there are any specific camera movements you want to incorporate, such as tracking shots, crane shots, or handheld shots. These movements can add dynamism and energy to your video. Plan these in advance to ensure you have the necessary equipment or techniques to achieve them.
- Collaborate with the performers: Involve your performers in the shot planning process. Discuss their ideas and incorporate their input, allowing them to contribute to the visual storytelling as well. This collaboration can lead to more impactful performances and a stronger connection between the music and the visuals.
- Consider shot variations: Plan for a mix of wide, medium, and close-up shots to add variety and visual interest. Consider different angles, perspectives, and compositions that can bring an engaging look to your video.
Remember that the most important aspect of storyboarding and shot planning is to align the visuals with the emotions and message of the music. Be flexible during the shooting process, allowing for creative moments and improvisation that can enhance the final product. Proper planning lays the foundation for a successful music video production and ensures that your vision is effectively translated to the screen.
Directing the Performers
Directing the performers in your music video is crucial for bringing your vision to life and capturing compelling performances. As the director, you have the responsibility to guide and inspire the performers, helping them deliver their best on-screen presence.
Here are some tips for effectively directing the performers in your music video:
- Discuss the concept: Start by discussing the concept and narrative of the music video with the performers. Share your vision and explain the emotions and story you want to convey. Allow the performers to ask questions and provide their input.
- Provide clear instructions: Communicate your ideas and expectations clearly to the performers. Explain the actions, movements, or expressions you want them to portray. Use descriptive language and visual references to help them understand your vision.
- Encourage improvisation: While providing clear instructions is vital, also encourage the performers to bring their own creativity and interpretation to their performances. Allow for improvisation and moments of spontaneity that can add authenticity and depth to their portrayal.
- Guide energy and pacing: Help the performers understand the desired energy and pacing for each part of the song. Discuss the dynamics, the moments that require intensity, and the moments that need subtlety. Guide them in finding the right balance to match the music.
- Provide feedback and encouragement: Continuously provide feedback and encouragement to the performers throughout the shoot. Offer constructive criticism when necessary, but also highlight their strengths and successes. This helps them stay motivated and confident in their performances.
- Collaborate and build rapport: Foster a collaborative environment where the performers feel comfortable expressing their ideas. Listen to their suggestions and integrate them when appropriate. Building a positive and respectful rapport with the performers enhances the overall creative process.
- Consider camera presence: Remind the performers to be aware of the camera and its position. Guide them on where to direct their eye contact and how to utilize the space effectively. This ensures that their performances are visually engaging and connect with the audience.
- Be adaptable: Remain flexible and open to adjustments during the shoot. Sometimes, unexpected moments or ideas arise that can enhance the performances and the overall video. Embrace those moments and be willing to make changes if it benefits the final product.
Remember, directing the performers is an art that requires clear communication, creativity, and sensitivity to bring out their best performances. Create a collaborative and supportive environment, and always keep the music and the message at the forefront of your direction.
Filming and Capturing the Footage
Once you have planned and prepared all the necessary elements, it’s time to start filming and capturing the footage for your music video. This is where your vision comes to life, and your skills as a videographer come into play. It’s important to approach the filming process with creativity, attention to detail, and a clear understanding of the desired outcome.
Consider the following tips when filming and capturing the footage for your music video:
- Set up the shots: Refer to your shot list and storyboard to guide your setup. Position the camera, lights, and performers accordingly. Take into account factors such as framing, composition, and camera movement to capture visually compelling shots.
- Check your equipment: Before starting, ensure all your equipment is functioning properly. Check the camera settings, focus, audio levels, and lighting setup. This helps avoid any technical issues that could compromise the quality of your footage.
- Communication is key: Clearly communicate with your team, including the performers and any crew members, throughout the filming process. Provide instructions, cues, and feedback as needed. A well-coordinated team ensures a smoother production process and better results.
- Vary the shots: Incorporate a variety of shots to add visual interest and capture different perspectives. Experiment with wide shots, close-ups, and medium shots to create a dynamic visual narrative. Consider different camera angles and movements to bring depth and energy to your video.
- Pay attention to the details: Keep an eye on the details during filming. Check for continuity, ensure wardrobe and props are in the right place, and watch out for any distracting elements in the frame. Small details can make a big difference in the final edit.
- Shoot for the edit: Keep in mind how the shots will come together in the editing process. Capture additional footage or alternative takes to provide more options during post-production. Shoot for seamless transitions and consider the pacing and rhythm of the music.
- Take breaks when needed: Filming can be physically and mentally taxing, both for the performers and the crew. Take regular breaks to rest, recharge, and maintain energy levels. This helps keep everyone focused and productive throughout the shoot.
- Capture authentic performances: Encourage the performers to embrace the emotion and connection to the music while performing. Aim for genuine, heartfelt performances that resonate with the audience. Capture their energy and passion in the footage.
Remember, filming is a creative process that requires attention to detail, adaptability, and the ability to seize the moment. Stay focused on your vision while remaining open to unexpected opportunities or ideas that may arise during filming. With careful planning and capturing, you’ll be able to gather the footage necessary to bring your music video to life.
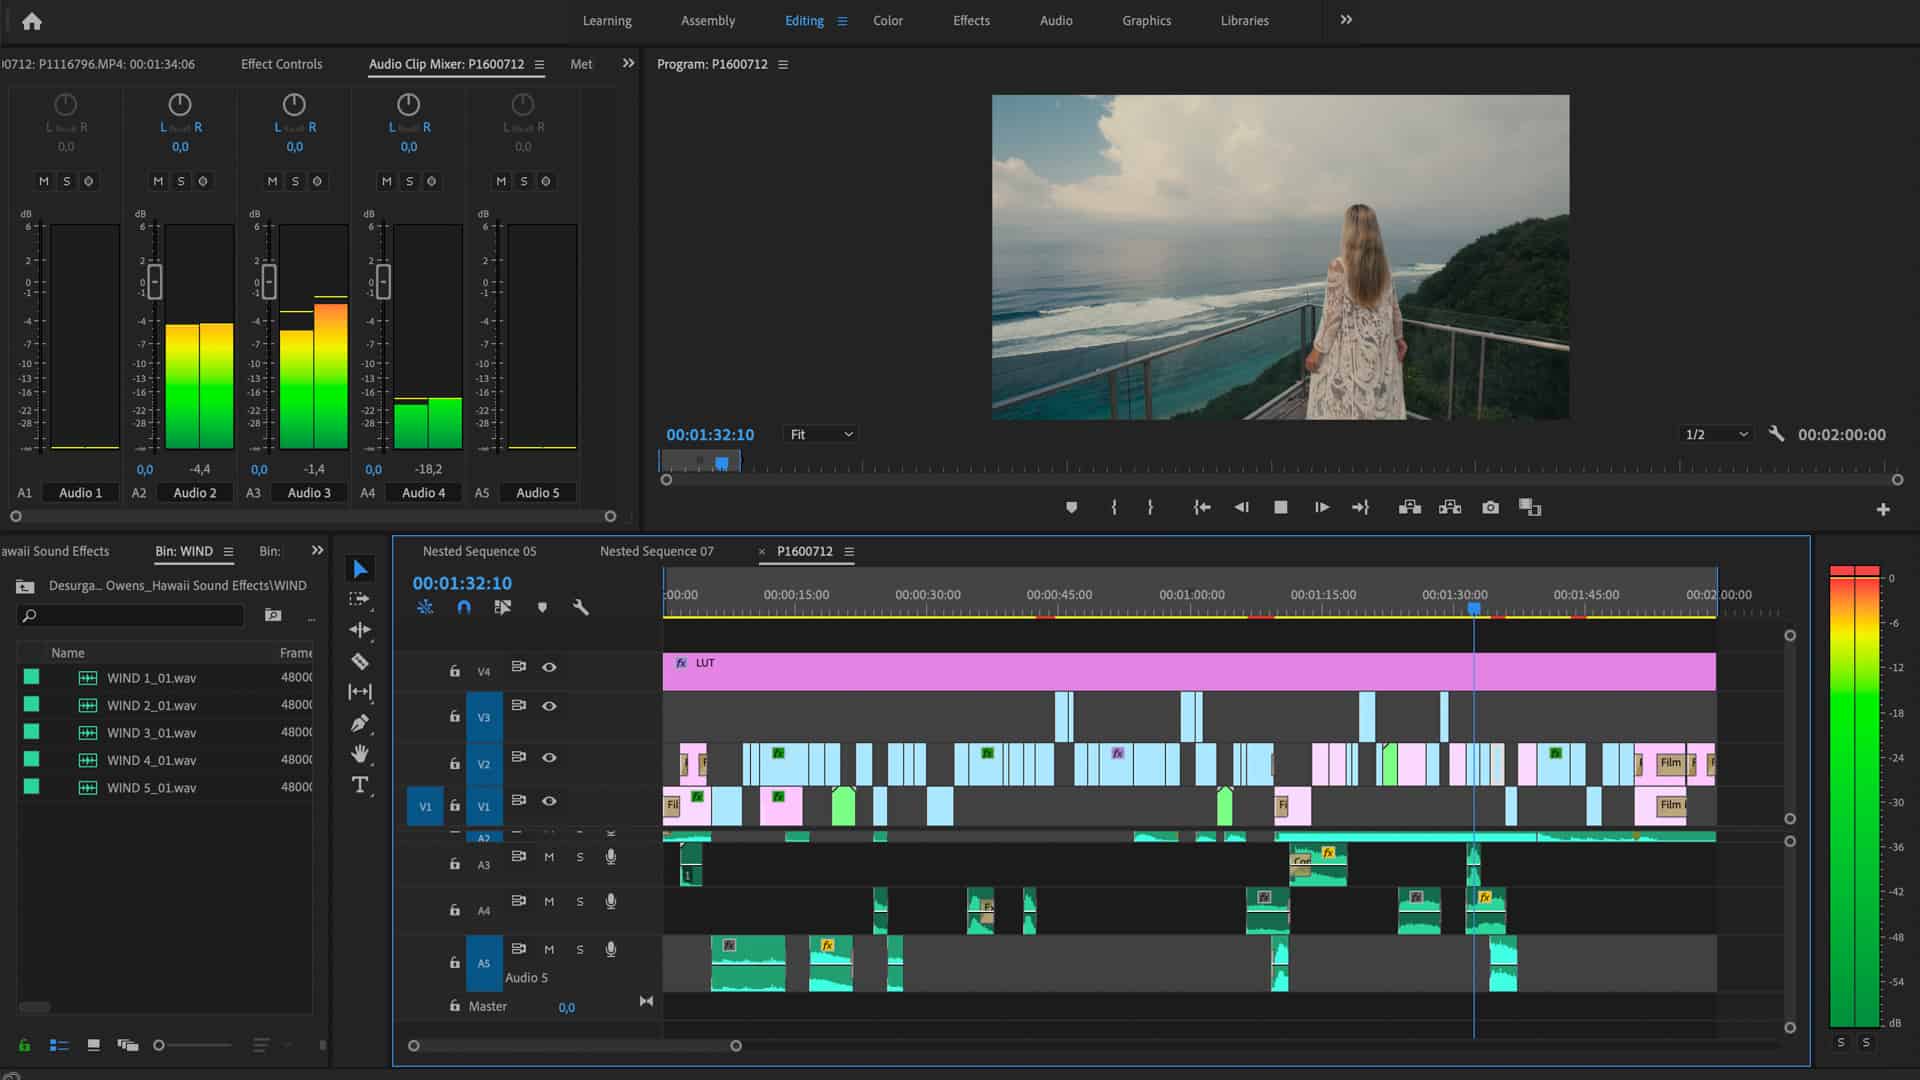
Editing and Post-production
Once you have captured all the footage for your music video, it’s time to bring it all together in the editing and post-production phase. This is where you shape and refine the visual and auditory elements to create a polished and cohesive final product. The editing process allows you to add depth, storytelling elements, and visual effects to enhance the impact of your music video.
Consider the following steps and tips for editing and post-production:
- Import and organize your footage: Start by importing all your footage into your chosen editing software. Create a logical folder structure and organize the clips in a way that makes it easier to locate and access specific shots.
- Review and select the best shots: Review all your footage and select the best takes for each section of the music video. Look for shots that align with your vision, capture the performers’ best moments, and convey the desired emotions.
- Establish the pacing: Determine the desired pace and rhythm for different sections of the music video. This will help guide your editing decisions, such as the length of shots, the timing of cuts, and the overall flow of the video.
- Sequence and arrangement: Arrange the selected shots in a logical sequence that aligns with the narrative and structure of the song. Create a flow that captivates the viewer and holds their attention throughout the music video.
- Add transitions and effects: Enhance the visual appeal of your music video by incorporating appropriate transitions between shots. Experiment with different types of transitions, such as cuts, fades, or wipes, to create smooth and seamless transitions.
- Color grading: Apply color grading techniques to achieve a consistent and visually appealing look throughout the music video. Adjust the color balance, saturation, and exposure levels to enhance the mood and tone of each scene.
- Visual effects: If desired, incorporate visual effects to add an extra layer of creativity or thematic elements to your music video. Be cautious not to overdo it, as too many effects can distract from the music and the overall message.
- Audio editing: Pay attention to the audio elements of your music video. Ensure that the music is well mixed, the vocals are clear, and any additional audio, such as dialogue or sound effects, are appropriately balanced with the music.
- Experiment and refine: Use your editing software’s tools and features to experiment with different creative choices and refine the finer details of your music video. Iterate on your initial edit and seek feedback from trusted individuals to help you make objective improvements.
- Export and finalize: Once you are satisfied with the final edit, export the music video in the appropriate file format for sharing or distribution. Consider creating multiple versions to accommodate different platforms or resolutions.
The editing and post-production phase is where you can truly bring your vision to life and ensure that your music video is polished and engaging. Take the time to fine-tune every aspect, from the pacing to the color grading, to create a visually stunning and emotionally resonant music video.
Adding Effects and Visual Enhancements
Adding effects and visual enhancements can elevate the overall quality and impact of your music video. With careful and creative use of effects, you can enhance the mood, create visual interest, and add a touch of cinematic flair. While it’s important to use effects thoughtfully and avoid overwhelming the viewer, incorporating subtle enhancements can greatly enhance the visual appeal of your music video.
Consider the following tips for adding effects and visual enhancements:
- Color correction and grading: Adjusting the color balance, saturation, and mood through color correction and grading can completely transform the look and feel of your music video. Experiment with different color palettes to evoke the desired emotions and enhance the visual storytelling.
- Visual filters and overlays: Apply visual filters or overlays to give a unique and stylized look to your footage. These can simulate different film stocks, add texture, or create a vintage effect. Use them sparingly and intentionally to maintain a cohesive aesthetic throughout the music video.
- Transitions and motion graphics: Incorporate dynamic transitions between shots to create a seamless flow and add visual interest. Experiment with wipes, fades, slides, or other transition effects to enhance the overall rhythm and pace of your music video. Consider adding simple motion graphics or typography overlays to highlight lyrics or provide additional information.
- Green screen or chroma key: If you have access to a green screen, you can use it to replace the background with different images or footage. This allows for creative and visually striking possibilities, such as placing the performers in fantastical or surreal environments.
- Visual effects for storytelling: Integrate visual effects that enhance the storytelling of your music video. This can include subtle effects like light leaks, lens flares, or particle effects to create a dreamy or ethereal atmosphere. Align the effects with the emotions in the music to enhance the narrative and immerse the viewer.
- Overlay and picture-in-picture: Add overlays or picture-in-picture elements to create visual layers and depth. This can involve incorporating additional footage, images, or graphics that support or enhance the storytelling. Ensure these elements do not overwhelm the main footage but complement and add meaning to the visuals.
- Slow motion and time manipulation: Utilize slow motion and time manipulation techniques to create captivating visual moments. Slowing down certain actions or emphasizing specific moments can add impact and draw the viewer’s attention.
- Experiment and find your style: Explore different effects and visual enhancements to find a style that aligns with the music and adds a unique touch to your music video. Allow yourself to experiment and take creative risks while ensuring that the effects serve the purpose of enhancing the overall experience.
Remember, the key to using effects and visual enhancements is to strike a balance. Use them to enhance the storytelling, mood, and aesthetic of your music video without overshadowing the core message or distracting from the performers and the music. When used effectively, effects can take your music video to the next level and captivate your audience.
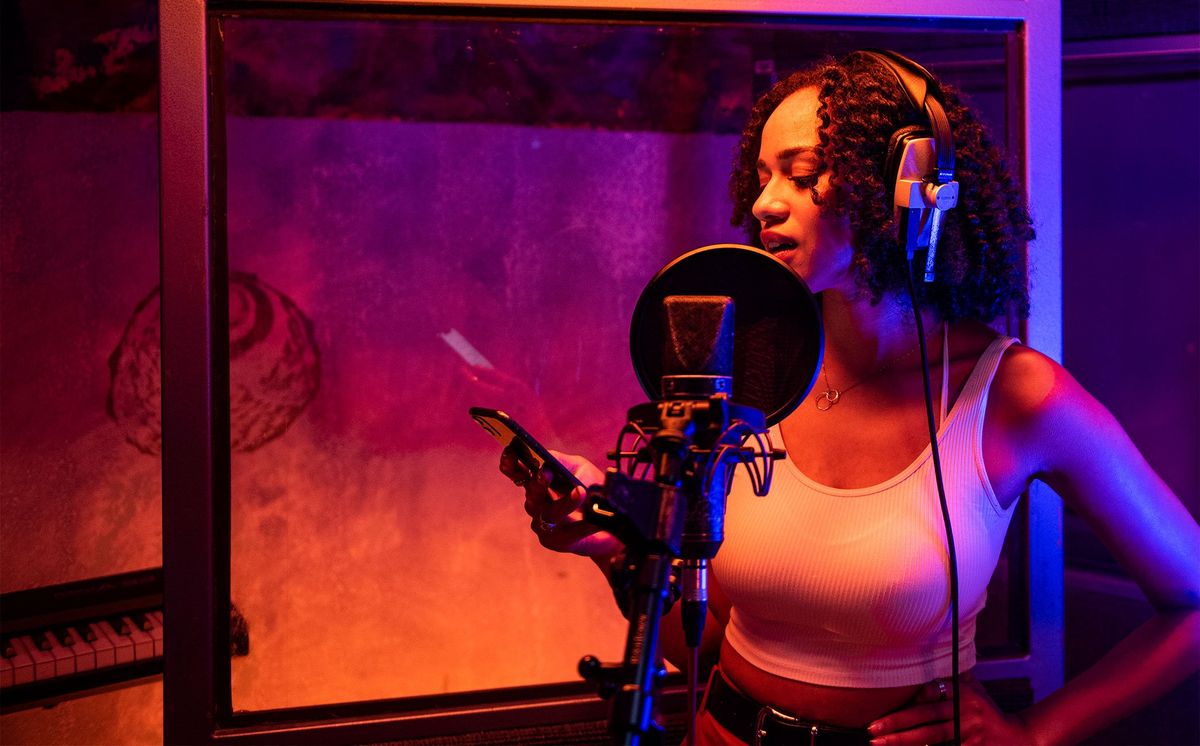
Adding Sound and Music
Sound and music play a crucial role in creating a captivating music video. They enhance the emotional impact, heighten the storytelling, and create a cohesive audio-visual experience for the viewer. When adding sound and music to your video, it’s important to focus on quality, synchronization, and seamless integration.
Consider the following tips for adding sound and music to your music video:
- Select the right soundtrack: Choose music that aligns with the mood, genre, and message of your song. The music should complement the visuals and enhance the emotional impact. Consider licensing music or collaborating with a composer to ensure you have a high-quality soundtrack that fits your vision.
- Sync audio and video: The synchronization between the audio and video is crucial for a polished and professional music video. Ensure that the visuals align perfectly with the music, especially during performance segments. Pay attention to the timing of cuts and transitions to maintain seamless synchronization.
- Capture high-quality audio: During filming, prioritize capturing high-quality audio along with your visuals. Use external microphones or record the audio separately to achieve the best sound quality possible. This will ensure that the vocals and instruments are clear and well-balanced in the final mix.
- Mix and master the audio: In the post-production phase, mix and master the audio to achieve a well-balanced, professional sound. Adjust the levels, EQ, and effects to ensure the vocals and instruments sound clear and cohesive. Pay attention to the dynamic range and make any necessary adjustments to ensure a pleasing audio experience.
- Enhance with sound effects: Consider incorporating sound effects to enhance certain moments or actions in your music video. This can add depth and atmosphere to specific scenes, such as footsteps on different surfaces, door slams, or environmental sounds. Use sound effects sparingly and purposefully to avoid overpowering the music.
- Consider dialogue or narration: If your music video includes dialogue or narration, ensure that it is clear and audible. Mix the dialogue or narration appropriately so that it blends seamlessly with the music and other audio elements. Pay attention to the timing and delivery to ensure effective communication of the message.
- Experiment with audio effects: Similar to visual effects, consider using audio effects to enhance certain moments or create a specific sonic atmosphere. Echo, reverb, or modulation effects can add depth and enhance the auditory experience. Use these effects judiciously to maintain a cohesive audio aesthetic.
- Test and refine: After adding the sound and music elements to your video, review the final mix with a critical ear. Test it on different devices and environments to ensure that the audio translates well and sounds consistent. Make any necessary adjustments to achieve the best possible audio quality.
Adding sound and music to your music video is a crucial step in creating a captivating experience for your audience. Pay attention to quality, synchronization, and the overall audio-visual balance to ensure that your music video resonates with your viewers both visually and audibly.
Finalizing and Exporting the Music Video
As you reach the final stage of your music video production, it’s time to refine, polish, and prepare your video for distribution. Finalizing and exporting your music video involves several crucial steps to ensure that you deliver a high-quality product that meets your creative vision.
Consider the following steps for finalizing and exporting your music video:
- Review and refine the edit: Watch through your music video multiple times to ensure that it flows smoothly, the timing is precise, and the visual and audio elements are in sync. Make any necessary adjustments to enhance the pacing, transitions, and overall coherence.
- Color correction and grading: Fine-tune the color correction and grading to achieve a consistent and visually appealing look. Ensure that the colors accurately represent your creative vision and enhance the intended mood of the music video.
- Audio mastering: Give the audio one final pass to ensure it is well-balanced, clear, and of high quality. Double-check for any potential issues such as pops, clicks, or unwanted background noise. Make sure the audio levels are appropriate and suitable for different listening devices and platforms.
- Add final touches: Consider adding any final touches or visual enhancements that enhance the overall impact of the video. This could include adding subtle effects, text overlays, or adjusting the framing of specific shots for optimal composition.
- Export and compress the video: Export the final video using the appropriate settings for your desired distribution platform. Consider the resolution, file format, and compression that aligns with the platform’s requirements while maintaining the best possible video quality.
- Quality check: Before officially declaring your music video as complete, perform a thorough quality check by watching it on different screens and devices. Check for any potential issues like visual artifacts, audio glitches, or sync issues. If necessary, make any final adjustments or corrections to ensure a seamless, high-quality viewing experience for your audience.
- Create multiple versions: Depending on your distribution strategy, consider creating multiple versions of your music video. This may include social media-ready versions with different aspect ratios, teaser clips, or extended versions for specific platforms or audiences.
- Metadata and tagging: Add appropriate metadata and tags to your music video file. This will help with discoverability and search engine optimization. Include relevant information such as the song title, artist name, genre, and any important keywords.
- Promotion and distribution: Develop a strategy for promoting and distributing your music video. Consider sharing it on various social media platforms, submitting it to music video channels or platforms, or working with a publicist to maximize its reach and exposure.
By following these finalizing and exporting steps, you can ensure that your music video is of the highest quality and aligns with your creative vision. Embrace the excitement of sharing your music video with the world and promote it to reach as many viewers as possible.
Conclusion
Creating a music video on a limited budget may seem challenging, but with the right approach, creativity, and resourcefulness, it is entirely possible to produce a compelling and visually stunning result. Throughout the process, you have learned how to make the most of your resources, from finding suitable locations and gathering affordable equipment to directing performers and adding post-production enhancements.
Remember that the key to a successful music video is not solely dependent on the budget or equipment you have at hand. It’s about leveraging your creativity, storytelling abilities, and understanding of your music to create a captivating visual representation. With careful planning, meticulous attention to detail, and a focus on the connection between your music and the visuals, you can produce a high-quality music video that resonates with your audience.
As you embark on your music video production journey, embrace the spirit of exploration and innovation. Don’t be afraid to take risks and think outside the box. Utilize the power of DIY solutions, collaborate with fellow artists, and constantly refine your skills to create unique and memorable music videos.
Remember, a successful music video is not solely determined by its production value, but by its ability to convey emotions, tell a story, and connect with viewers on a deeper level. Ultimately, it’s the passion and creativity you bring to the project that truly brings it to life.
So go out there, embrace your musical vision, and create a music video that showcases your talent, captivates your audience, and takes your music to new heights!