Home>Production & Technology>Music Video>How To Create A Music Video On Windows Movie Maker

Music Video
How To Create A Music Video On Windows Movie Maker
Published: November 20, 2023
Learn how to create your own music video using Windows Movie Maker. Step-by-step guide for beginners. Express your creativity with this easy-to-use software.
(Many of the links in this article redirect to a specific reviewed product. Your purchase of these products through affiliate links helps to generate commission for AudioLover.com, at no extra cost. Learn more)
Table of Contents
- Introduction
- Step 1: Gathering Materials and Planning
- Step 2: Setting Up Windows Movie Maker
- Step 3: Importing and Organizing Music Files
- Step 4: Importing Video Clips and Images
- Step 5: Editing the Music Track
- Step 6: Adding Video Clips and Images to the Timeline
- Step 7: Adjusting Clip Length and Order
- Step 8: Applying Video Effects and Transitions
- Step 9: Adding Text and Titles
- Step 10: Incorporating Special Effects
- Step 11: Adjusting Volume Levels
- Step 12: Previewing and Fine-Tuning the Video
- Step 13: Saving and Exporting the Music Video
- Conclusion
Introduction
Welcome to the exciting world of music videos! Music videos have become an integral part of the music industry, providing visual representations of songs that can enhance the overall listening experience. Whether you’re an aspiring musician, a videographer, or simply someone who wants to express their creativity, learning how to create a music video can be a rewarding and fulfilling endeavor.
In this article, we will explore the process of creating a music video using Windows Movie Maker. Windows Movie Maker is a user-friendly video editing software available for Windows users. It provides a range of features and tools that allow you to import and edit video clips, add music, apply effects, and create a professional-looking music video.
Creating a music video requires careful planning and attention to detail. You’ll need to gather the necessary materials, such as music files, video clips, and images, and have a clear vision of the concept or storyline you want to convey. With the right preparation and the right tools, you can bring your music to life and create a visually captivating music video.
In the following sections, we will take you through the step-by-step process of creating a music video using Windows Movie Maker. From gathering materials and planning, to editing the music track, adding video clips and effects, and finalizing the video, we will cover everything you need to know to create a stunning music video.
So, if you’re ready to dive into the world of music videos and unleash your creativity, let’s get started on creating your very own masterpiece using Windows Movie Maker!
Step 1: Gathering Materials and Planning
Before you start creating your music video, it’s important to gather all the necessary materials and plan out the concept or storyline of your video. This will ensure a smooth and organized video creation process. Here are the key steps to follow:
- Select the music: The first step is to choose the music track for your video. This could be your own original song or a licensed track that you have permission to use. Consider the mood and theme of the song and how it aligns with the video concept you have in mind.
- Develop the video concept: Once you have selected the music, spend some time brainstorming and developing a clear concept or storyline for your video. Think about the emotions you want to evoke and the overall message you want to convey. This will guide the visual elements and direction of your video.
- Write a storyboard: A storyboard is a visual representation of how each scene will unfold in your video. Sketch out the key scenes, camera angles, and transitions to give yourself a clear blueprint to follow during the video editing process.
- Gather video clips: Depending on your video concept, you may need to gather video footage. This could be footage you have shot yourself or videos you have found that are relevant to your concept. Make sure the footage aligns with your storyboard and overall vision for the video.
- Collect images and graphics: In addition to video clips, you may also want to incorporate images or graphics into your music video. These can add visual interest and help tell your story. Collect relevant images or create custom graphics that complement the theme and style of your video.
- Gather props and costumes: If your video requires props or costumes, make a list of what you will need and gather them before you start filming. This could include instruments, accessories, or any other items that add to the visual appeal of your video.
By taking the time to gather all the necessary materials and plan out your video concept, you will set yourself up for a successful and seamless video creation process. Remember, the more thought and preparation you put into this stage, the better your final music video will be.
Step 2: Setting Up Windows Movie Maker
Once you have gathered all the materials and have a clear concept for your music video, it’s time to set up Windows Movie Maker to begin the editing process. Follow these steps to get started:
- Download and install Windows Movie Maker: If you don’t already have Windows Movie Maker installed on your computer, you will need to download and install it. You can find the official download link on the Microsoft website. Follow the instructions provided to complete the installation process.
- Launch Windows Movie Maker: After installing the software, locate the Windows Movie Maker application on your computer and launch it. You should see a simple and user-friendly interface that will serve as your editing workspace.
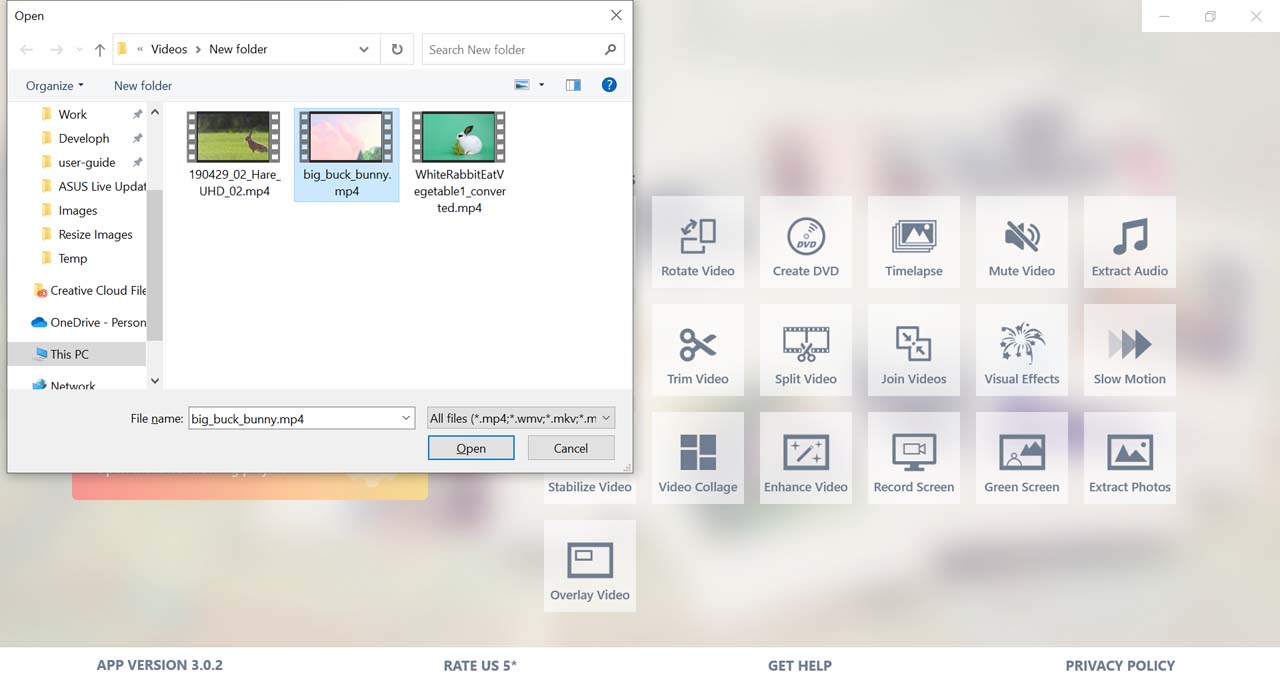
- Import media files: To begin editing your music video, you’ll need to import the media files you gathered in Step 1. Click on the “Add Videos and Photos” or “Add Music” button in the toolbar to select the files from your computer. You can also drag and drop the files directly into the project timeline.
- Create a new project: Before you start editing your music video, it’s a good practice to create a new project. Click on the “File” tab in the top left corner of the window and select “New Project.” This will allow you to work on your video without affecting any previous projects.
- Set project settings: Once you’ve created a new project, you can customize the project settings according to your preferences. You can adjust the aspect ratio, frame rate, and other settings by clicking on the “Project” tab and selecting “Project Settings.”
Setting up Windows Movie Maker is a crucial step that lays the foundation for your music video editing process. By downloading and installing the software, importing your media files, and customizing the project settings, you are now ready to harness the power of Windows Movie Maker and bring your music video to life.
Step 3: Importing and Organizing Music Files
Now that you have Windows Movie Maker set up, it’s time to import and organize the music files for your music video. By following these steps, you can ensure that your music track is ready for editing and syncing with your video footage:
- Import the music files: Within Windows Movie Maker, click on the “Add Music” button in the toolbar or go to the “Home” tab and select “Add Music” from the ribbon. Browse your computer and select the music files you want to use in your video. You can import multiple music files if needed.
- Preview and trim the music track: Once the music files are imported, you can preview them by clicking on the play button in the preview window. To trim the track, select it in the timeline and click on the “Edit” tab. Use the “Trim Tool” to adjust the start and end points of the music track as desired.
- Organize the music track: If your music video requires specific sections or transitions within the song, you can organize the music track accordingly. To cut the track into different sections, position the playhead at the desired point in the timeline and click on the “Split” button.
- Add and adjust audio effects: Windows Movie Maker provides various audio effects that you can apply to your music track to enhance the overall sound. To add an audio effect, select the track in the timeline and click on the “Edit” tab. Choose an effect from the preset options and adjust the settings as needed.
- Adjust the volume levels: To ensure that the music track is balanced with other audio elements in your video, you can adjust the volume levels. Click on the audio track in the timeline, and on the “Audio Tools” tab, use the volume slider to increase or decrease the volume as desired.
By importing and organizing your music files in Windows Movie Maker, you are one step closer to creating a synchronized and impactful music video. Take the time to preview and trim the music track, organize it into sections if needed, and apply audio effects and volume adjustments to refine the audio experience of your video.
Step 4: Importing Video Clips and Images
With the music track ready, it’s time to import the video clips and images that will accompany the music in your music video. By following these steps, you can bring visual elements into your project and start building your video:
- Import video clips: Within Windows Movie Maker, go to the “Home” tab and click on the “Add Videos and Photos” button in the toolbar. Browse your computer and select the video clips you want to use in your music video. You can import multiple video clips if needed.
- Import images: To incorporate still images into your music video, follow the same process of clicking on the “Add Videos and Photos” button in the toolbar, and select the images you want to import. These can be photos or graphic elements that enhance the visual storytelling aspect of your video.
- Arrange the video clips and images: Once imported, the video clips and images will appear in the project library. Drag and drop them into the project timeline in the desired order. Pay attention to the flow and transitions between different clips to ensure a seamless visual experience.
- Trim and split the video clips: If necessary, you can trim and split the video clips to focus on specific sections or moments. Position the playhead at the desired point in the timeline, and click on the “Split” button to divide the clip. Use the “Trim Tool” to adjust the start and end points of each section.
- Set durations for images: For still images, you can adjust the duration they appear on screen. Select the image in the timeline and go to the “Visual Tools” tab. Use the Duration slider to increase or decrease the time that the image is displayed in your music video.
Importing and organizing your video clips and images is an essential step in the music video creation process. By carefully selecting and arranging visual elements, you can bring the concepts and emotions of your music to life on screen. Take the time to trim and split video clips, set durations for images, and ensure a smooth transition between different visual elements in your music video.
Step 5: Editing the Music Track
Now that you have imported and organized your video clips and images, it’s time to focus on editing the music track itself. By applying various editing techniques and effects, you can enhance the impact and synchronization between the audio and visual elements of your music video. Follow these steps to edit the music track:
- Add markers: Markers are useful for highlighting specific points in the music track where you want to align specific visual elements or make edits. To add a marker, position the playhead at the desired point in the timeline and click on the “Marker” button in the toolbar. You can then name the marker and add a description if needed.
- Apply fade in and fade out: Fade in and fade out effects can provide smooth transitions for the beginning and end of the music track. To apply these effects, select the audio track in the timeline and go to the “Audio Tools” tab. Click on the “Fade In” or “Fade Out” button to adjust the duration and intensity of the fade effect.
- Sync the music track to video clips: To ensure that the music track aligns perfectly with the visual elements in your video, you can sync it to specific video clips. Select the audio track in the timeline and use the “Trim Tool” to adjust the start and end points of the track to match the desired section of the video.
- Loop sections: If you want to repeat certain sections of the music track to create a desired effect or emphasize a specific moment, you can use the looping feature. Select the section you want to loop in the timeline, right-click, and choose the “Loop” option.
- Apply audio effects: Windows Movie Maker offers a range of audio effects that you can apply to your music track to enhance its overall sound and impact. Go to the “Audio Tools” tab, click on the “Audio Effects” button, and choose from the available options. Experiment with effects like echo, reverb, or equalization to find the desired result.
By editing the music track in your music video, you can achieve precise synchronization between the audio and visual elements, enhancing the overall impact and storytelling of your video. Make use of markers, fade in/out effects, syncing techniques, looping sections, and audio effects to fine-tune the music track and create a captivating experience for your audience.
Step 6: Adding Video Clips and Images to the Timeline
With the music track edited and ready, it’s time to bring your video clips and images to life by adding them to the timeline. This step involves carefully arranging and sequencing your visual elements to create a cohesive and visually engaging music video. Follow these steps to add video clips and images to the timeline:
- Drag and drop: To add video clips or images to the timeline, simply drag and drop them from the project library onto the timeline. Position them in the desired order to create a logical flow and sequence for your music video.
- Trim and adjust durations: If necessary, you can trim the video clips to include only the desired portions. Select a video clip in the timeline, then use the “Trim Tool” to adjust the start and end points. Similarly, use the “Duration” tool to adjust the length of images if you want them to appear for a specific amount of time.
- Overlapping clips: Overlapping video clips can create smooth transitions between different scenes or shots. To overlap clips, drag a video clip to the right or left and let it overlap with the previous or following clip. Adjust the duration of the overlapping portions for seamless transitions.
- Apply visual effects: Windows Movie Maker provides a variety of visual effects that you can apply to your video clips to enhance their appearance. Go to the “Visual Effects” tab, select a clip, and choose from preset effects like sepia, black and white, or vignette. Experiment with different effects to achieve the desired aesthetic for your video.
- Place images and graphics: If you have images or graphics that you want to insert into your music video, drag and drop them onto the timeline. You can position them between video clips or overlap them with video footage to create visually interesting compositions.
By adding video clips and images to the timeline, you can start building the visual narrative of your music video. Take the time to trim and adjust durations, overlap clips for smooth transitions, and apply visual effects to enhance the overall look and feel of your video. Remember to experiment and be creative with your placement of images and graphics to create a visually captivating music video.
Step 7: Adjusting Clip Length and Order
Now that you have added video clips and images to the timeline, it’s time to fine-tune their length and order to create a cohesive and well-paced music video. By adjusting the clip length and order, you can ensure that your video flows smoothly and effectively communicates your desired message. Follow these steps to adjust clip length and order:
- Trimming clips: To adjust the length of a video clip, select it in the timeline and use the “Trim Tool” to cut out unwanted sections. Drag the edges of the clip inward or outward to shorten or lengthen it accordingly. This allows you to focus on the most impactful moments in the footage.
- Moving clips: If you want to reorganize the order of your clips, simply click on a clip in the timeline and drag it to a new position. This allows you to create a visually compelling sequence that aligns with the flow of the music and enhances the story you’re trying to tell.
- Splitting clips: Sometimes, you may want to insert other clips or images in between existing footage. In such cases, position the playhead at the desired point in the timeline and click on the “Split” button to divide a clip into two segments. You can then insert a new clip or image in between them.
- Adding transitions: Transitions can help smooth the visual flow between clips and create a more polished music video. Click on the “Transitions” tab, select a transition effect, and drag it between two clips. Try out various transitions to find the ones that best fit the mood and style of your video.
- Preview and fine-tune: After adjusting the clip length and order, take the time to preview your music video to ensure everything is in sync. Play around with the placement of clips, their durations, and transitions to achieve the desired visual impact. Make any necessary adjustments until you are satisfied with the flow and pacing of your video.
By adjusting the clip length and order, you can create a visually engaging music video that effectively communicates your message. Trim clips to focus on key moments, move them around to tell a coherent story, split them to insert new elements, add transitions for smooth transitions between scenes, and carefully fine-tune until you achieve the desired result. Remember to frequently preview your video to ensure it aligns with your vision.
Step 8: Applying Video Effects and Transitions
To enhance the visual appeal and storytelling of your music video, you can apply video effects and transitions. These creative elements add depth, style, and continuity to your video, making it more engaging for viewers. Follow these steps to apply video effects and transitions:
- Select a clip: Choose a video clip in the timeline that you want to apply an effect or transition to. Click on the clip to select it.
- Apply video effects: Windows Movie Maker offers a range of video effects that can dramatically change the look and feel of your footage. Go to the “Visual Effects” tab and select an effect that suits your creative vision. Examples of effects include sepia, grayscale, vignette, and many more. Experiment with different effects and see how they enhance the atmosphere of your video.
- Adjust effect settings: Once you apply an effect, you may have the option to adjust its settings. Use sliders or other controls to fine-tune the intensity or appearance of the effect. This way, you can tailor it to your specific preferences and ensure it complements your overall video aesthetic.
- Add transitions between clips: Transitions help smoothen the visual transition between different video clips. To add a transition, go to the “Transitions” tab and choose a transition style such as dissolve, fade, or wipe. Click on the transition and drag it to the timeline, placing it between two clips. Adjust the duration of the transition by dragging its edges.
- Experiment and find the right balance: Play around with different video effects and transitions to find the right balance for your music video. Each effect and transition can evoke a different mood or enhance a specific moment. Trust your creative instincts and choose effects and transitions that enhance your intended story and resonate with your audience.
By applying video effects and transitions, you can elevate the visual impact of your music video. Experiment with different effects, adjust their settings, and consider the right timing and duration for transitions between clips. Remember, the key is to highlight the emotions and messages of your music, creating a visually stunning video that captivates your viewers.
Step 9: Adding Text and Titles
Adding text and titles to your music video can provide important context, convey messages, and highlight key elements of your video. Whether it’s displaying song lyrics, introducing scenes, or providing credits, text and titles add an extra layer of information and interest to your video. Follow these steps to add text and titles to your music video:
- Choose the appropriate tool: Windows Movie Maker offers different tools for adding text and titles to your video. The two primary options are the “Caption” tool and the “Titles” tool. The “Caption” tool is ideal for displaying short snippets of text, while the “Titles” tool allows for more customization and flexibility.
- Select the location: Decide where you want to place the text or title in your video. It can be at the top, bottom, or anywhere on the screen. Click on the appropriate tool and position the playhead in the timeline where you want the text or title to appear.
- Add the text or title: With the playhead positioned, click on the chosen tool and enter the text or title you want to display. Customize the font style, size, and color to match the overall aesthetic of your video. You can also adjust the duration of how long the text or title is displayed on the screen.
- Choose animation effects: Windows Movie Maker offers various animation effects that can make your text or title appear in a dynamic and visually appealing way. Explore the available animation options and choose one that suits your video’s style. You can also adjust the speed and direction of the animation.
- Preview and fine-tune: After adding the text or title, preview your video to see how it looks and ensure it aligns with your vision. If necessary, make any adjustments to the placement, font, animation, or duration. Pay attention to legibility and readability, ensuring that the text or title stands out without overpowering other visual elements.
By adding text and titles to your music video, you can enhance communication, provide additional context, and add artistic flair. Experiment with different styles, animations, and placements to find the right balance between visual impact and readability. Just remember to align the text and titles with the overall theme and tone of your video, ensuring they enhance the overall viewing experience.
Step 10: Incorporating Special Effects
To take your music video to the next level, consider incorporating special effects that add creativity and visual interest. Special effects can emphasize certain moments, create unique visual experiences, and make your video stand out. Follow these steps to incorporate special effects into your music video:
- Choose the right effects: Determine the type of special effects you want to incorporate into your video. Some popular options include slow motion, fast motion, overlays, color grading, and visual filters. Consider the mood and tone of your video, and choose effects that amplify the desired emotions.
- Time manipulation: Special effects like slow motion or fast motion can enhance the impact of specific scenes or moments in your music video. To apply these effects, select the desired clip in the timeline, go to the “Video Tools” tab, and choose the appropriate speed option.
- Overlays and visual filters: Overlays and visual filters can add an artistic touch and create a specific atmosphere in your video. Windows Movie Maker provides a range of overlays and filters to choose from. Experiment with different options and adjust their intensity to achieve the desired look.
- Color grading: Color grading is the process of adjusting the colors and hues in your video to create a specific visual aesthetic. With Windows Movie Maker, you can modify the brightness, contrast, saturation, and hue of your video clips. Play around with these settings to achieve the desired color grading effect.
- Experiment and refine: Incorporating special effects is all about experimentation and creative expression. Don’t be afraid to try different combinations of effects, overlays, and color grading. Preview your video frequently and make adjustments as needed to achieve the desired visual impact.
By incorporating special effects into your music video, you can add depth and creativity to the visual presentation. Whether it’s with time manipulation, overlays, visual filters, or color grading, special effects can help you create a unique and memorable music video that captivates your audience.
Step 11: Adjusting Volume Levels
One crucial aspect of creating a professional-grade music video is ensuring that the audio elements are properly balanced. Adjusting the volume levels of the music track, video clips, and other audio effects is essential to delivering an optimal listening experience. Follow these steps to adjust the volume levels in your music video:
- Access the audio tracks: In Windows Movie Maker, locate the audio tracks in the timeline. This includes the music track, video clip audio, and any other audio effects you have incorporated into the video.
- Adjust the overall volume: Start by adjusting the overall volume level of the music track. Click on the audio track in the timeline and go to the “Audio Tools” tab. Use the volume slider to increase or decrease the overall volume as needed. Ensure that the music is audible, but not overpowering.
- Balance with video clip audio: If you have audio within your video clips, it’s important to balance it with the music track. Select the video clip in the timeline and go to the “Audio Tools” tab. Use the volume slider to adjust the clip’s audio level, ensuring it complements the music without overpowering it.
- Adjust audio effects: If you have applied any audio effects to your music or video clips, consider how they contribute to the overall sound. Fine-tune the volume levels of these effects using the volume sliders in the “Audio Tools” tab. Ensure that they seamlessly blend with the music and video audio.
- Preview and make adjustments: After adjusting the volume levels, preview your music video to ensure a balanced and enjoyable listening experience. Pay attention to any areas where the audio may be too low or too loud, and make adjustments accordingly. Strive for a cohesive sound where all audio elements work harmoniously.
By properly adjusting the volume levels in your music video, you can ensure that the audio elements complement the visual elements, providing a well-balanced and immersive experience for your viewers. Take the time to carefully listen and make adjustments as needed, ensuring that every sound is clear and enhances the overall impact of your music video.
Step 12: Previewing and Fine-Tuning the Video
Previewing and fine-tuning your music video is a critical step that allows you to polish and perfect every aspect of the final product. By carefully reviewing your video, you can identify any areas that need adjustments and make the necessary refinements. Follow these steps to effectively preview and fine-tune your music video:
- Play the entire video: Start by watching the entire music video from start to finish. Pay attention to the flow, pacing, and overall impact of the video. Take note of any sections that feel too long or too short or any visual or audio elements that seem out of place.
- Focus on transitions: Pay particular attention to the transitions between different video clips and scenes. Ensure that they are smooth and seamless, without any abrupt cuts or visual inconsistencies. Adjust the duration of transitions or add additional effects if necessary to create a cohesive and visually appealing transition between scenes.
- Check for synchronization: Verify that the visual elements of your music video are synchronized with the beat and rhythm of the music track. Make sure that key moments and on-screen actions align with important musical elements such as drumbeats or soft melodies. Adjust the timing of clips or effects as needed to enhance the synchronicity between audio and visual elements.
- Review text and titles: Read and review any text or titles displayed throughout the video. Ensure that they are legible, properly timed, and convey the intended information or messages effectively. Make any necessary adjustments to font size, color, or duration to enhance readability and impact.
- Listen to audio quality: Pay attention to the audio quality and ensure that it is clear and balanced. Check for any background noise, distortions, or inconsistencies in volume levels. Adjust the audio effects or volume levels if necessary to create an enhanced and immersive audio experience.
- Make iterative refinements: Based on your observations and feedback, make incremental adjustments to different aspects of the music video. This can include trimming clips, changing timings, modifying effects, or refining visual elements. Continually preview and review your video after each adjustment to ensure that the changes have the desired effect.
By closely previewing and fine-tuning your music video, you have the opportunity to refine it into the best possible version. Take the time to carefully review all aspects of the video, making adjustments where needed to improve flow, synchronization, visual appeal, and audio quality. Strive for perfection and aim to create a polished music video that exceeds your audience’s expectations.
Step 13: Saving and Exporting the Music Video
After all the hard work and fine-tuning, it’s time to save and export your music video as a final, shareable file. Windows Movie Maker provides various exporting options that allow you to choose the format, quality, and size of your video. Follow these steps to save and export your music video:
- Review and finalize your video: Before exporting, ensure that you are completely satisfied with the final version of your music video. Double-check for any errors, glitches, or inconsistencies, and make any necessary last-minute adjustments.
- Click on the “Home” tab: Locate the “Home” tab on the top navigation bar of Windows Movie Maker. Click on it to access the export and sharing options.
- Select an export format: In the “Home” tab, choose the “Save Movie” or “Export” option. This will open a list of export formats, such as MP4, AVI, WMV, or others. Select the format that best suits your needs and the requirements of your intended audience or platform.
- Set export properties: Depending on the export format you choose, you may have the option to set specific properties such as resolution, frame rate, or audio quality. Adjust these settings based on your preferences and the intended use of the video.
- Choose a destination folder: Specify the folder or directory where you want to save the exported video file. Select a location on your computer or an external storage device with sufficient space to accommodate the file.
- Name and save the video: Give your music video a meaningful and descriptive name to easily identify it later. Click on the “Save” or “Export” button to commence the saving and exporting process. The duration of this process will depend on the length and complexity of your video.
- Share your music video: Once the exporting process is complete, you can now share your music video with the world. Upload it to your preferred video sharing platforms, social media, or websites to reach your target audience. Consider adding a captivating title, description, and relevant tags to attract viewers.
By saving and exporting your music video, you are ready to showcase your creative work to a wider audience. Remember to choose the appropriate export format, adjust export properties, and select a suitable destination folder. With your music video exported, share it on the desired platforms and proudly promote your artistic creation!
Conclusion
Congratulations on completing the process of creating your very own music video using Windows Movie Maker! Throughout this journey, you have learned how to gather materials, set up the software, import and organize music files, video clips, and images, as well as edit the music track, apply video effects, and incorporate text and titles. You have also fine-tuned the volume levels, previewed and refined the video, and finally, saved and exported your music video as a polished and shareable file.
Creating a music video is a blend of creativity, technical skills, and attention to detail. It allows you to express yourself, bring your music to life visually, and captivate your audience. With Windows Movie Maker, you have a user-friendly tool at your disposal for editing and producing professional-looking music videos.
Remember, the key to a successful music video is to have a clear concept, synchronize the visual elements with the beat and mood of the music, and tell a compelling story. Take the time to plan and gather the necessary materials, and always experiment with different effects, transitions, and visual styles to achieve a unique and engaging video.
Now that you have completed this comprehensive guide, it’s time to unleash your creativity and continue exploring the world of music videos. With your newfound knowledge, you can continue to improve your skills, experiment with different video editing tools, and develop your own signature style.
So go ahead, share your music video with the world, connect with your audience, and continue to create captivating visuals that complement your music. The possibilities are endless, and the journey of creating music videos is truly an exciting one. Good luck, and may your music videos be a testament to your artistic vision and passion!


