Home>Production & Technology>Background Music>How To Add Background Music In Video Editor Windows 10

Background Music
How To Add Background Music In Video Editor Windows 10
Modified: January 22, 2024
Learn how to add background music to your videos using the Windows 10 video editor. Enhance your videos with the perfect soundtrack.
(Many of the links in this article redirect to a specific reviewed product. Your purchase of these products through affiliate links helps to generate commission for AudioLover.com, at no extra cost. Learn more)
Table of Contents
- Introduction
- Step 1: Choosing a Video Editor
- Step 2: Preparing the Background Music
- Step 3: Importing Your Video into the Editor
- Step 4: Adding Background Music to Your Video
- Step 5: Adjusting the Music Volume
- Step 6: Editing the Music Track
- Step 7: Previewing and Exporting Your Video with Background Music
- Conclusion
Introduction
Adding background music to your videos can greatly enhance the overall viewing experience. It can set the mood, add emotion, and make your videos more engaging and memorable. If you’re using the Windows 10 operating system and looking to add background music to your videos, you’re in luck. Windows 10 offers a range of video editing software that allows you to easily incorporate background music into your video projects.
In this article, we will guide you through the process of adding background music to your videos using a video editor on Windows 10. Whether you’re a beginner or an experienced video creator, you’ll find these steps easy to follow and implement.
Before we dive into the steps, it’s important to note that choosing the right video editor for your needs is essential. Windows 10 offers various video editing software options. The most popular and user-friendly ones include Windows Movie Maker, Adobe Premiere Pro, and Filmora. These video editors offer a range of features, including the ability to add background music.
Now that we’ve covered the basics, let’s get started on adding the perfect background music to your videos and take your video editing skills to the next level.
Step 1: Choosing a Video Editor
The first step in adding background music to your videos is choosing the right video editing software. As mentioned earlier, Windows 10 offers several options that cater to different skill levels and editing needs. Here are a few popular video editing software choices:
- Windows Movie Maker: This is a free and easy-to-use video editing software that comes pre-installed on most Windows 10 systems. It offers basic editing features and a user-friendly interface, making it ideal for beginners.
- Adobe Premiere Pro: If you’re looking for a more professional video editing software with advanced features, Adobe Premiere Pro is a great choice. It offers a wide range of editing tools, including the ability to add background music and adjust audio levels.
- Filmora: Filmora is another popular video editing software that offers a balance between simplicity and functionality. It has a user-friendly interface and provides various editing features, including the ability to add background music.
Take some time to explore these options and choose the one that best suits your needs and skill level. Consider factors such as ease of use, features, and budget. Once you’ve selected the video editor that you want to work with, you’re ready to move on to the next step.
Step 2: Preparing the Background Music
Before you can add background music to your videos, it’s important to have the right music files prepared. Here are a few tips to help you prepare the background music:
- Choose the right music: Select background music that complements the theme and mood of your video. Consider the tone and message you want to convey and choose music that enhances those elements.
- Check for copyright: Ensure that the music you use is copyright-free or that you have the necessary licensing to use it in your videos. Using copyrighted music without permission can lead to legal issues.
- Format and quality: Use audio files in formats supported by your video editing software, such as MP3 or WAV. Ensure that the music files are of high quality to maintain the integrity of the sound.
- Trim and edit: If needed, trim or edit the music file to match the desired length or remove any unwanted sections. You can use audio editing software like Audacity or the editing capabilities of your video editor to make these adjustments.
Once you have selected and prepared the background music files, make sure to keep them readily accessible on your computer. This will make it easier and faster to import them into your video editing software and add them to your videos.
Step 3: Importing Your Video into the Editor
Now that you have your video editor of choice selected and your background music prepared, it’s time to import your video into the editor. Follow these steps to import your video:
- Open your video editor: Launch the video editing software on your Windows 10 system.
- Create a new project: Click on “New Project” or a similar option to create a new project in the video editor.
- Import your video: Look for an “Import” or “Add Media” button within the video editor’s interface. Click on it to browse and select the video file you want to add background music to. Once selected, click on “Open” to import the video into the editor.
Depending on the video editor you’re using, there may be additional options or steps involved in importing your video. Refer to the software’s documentation or help resources for specific instructions tailored to your chosen video editor.
After importing your video, you should see a video timeline or workspace where you can view and edit your video. The imported video should appear in the timeline or workspace, ready for you to make modifications and add background music.
Now that your video is successfully imported into the editor, let’s move on to the next step: adding background music!
Step 4: Adding Background Music to Your Video
Adding background music to your video is a straightforward process in most video editing software. Follow these steps to seamlessly incorporate your prepared background music:
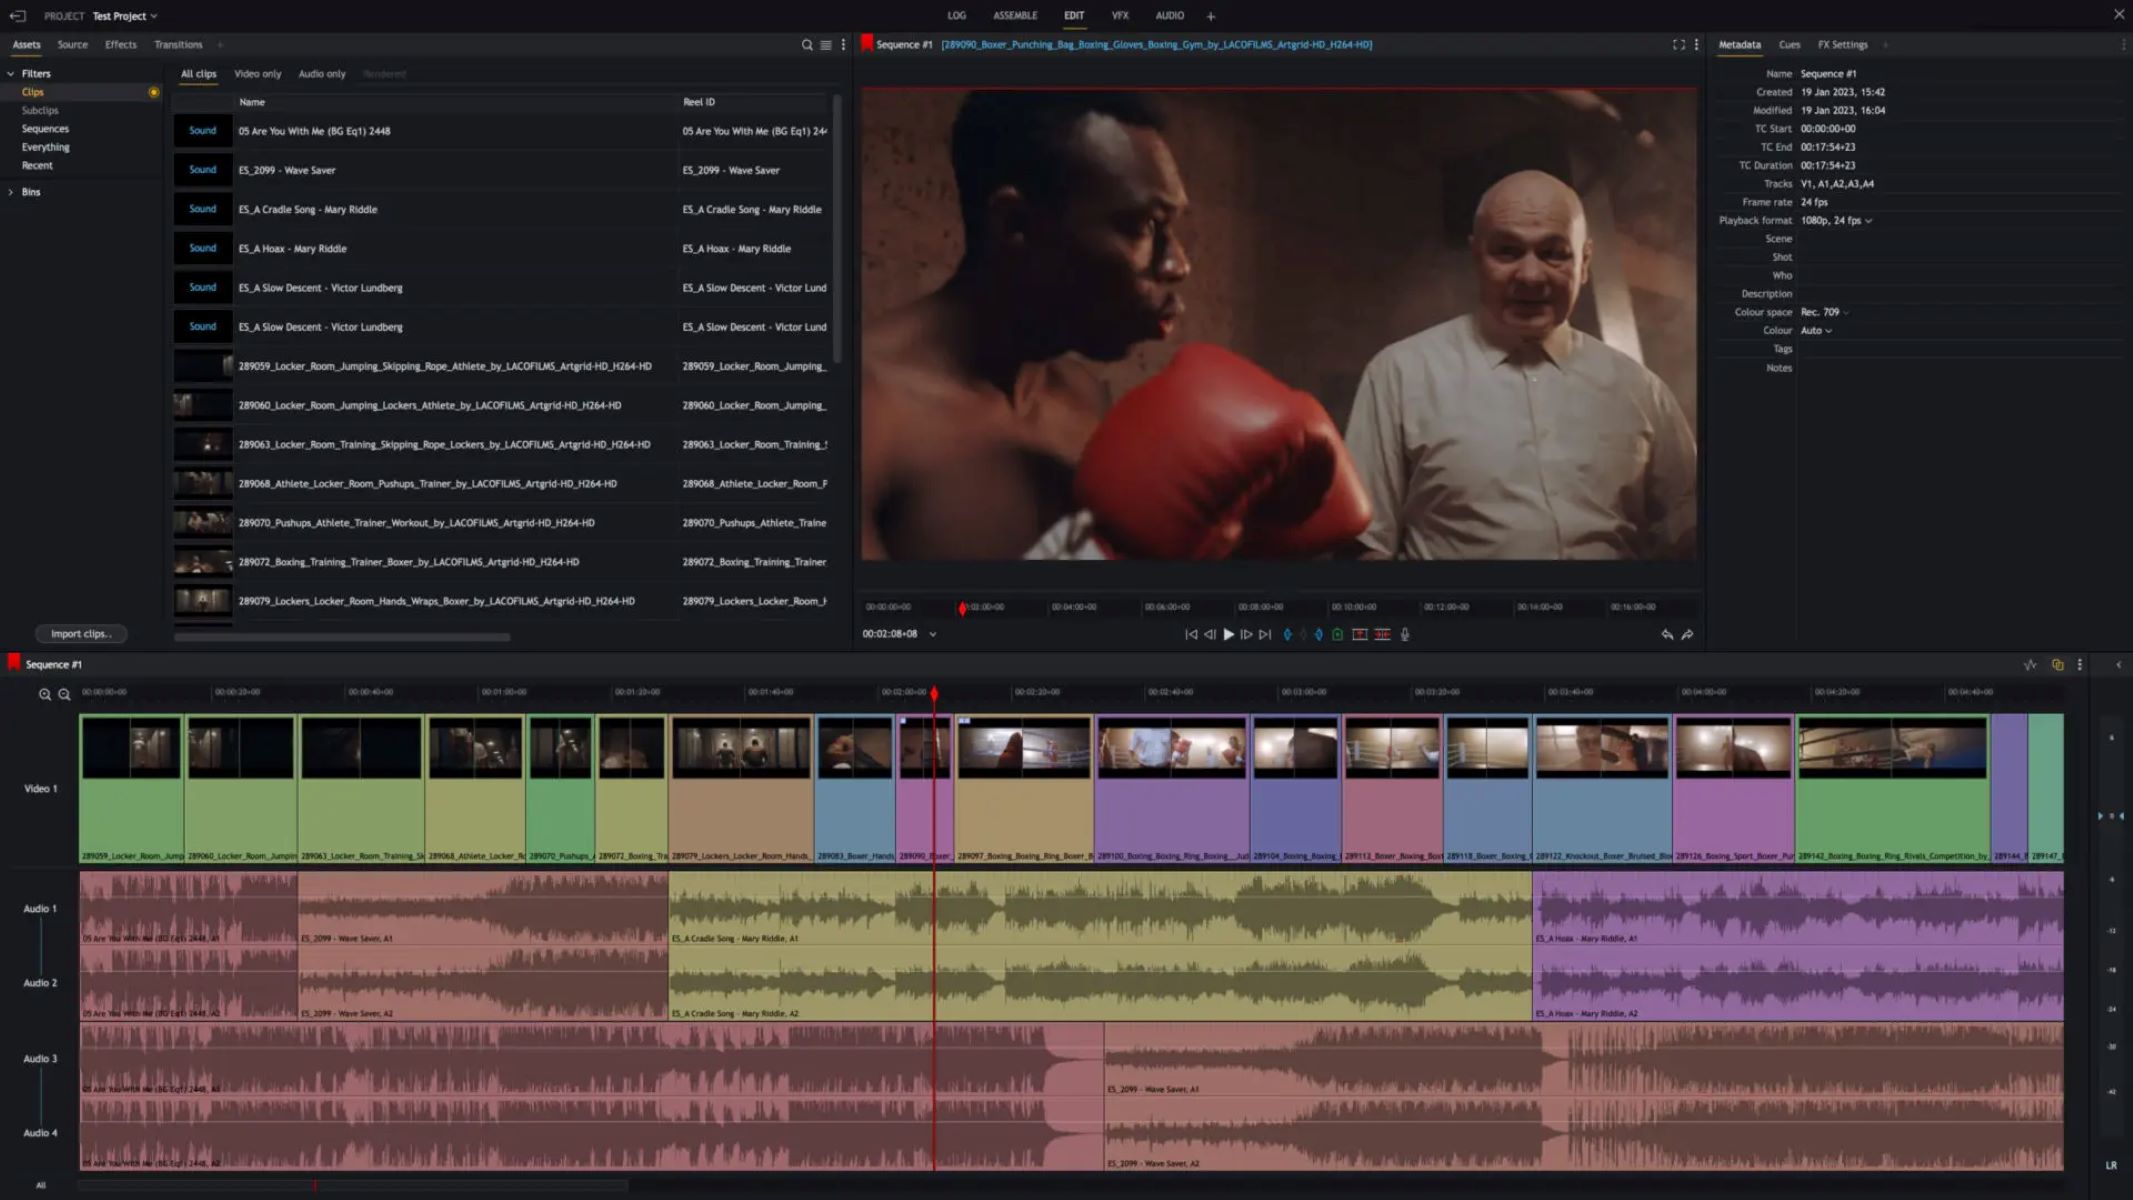
- Select the music track: Locate the music track you want to add to your video in the video editor’s media library or folder. Select the music file and drag it onto the video timeline or the designated area for audio tracks.
- Sync the music with your video: Once the music track is placed on the video timeline, align it with the video footage. You can adjust the starting point of the music track to sync it with specific scenes or moments in your video.
- Resize or trim the music track: If necessary, you can resize or trim the music track to match the desired duration. This allows you to control when the music starts and ends and ensures it fits perfectly with the visuals.
- Blend the music with volume controls: Adjust the volume levels of both the video’s original audio and the added background music to create a proper balance. You can increase or decrease the music volume to adjust its prominence in the video.
During this step, take the time to listen to the video with the added background music to ensure that it complements the visuals and maintains a harmonious balance. Make any necessary adjustments until you are satisfied with the result.
Remember, the process of adding background music may vary slightly depending on the video editing software you’re using. If you encounter any difficulties or specific steps unique to your chosen software, refer to its documentation or help resources for further guidance.
Now that you’ve successfully added background music to your video, it’s time to fine-tune and edit the music track to perfection in the next step.
Step 5: Adjusting the Music Volume
Once you have added the background music to your video, it’s important to adjust the music volume to ensure a balanced audio mix. Follow these steps to adjust the music volume:
- Select the music track: In the video editor’s timeline or audio track section, locate the music track that you added to your video.
- Access volume controls: Look for volume controls or audio settings associated with the music track. This may be represented by a volume slider, numerical value, or audio meter.
- Gradually adjust the volume: Begin by playing the video and music together. Make incremental adjustments to the music volume as needed. Listen carefully to ensure the music doesn’t overpower the video’s original audio or dialogue.
- Balance the audio levels: Aim for a balanced audio mix where the background music enhances the video without dominating it. The music should complement the visuals and create a cohesive audio-visual experience for the viewers.
While adjusting the music volume, it’s important to consider the overall dynamics of the video and the intended impact of the background music. For example, in certain scenes, you may want the music to be more prominent, while in others, it may need to be more subtle.
Remember to periodically listen to the video with the adjusted music volume to ensure it sounds cohesive and balanced. It’s also a good practice to test the video on different devices or speakers to ensure the music volume translates well across different mediums.
By taking the time to fine-tune the music volume, you can create a more immersive and engaging experience for your viewers.
Step 6: Editing the Music Track
After adjusting the volume of the background music, you may want to further edit the music track to enhance its impact and synchronization with the video. Follow these steps to fine-tune the music track:
- Access the music editing tools: Locate the music track on the video editor’s timeline or audio track section. Look for additional editing options or tools specific to the music track.
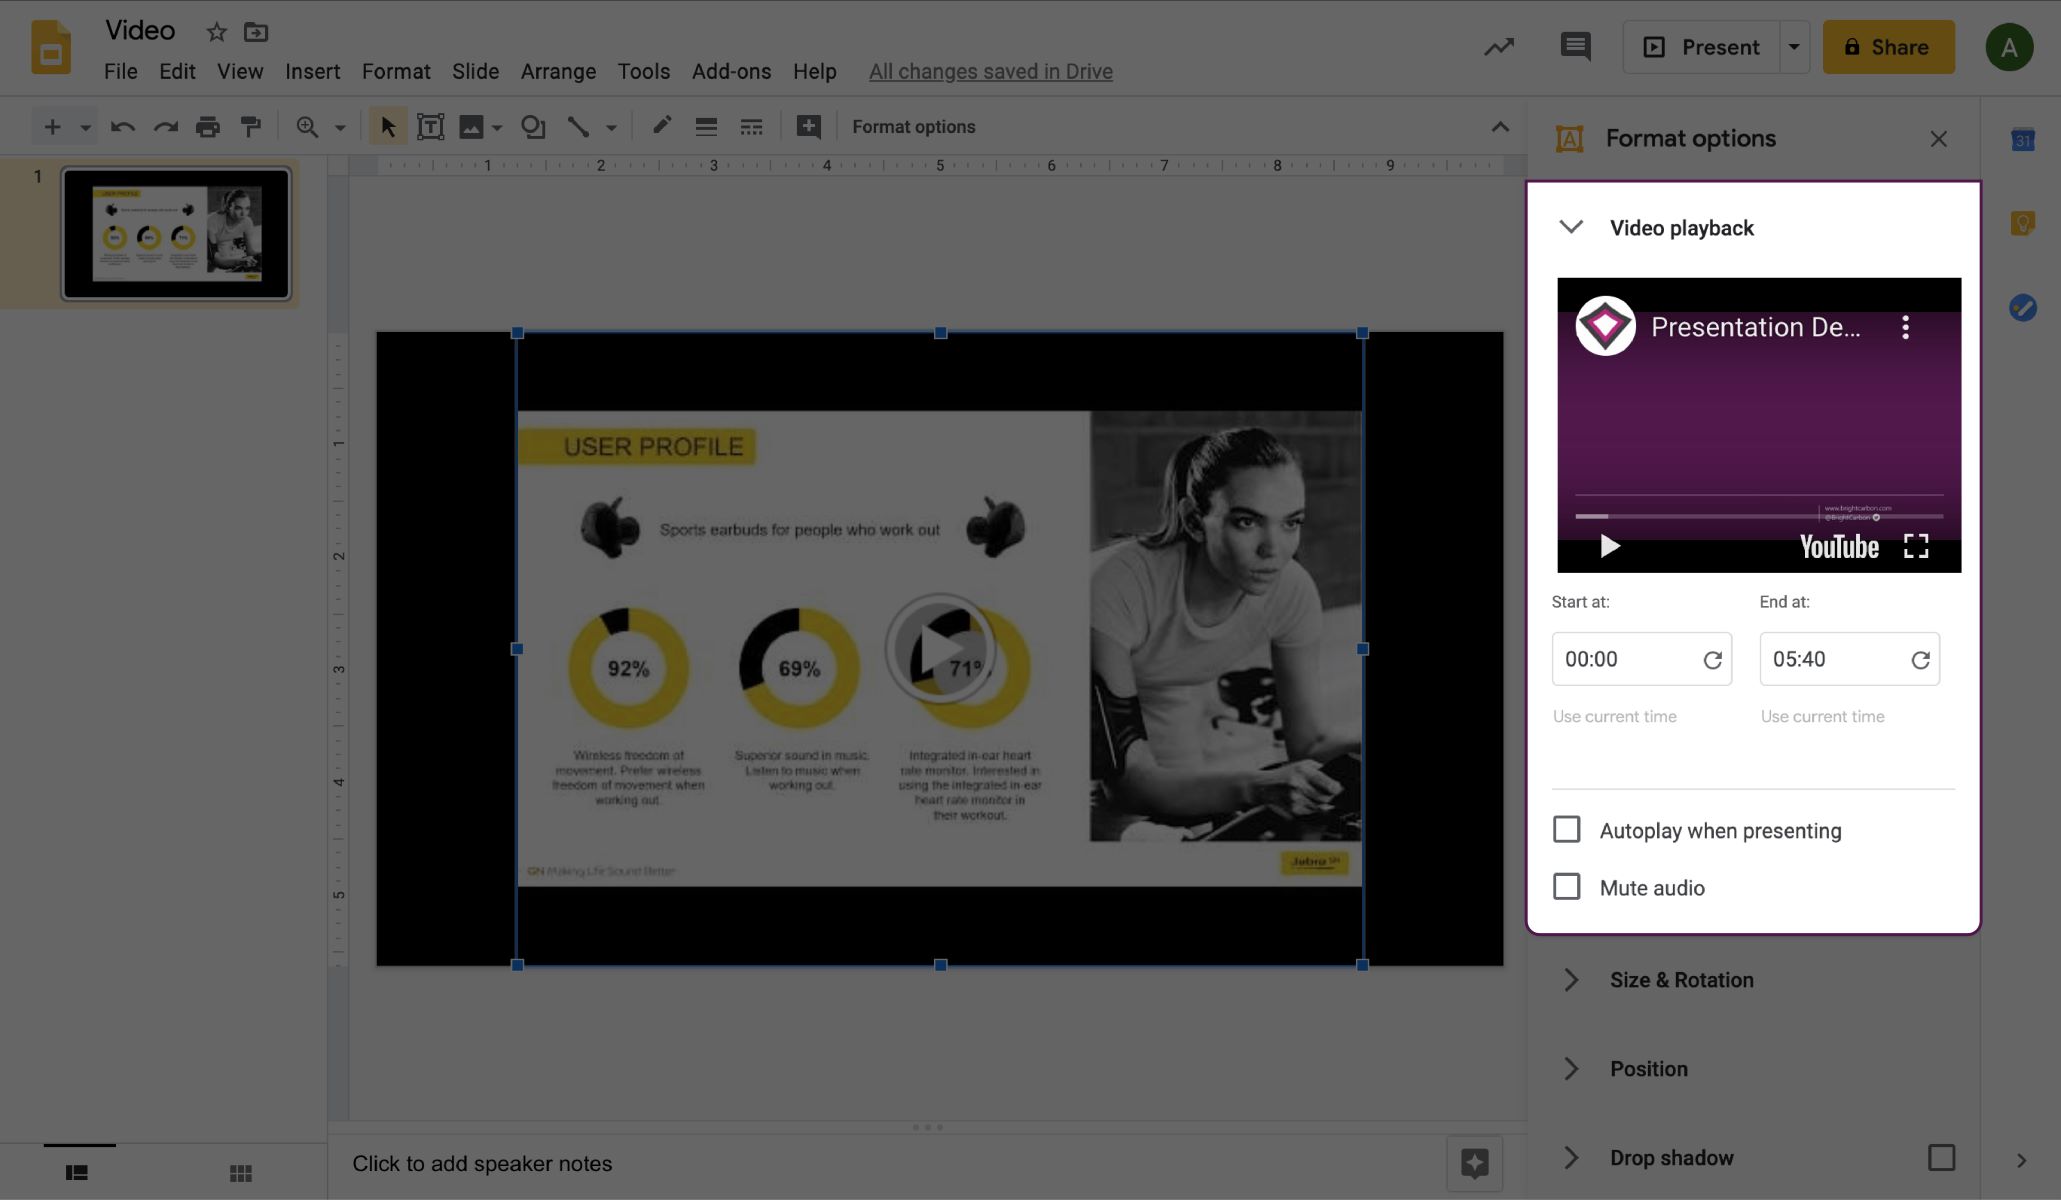
- Trim or extend the music: If necessary, you can trim or extend the music track to align it with specific scenes or moments in the video. Use the editing tools to select and adjust the duration of the music accordingly.
- Add fade-in and fade-out: To create smooth transitions between the video’s original audio and the background music, consider adding fade-in and fade-out effects. These effects gradually increase or decrease the volume at the beginning and end of the music track.
- Apply audio effects: Depending on the video editor’s capabilities, you may be able to apply audio effects to the music track. Explore options such as equalization, reverb, or other effects that can enhance the desired mood or tone.
- Experiment with layering: If you’re feeling more advanced, you can experiment with layering multiple music tracks or adding sound effects to create a more immersive audio experience. Be mindful of maintaining a cohesive balance between the various audio elements.
By editing the music track, you can customize it to perfectly align with the visuals, create seamless transitions, and evoke the desired emotional response from your viewers.
Remember to listen to the video with the edited music track to ensure that it enhances the overall impact and synchronization. Make any necessary adjustments until you achieve the desired result.
Now that you’ve fine-tuned the music track, let’s move on to the final steps of previewing and exporting your video with the background music.
Step 7: Previewing and Exporting Your Video with Background Music
Once you have added, adjusted, and edited the background music to perfection, it’s time to preview and export your video with the enhanced audio. Follow these final steps:
- Preview your video: Before exporting, take a moment to preview the entire video to ensure that the background music is in sync with the visuals, the volume is balanced, and the overall audio-visual experience is seamless.
- Make necessary adjustments: If you notice any issues during the preview, go back to the respective steps and make the necessary adjustments to the music track or other audio settings.
- Select the export settings: Access the export or render settings in your video editor. Choose the appropriate format, resolution, and other export parameters based on your preferences and requirements. Consider the platform or device on which you plan to share or use the exported video.
- Export your video: Click on the export or render button to start the exporting process. Depending on the video length and your computer’s processing power, this may take some time. Be patient and let the video editor render the final output.
- Save and share your video: Once the exporting process is complete, choose a destination on your computer to save the exported video. At this point, your video is ready to be shared, uploaded to a video streaming platform, or used in any desired way.
It’s always a good practice to save a backup copy of your project file, including the video editor’s project file and the original video and audio files used. This allows you to make further edits or adjustments in the future if needed.
Congratulations! You have successfully added background music to your video using a video editor on Windows 10. By following these steps, you can enhance the audio-visual experience and create engaging videos that leave a lasting impression on your audience.
Remember, the specific steps and options may vary slightly depending on the video editing software you’re using. Refer to the software’s documentation or help resources for detailed instructions tailored to your chosen video editor.
Enjoy the process of adding background music to your videos and let your creativity shine through!
Conclusion
Adding background music to your videos can elevate the overall quality and impact of your content. With the wide range of video editing software available for Windows 10, incorporating background music into your videos has become easier than ever before. By following the steps outlined in this guide, you can seamlessly integrate the perfect music track into your videos, enhancing the emotional connection with your viewers.
Remember to choose a video editor that suits your needs and skill level, ensuring you have the necessary features to add background music. Carefully select the right music, keeping in mind the tone and mood you want to convey in your videos. Additionally, always ensure that you have the appropriate licensing or copyright permissions for any music you use.
Throughout the process, take the time to adjust and edit the music track to synchronize it with the visuals and create a harmonious audio-visual experience. Fine-tune the music volume to maintain a balanced audio mix, and explore additional editing options to further enhance the music and overall impact of your videos.
Before exporting your video, preview it to ensure that the background music is in perfect sync with the visuals and the desired audio-visual experience is achieved. Finally, select the appropriate export settings and save your video for sharing or future use.
Adding background music to your videos is a creative process that allows you to express your unique style and captivate your audience. So go ahead, unleash your creativity, and create exceptional videos that leave a lasting impression.