Home>Production & Technology>Background Music>How To Remove Background Music From A Video In Movie Maker

Background Music
How To Remove Background Music From A Video In Movie Maker
Published: October 29, 2023
Learn how to easily remove background music from a video using Movie Maker. Say goodbye to unwanted audio interference and enhance your videos with this simple tutorial!
(Many of the links in this article redirect to a specific reviewed product. Your purchase of these products through affiliate links helps to generate commission for AudioLover.com, at no extra cost. Learn more)
Table of Contents
Introduction
Background music can greatly enhance the overall quality and impact of a video. However, there may be situations where you want to remove the background music from a video to create a different atmosphere or to focus exclusively on the visuals or other audio elements. One popular video editing tool that allows you to accomplish this is Movie Maker.
Movie Maker is a user-friendly software that offers a variety of editing features, including the ability to separate the video and audio tracks and remove the audio independently. In this article, we will guide you through the process of removing background music from a video in Movie Maker, so you can achieve the desired result.
Please note that different versions of Movie Maker may have slightly different interfaces and options. We will be focusing on the steps for Movie Maker 2012, as it is one of the most widely used versions.
Before we dive into the step-by-step process, it’s important to mention that you should only remove the background music from a video if you have the necessary rights or permissions to do so. Copyright laws protect the music, and unauthorized removal or use of copyrighted material can lead to legal consequences. It’s always best to use royalty-free or original music to avoid any complications.
Step 1: Importing the video into Movie Maker
The first step in removing the background music from a video using Movie Maker is to import the video file into the software. Follow the steps below to get started:
- Open Movie Maker on your computer. If you don’t have Movie Maker installed, you can download it from the official Microsoft website.
- Click on the “Home” tab at the top of the screen to access the main editing menu.
- Click on the “Add videos and photos” button to open a file explorer window.
- Navigate to the location where your video file is stored and select it. You can select multiple video files if you want to remove the background music from multiple videos.
- Click on the “Open” button to import the selected video(s) into Movie Maker. The video(s) will appear in the “Media Library” section of the software.
Once you have successfully imported the video(s) into Movie Maker, you can proceed to the next step of splitting the video clip.
Step 2: Splitting the video clip
Now that you have imported your video into Movie Maker, the next step is to split the video clip. This process will allow you to isolate the section of the video where the background music needs to be removed. Here’s how you can do it:
- Click on the video clip in the “Media Library” section of Movie Maker to select it.
- Drag the video clip from the “Media Library” section and drop it onto the “Timeline” section at the bottom of the screen. This is where you will be able to visually manipulate and edit your video.
- Play the video in the “Preview” window to determine the exact point where you want to start the split. Once you have identified the starting point, pause the video at that specific frame.
- Click on the “Split” button, which is represented by a scissor icon, located in the “Editing” section of the “Home” tab. Alternatively, you can use the keyboard shortcut “Ctrl + L” to split the video clip.
- Move the playhead to the desired ending point for the split by dragging it along the timeline.
- Click on the “Split” button once again to create the second split at the ending point.
- You will now have two separate video clips on the timeline, divided by the split points. The section between the two splits is the part of the video where you can remove the background music.
Now that you have successfully split the video clip, you can move on to the next step of removing the audio track.
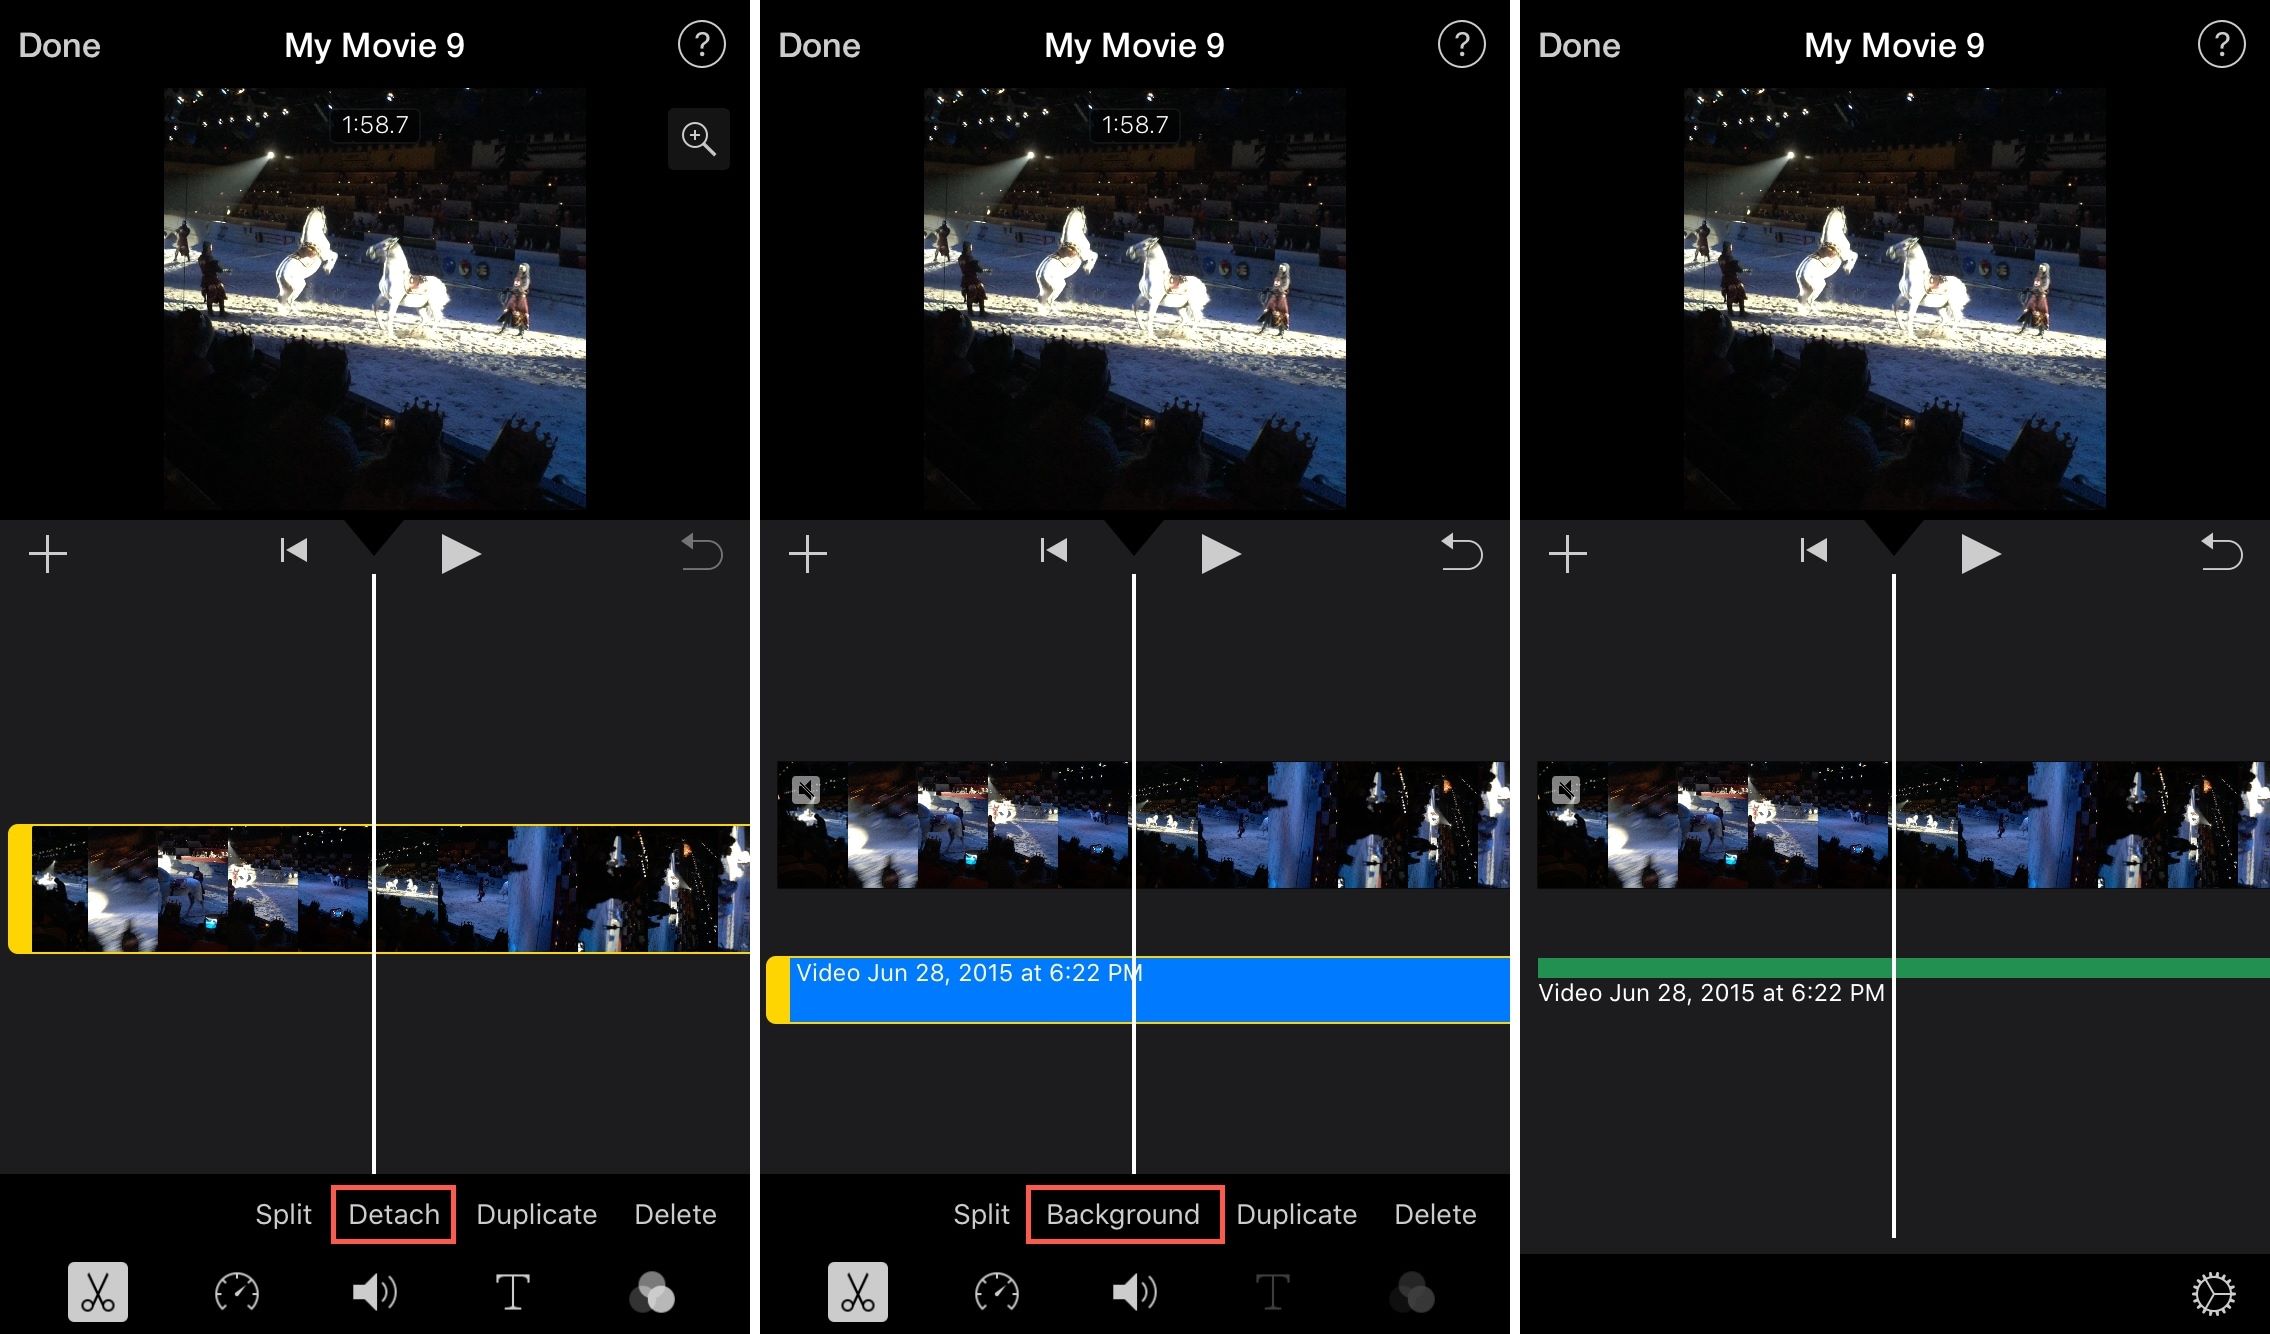
Step 3: Removing the audio track
After splitting the video clip, it’s time to remove the audio track that contains the background music. Follow these steps to remove the audio track using Movie Maker:
- Select the video clip that contains the background music by clicking on it in the “Timeline” section of Movie Maker.
- Once the video clip is selected, click on the “Audio” tab at the top of the screen. This will bring up the options related to the audio track.
- In the “Audio” tab, you will see a checkbox labeled “Mute.” Check this box to mute the audio track of the selected video clip.
- Preview the video in the “Preview” window to ensure that the background music has been successfully removed. If you want to make further adjustments, you can go back and split the video clip again to refine the sections without background music.
By following these steps, you can effectively remove the audio track containing the background music from the video clip. Once you are satisfied with the result, you can proceed to save the video without the background music.
Step 4: Saving the video without background music
Now that you have successfully removed the background music from your video using Movie Maker, the final step is to save the edited video without the audio track. Follow these instructions to save your video:
- Click on the “Home” tab at the top of the screen to access the main editing menu.
- Ensure that the edited video clip is selected in the “Timeline” section.
- Click on the “File” tab in the top-left corner of the Movie Maker interface.
- From the drop-down menu, select the “Save movie” option. You will then be presented with a sub-menu containing various saving options.
- Choose the appropriate saving option based on your preference or requirements. Movie Maker offers several options, such as saving the video in different formats or uploading it directly to popular video-sharing platforms.
- Specify the location on your computer where you want to save the edited video and provide a suitable file name.
- Click on the “Save” button to initiate the saving process.
- The video without the background music will now be saved to the location you specified. Depending on the length and complexity of the video, this process may take some time.
Once the saving process is complete, you can locate the saved video file and play it to ensure that the background music has been successfully removed. Congratulations, you have successfully removed the background music from your video using Movie Maker!
Conclusion
Removing background music from a video can be a useful technique to alter the atmosphere, highlight other audio elements, or simply create a different viewing experience. Movie Maker provides a simple and effective solution for removing the audio track containing the background music from your video clips.
Through the step-by-step guide we provided, you learned how to import a video into Movie Maker, split the video clip to isolate the desired section, and remove the audio track containing the background music. Finally, we guided you through the process of saving the edited video without the background music.
It’s important to remember that while Movie Maker provides a convenient way to remove background music, you should always ensure that you have the necessary rights or permissions to modify or use copyrighted material. Using royalty-free or original music is the best approach to avoid any legal issues.
Now that you have mastered the technique of removing background music from a video using Movie Maker, you can unleash your creativity and create videos with a personalized touch. Experiment with different visuals and audio elements to captivate your audience and tell compelling stories.
So go ahead and explore the world of video editing with Movie Maker, and enjoy the process of transforming your videos by removing background music and focusing on other aspects of your creations!