Home>Production & Technology>Stereo>How To Build A Vintage Stereo System
Stereo
How To Build A Vintage Stereo System
Published: November 17, 2023
Learn how to build a vintage stereo system and transform your listening experience. Find the best stereo components, speakers, and tips for creating your own unique setup.
(Many of the links in this article redirect to a specific reviewed product. Your purchase of these products through affiliate links helps to generate commission for AudioLover.com, at no extra cost. Learn more)
Table of Contents
Introduction
Are you a music lover who appreciates the warm, rich sound of vintage audio equipment? Building a vintage stereo system can be a rewarding and exciting project, allowing you to experience music the way it was meant to be heard. Whether you’re a collector, an audiophile, or simply someone seeking to add a touch of nostalgia to their home, creating a vintage stereo system can be a worthwhile endeavor.
Unlike modern audio systems, vintage stereo equipment is renowned for its craftsmanship and attention to detail. From the sleek design of the turntable to the warm tones produced by the amplifier and speakers, a vintage stereo system offers a unique listening experience that can transport you back in time.
In this guide, we will take you through the step-by-step process of building your own vintage stereo system. We will cover everything from research and planning to finding and restoring the components. By the end of this article, you will be well-equipped to embark on your journey of creating the ultimate vintage audio setup.
Before we dive into the details, it’s important to note that building a vintage stereo system requires some investment in terms of time, effort, and potentially money. Vintage audio equipment can be more challenging to find and may require restoration or repairs. However, the end result will be a one-of-a-kind system that brings joy and nostalgia to your music-listening experience.
So, if you’re ready to embark on this journey down memory lane and surround yourself with the enchanting sounds of the past, let’s dive into the first step: research and planning.
Step 1: Research and Planning
Before diving headfirst into building your vintage stereo system, it’s important to do your research and lay out a solid plan. This step will help you understand the various components, their compatibility, and the overall budget required for your project. Here are a few key considerations to keep in mind during the research and planning phase:
- Determine your goals: Take some time to think about what you want to achieve with your vintage stereo system. Are you looking for a specific sound signature, or do you simply want to recreate the nostalgia of the era? Having a clear vision of your goals will help you make better decisions throughout the process.
- Educate yourself about vintage audio equipment: Familiarize yourself with the different types of components that make up a vintage stereo system. Research turntables, amplifiers, receivers, speakers, and other related equipment. Understanding the features, brands, and specifications will empower you to make informed choices.
- Set a budget: Determine how much you are willing to spend on your vintage stereo system. Factor in the costs of acquiring equipment, potential repairs or restorations, and any additional accessories or cables you may need. Setting a budget will help guide your purchasing decisions and prevent overspending.
- Explore reputable sellers and marketplaces: Look for reputable sellers, both online and offline, that specialize in vintage audio equipment. Read reviews, seek recommendations, and ensure that you are dealing with reputable sources to minimize the risk of purchasing faulty or counterfeit items.
- Consider compatibility: Make sure the components you choose are compatible with one another. Not all turntables, amplifiers, and speakers are interchangeable, so double-check the specifications to ensure they can be connected and work together seamlessly.
- Plan for space and aesthetics: Consider the space available in your room and the aesthetic preferences you have for your vintage stereo setup. Think about the size and dimensions of the components, as well as any furniture or shelves you may need to accommodate them.
By taking the time to research and plan before making any purchases, you will be able to make informed decisions and avoid costly mistakes. This phase is crucial for setting the foundation of your vintage audio setup and ensuring that you stay on track throughout the process. Once you have completed your research and planning, it’s time to move on to the next step: choosing the right components for your system.
Step 2: Choosing the Right Components
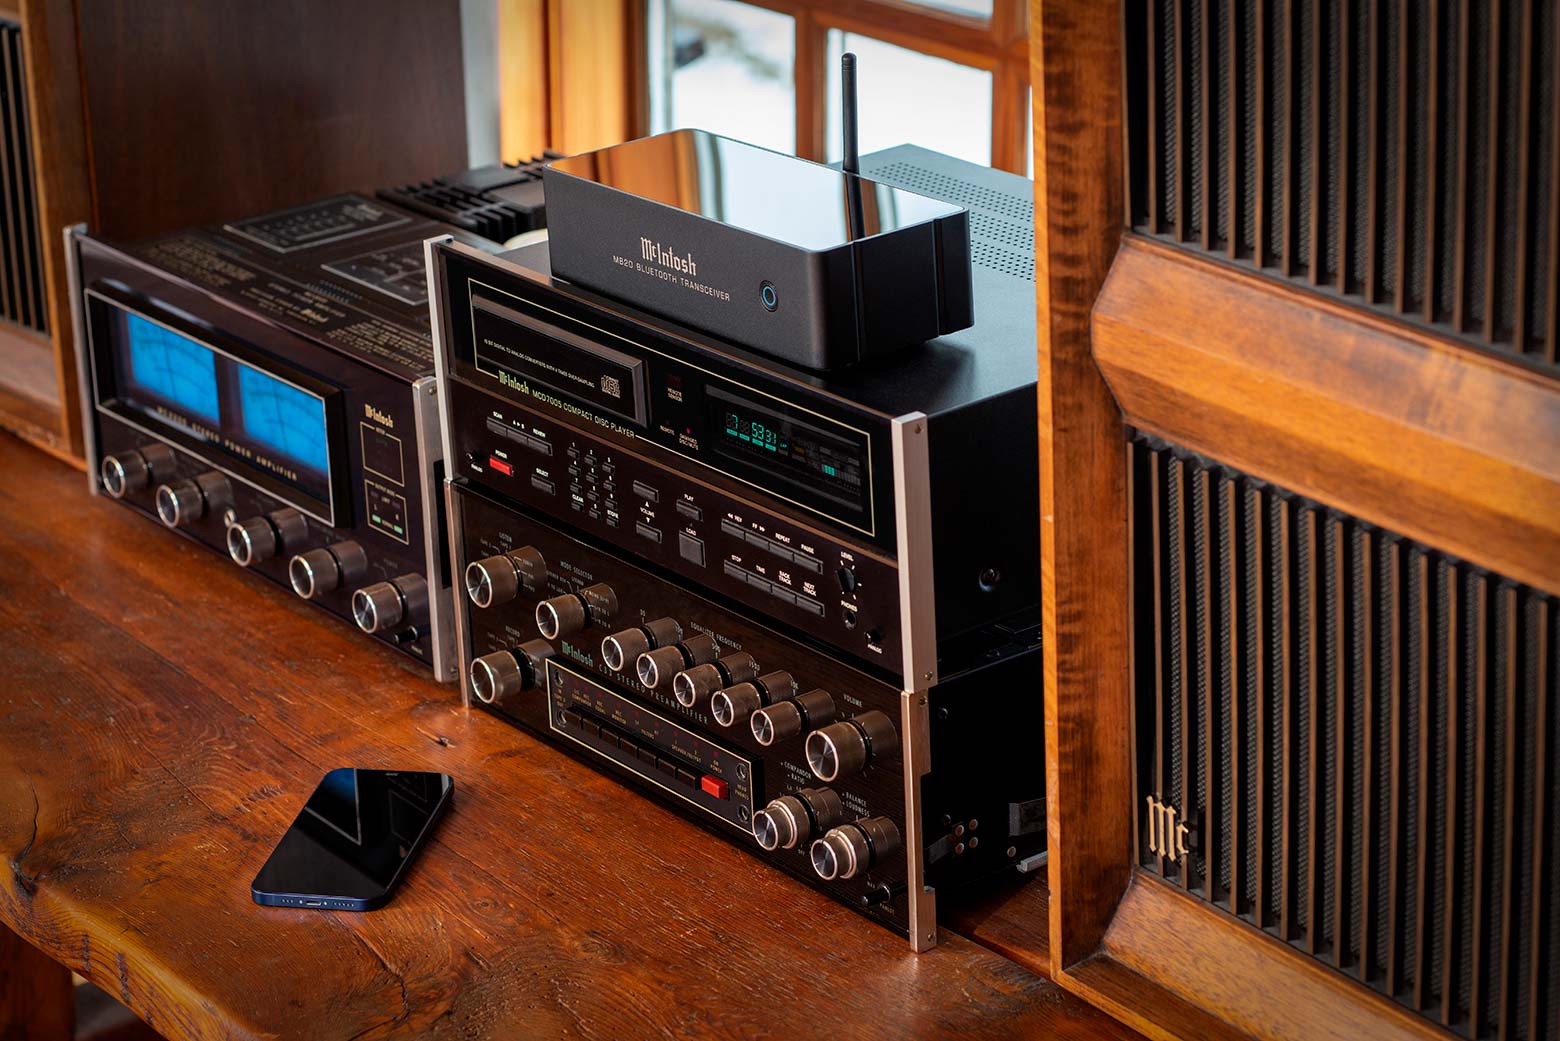
Choosing the right components is a critical step in building your vintage stereo system. Each component plays a vital role in delivering the desired audio experience. Here’s a breakdown of the key components to consider:
- Turntable: The turntable is the heart of any vintage stereo system. It allows you to play vinyl records and experience the warm, analog sound that many audiophiles crave. When selecting a turntable, consider factors such as drive type (belt-drive or direct-drive), features (automatic or manual operation), and the condition of the turntable’s cartridge and stylus.
- Amplifier/Receiver: The amplifier or receiver is responsible for amplifying the audio signal from the turntable and other audio sources, such as CD players or streaming devices. Look for amplifiers or receivers that match the power requirements of your speakers and have the necessary connectivity options for your setup.
- Speakers: The speakers are the final link in the audio chain and can significantly impact the overall sound quality. When choosing speakers, consider factors like size, power handling, frequency response, and the room size in which they will be placed. Additionally, pay attention to the speaker’s condition and any potential repairs or restorations they may require.
- Additional components: Depending on your preferences, you may want to add other components to your vintage stereo system. These can include a cassette deck for playing tapes, a CD player, or even a reel-to-reel tape recorder. Consider your audio needs and how these additional components will fit into your setup.
As you select each component, pay attention to their compatibility and how they work together as a system. A well-matched combination of components will ensure optimal performance and a cohesive audio experience.
When it comes to purchasing vintage components, there are several options available. You can explore local audio stores specializing in vintage equipment, browse online marketplaces, or even attend audio equipment trade shows or flea markets. Whichever method you choose, be sure to thoroughly evaluate the condition of the components, ask questions about their history and maintenance, and listen to them if possible before making a purchase.
By carefully selecting the right components for your vintage stereo system, you’ll be one step closer to creating a truly immersive and authentic audio experience. Once you have assembled your desired components, it’s time for the next step: finding and acquiring the vintage stereo equipment.
Step 3: Finding Vintage Stereo Equipment
Finding vintage stereo equipment can be an exciting adventure, but it requires some dedicated effort. Here are some tips to help you locate the perfect components for your vintage stereo system:
- Local audio stores: Visit local audio stores that specialize in vintage equipment. These stores often have a selection of well-maintained, restored, and tested components. Speak with the store owners or experts to gain insights and recommendations based on your specific requirements.
- Online marketplaces: Explore online platforms like eBay, Craigslist, and dedicated audio equipment forums. These platforms often have a wide range of vintage stereo equipment listed for sale. When shopping online, be cautious and verify the reputation of the sellers, read user reviews, and ask questions about the condition of the equipment before committing to a purchase.
- Audiophile communities: Engage in online audiophile communities or forums where enthusiasts discuss vintage audio equipment. These communities can provide valuable insights, recommendations, and even potential leads on where to find specific components.
- Audio equipment fairs and conventions: Attend audio equipment fairs, conventions, or swap meets in your area. These events bring together audio enthusiasts, collectors, and sellers, making them a great opportunity to see, test, and purchase vintage stereo equipment in person.
- Local classifieds: Check local classifieds or community bulletin boards for individuals selling vintage audio equipment. People often list their components for sale locally before resorting to online platforms, giving you a chance to find unique and well-priced items.
- Networking: Spread the word among friends, family, and acquaintances that you are looking for vintage stereo equipment. You never know who may have a dusty gem hidden in their basement or know someone looking to sell their collection.
When searching for vintage stereo equipment, it’s essential to take your time, be patient, and thoroughly evaluate the items you come across. Ask about the maintenance history, check for any visible damage or wear, and if possible, listen to the equipment before making a decision. Remember, vintage audio equipment may require some level of restoration or repair, so factor in these potential costs when considering a purchase.
By actively searching through various channels and networking with fellow audio enthusiasts, you increase your chances of finding the perfect vintage stereo equipment for your system. Once you have acquired the components, it’s time to move on to the next step: restorations and repairs.
Step 4: Restoring and Repairing
When working with vintage stereo equipment, it’s common to encounter components that require restoration or repair. Restoring and repairing these components not only improves their functionality but also ensures that they provide the best possible sound quality. Here are some essential steps to take when restoring and repairing your vintage stereo equipment:
- Assessment and cleaning: Begin by carefully assessing the condition of each component. Look for any visible damage, loose connections, or signs of wear. Clean the components using appropriate cleaning solutions and techniques to remove dirt, dust, and grime that may have accumulated over the years.
- Electrical inspections: If you’re knowledgeable about electronics, you can conduct basic electrical inspections to identify any faulty components or wiring issues. Otherwise, it’s advisable to seek the assistance of a professional technician to handle electrical inspections and repairs.
- Replace worn-out parts: Over time, certain parts in vintage stereo equipment may deteriorate or become faulty. Identify and replace any worn-out or malfunctioning parts, such as capacitors, resistors, or tubes, using appropriate replacements that match the original specifications of the components.
- Calibration and alignment: Depending on the equipment you have, calibration and alignment may be necessary. Follow the manufacturer’s instructions or consult a professional technician to properly calibrate and align the turntable, amplifier, or other components, ensuring optimal performance.
- Testing and fine-tuning: Once you have completed the necessary repairs and restorations, test each component thoroughly to ensure that they are functioning properly. Fine-tune settings, such as tracking force or equalizer settings, to achieve the best possible sound quality.
- Seek professional help if needed: If you’re not comfortable with repairing or restoring the components yourself, or if the equipment requires extensive repairs, it’s best to seek the help of a professional audio technician or restoration service. They have the expertise and experience to handle complex repairs and ensure that your vintage stereo system is in optimal condition.
Restoring and repairing vintage stereo equipment can be a time-consuming process, but it is worth the effort to revive and preserve these timeless pieces of audio history. By taking the necessary steps to restore and repair your components, you ensure that your vintage stereo system operates at its best and delivers the exceptional sound quality it was designed to provide.
Once you have completed the restoration and repair process, it’s time to move on to the next step: connecting and setting up your vintage stereo system.
Step 5: Connecting and Setting Up
After restoring and repairing your vintage stereo components, it’s time to connect and set up your system. Proper and careful connections are crucial to ensure optimal performance and a seamless audio experience. Here are the key steps to follow when connecting and setting up your vintage stereo system:
- Placement: Decide on the layout of your vintage stereo system. Consider factors such as the size and weight of the components, the availability of power outlets, and the aesthetics of your setup. Ensure that each component has enough space for ventilation and that the cables can be neatly arranged.
- Power connections: Connect each component to a reliable power source. Ensure that the voltage requirements match and use suitable power cables. Avoid overloading electrical outlets, and use surge protectors to safeguard against power fluctuations.
- Audio connections: Connect the turntable to the amplifier or receiver using appropriate cables. If your turntable has a built-in preamp, use the line-level output to connect directly. Otherwise, use a phono preamp to match the turntable’s output to the line-level input of the amplifier or receiver. Connect any additional audio sources, such as CD players or cassette decks, to the amplifier or receiver using RCA cables.
- Speaker connections: Connect the speakers to the amplifier or receiver using speaker wire. Ensure that the positive (+) and negative (-) terminals match between the speakers and the amplifier or receiver. Double-check the impedance rating of your speakers to ensure they are compatible with the amplifier or receiver.
- Grounding: If your turntable has a grounding wire, connect it to the appropriate grounding terminal on the amplifier or receiver. This helps reduce unwanted noise and interference during playback.
- Placement and acoustic considerations: Position the speakers in the desired location, considering factors such as room acoustics and speaker placement guidelines. Experiment with speaker positioning to achieve the best possible soundstage and balance within your listening environment.
Ensure that all connections are secure and free from any loose or frayed wires. Take the time to organize and manage the cables neatly to minimize clutter and reduce the risk of interference. Once the connections are complete, it’s time to turn on your vintage stereo system and proceed to the next step: fine-tuning and enjoying the music.
Step 6: Fine-tuning and Enjoying the Music
With your vintage stereo system fully connected and set up, it’s time to fine-tune the settings and immerse yourself in the joy of music. Follow these steps to optimize the performance of your system and enhance your listening experience:
- Volume and balance adjustment: Start by setting the volume at a comfortable level. Adjust the balance control to ensure that the sound is evenly distributed between the left and right speakers.
- Tone controls and equalization: Determine your preferred sound signature by adjusting the bass, midrange, and treble controls on the amplifier or receiver. Experiment with the settings to achieve a balanced and pleasing sound that suits your personal preferences and the music you are listening to.
- Cartridge alignment: If you have a turntable with an adjustable tonearm, make sure the cartridge is properly aligned. Use a suitable alignment tool and follow the manufacturer’s instructions to ensure accurate tracking and minimize tracking force error.
- Record cleaning and maintenance: Take care of your vinyl records by cleaning them regularly using a record cleaning solution and a soft brush or cloth. This helps remove dust, dirt, and static that can affect the sound quality. Store your records in protective sleeves to prevent damage.
- Acoustic treatments: Consider implementing acoustic treatments in your room to improve the overall listening experience. This can include using curtains, rugs, or acoustic panels to minimize echoes and reflections, resulting in a more controlled and immersive sound environment.
- Music selection: Explore your music collection and discover new albums or genres that shine on your vintage stereo system. Rediscover the nuances and warmth of analog recordings, and indulge in the nostalgia and emotion that vintage audio can bring to your favorite songs.
- Sit back and enjoy: Finally, sit back, relax, and fully enjoy the music. Take the time to appreciate the nostalgia, the depth, and the unique sonic characteristics of your vintage stereo system. Let the music transport you to another time and envelop you in its captivating melodies.
Remember that fine-tuning your vintage stereo system is a personal journey. Take the time to experiment, adjust, and find the settings that bring the most satisfaction to your ears. Allow yourself to fully immerse in the experience and relish the beauty of music as it was intended to be heard.
Congratulations! You have successfully built your vintage stereo system, from research and planning to connecting and fine-tuning. Now, it’s time to create beautiful memories, share the magic of music, and let your vintage stereo system become a centerpiece of entertainment in your home.
Conclusion
Building a vintage stereo system is an incredible journey that combines the love for music, nostalgia, and the pursuit of superior sound quality. Throughout this guide, we have walked you through the step-by-step process of creating your own vintage stereo system. From the initial research and planning to the final enjoyment of your favorite music, each step has been designed to help you achieve the best possible audio experience.
By investing time and effort into researching the right components, finding and restoring vintage stereo equipment, and carefully setting up and fine-tuning your system, you have created a unique audio setup that will transport you back in time. The warm, rich sounds produced by your vintage turntable, amplifier, and speakers will bring a level of depth and authenticity to your music that is truly captivating.
As you continue to explore your vintage stereo system, don’t hesitate to experiment, discover new music, and expand your vinyl collection. Immerse yourself in the world of vintage audio and enjoy the subtle nuances and timeless charm that it offers.
Remember, the journey doesn’t end with the completion of your vintage stereo system. Continuously maintain and care for your components, keeping them in top-notch condition for years of enjoyment. Stay connected with the vibrant community of vintage audio enthusiasts, share your experiences, and learn from others who share your passion for exceptional sound.
Building a vintage stereo system is more than just acquiring and connecting equipment; it’s an opportunity to appreciate the art and craftsmanship of audio technology. It’s a way to celebrate the beauty of music and indulge in the nostalgia it brings. So, sit back, relax, and let the enchanting sound of your vintage stereo system transport you to a world of musical bliss.
Now, go forth and embark on your journey to create and cherish your very own vintage stereo system. Enjoy the music, revel in the nostalgia, and embrace the timeless beauty of vintage audio.