Home>Production & Technology>Stereo>How To Set Up Home Stereo System
Stereo
How To Set Up Home Stereo System
Modified: February 18, 2024
Learn how to set up a home stereo system and enjoy high-quality audio with our step-by-step guide. Enhance your listening experience with the latest stereo technology.
(Many of the links in this article redirect to a specific reviewed product. Your purchase of these products through affiliate links helps to generate commission for AudioLover.com, at no extra cost. Learn more)
Table of Contents
Introduction
Welcome to the world of home stereo systems, where you can transform your living space into a personal auditory haven. Whether you’re a music lover, a movie enthusiast, or simply seeking a better audio experience, setting up a home stereo system is a fantastic way to immerse yourself in high-quality sound. But where do you start? How do you choose the right components and set them up to maximize their potential?
In this article, we’ll guide you through the process of setting up a home stereo system step by step. From choosing the right components to connecting and positioning the speakers, we’ll cover all the essential aspects to optimize your audio experience. Whether you’re a complete beginner or a seasoned audiophile, you’ll find this guide useful and informative.
Before we dive into the technical details, let’s take a moment to understand the benefits of setting up a home stereo system. Unlike traditional stereo systems that come pre-packaged, a home stereo system allows you to customize and tailor the components according to your preferences. This means you have the freedom to choose high-quality speakers, a powerful receiver, and other audio equipment that best suits your needs.
With a home stereo system, you can elevate your music listening experiences to new heights. Get ready to rediscover your favorite songs with enhanced clarity, depth, and detail. Immerse yourself in the sound and feel like you’re in a live concert or studio recording session. And when it comes to movies and TV shows, brace yourself for a cinematic experience with rich surround sound that pulls you into the action.
Setting up a home stereo system may seem daunting at first, but fear not. We’re here to simplify the process and help you every step of the way. So, let’s get started on this audio adventure!
Choosing the Right Components
When it comes to building a home stereo system, one of the most crucial steps is selecting the right components. The quality and compatibility of these components will directly impact the overall performance of your audio system. Here are some key factors to consider when choosing the components:
- Receiver: The receiver is the central hub of your home stereo system, responsible for amplifying the audio signals and distributing them to the speakers. Look for a receiver that has enough power and features to meet your needs. Consider factors such as wattage, compatibility with audio formats, connectivity options, and additional features like Bluetooth or Wi-Fi capabilities.
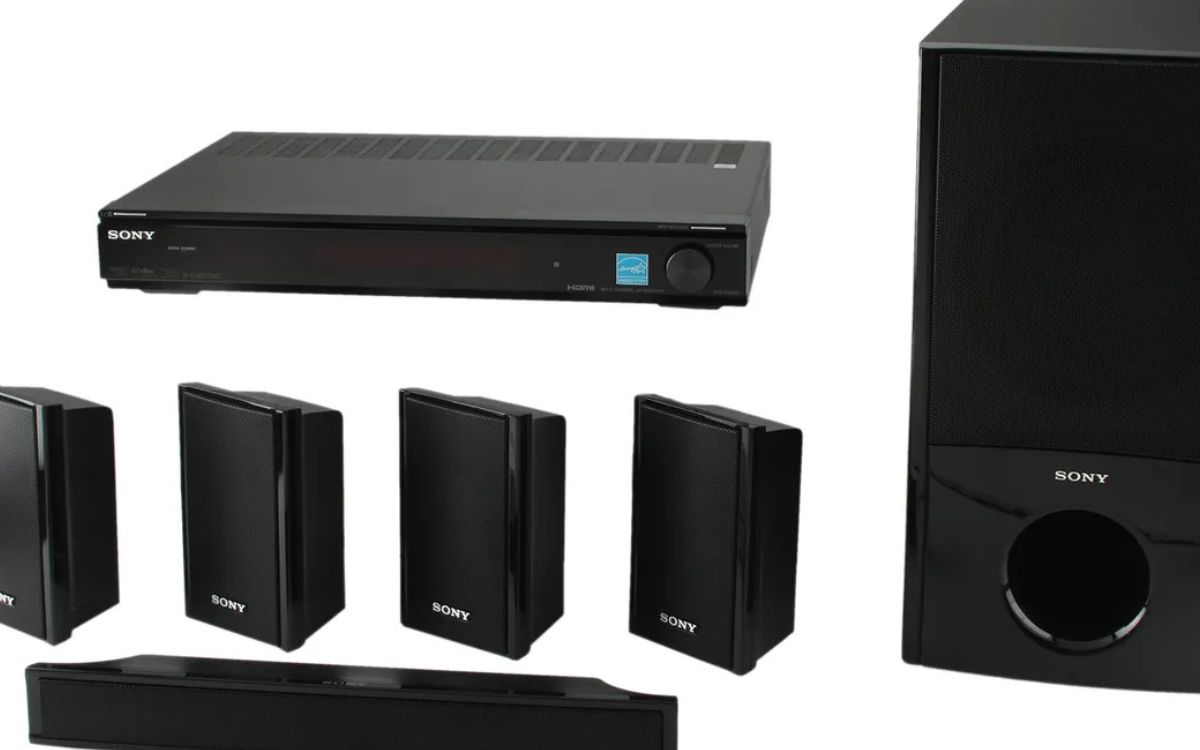
- Speakers: The speakers are the heart and soul of your stereo system, responsible for delivering the sound. There are various types of speakers available, including floor-standing speakers, bookshelf speakers, and satellite speakers. Consider the size of your room, your listening preferences, and the intended use of the system – whether it’s primarily for music, movies, or both. It’s also essential to choose speakers that match well with your receiver in terms of power handling and impedance.
- Subwoofer: If you want to enhance the low-frequency performance and add depth to your audio, consider adding a subwoofer to your system. Subwoofers specialize in reproducing bass frequencies and can significantly improve the overall audio experience, especially for movies and music genres that heavily rely on bass. Look for a subwoofer that complements your speakers and the size of your room.
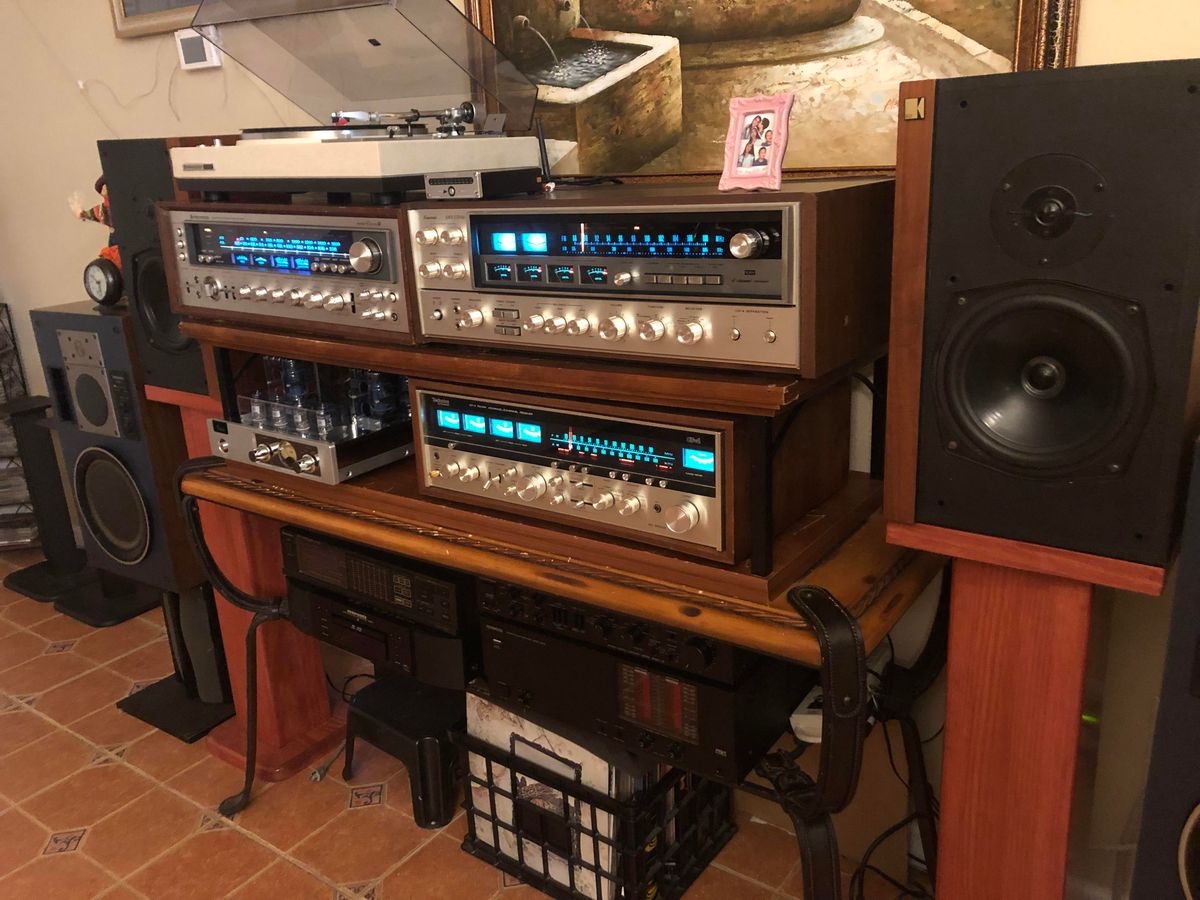
- Audio Sources: Consider the audio sources you’ll be using with your stereo system. Whether it’s a CD player, turntable, streaming device, or even a computer, make sure the receiver has the necessary inputs and compatibility to accommodate these sources. For example, if you have a vinyl collection and plan to use a turntable, ensure that the receiver has a dedicated phono input or a built-in phono preamp.
- Cables and Accessories: Don’t forget about the cables and accessories required to connect and optimize your home stereo system. Invest in high-quality cables that minimize signal loss and interference, such as HDMI cables for digital audio or speaker wires for analog connections. Additionally, consider accessories like speaker stands or mounts, which can help position your speakers for optimal sound projection.
Remember, the components you choose should work together harmoniously to create a well-balanced and immersive audio experience. Take the time to research and audition different options, read reviews, and consult with experts if needed. The right combination of components will elevate your home stereo system to new heights of audio bliss.
Setting Up the Receiver
Now that you’ve chosen the right components for your home stereo system, it’s time to set up the receiver. The receiver acts as the central control unit, managing the audio signals and connecting all the other components. Here’s a step-by-step guide to help you with the receiver setup:
- Choose a Suitable Location: Select a suitable location for your receiver, preferably near your entertainment setup and close to power outlets. Make sure there’s adequate ventilation to prevent overheating.
- Connect the Power Cord: Plug the power cord of the receiver into a power outlet, ensuring it is securely connected.
- Connect the Speakers: Identify the speaker terminals on the back of the receiver and connect the corresponding speaker wires. Ensure a proper connection by matching the positive (+) and negative (-) terminals.
- Connect Audio Sources: Depending on the audio sources you’ll be using, connect the appropriate cables from each source to the corresponding inputs on the receiver. This could include HDMI, optical, RCA, or USB connections.
- Connect the Display: If your receiver has video capabilities and you wish to connect it to a TV or projector, use an HDMI cable to connect the receiver’s HDMI output to the display input.
- Tune in to FM/AM Radio (Optional): If your receiver has an FM/AM tuner, connect an FM/AM antenna to the receiver’s antenna input(s), and follow the manufacturer’s instructions to tune in to your preferred radio stations.
- Turn on the Receiver: Once all the connections are made, turn on the receiver and follow the on-screen or front-panel instructions to complete the initial setup. This may involve configuring settings like language, speaker size, crossover points, and channel levels.
- Test the Audio: Play some audio, whether it’s music from a connected device or a radio station, to test the sound output. Adjust the volume and balance as needed, ensuring that the sound is coming from all connected speakers.
- Make Further Adjustments: Explore the receiver’s settings to fine-tune the sound to your liking. This may include adjusting equalizer settings, setting up speaker distances, enabling surround sound modes, or configuring network settings for streaming capabilities.
Each receiver may have unique features and setup procedures, so be sure to consult the user manual for specific instructions. Once your receiver is correctly set up, you can move on to connecting and positioning the speakers to complete your home stereo system.
Connecting the Speakers
Connecting the speakers is a crucial step in setting up your home stereo system. Proper speaker connections ensure that the sound signals are accurately transmitted from the receiver to the speakers. Here’s a step-by-step guide to help you connect the speakers correctly:
- Identify the Speaker Wires: Speaker wires typically have two conductors, often color-coded as red and black or marked with a plus (+) and minus (-) sign. Ensure that you have the appropriate length of speaker wire for each speaker.
- Prepare the Speaker Wires: Strip off a small section of insulation from the ends of the speaker wires (about half an inch), exposing the bare metal conductors.
- Identify the Speaker Terminals: Examine the back of each speaker and locate the speaker terminals. They are usually labeled as positive (+) and negative (-) or red and black.
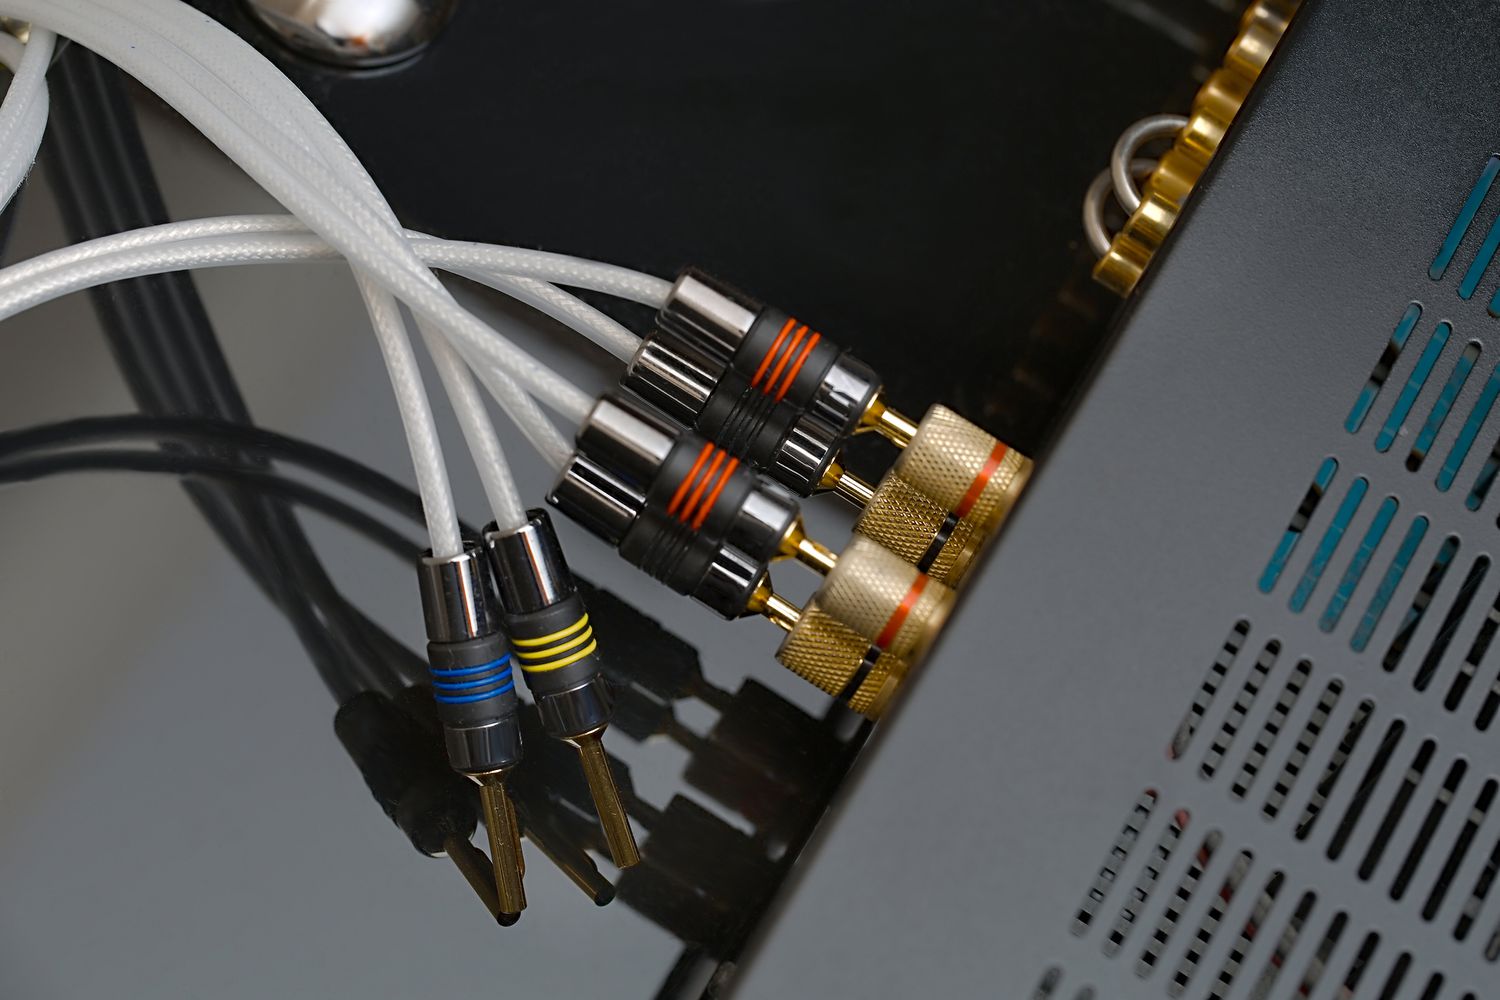
- Speaker Wire Connections: Connect one end of the speaker wire to the positive terminal of the speaker, making sure to match the polarities correctly (positive to positive, negative to negative). Repeat the process for all the speakers.
- Speaker Wire Connections to the Receiver: Moving to the receiver, identify the speaker terminals on the back or front panel. Connect the other end of the speaker wire to the corresponding positive (+) and negative (-) terminals on the receiver.
- Secure the Connections: Ensure that the speaker wire is securely connected to both the speakers and the receiver. This can be done by tightening any binding posts or using clips or connectors provided by the speaker and receiver manufacturers.
- Double-check the Connections: Before powering on your home stereo system, double-check all the speaker connections to ensure they are secure and properly matched in terms of polarity.
It’s essential to maintain consistency when connecting the speakers to avoid any phase cancellation or sound imbalance. Ensure that the positive (+) terminal of each speaker is connected to the corresponding positive (+) terminal on the receiver, and the negative (-) terminals are likewise connected.
If you’re using a subwoofer, refer to the subwoofer’s user manual for instructions on how to connect it to the receiver. Generally, it involves using a subwoofer cable (usually an RCA cable) to connect the subwoofer’s input to the designated subwoofer output on the receiver.
Once all the speakers are properly connected, you can proceed to position them strategically within your listening space to create an immersive audio experience.
Positioning the Speakers
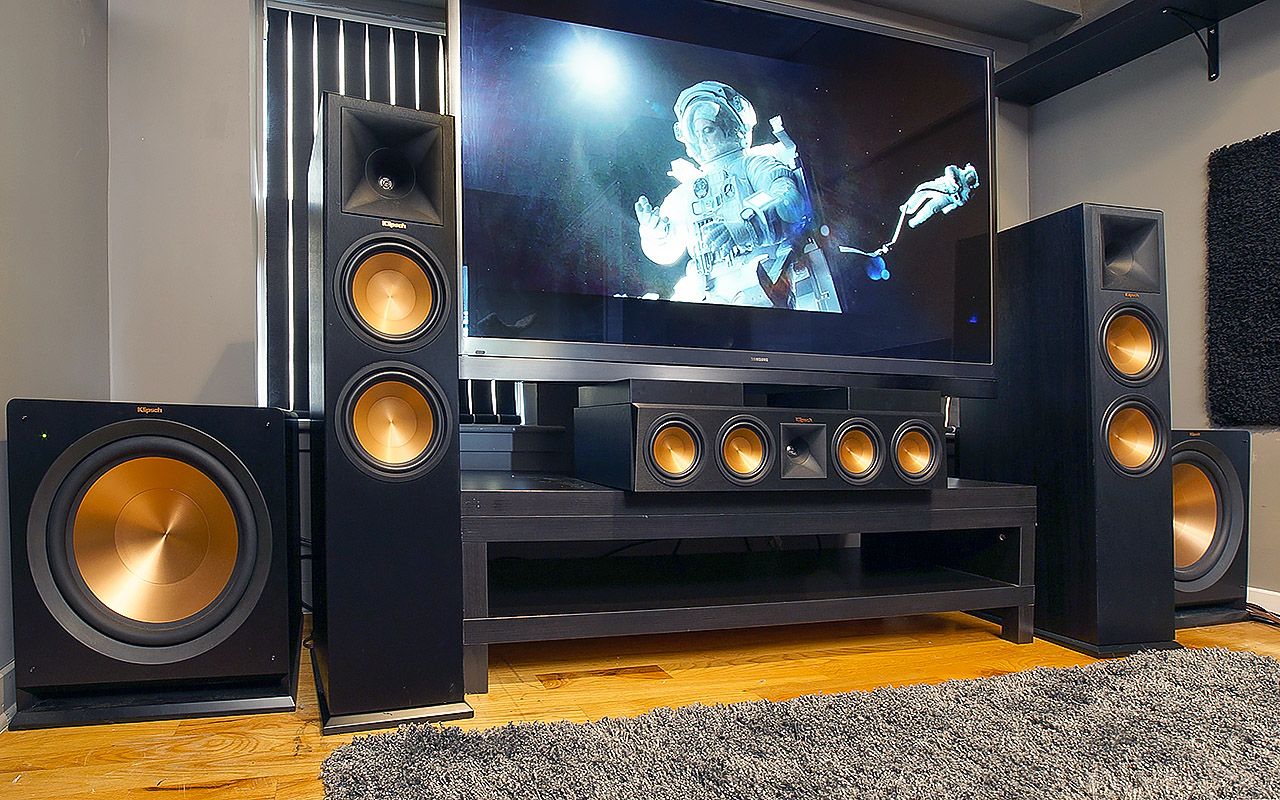
The positioning of your speakers plays a crucial role in the overall audio experience of your home stereo system. Proper speaker placement allows for optimal sound dispersion, imaging, and staging. Here are some guidelines to follow when positioning your speakers:
- Stereo Imaging: For a stereo setup, place the two main speakers equidistant from the listening area, forming an equal triangle with the listener. The distance between the speakers should be approximately the same as the distance from each speaker to the listener.
- Toe-In: To enhance imaging and focus the sound towards the listening position, angle each speaker slightly inward, facing the listener. The angle can vary depending on the room acoustics and personal preference, but a general rule of thumb is to aim the speakers towards the listener’s ear level.
- Room Acoustics: Consider the characteristics of your room. Hard surfaces, such as walls and floors, can cause sound reflections and reverberations. Experiment with speaker placement to minimize these reflections and achieve a balanced sound.
- Subwoofer Placement: If you have a subwoofer, its placement can significantly impact bass response. Experiment with different placements to find the spot that provides the best balance of bass impact and smoothness. Common options include placing the subwoofer near a wall or in a corner, as these tend to reinforce low-frequency sound waves.
- Center Channel Speaker: If you have a center channel speaker for surround sound, position it above or below the display, centered horizontally. This speaker is responsible for dialogue and should be at ear level when seated.
- Surround Speakers: For surround sound systems, place the surround speakers slightly behind the listening position, facing inward towards the center. They should be elevated at or slightly above ear level to create an immersive sound field.
- Adjustment and Experimentation: Don’t be afraid to experiment with different speaker positions and angles to find the optimal setup for your room. Room size, shape, and furnishings can all affect sound quality, so listen carefully and make adjustments as needed.
Remember that achieving the perfect speaker placement may require some trial and error. Take the time to listen and make adjustments until you find the positioning that delivers the best soundstage, imaging, and overall listening experience.
Once your speakers are properly positioned, it’s time to wire your home stereo system and connect any external devices for a complete audio setup.
Wiring the System
Wiring is a crucial step in setting up your home stereo system. Proper wiring ensures seamless connectivity between components and allows for the transmission of audio signals with minimal interference. Here’s a step-by-step guide to help you wire your system:
- Gather the Necessary Cables: Identify the cables required to connect your components. This may include speaker wires, HDMI cables, RCA cables, optical cables, or any other cables specific to your setup.
- Speaker Wiring: Connect the speaker wires from the speaker terminals on the back of the receiver to the corresponding terminals on each speaker, ensuring that the positive (+) and negative (-) connections are correctly matched.
- Audio Source Connections: Connect the audio output cables from your sources (such as a CD player, turntable, or streaming device) to the corresponding audio inputs on the receiver. Use the appropriate cables based on the available connections (HDMI, RCA, optical, etc.)
- Video Source Connections: If you have video sources such as a Blu-ray player or game console, connect the HDMI or other video cables from these sources to the receiver’s HDMI or video inputs. Use HDMI cables for the best audio and video quality.
- TV or Display Connections: Connect an HDMI cable from the receiver’s HDMI output to the HDMI input on your TV or display to enable audio and video pass-through. This allows you to use your TV as a video monitor and enjoy the audio from your home stereo system.
- Power Up the System: Plug all the components, including the receiver, speakers, and external devices, into the appropriate power outlets. Ensure that all connections are secure and properly seated.
- Test the Connections: Power on your home stereo system and test the audio and video connections. Play audio from your sources and verify that the sound is being outputted through the speakers.
- Organize and Manage Cables: Proper cable management is essential to maintain a neat and organized setup. Use cable ties, clips, or cable management sleeves to bundle and route the cables, reducing clutter and potential tripping hazards.
When wiring your home stereo system, it’s important to use high-quality cables that provide reliable signal transmission and minimize interference. Consider investing in cables that are appropriate for the specific audio and video signal types in your setup.
Finally, ensure that all cables are properly connected and secured to avoid any loose connections or signal loss. Take the time to label the cables or use color-coded tags to make future troubleshooting or reconfiguration easier.
With your home stereo system properly wired, you can now connect external devices and adjust the audio settings to fine-tune your listening experience.
Connecting External Devices
In addition to your audio sources, such as CD players or turntables, you may have other external devices that you would like to connect to your home stereo system. These devices could include smartphones, tablets, computers, gaming consoles, or streaming devices. Here’s a guide on how to connect these external devices to enhance your audio experience:
- Bluetooth or Wi-Fi Devices: Many modern receivers have built-in Bluetooth or Wi-Fi capabilities. To connect a Bluetooth device, enable pairing mode on both the receiver and the device, then pair them. For Wi-Fi devices, connect to the same network as your receiver and follow any necessary setup steps within the device’s settings.
- Auxiliary Devices: If your external device has a headphone or line-out jack, you can connect it to the receiver using a 3.5mm to RCA cable or a dedicated auxiliary cable. Simply plug one end into the device and the other end into an available auxiliary input on the receiver.
- Streaming Devices: Streaming devices, such as Chromecast, Roku, or Apple TV, can be connected to your receiver via HDMI or optical cable. Once connected, follow the respective device’s instructions to set up audio output settings for your home stereo system.
- Computers/Laptops: Connect your computer or laptop to the receiver using an HDMI cable, optical cable, or USB cable, depending on the available connections. Adjust the audio settings on your computer to ensure that the output is directed to the receiver.
- Gaming Consoles: For gaming enthusiasts, connect your gaming console to the receiver using HDMI cables for both audio and video. This way, you can enjoy immersive sound while playing your favorite games.
- Turntables: If you have a turntable, connect it to a dedicated phono input on your receiver. If your receiver doesn’t have a phono input, you will need to add a phono preamp between the turntable and the receiver to amplify and equalize the signal.
- TV or Display Audio: If you have a smart TV or a display without built-in speakers, connect its audio output to the receiver using an optical cable or HDMI ARC (Audio Return Channel) functionality. This allows you to enjoy the audio from your TV through your home stereo system.
- Other Devices: Depending on the specific devices you want to connect, refer to their user manuals or online resources for guidance on connecting them to an audio system. The key is to identify the compatible audio outputs on the device and connect them to an appropriate input on your receiver.
By connecting these external devices to your home stereo system, you can expand your audio options and enjoy a more versatile and immersive listening experience.
Once these devices are connected, you may need to adjust the receiver’s input settings to ensure that the audio is routed correctly. Consult your receiver’s manual for instructions on how to select and configure input sources. With everything connected, it’s time to adjust the audio settings to optimize your listening experience.
Adjusting the Audio Settings
Adjusting the audio settings of your home stereo system is crucial to fine-tune the sound to your preferences and optimize the overall listening experience. Here are some key settings to consider:
- Speaker Configuration: Access the receiver’s settings menu and verify that the speaker configuration matches your setup. Ensure that the speaker sizes, distances, and crossover frequencies are correctly set for optimal sound reproduction.
- Channel Levels: Adjust the individual channel levels to balance the volume output from each speaker. This can be useful if you find that certain speakers are louder or softer than others. Use a test tone or an audio calibration tool to assist you in achieving the desired channel balance.
- EQ Settings: Many receivers offer equalization settings to fine-tune the sound to your preferred tonal balance. Experiment with these settings to enhance the bass, treble, and midrange frequencies according to your listening preferences and the acoustic characteristics of your room.
- Surround Sound Modes: If your home stereo system supports surround sound, explore and experiment with various surround sound modes. These modes create a more immersive audio experience by simulating different listening environments, such as stadiums, concert halls, or movie theaters.
- Bass Management: Adjust the subwoofer settings and bass management options to control the low-frequency output in your system. This allows you to fine-tune the bass response and integration between the main speakers and subwoofer.
- Dynamic Range Compression: If you find that there is a significant difference in volume levels between quiet and loud passages in movies or music, consider enabling dynamic range compression. This feature decreases the contrast between soft and loud sounds, making it easier to hear dialogue and preventing sudden volume jumps.
- Room Correction: Some receivers offer room correction systems that analyze the acoustics of your listening space and automatically adjust the audio settings to compensate for room-related issues. Follow the instructions provided by your receiver to calibrate the system for optimal sound quality.
- Listening Modes: Explore different listening modes depending on the type of content you’re listening to. For example, you may have specific modes for music, movies, or gaming. These modes optimize the audio settings to enhance the experience based on the content type.
- Network Streaming Setup: If your home stereo system has network streaming capabilities, go through the setup process to connect it to your local network. This will allow you to stream music from online services or access your digital music library.
Remember, adjusting the audio settings is a subjective process, and what sounds good to one person may not sound the same to another. Take the time to listen carefully and make incremental adjustments to find the perfect balance for your preferences and listening environment.
With the audio settings dialed in, you’re now ready to sit back, relax, and enjoy the immersive audio experience provided by your home stereo system.
Troubleshooting Tips
Even with careful setup and adjustment, you may encounter some issues or challenges with your home stereo system. Here are some troubleshooting tips to help you overcome common problems and ensure smooth operation:
- No Sound: If you don’t hear any sound, first check the connections between the receiver and speakers. Ensure that the speaker wires are securely connected to the correct terminals on both ends. Verify that the receiver is powered on and the volume is turned up. You may also want to check the input settings on the receiver to ensure the correct audio source is selected.
- Poor Audio Quality: If you notice distorted, muffled, or unclear sound, ensure that all audio connections are secure. Check the speaker wire connections and ensure that the positive and negative terminals are correctly matched. Experiment with different audio settings, such as EQ adjustments or surround sound modes, to see if it improves the audio quality. Consider the quality of your audio sources as well.
- No Display or Video Issues: If you’re experiencing issues with video output or no display at all, ensure that the HDMI or video cables are securely connected between the receiver and the display. Verify that the correct input source is selected on the display. Make sure the receiver’s video settings are correctly configured. If using HDMI, check if the cables and devices are HDMI-compatible and support the appropriate protocols.
- Interference or Noisy Audio: If you’re experiencing interference or noise in the audio, check for any nearby sources of electrical interference, such as other electronic devices or power cables. Keep audio cables away from power cables to minimize interference. Consider using shielded audio cables to reduce susceptibility to interference. Additionally, ensure that the speaker wires are not in contact with any metal objects or each other.
- Subwoofer Issues: If your subwoofer is not working or providing weak bass, double-check the connections between the subwoofer and the receiver. Ensure that the subwoofer is powered on and the volume is appropriately set. Experiment with the subwoofer placement, as different positions in the room can impact bass response. Adjust the crossover frequency settings on the receiver to properly blend the subwoofer with the main speakers.
- Remote Control Problems: If you’re experiencing issues with the remote control, ensure that the batteries are properly installed and are not depleted. Clean the remote control’s infrared sensor and make sure there are no obstructions between the remote and the receiver. Re-pair the remote control with the receiver if necessary, following the instructions in the user manual.
- Network Streaming Issues: If you’re having trouble with network streaming capabilities, check your internet connection and ensure that the receiver is correctly connected to your Wi-Fi network. Verify that you have entered the correct login credentials for your streaming services. Restart the router and receiver if needed. Updating the receiver’s firmware to the latest version may also resolve any compatibility issues.
- User Manual and Manufacturer Support: If you encounter any persistent issues, consult the user manual that came with your home stereo system for specific troubleshooting instructions. Additionally, reach out to the manufacturer’s customer support for further assistance or guidance.
Remember, troubleshooting can be a process of elimination, so be patient and methodical in your approach. Sometimes a small adjustment or the right troubleshooting step can resolve the issue and get your home stereo system back up and running smoothly.
By following these tips, you’ll be better equipped to tackle and resolve any potential issues that may arise with your home stereo system, ensuring uninterrupted audio enjoyment.
Conclusion
Congratulations! You have successfully learned how to set up a home stereo system and optimize your audio experience. By choosing the right components, setting up the receiver, connecting the speakers, positioning them strategically, wiring the system, and adjusting the audio settings, you have created a personalized and immersive environment for enjoying your favorite music, movies, and more.
Remember, the key to a great home stereo system lies not only in the quality of the components but also in careful setup and thoughtful positioning. Take the time to experiment and fine-tune the settings to suit your preferences and the acoustics of your space.
Should you encounter any issues along the way, our troubleshooting tips will help you diagnose and resolve common problems, ensuring that your system performs at its best.
Now, sit back, relax, and immerse yourself in the incredible audio experience that your home stereo system provides. Enjoy the crisp highs, rich mids, and deep lows as your favorite songs come to life, and feel the excitement of movies and games through enveloping surround sound.
Never stop exploring the possibilities of your home stereo system. Discover new music, create playlists, and invite friends over for movie nights or gaming sessions. Let your home become a haven of immersive entertainment, where every note and sound effect transport you to new realms.
Thank you for joining us on this audio adventure. We hope this guide has empowered you to unleash the full potential of your home stereo system and brought you countless hours of enjoyment. Happy listening!