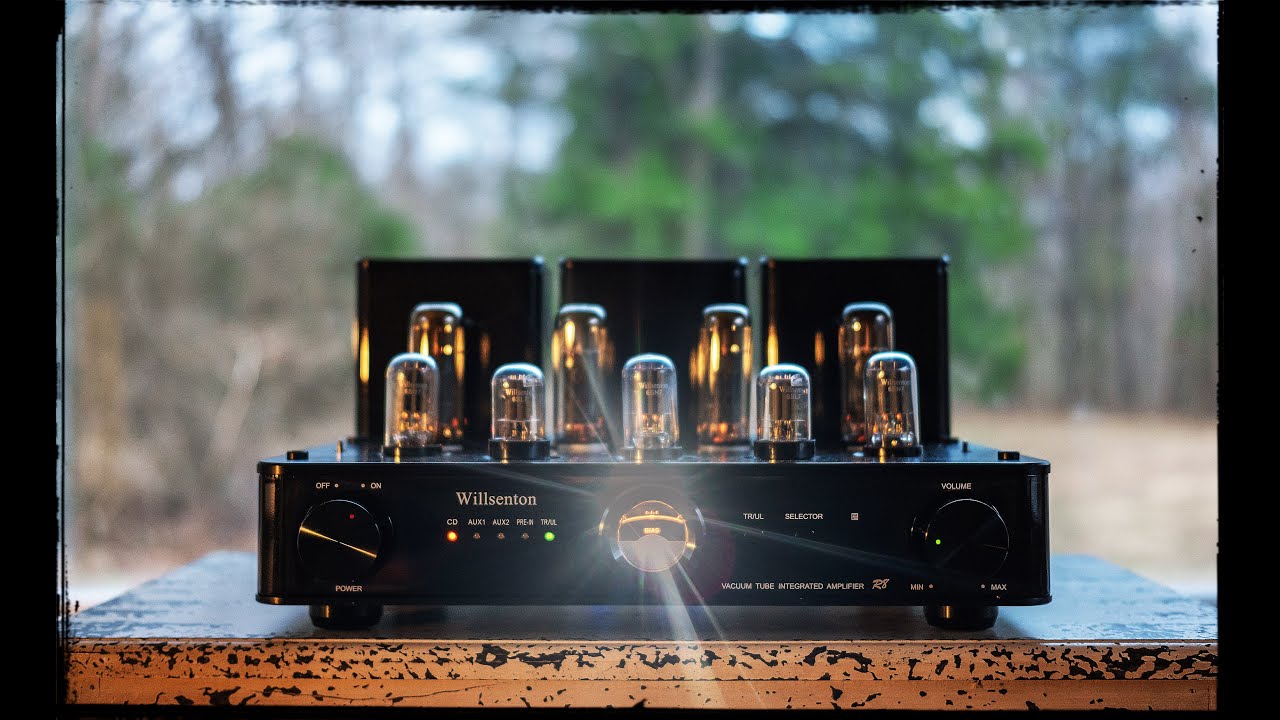
Home>Production & Technology>Stereo>How To Build A Stereo Tube Amp
Stereo
How To Build A Stereo Tube Amp
Published: November 17, 2023
Learn how to build a stereo tube amp and enhance your audio experience with our comprehensive guide. Discover the art of creating an immersive stereo sound.
(Many of the links in this article redirect to a specific reviewed product. Your purchase of these products through affiliate links helps to generate commission for AudioLover.com, at no extra cost. Learn more)
Table of Contents
- Introduction
- Understanding Tube Amps
- Gathering the Required Materials
- Preparing the Workspace
- Soldering Basics
- Assembling the Power Supply
- Wiring the Tube Socket
- Connecting the Output Transformer
- Installing the Tubes
- Wiring the Input and Output Jacks
- Testing and Troubleshooting
- Finalizing the Connections
- Powering On and Enjoying the Sound
- Conclusion
Introduction
Welcome to the world of stereo tube amps, where vintage technology meets modern audio enthusiasts. Stereo tube amps, also known as valve amplifiers, are revered for their warm and rich sound reproduction. These amplifiers use vacuum tubes to amplify and enhance the audio signal, resulting in a unique and immersive listening experience.
Building your own stereo tube amp can be a rewarding and educational journey, allowing you to delve into the inner workings of this classic audio technology. In this article, we will guide you through the process of building a stereo tube amp from scratch, providing step-by-step instructions and essential tips to make the experience enjoyable and successful.
Before we dive into the construction process, let’s take a moment to understand the fundamentals of tube amps. Unlike solid-state amplifiers that use transistors or integrated circuits, tube amps rely on vacuum tubes to amplify the audio signal. These tubes, also known as valves, are made of glass or metal and contain electrodes that control the flow of electrons, creating the amplification effect.
Tube amps are beloved for their characteristic sound, often described as warm, smooth, and rich in harmonic overtones. They have a unique ability to add depth and dimension to music, making them highly sought-after by audio enthusiasts, musicians, and even professional recording studios.
Building your own stereo tube amp not only allows you to customize the sound to your preferences, but it also offers a sense of accomplishment and a deeper connection to your audio equipment. Plus, it can save you a substantial amount of money compared to purchasing a high-quality tube amp from a manufacturer.
However, it’s important to note that building a tube amp requires some technical knowledge and skill in electronics. Soldering, wiring, and understanding circuit diagrams are essential aspects of the construction process. If you’re new to electronics, we recommend starting with a basic understanding and gradually building your skills before tackling a project of this magnitude.
In the next sections of this article, we will walk you through the process of building a stereo tube amp step by step. From gathering the necessary materials to testing and troubleshooting, we will provide detailed instructions and expert tips along the way. So, let’s get started on your journey to building your dream stereo tube amp!
Understanding Tube Amps
Before delving into the construction process, it’s essential to have a basic understanding of how tube amps work and what sets them apart from other types of amplifiers. While solid-state amplifiers have become prevalent in modern audio equipment, tube amps continue to have a dedicated following due to their unique sonic characteristics.
Tube amps operate on the principle of thermionic emission, where the flow of electrons through vacuum tubes creates amplification. These vacuum tubes, usually made of glass or metal, contain three key components: the cathode, the grid, and the plate.
The cathode is a heated element that emits electrons, while the grid acts as a control element, controlling the flow of electrons from the cathode to the plate. The plate, also known as the anode, attracts the electrons and completes the amplification process.
One of the defining characteristics of tube amps is their ability to introduce natural harmonic distortion at higher volumes. This distortion adds warmth and character to the sound, making tube amps particularly suited for reproducing music with a sense of depth and musicality.
Tube amps are often associated with a warmer and more vintage sound compared to solid-state amplifiers, which tend to provide a cleaner and more clinical sound. The inherent characteristics of tube amps, such as softer clipping and a more responsive dynamic range, make them popular for certain genres of music, such as jazz, blues, and rock.
An important aspect to consider when building or using a tube amp is the choice of tubes. Different types of tubes, such as 6L6, EL34, or 12AX7, can have varying tonal characteristics. Experimenting with different tube types and brands can help you tailor the sound of your amp to your personal preferences.
Tube amps also require some care and maintenance. Because of the heat generated by the tubes, proper ventilation and cooling are crucial to avoid overheating. Tube replacement is also a regular part of maintenance, as tubes do wear out over time and can affect the sound quality when they deteriorate. Understanding how to properly bias and replace tubes is an essential skill for tube amp owners.
Despite the added maintenance and slightly higher cost compared to solid-state amplifiers, tube amps continue to have a dedicated following among audiophiles and music enthusiasts. The allure of their distinctive sound, the nostalgia of vintage technology, and the sense of craftsmanship associated with building and maintaining tube amps contribute to their enduring popularity.
With a solid understanding of how tube amps work and their unique sonic characteristics, you are now ready to embark on the journey of building your own stereo tube amp. In the next sections, we will guide you through the step-by-step process of gathering materials, preparing your workspace, soldering, wiring, and troubleshooting, so that you can create your own professional-grade stereo tube amp to elevate your audio experience.
Gathering the Required Materials
Before diving into the construction process, it’s important to gather all the necessary materials for building your own stereo tube amp. Having everything in place will ensure a smooth and uninterrupted workflow. Here is a list of essential components you’ll need:
- Tubes: Depending on the design of your amp, you’ll need power tubes, preamp tubes, and rectifier tubes. Common tube types include 6L6, EL34, 12AX7, and 5U4.
- Transformers: A power transformer, output transformer, and filament transformer are crucial components for a tube amp. These transformers provide the required voltages and ensure efficient power delivery.
- Resistors and Capacitors: These electronic components control the flow of current and help shape the amplification process. Make sure to have a range of resistors and capacitors with different values to accommodate the specific requirements of your amp design.
- Diodes: In some tube amp designs, diodes are used as rectifiers to convert alternating current (AC) to direct current (DC). Select diodes that can handle the necessary voltage and current ratings.
- Chassis: A sturdy and well-ventilated chassis is needed to house all the components and provide stability for your tube amp. Choose a chassis that fits your desired amp size and has enough room for proper airflow.
- Potentiometers: These control knobs adjust the volume, tone, and other parameters of your tube amp. Make sure to select high-quality potentiometers for smooth and precise control.
- Switches and Jacks: You’ll need switches for power on/off and selecting different inputs if desired. Additionally, input and output jacks are needed for connecting your audio sources and speakers.
- Knobs, Buttons, and Indicator Lights: These components add a professional finishing touch to your tube amp. Choose knobs, buttons, and indicator lights that complement the design and aesthetics of your amp.
- Soldering Iron and Solder: A good quality soldering iron and lead-free solder are essential tools for assembling the components together. Ensure that your soldering iron has a fine tip for precise soldering.
- Wire and Heat Shrink Tubing: High-quality wire and heat shrink tubing are necessary for connecting the components and ensuring proper insulation. Opt for wire with suitable gauge and heat shrink tubing that fits the wire diameter.
- Tools: A set of screwdrivers, pliers, wire strippers, and multimeter will come in handy during the construction process. These tools help with wiring, testing, and troubleshooting your tube amp.
It’s important to source your materials from reputable suppliers, ensuring that you receive genuine and reliable components. Online retailers specializing in audio equipment or electronics are a good place to start your search.
Once you have gathered all the necessary materials, double-check everything to ensure you have everything you need. Missing components can delay your project, so it’s best to be thorough in this step. With a well-prepared collection of materials, you are now ready to move on to the next stage: preparing your workspace.
Preparing the Workspace
Creating an organized and well-equipped workspace is crucial when building a stereo tube amp. A properly prepared workspace ensures efficiency, safety, and ease of construction. Here are some important steps to follow when setting up your workspace:
- Clean and Clear the Area: Start by clearing any clutter from the area where you’ll be building your tube amp. A clean and spacious workspace will make it easier to layout your components and tools, minimizing the risk of misplacing or damaging anything.
- Ensure Proper Lighting: Adequate lighting is essential for clear visibility during the construction process. Make sure you have sufficient light in your workspace, either through natural lighting or by using bright lamps or task lights.
- Designate a Workbench: Set up a sturdy workbench or table specifically for your tube amp construction. This will provide a stable and dedicated area for assembling and soldering the components. Ensure that the workbench is at a comfortable height and has sufficient space for your amp chassis and tools.
- Organize Tools and Components: Arrange your tools and components in a systematic manner on your workbench. Use trays, compartments, or bins to keep them organized and easily accessible. This will save you valuable time searching for specific items and minimize the risk of misplacing anything important.
- Implement Safety Measures: When working with electronics, safety should always be a top priority. Ensure that your workspace is equipped with fire extinguishers and a first aid kit. Additionally, have a fire-resistant surface, such as a silicone mat or a non-flammable workbench cover, to protect against accidental solder spills or heat damage.
- Keep Documentation Handy: As you progress through the construction process, it’s important to refer to circuit diagrams, assembly instructions, and any other documentation specific to your tube amp design. Keep these documents within reach, either by printing them out or having them easily accessible on your computer or tablet.
- Invest in ESD Protection: Electrostatic discharge (ESD) can damage sensitive electronic components. Invest in an ESD mat or wristband to prevent static electricity build-up and discharge. This will protect your components from potential damage and ensure their reliability.
- Be Mindful of Ventilation: Since tube amps generate heat, proper ventilation is crucial to prevent overheating. Ensure that your workspace has adequate air circulation to dissipate the heat generated by the tubes. If necessary, consider using a small fan or opening windows to maintain a comfortable working environment.
- Minimize Distractions: Creating a focused and distraction-free environment will allow you to concentrate on the task at hand. Keep personal devices, noise-emitting appliances, and other distractions away from your workspace to maintain your focus and productivity.
By following these steps and preparing your workspace beforehand, you can establish an environment that promotes efficiency, organization, and safety during the construction process. Once your workspace is set up, you’re now ready to start soldering and assembling the components of your stereo tube amp.
Soldering Basics
Soldering is a fundamental skill that you’ll need for building your stereo tube amp. Proper soldering ensures secure connections between components, allowing for reliable electrical conductivity. Here are some basic steps and tips to keep in mind when soldering:
- Select the Right Soldering Iron: Choose a soldering iron that suits the size and type of components you’ll be working with. A soldering iron with an adjustable temperature control is recommended for more precise soldering. Ensure it has a clean and properly heated tip before starting.
- Prepare the Components: Prior to soldering, trim the leads of the components to a suitable length, leaving enough room for proper connections. Use wire strippers to remove the insulation from wire ends if necessary.
- Clean the Surfaces: Clean the surfaces of the components and the soldering pads on the circuit board with isopropyl alcohol or a flux cleaner to remove any oxidation, dirt, or grease. This ensures better adhesion and conductivity during soldering.
- Apply Flux: Apply a small amount of flux to the soldering pads or the leads of the components. Flux helps to facilitate the flow of solder and improve the quality of the solder joint. Use a flux pen or a flux gel for controlled application.
- Heat the Joint: Bring the soldering iron tip in contact with the joint to be soldered. The joint should be heated adequately but not excessively, as excessive heat can damage the component or the circuit board.
- Apply Solder: Once the joint is heated, touch the tip of the solder wire to the joint, ensuring that it makes contact with both the component lead and soldering pad. Allow the solder to melt and flow evenly onto the joint. The right amount of solder should create a smooth and shiny fillet around the joint.
- Avoid Cold Joints: Cold joints occur when the solder doesn’t fully melt or doesn’t adhere properly to the surface. To avoid cold joints, ensure that the joint is thoroughly heated before applying solder and maintain contact until the solder flows smoothly around the joint.
- Remove Excess Solder: After soldering a joint, remove the soldering iron and allow the joint to cool for a few seconds. Once cooled, inspect the joint for any excess solder or solder bridges. Use a soldering wick or pump to remove any excess solder and ensure a clean and precise connection.
- Practice Good Technique: Maintain a steady hand while soldering and avoid excessive movement that may result in shaky or messy solder joints. Position your soldering iron at a suitable angle and apply gentle pressure for effective heat transfer.
- Ensure Proper Insulation: Once soldering is complete, ensure that exposed wire ends or solder joints are properly insulated. Use heat shrink tubing, electrical tape, or hot glue to protect exposed connections from short circuits or unintentional contact.
Remember, practice makes perfect when it comes to soldering. It’s a skill that improves with experience, so don’t be discouraged if your first solder joints aren’t perfect. Take your time, be patient, and aim for clean and solid connections. With practice and attention to detail, you’ll soon become proficient in soldering the components of your stereo tube amp.
Assembling the Power Supply
The power supply is a critical component of your stereo tube amp, providing the necessary voltages for the tubes to operate. Assembling the power supply requires careful attention to detail and adherence to safety precautions. Here are the steps to follow when assembling the power supply:
- Study the Circuit Diagram: Familiarize yourself with the circuit diagram specific to your tube amp design. Understand the different sections of the power supply, such as the transformer, rectifier, filter capacitors, and voltage regulators.
- Prepare the Transformer: Mount the power transformer securely in the chassis, following the manufacturer’s instructions. Ensure proper insulation and physical separation from other components to prevent interference or electrical hazards.
- Wire the Rectifier: Connect the diodes or rectifier tube to the appropriate terminals on your power transformer, making sure the polarity is correct. Use high-quality hookup wire and insulate the connections properly.
- Add Filter Capacitors: Install the filter capacitors near the rectifier to smooth and filter the rectified AC voltage. Pay attention to the polarity of the capacitors and connect them according to the circuit diagram.
- Include Bleeder Resistors: To discharge stored energy and prevent electrical shock, include bleeder resistors across the filter capacitors. These resistors help safely discharge the capacitors when the power is turned off.
- Integrate Voltage Regulators: If your power supply design includes voltage regulators, wire them according to the circuit diagram. Adjust the regulators to provide the specified output voltages for different sections of your stereo tube amp.
- Double-Check Connections: Before powering on your amp, carefully inspect all the connections in the power supply section. Ensure that wires are properly routed, connections are secure, and electrical insulation is in place.
- Test the Power Supply: Perform a preliminary test of the power supply before connecting it to the rest of the amplifier circuitry. Use a multimeter to measure the output voltages and confirm that they match the expected values.
- Ensure Proper Grounding: Proper grounding is essential for safety and performance. Connect the ground wire from the power supply to the appropriate grounding points on the chassis and other key components.
- Protective Shielding: Depending on your power supply design, you may need to add shielding to protect against electromagnetic interference (EMI). Use EMI shielding materials such as copper foil or conductive paint to shield sensitive components.
- Final Inspection: Once the power supply is fully assembled, give it a final inspection. Check for any loose connections, short circuits, or physical obstructions that could hinder the performance or safety of the power supply.
Keep in mind that the power supply deals with high voltages, so always exercise caution and follow safety procedures. Double-check your work before powering up the amplifier, as mistakes or faulty connections in the power supply can cause serious damage or pose a safety hazard. If you’re not confident in your abilities, consider seeking assistance from a knowledgeable individual with experience in tube amp construction.
With the power supply successfully assembled and properly checked, you are now one step closer to completing your stereo tube amp. In the next sections, we will guide you through wiring the tube socket, connecting the output transformer, installing the tubes, and wiring the input and output jacks.
Wiring the Tube Socket
The tube socket serves as the interface between the tubes and the rest of the amplifier circuitry. Properly wiring the tube socket is crucial for ensuring correct tube operation and signal transmission. Here are the steps to follow when wiring the tube socket:
- Choose the Right Socket: Select a tube socket that matches the type and pin configuration of the tubes you’ll be using in your stereo tube amp. Different types of tubes may have different pin arrangements, so ensure compatibility between the socket and your chosen tubes.
- Position the Socket: Mount the tube socket securely on the chassis in the designated location. Ensure that the socket is aligned properly and properly insulated to prevent contact with other components.
- Identify the Pin Assignments: Refer to the datasheet or tube manual to identify the pin assignments for the specific tube type you’re using. Each pin of the tube socket corresponds to a specific electrical connection.
- Wire the Heater Filaments: The heater filaments provide the necessary heat to the tubes. Connect the appropriate pins of the tube socket to the filament winding on the power transformer, following the heating voltage specifications of your tube design.
- Connect the Cathode: The cathode is an important element of the tube that controls the flow of electrons. Connect the cathode pin of the tube socket to the designated location on the circuit board or component, following the circuit diagram.
- Wire the Plate: The plate is the output terminal of the tube. Connect the plate pin of the tube socket to the corresponding location on the circuit board or component, ensuring proper insulation and secure connections.
- Add Grid and Bias Connections: The grid controls the flow of electrons in the tube, while the bias voltage ensures optimal tube operation. Wire the grid and bias pins of the tube socket to their respective connections on the circuit board or components.
- Ground Connections: Proper grounding is critical for noise reduction and safety. Connect the ground pins of the tube socket to the designated grounding points on the circuit board or chassis to ensure proper grounding.
- Double-Check Connections: Before proceeding further, carefully inspect all the tube socket connections. Ensure that wires are properly routed, connections are secure, and electrical insulation is in place.
- Test the Tube Socket: Perform a continuity test to verify that all the pins of the tube socket are electrically and properly connected. This will help identify any faults or shorts before inserting tubes into the socket.
Take your time when wiring the tube socket to ensure accuracy and avoid potential errors. Pay close attention to the pin assignments and follow the circuit diagram closely. Mistakes in tube socket wiring can lead to improper tube operation or damage to the amplifier components.
Once you have successfully wired the tube socket, you’re ready to move on to connecting the output transformer. This crucial step will help convert the amplified signal from the tubes to a format suitable for driving the speakers in your stereo tube amp.
Connecting the Output Transformer
The output transformer is a vital component in your stereo tube amp that performs the crucial task of matching the impedance of the tube circuit to the speakers. Connecting the output transformer correctly ensures optimal signal transfer and efficient power delivery to the speakers. Here are the steps to follow when connecting the output transformer:
- Identify the Primary and Secondary Windings: The output transformer has primary and secondary windings. The primary winding is connected to the tube circuit, while the secondary winding is connected to the speakers. Refer to the transformer datasheet or manual to identify the primary and secondary terminals.
- Mount the Output Transformer: Securely mount the output transformer in the designated location on the chassis, making sure it is properly insulated and physically separated from other components to prevent interference.
- Wire the Primary Winding: Connect the primary winding of the output transformer to the corresponding output stage of your tube amp. The specific connections will depend on your amplifier’s circuit design. Follow the circuit diagram carefully, ensuring proper insulation and secure connections.
- Wire the Secondary Winding: Connect the secondary winding of the output transformer to the speaker terminals. The number of secondary windings may vary depending on the transformer and the amplifier’s output configuration. Ensure that the speaker connections are properly insulated and securely fastened.
- Check Polarity: Double-check the polarity of the output transformer connections. Make sure that the primary and secondary windings are connected with the correct polarity to ensure proper signal phase and prevent any unwanted distortion or cancellation.
- Secure Connections: Once all the connections are in place, carefully inspect them to ensure they are secure and properly routed. Use tie wraps, cable clamps, or other suitable methods to organize and secure the wires to prevent strain or accidental disconnection.
- Insulate and Protect: Apply suitable insulation, such as heat shrink tubing or electrical tape, to cover any exposed connections and prevent short circuits or unintentional contact. This step is crucial for safety and to ensure the longevity of your output transformer.
- Double-Check Connections: Before proceeding further, carefully inspect all the output transformer connections. Ensure there are no loose wires, short circuits, or accidental contact that could affect the performance or safety of your stereo tube amp.
- Test the Connections: Perform a continuity test to verify that all the output transformer connections are electrically and properly connected. This will help identify any faults or shorts before powering on the amplifier.
Connecting the output transformer is a critical step in completing the signal path from the tubes to the speakers. Take your time and pay close attention to the connections, ensuring accuracy and proper insulation throughout the process.
With the output transformer successfully connected, you’re now one step closer to completing your stereo tube amp. In the next section, we will guide you through the process of installing the tubes, culminating in the exciting moment of powering on your amplifier and enjoying its beautiful sound.
Installing the Tubes
Installing the tubes is a significant milestone in the construction of your stereo tube amp. Tubes play a vital role in amplifying and shaping the audio signal, and proper installation ensures their optimal functioning and longevity. Here are the steps to follow when installing the tubes:
- Ensure Safety Precautions: Before handling the tubes, make sure they are cool to the touch to prevent accidental burns. Additionally, make sure the power is disconnected, and the amp is fully discharged to minimize electrical hazards.
- Refer to Tube Manual: Each type of tube has a specific pin configuration and installation method. Refer to the tube manual or datasheet to identify the correct pins and their corresponding functions for the tubes you’re using.
- Identify Tube Sockets: Locate the tube sockets on your amp’s chassis, ensuring they match the type of tubes you will be installing. Tube sockets are typically labeled with numbers or letters corresponding to their pin connections.
- Match Tube Pins: Carefully match the pins of each tube with the corresponding tube socket pins. Take your time to align the tube pins correctly to avoid bending or damaging them. Gently insert the tubes into their respective sockets until they are seated securely.
- Apply Gentle Pressure: Once the tubes are seated in their sockets, apply gentle pressure to ensure a firm connection. Take care not to use excessive force, which could damage the tube pins or the sockets.
- Verify Tube Orientation: Some tubes may have specific orientation requirements, such as a key or a guide pin. Align the tube correctly with the socket, following the manufacturer’s instructions or the tube manual’s guidelines.
- Double-Check Connections: After installing all the tubes, double-check the connections. Ensure that each tube is securely seated in its socket and that the pins are making good contact. Inspect for any bent or misaligned pins that may cause poor electrical connections.
- Apply Tube Retainers (if applicable): If your tube sockets have retaining clips or springs, carefully apply them to hold the tubes in place. These retainers help ensure reliable connections and prevent tube movement during operation.
- Clean Tubes (optional): If desired, you can use an anti-static cloth or a specialized tube cleaning solution to gently clean the external surfaces of the tubes. This step helps remove any dust or fingerprints, enhancing the visual appeal of your stereo tube amp.
- Document Tube Replacements: It’s useful to keep a record of the specific tubes installed in your amp and their respective positions. This documentation will assist you in future maintenance and troubleshooting.
Proper tube installation is essential for the optimal performance and longevity of your stereo tube amp. Take your time, exercise caution, and ensure that each tube is securely seated in its socket with the correct orientation and pin connections.
With the tubes successfully installed, we’re now ready to move on to the next step: wiring the input and output jacks. This step brings us closer to the final stages of completing your stereo tube amp and enjoying its incredible sound.
Wiring the Input and Output Jacks
Wiring the input and output jacks is a crucial step in the construction of your stereo tube amp. These jacks serve as the interface for connecting your audio sources and speakers. Properly wiring the jacks ensures reliable signal transmission and allows you to enjoy the full potential of your amplifier. Here are the steps to follow when wiring the input and output jacks:
- Choose the Jacks: Select high-quality input and output jacks that match your amplifier’s design and accommodate the appropriate cables and connectors for your audio sources and speakers. Jacks come in various formats, such as 1/4″, RCA, or XLR.
- Mount the Jacks: Securely mount the input and output jacks onto your amp’s chassis. Ensure they are placed in convenient locations and adequately spaced to allow for easy access and proper cable management.
- Identify Jack Connections: Identify the connection points on the input and output jacks, usually labeled as tip, ring, and sleeve (TRS) for stereo jacks or as positive, negative, and ground for mono jacks.
- Wire the Input Jacks: Connect the cables from your audio sources to the input jacks. Typically, the positive or hot signal wire should be connected to the tip or positive terminal of the input jack, and the negative or ground wire should be connected to the sleeve or ground terminal.
- Wire the Output Jacks: Connect the cables leading to your speakers or audio output devices to the output jacks. Similar to the input jacks, connect the positive or hot wire to the tip or positive terminal of the output jack and the negative or ground wire to the sleeve or ground terminal.
- Grounding Considerations: Proper grounding is crucial for noise reduction and safety. Ensure that the ground connections from the input and output jacks are securely connected to the designated grounding points on the amplifier’s circuit board or chassis.
- Double-Check Connections: Carefully inspect all the input and output jack connections to ensure they are secure and properly routed. Verify that the connections are insulated and free from any accidental contact with other components.
- Test the Connections: Before connecting your audio sources or speakers, perform a continuity test on the input and output jacks to verify that all connections are electrically and properly connected. This will help identify any faults or shorts that need to be addressed before operation.
- Label the Jacks (optional): If desired, you can label the input and output jacks to ensure easy identification and proper cable routing. This step can be particularly helpful if you have multiple sources or speakers connected to your stereo tube amp.
Wiring the input and output jacks correctly is essential for achieving optimal audio signal transmission and ensuring compatibility with your audio devices. Take your time, follow the wiring guidelines specific to your amp’s design, and double-check all connections to ensure accuracy and reliability.
With the input and output jacks wired, we’re nearly approaching the finish line. In the next section, we will guide you through the crucial steps of testing and troubleshooting your stereo tube amp to ensure it operates flawlessly before powering it on.
Testing and Troubleshooting
Testing and troubleshooting are essential steps in the construction process of your stereo tube amp. Thoroughly testing your amplifier ensures that all components are functioning as intended and identifies any potential issues that need to be addressed. Follow these steps to test and troubleshoot your stereo tube amp:
- Inspect the Wiring: Conduct a visual inspection of the entire amplifier circuitry, including components, solder joints, and connections. Look for any loose wires, dislodged components, or signs of damage or overheating.
- Perform a Continuity Test: Use a multimeter to check for continuity throughout the circuit. Verify that all the connections are correctly wired and that there are no accidental shorts or open circuits. This test helps identify any wiring errors or faulty connections.
- Check the Power Supply Voltages: Measure the voltages at various points of the power supply circuit, ensuring that they match the expected values. Incorrect voltages can be a sign of issues with the power supply components or incorrect wiring.
- Test Signal Path: Connect an audio signal source, such as a CD player or smartphone, to the input jack of your stereo tube amp. Use a multimeter or an oscilloscope to trace the signal path from the input to the output. Ensure that the signal is passing through each stage of the amplifier as expected.
- Verify Tube Operation: With the amplifier powered off, carefully remove each tube and examine them visually. Look for any signs of damage, discoloration, or loose connections. If necessary, test the tubes using a tube tester or consult a professional to ensure they are functioning correctly.
- Check Bias (if applicable): If your amplifier design includes bias adjustment, measure the bias voltage and current for each tube using appropriate equipment. Ensure that the bias levels are within the specified range for optimal tube performance and longevity.
- Listen for Noise or Distortion: Power on your stereo tube amp and listen for any abnormal noise, hum, or distortion when playing audio through the speakers. Note any unwanted sounds or irregularities, as they may indicate grounding issues, faulty components, or improper wiring.
- Address Issues: If you encounter any issues during testing, refer to the circuit diagram and construction guide to diagnose and troubleshoot the problem. Check for loose connections, cold solder joints, faulty components, or incorrect wiring. Make necessary adjustments or repairs accordingly.
- Re-test and Fine-tune: Once you’ve addressed any issues, re-test your stereo tube amp to ensure that all problems have been resolved. Use additional tests, such as testing frequency response or distortion levels, to further fine-tune the performance of your amplifier.
It’s important to approach testing and troubleshooting with patience and thoroughness. Take your time to identify and resolve any issues, ensuring that your stereo tube amp is functioning optimally before moving forward.
Once you are satisfied with the performance and functionality of your stereo tube amp, you are ready to power it on and immerse yourself in the beautiful sound it produces. In the final section, we will discuss the steps for powering on your amplifier and enjoying the fruits of your labor.
Finalizing the Connections
As you near the completion of your stereo tube amp, it’s time to finalize the connections and ensure everything is secure and properly insulated. This step is crucial for the overall reliability and performance of your amplifier. Follow these steps to finalize the connections:
- Review the Circuit Diagram: Before proceeding, revisit the circuit diagram of your amplifier. Double-check that all components are connected as specified, and verify the accuracy of your wiring.
- Secure and Insulate Connections: Inspect all connections throughout your amplifier circuitry, including wire connections, terminal blocks, and solder joints. Ensure they are secure and properly tightened. Additionally, double-check that all connections are adequately insulated to prevent accidental shorts or exposed components.
- Cable Dressing: Organize and route the cables inside your stereo tube amp to promote good airflow and prevent interference. Use cable ties or clips to secure and bundle wires together, keeping them away from heat sources or moving parts.
- Locking Hardware: For any components that require adjustment or may come loose during operation, consider using locking hardware such as lock washers, nylon nuts, or threadlock adhesive. This ensures that critical components and connections remain secure over time.
- Labeling: If desired, label the various components and connection points to facilitate future maintenance or troubleshooting. Use adhesive labels or markers to clearly indicate the purpose of each wire or connection.
- Cleanup: Remove any excess flux, solder fragments, or debris from your amplifier’s circuit board or chassis. Use a brush or compressed air to carefully clean components and ensure a tidy appearance.
- Final Inspection: Conduct a thorough visual inspection of your stereo tube amp, looking for any loose connections, improper insulation, or signs of damage. Check for potential issues such as component interference or the potential for accidental contact.
- Prepare for Power: Ensure that your amplifier’s power switch is in the off position. Double-check that the volume control is turned down to its minimum setting. Prepare your speakers or audio output devices to be connected to the amplifier.
- Review Safety Precautions: Remind yourself of the safety precautions for operating your stereo tube amp. Ensure you are aware of the correct procedure for powering on and shutting down your amplifier.
- Final Functionality Test: Perform a final functionality test by connecting your audio sources and speakers, then power on your amplifier. Verify that audio signal is being amplified and reproduced correctly without any unwanted noise, distortion, or issues.
By following these steps and ensuring all connections are secure, properly insulated, and labeled, you can have confidence in the longevity and performance of your stereo tube amp. Take pride in the accomplishment of building your very own custom amplifier.
Once you have completed the finalization of connections, it’s time to power on your stereo tube amp and immerse yourself in the breathtaking sound it produces. In the concluding section of this article, we will guide you through the exhilarating process of powering on your amplifier and enjoying the fruits of your labor.
Powering On and Enjoying the Sound
Congratulations! After all the hard work and meticulous construction, it’s time to power on your stereo tube amp and embark on a journey into the world of exceptional sound quality. Follow these steps to power on your amplifier and enjoy the amazing sonic experience:
- Double-Check Connections: Before powering on your amplifier, ensure that all connections, including audio sources, speakers, and power supply, are properly connected and secured. Verify that all cables and wires are in their correct positions and that nothing is loose or unplugged.
- Set Volume Control: Set the volume control of your amplifier to the minimum setting. This precautionary step prevents any potential sudden loud sounds that could damage your speakers or cause discomfort.
- Switch On the Power: Locate the power switch on your amplifier chassis and flip it to the “On” position. As the power flows into your amplifier, you may hear a faint click or hum as the tubes warm up. This is normal and indicates the amp is coming to life.
- Wait for Tube Warm-Up: Give your stereo tube amp a few minutes to warm up and stabilize. During this time, the tubes reach their optimal operating temperature, ensuring optimal sound quality and performance.
- Gradually Increase Volume: Slowly increase the volume control on your amplifier, carefully listening to the sound as it starts to fill the room. Take your time to find the desired listening level and adjust the tonal settings to optimize your listening experience.
- Enjoy the Sound: Sit back, relax, and immerse yourself in the beautiful sound of your stereo tube amp. Appreciate the warmth, richness, and clarity that tube amplification brings to your favorite music. Experience the nuances and details of the audio that was previously hidden or masked.
- Experiment and Refine: Explore various genres of music to fully appreciate the versatility and capabilities of your stereo tube amp. Experiment with different settings, tube types, and audio sources to fine-tune the sound to your preferences. This process allows you to unlock the true potential of your amplifier.
- Regular Maintenance: As you enjoy your stereo tube amp, remember to perform regular maintenance. Periodically check the tubes for signs of wear and replace them if needed. Keep the amplifier clean and free of dust by gently wiping the surfaces. Also, consider storing your amplifier in a cool, dry place when not in use.
Now you can indulge in the exceptional sound quality and musicality that your custom-built stereo tube amp delivers. Experience the warmth, clarity, and emotion that tube amplification brings to music, enhancing your enjoyment and appreciation of your favorite songs.
Remember, the journey doesn’t end here. As you grow in your understanding and appreciation of your stereo tube amp, you can continue to refine and customize your amplifier to suit your evolving preferences. Embrace the joy of owning and using such a remarkable audio masterpiece!
Thank you for joining us on this guide to building and enjoying your stereo tube amp. We hope this article has been enlightening and inspiring, and we wish you countless hours of musical bliss with your one-of-a-kind amplifier creation!
Conclusion
Congratulations on completing the construction of your own stereo tube amp! By embarking on this journey, you have not only gained a deeper understanding of the inner workings of amplifiers but also created a unique and personalized audio masterpiece. Your stereo tube amp represents a testament to your passion for music and the world of vintage audio technology.
Throughout this guide, we have walked you through the step-by-step process of building the amplifier, from understanding tube amps to finalizing the connections. We explored the fundamentals of tube amplification, discussed the importance of gathering the necessary materials, and provided guidance on soldering, assembling the power supply, wiring the tube socket, connecting the output transformer, and other crucial steps.
By carefully following these instructions and incorporating your own creativity and attention to detail, you have brought life to your stereo tube amp. You have gained valuable skills in electronics, soldering, and troubleshooting, and have expanded your knowledge of audio equipment and amplifier design.
Now, it’s time to revel in the stunning sound and unique character that your stereo tube amp brings to your audio setup. Enjoy the warmth, richness, and musicality that only tube amplification can provide. Immerse yourself in the intricate details and nuances of your music, experiencing the true essence and emotion behind each note.
Remember, your journey with your stereo tube amp doesn’t end here. As you explore and refine your amplifier, you can continue to experiment with different components, tube types, and configurations. Embrace the endless possibilities for customization and tailor your amp to suit your unique preferences and musical taste.
We hope that this guide has been informative, inspiring, and empowering, enabling you to create a stereo tube amp that you can be proud of. Building your own amplifier is a remarkable accomplishment, and we commend you for your dedication and passion.
Whether you are using your stereo tube amp for personal enjoyment, audio production, or sharing the gift of music with others, may it bring you countless hours of sonic bliss and enrich your musical journey. Happy listening!