Home>Devices & Equipment>Microphone>How To Use Mini Microphone On IPhone
Microphone
How To Use Mini Microphone On IPhone
Modified: February 17, 2024
Learn how to use a mini microphone on your iPhone to enhance audio quality for recordings, videos, and voice memos. Follow our step-by-step guide to make the most of your microphone.
(Many of the links in this article redirect to a specific reviewed product. Your purchase of these products through affiliate links helps to generate commission for AudioLover.com, at no extra cost. Learn more)
Table of Contents
Introduction
In today's digital age, the demand for high-quality audio recording has surged, driven by the burgeoning popularity of podcasts, vlogging, and mobile journalism. As a result, the use of mini microphones with smartphones, particularly the iPhone, has become increasingly prevalent. These compact yet powerful devices offer superior sound capture capabilities, making them a valuable tool for content creators, musicians, journalists, and anyone seeking professional-grade audio on the go.
The integration of mini microphones with iPhones has revolutionized the way individuals record audio, providing a portable and versatile solution for capturing crisp, clear sound in various environments. Whether it's conducting interviews, recording music, or capturing ambient sounds, mini microphones offer unparalleled flexibility and performance.
This article delves into the intricacies of using a mini microphone with an iPhone, offering a comprehensive guide on how to seamlessly integrate these devices to elevate your audio recording experience. From understanding the nuances of mini microphones to connecting and optimizing settings, this guide will equip you with the knowledge and insights needed to harness the full potential of your iPhone in conjunction with a mini microphone. Additionally, we will explore the process of recording with a mini microphone and troubleshoot common issues that may arise, ensuring that you can make the most of this powerful combination.
Join us as we embark on a journey to unlock the transformative capabilities of mini microphones and iPhones, empowering you to capture exceptional audio with unparalleled convenience and precision. Whether you're a seasoned professional or an aspiring enthusiast, this guide is your gateway to harnessing the true power of mini microphones with your iPhone.
Understanding Mini Microphones
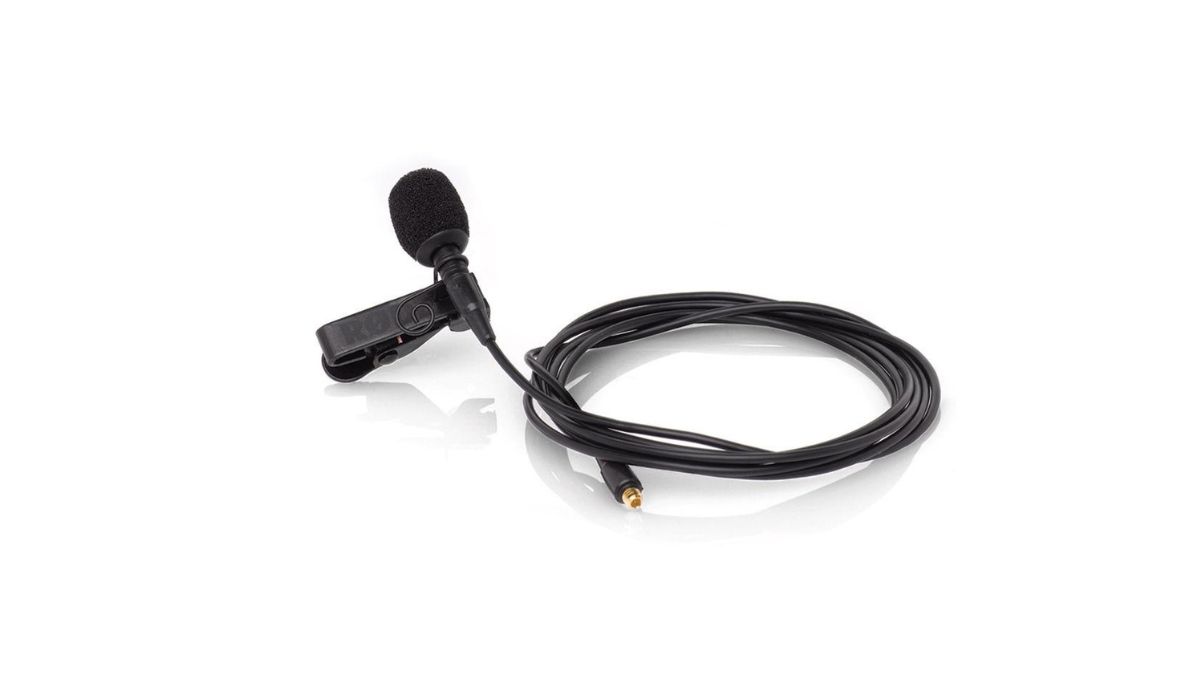
Mini microphones, also known as lavalier or lapel microphones, are compact audio devices designed to capture high-quality sound with remarkable precision. These miniature marvels are favored for their portability and exceptional performance, making them an ideal choice for a wide array of audio recording needs. Whether you’re conducting interviews, recording podcasts, or capturing ambient sounds for video production, mini microphones offer unparalleled versatility and convenience.
These diminutive yet powerful devices are engineered to deliver exceptional audio fidelity while remaining unobtrusive during use. Typically featuring omnidirectional or cardioid pickup patterns, mini microphones excel in capturing clear, natural sound while minimizing background noise and unwanted interference. Their discreet form factor makes them well-suited for a range of applications, from live performances to on-location interviews, where mobility and unobtrusiveness are paramount.
Mini microphones are available in both wired and wireless configurations, catering to diverse recording scenarios and user preferences. Wired mini microphones offer a direct connection to recording devices, ensuring a reliable and uninterrupted audio signal. On the other hand, wireless models provide enhanced mobility and freedom of movement, making them an excellent choice for dynamic recording situations.
These microphones are equipped with miniature clips or attachment mechanisms that allow for easy and secure placement on clothing or accessories, facilitating inconspicuous and hassle-free use. Additionally, many mini microphones feature built-in windshields or foam covers to mitigate unwanted wind noise and plosives, further enhancing the overall audio quality.
Understanding the nuances of mini microphones is pivotal in harnessing their full potential when paired with an iPhone. Their compact size, exceptional sound capture capabilities, and adaptability to various recording scenarios make them an indispensable tool for content creators, journalists, musicians, and audio enthusiasts alike. By familiarizing yourself with the intricacies of mini microphones, you can leverage their strengths to elevate your audio recording endeavors to new heights.
Connecting Mini Microphone to iPhone
Connecting a mini microphone to an iPhone is a straightforward process that unlocks the device’s full potential for professional-grade audio recording. Whether you’re using a wired or wireless mini microphone, the seamless integration with an iPhone empowers you to capture pristine sound with unparalleled convenience. Here’s a step-by-step guide to connecting a mini microphone to your iPhone:
- Wired Mini Microphone: If you’re using a wired mini microphone, begin by ensuring that the microphone’s connector is compatible with your iPhone’s input port. For newer iPhone models without a traditional headphone jack, a Lightning to 3.5mm adapter may be required to connect the microphone. Once the compatibility is confirmed, simply plug the mini microphone into the iPhone’s audio input port, and it should be ready for use.
- Wireless Mini Microphone: When using a wireless mini microphone, such as a Bluetooth-enabled lavalier mic, the initial setup involves pairing the microphone with your iPhone. Activate the Bluetooth function on your iPhone and follow the manufacturer’s instructions to pair the wireless mini microphone. Once successfully paired, the mini microphone will be recognized as an available audio input device for your iPhone.
Upon establishing the connection, it’s essential to ensure that the iPhone recognizes the mini microphone as the primary audio input source. This can be verified by accessing the audio input settings within the recording app or the iPhone’s system settings. Select the connected mini microphone as the preferred audio input device to enable seamless integration and optimal performance.
By connecting a mini microphone to your iPhone, you gain the ability to capture professional-quality audio in diverse environments, empowering you to unleash your creativity and elevate the overall production value of your recordings. Whether you’re engaged in content creation, journalism, or musical pursuits, the integration of a mini microphone with your iPhone opens up a world of possibilities for immersive and captivating audio experiences.
Adjusting Settings
Optimizing the settings on your iPhone when using a mini microphone is crucial for achieving exceptional audio quality and seamless functionality. By adjusting specific parameters and preferences, you can tailor the recording setup to suit your specific requirements and enhance the overall audio capture experience. Here are essential settings to consider when using a mini microphone with your iPhone:
- Input Selection: Access the audio input settings on your iPhone and ensure that the connected mini microphone is selected as the primary audio input device. This step is vital for directing the iPhone to utilize the mini microphone for audio capture, bypassing the built-in microphone and harnessing the superior capabilities of the external device.
- Gain Control: Many recording apps and the iPhone’s native recording interface offer gain control settings, allowing you to adjust the microphone’s input sensitivity. Fine-tuning the gain ensures that the audio signal is optimized for clarity and volume, preventing distortion while capturing nuanced sound with precision.
- Monitoring Options: Explore the monitoring options available within your recording app or the iPhone’s settings. Enabling real-time audio monitoring through headphones allows you to monitor the sound being captured by the mini microphone, ensuring that levels are optimal and that any potential issues can be addressed during recording.
- File Format and Quality: Depending on your recording preferences and intended use, consider adjusting the file format and quality settings within your recording app. Selecting higher bitrates and uncompressed formats can preserve the fidelity of the recorded audio, catering to professional production standards and post-processing flexibility.
By meticulously adjusting these settings, you can harness the full potential of your mini microphone when paired with an iPhone, unlocking the ability to capture pristine audio with remarkable clarity and depth. Whether you’re engaged in vocal recordings, field interviews, or musical performances, the ability to fine-tune these settings empowers you to achieve professional-grade results with ease.
Recording with Mini Microphone
When it comes to recording with a mini microphone on your iPhone, the seamless integration of these devices empowers you to capture exceptional audio with unparalleled convenience. Whether you’re embarking on a podcasting session, conducting interviews, or documenting live performances, the process of recording with a mini microphone is straightforward and yields professional-grade results. Here’s a guide to optimizing your recording experience with a mini microphone:
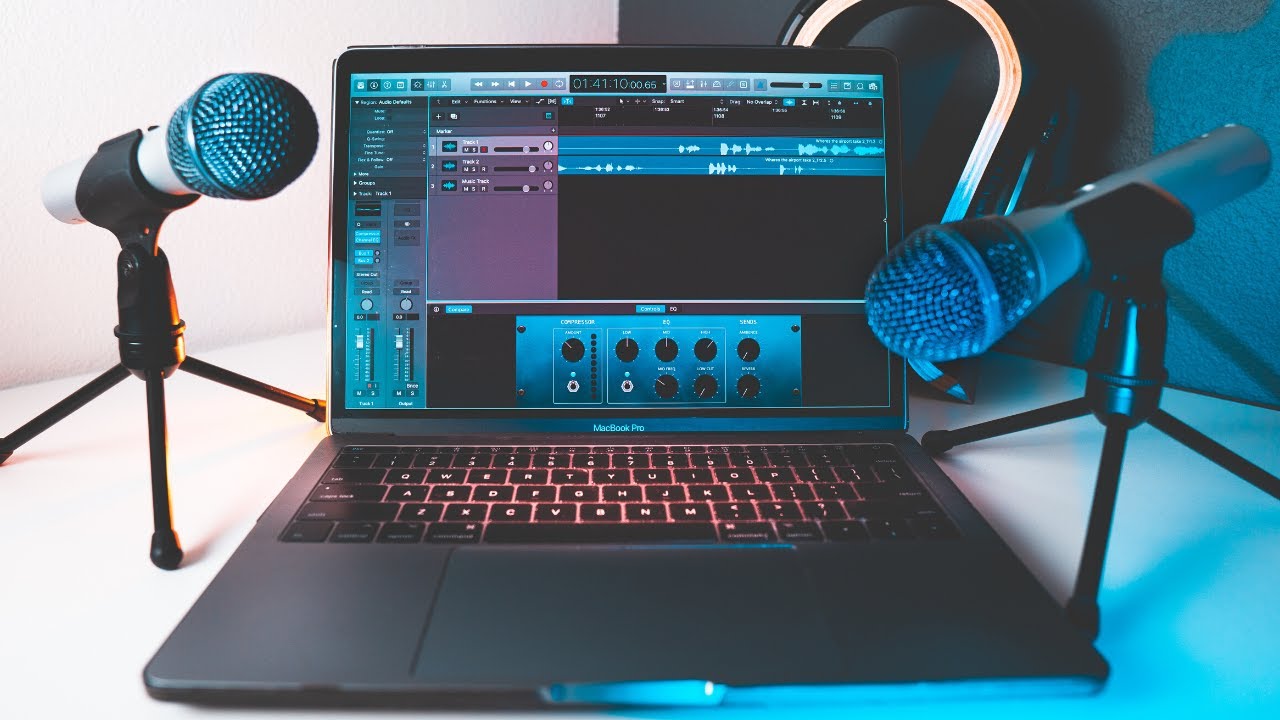
- Selecting the Recording App: Choose a recording app that aligns with your specific recording needs and preferences. Whether you opt for a feature-rich third-party app or utilize the iPhone’s native recording interface, ensure that the app supports external microphones and offers essential features such as gain control, audio monitoring, and file format options.
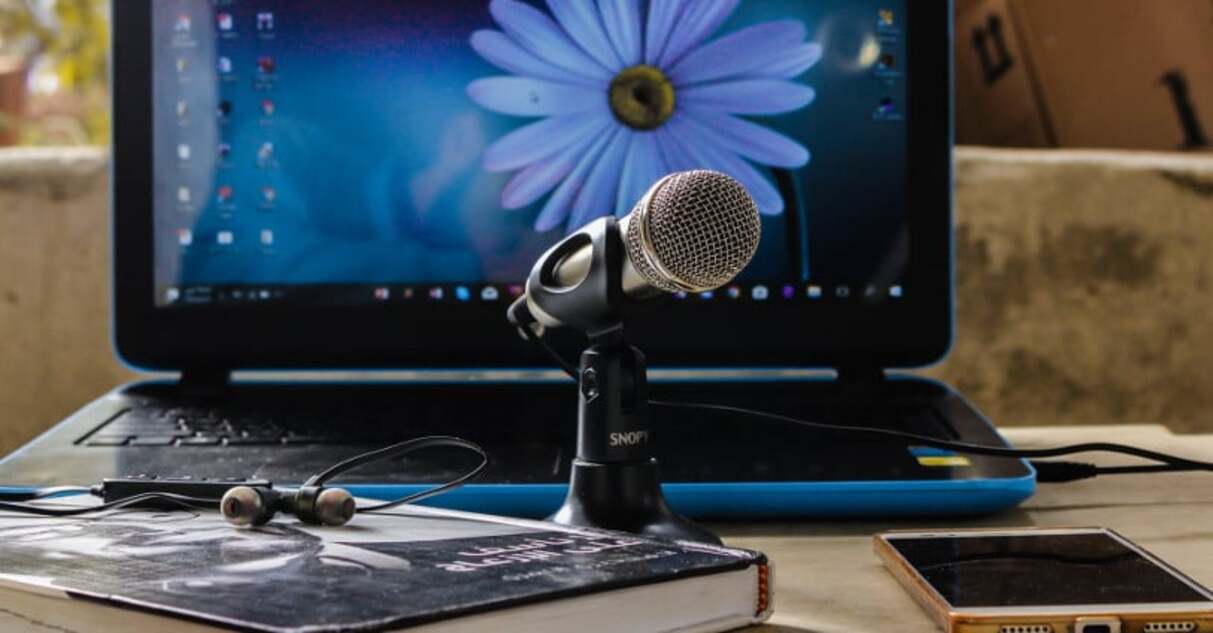
- Positioning the Mini Microphone: Securely attach the mini microphone to your clothing or preferred placement area, ensuring that it remains discreet while capturing optimal sound. Positioning the microphone strategically enhances audio clarity and minimizes unwanted noise, contributing to a professional and polished recording.
- Testing and Monitoring: Before commencing the actual recording, conduct a brief test to ensure that the mini microphone is functioning correctly and that audio levels are appropriately set. Utilize real-time monitoring through headphones to gauge the quality of the captured sound and make any necessary adjustments to optimize the recording setup.
- Commencing the Recording: Once you’ve confirmed the readiness of your recording setup, commence the recording session with confidence. Whether you’re delivering a monologue, engaging in a dialogue, or capturing ambient sounds, the mini microphone coupled with your iPhone empowers you to capture the essence of the moment with exceptional fidelity and clarity.
- Post-Recording Review: After concluding the recording, take the time to review the captured audio to ensure that it meets your expectations. Address any potential issues or imperfections, and consider leveraging post-processing tools or editing apps to further enhance the recorded audio and achieve a polished final product.
By following these steps and leveraging the capabilities of your mini microphone in tandem with your iPhone, you can embark on a recording journey that transcends limitations, unlocking the potential for immersive and captivating audio experiences. Whether you’re a content creator, journalist, musician, or enthusiast, the fusion of mini microphones and iPhones offers a gateway to seamless, high-quality audio recording in any setting.
Troubleshooting
While the integration of a mini microphone with an iPhone offers a myriad of benefits for audio recording, occasional technical hiccups or challenges may arise. Understanding common troubleshooting techniques can help you swiftly address issues and ensure a seamless recording experience. Here are some troubleshooting tips to navigate potential obstacles when using a mini microphone with your iPhone:
- Connection Issues: If you encounter connectivity problems with your wired mini microphone, inspect the microphone’s connector and the iPhone’s input port for any debris or damage. Ensure a secure and snug connection, and consider testing the microphone with another device to isolate the source of the issue.
- Wireless Interference: When using a wireless mini microphone, interference from other electronic devices or physical obstructions may disrupt the signal. Relocate to a different area, away from potential sources of interference, and ensure that the wireless microphone and iPhone are within the recommended operating range for optimal performance.
- Audio Distortion: If you encounter audio distortion or clipping during recording, adjust the microphone’s gain settings to prevent input overload. Additionally, ensure that the recording levels on your iPhone are appropriately set to accommodate the microphone’s output without introducing distortion.
- Compatibility Concerns: For newer iPhone models without a traditional headphone jack, compatibility issues may arise when using certain wired mini microphones. Utilize a reputable Lightning to 3.5mm adapter to ensure seamless compatibility and functionality with your iPhone.
- App-Specific Challenges: If you’re experiencing issues within a specific recording app, consider updating the app to the latest version or exploring alternative apps that offer robust support for external microphones. Additionally, review the app’s settings to ensure that the mini microphone is selected as the primary audio input device.
By familiarizing yourself with these troubleshooting techniques and remaining adaptable in addressing potential challenges, you can mitigate disruptions and maintain a smooth recording process with your mini microphone and iPhone. Embracing a proactive approach to troubleshooting empowers you to overcome obstacles swiftly, ensuring that you can consistently capture exceptional audio with confidence and ease.
Conclusion
As we conclude our exploration of using a mini microphone with an iPhone, it’s evident that the synergy between these devices unlocks a world of possibilities for audio enthusiasts, content creators, journalists, and musicians. The seamless integration of mini microphones with iPhones empowers individuals to capture exceptional audio with unparalleled convenience, whether in the studio, in the field, or on the go.
From understanding the nuances of mini microphones to connecting, adjusting settings, and troubleshooting, this comprehensive guide has equipped you with the knowledge and insights needed to harness the full potential of this powerful combination. By leveraging the compact yet powerful capabilities of mini microphones and the versatility of iPhones, you can elevate your audio recording endeavors to new heights, transcending limitations and capturing the essence of every moment with precision and clarity.
Whether you’re a seasoned professional seeking to enhance your audio production workflow or an aspiring enthusiast delving into the world of content creation, the fusion of mini microphones and iPhones offers a gateway to immersive and captivating audio experiences. With the ability to seamlessly integrate these devices and navigate potential challenges with confidence, you are poised to embark on a recording journey that transcends boundaries, enabling you to capture the nuances of sound with unparalleled fidelity and artistry.
As you venture forth, armed with the knowledge gleaned from this guide, may your recordings resonate with the richness of detail, the warmth of authenticity, and the clarity of purpose. Embrace the power of mini microphones and iPhones as your allies in the pursuit of sonic excellence, and unleash your creativity with the assurance that every sound you capture is a testament to your passion and artistry.
Together, let us continue to explore, innovate, and create, propelled by the harmonious union of mini microphones and iPhones, as we craft audio experiences that resonate deeply and endure indefinitely.