Home>Devices & Equipment>Turntable>How Do You Adjust The Turntable Arm On A Crosley Turntable
Turntable
How Do You Adjust The Turntable Arm On A Crosley Turntable
Published: January 19, 2024
Learn how to properly adjust the turntable arm on your Crosley turntable to ensure optimal performance. Discover the best techniques for fine-tuning your turntable experience.
(Many of the links in this article redirect to a specific reviewed product. Your purchase of these products through affiliate links helps to generate commission for AudioLover.com, at no extra cost. Learn more)
Table of Contents
- Introduction
- Understanding the Turntable Arm
- Tools Needed for Adjusting the Turntable Arm
- Step 1: Removing the Platter
- Step 2: Accessing the Arm Adjustment Mechanism
- Step 3: Adjusting the Vertical Tracking Force (VTF)
- Step 4: Adjusting the Anti-Skate
- Step 5: Ensuring Proper Alignment
- Step 6: Reassembling the Turntable
- Conclusion
Introduction
Turntables have experienced a resurgence in popularity in recent years, thanks to their warm and nostalgic sound that vinyl enthusiasts adore. Whether you are a devoted audiophile or a casual listener, having a properly adjusted turntable arm is crucial for achieving optimal audio performance and preserving your vinyl records.
In this article, we will guide you through the process of adjusting the turntable arm on a Crosley turntable, one of the most popular brands in the market. Understanding the components of a turntable arm and how to adjust them properly is essential for achieving precise tracking and minimizing wear on your records.
By adjusting the turntable arm, you can ensure that the stylus exerts the correct amount of downward force on the record, preventing skipping and distortion. Additionally, proper adjustment of the anti-skate feature helps counterbalance the inward force exerted by the stylus, allowing for even and smooth playback across the record grooves.
Before we dive into the specifics of adjusting the turntable arm on a Crosley turntable, let’s briefly discuss the various components involved in the process. These components include the platter, arm adjustment mechanism, vertical tracking force (VTF) adjustment, anti-skate adjustment, and alignment.
Understanding the Turntable Arm
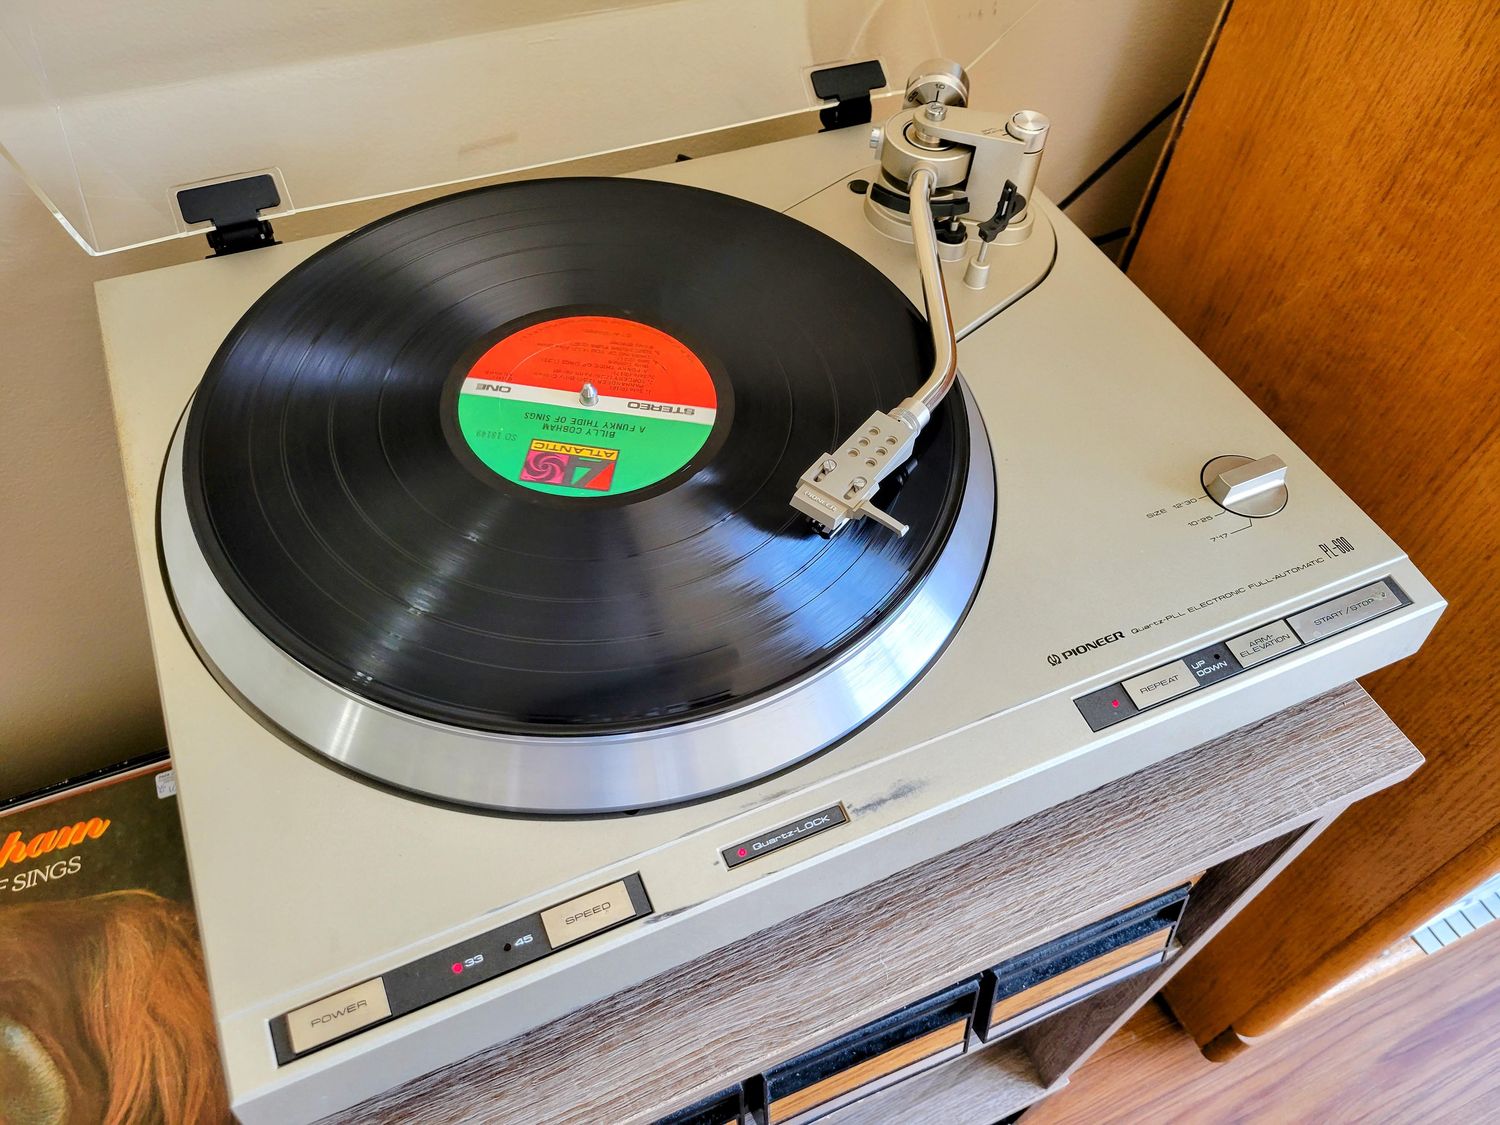
The turntable arm, also known as the tonearm, is a critical component of a turntable that carries the cartridge and stylus. It is responsible for accurately tracking the record grooves and converting the physical movements of the stylus into electrical signals that are amplified and played through speakers.
The main function of the turntable arm is to provide precise tracking and stability while ensuring the correct downward force and angle of the stylus on the record surface. The arm is typically balanced by a counterweight system, which allows for adjustable tracking force. The counterweight, situated at the back of the arm, can be moved forward or backward to achieve the desired tracking force.
Another crucial feature of the turntable arm is the anti-skate mechanism. This mechanism applies an inward force to counterbalance the outward force exerted by the stylus on the record. It helps maintain equal pressure on both groove walls, minimizing distortion and ensuring accurate playback.
When adjusting the turntable arm, it’s important to note that different cartridges and styluses may require slight variations in tracking force and anti-skate settings. Therefore, it is advisable to consult the manufacturer’s instructions or the cartridge’s user manual for specific guidelines.
Proper alignment of the turntable arm is also essential for optimal performance. There are various alignment methods, such as overhang, Stevenson, or Baerwald, each with its own set of instructions and alignment tools. Ensuring proper alignment allows for accurate tracking and reduces unnecessary wear on your records.
Now that we have a basic understanding of the turntable arm and its key components, let’s move on to the tools you will need to adjust the arm on a Crosley turntable.
Tools Needed for Adjusting the Turntable Arm
Before you begin adjusting the turntable arm on your Crosley turntable, it’s important to gather the necessary tools. Having the right tools will make the process easier and ensure that you can make precise adjustments. Here are the essential tools you will need:
- Allen wrench or screwdriver: Most Crosley turntables use either Allen screws or regular screws to secure the counterweight and arm adjustment mechanisms. Make sure you have the appropriate size Allen wrench or screwdriver to loosen and tighten these screws.
- Tracking force gauge: A tracking force gauge is used to measure the amount of downward force exerted by the stylus on the record. This tool allows you to adjust the vertical tracking force accurately. There are various types of tracking force gauges available, ranging from digital scales to mechanical gauges. Choose one that is suitable for your needs and budget.
- Anti-static brush: Keeping your records clean is crucial for optimal performance and longevity. An anti-static brush helps remove dust and debris from the record surface, ensuring smooth playback and minimizing the risk of damage to the stylus and records.
- Alignment protractor: If you plan to perform a thorough alignment of the turntable arm, an alignment protractor is essential. This tool helps you set the correct overhang and align the cartridge properly. There are many alignment protractors available, ranging from paper-based templates to precision-made acrylic protractors. Choose one that suits your level of expertise and preference.
- Tweezers: Tweezers can be handy when handling delicate components, such as the stylus and cartridge. They allow for precise adjustments and minimize the risk of accidentally damaging these sensitive parts.
By having these tools at your disposal, you will be well-prepared to adjust the turntable arm on your Crosley turntable and achieve optimal performance. Now that you have everything you need, let’s move on to the step-by-step process of adjusting the turntable arm.
Step 1: Removing the Platter
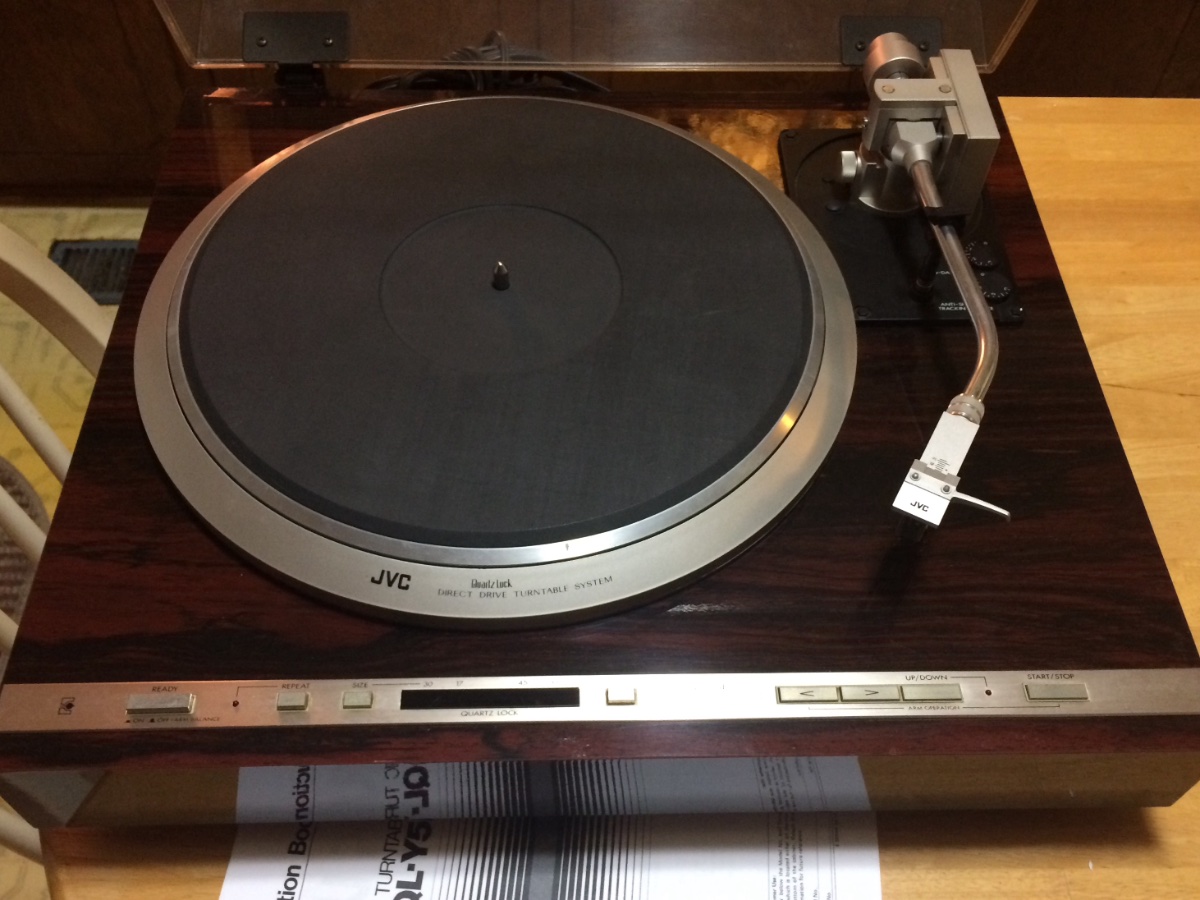
Before you can adjust the turntable arm on your Crosley turntable, you need to start by removing the platter. The platter is the rotating disc that holds your vinyl record in place while it spins. Here’s how you can remove the platter:
- Ensure that your turntable is powered off and the power cord is unplugged.
- Locate the center spindle of your turntable where the platter sits.
- Gently grip the edges of the platter with both hands.
- Apply an upward force while simultaneously rotating the platter counterclockwise. Most Crosley turntables have a non-threaded platter, meaning it can simply be lifted straight up.
- Once the platter is lifted, safely set it aside in a clean and secure location, away from any potential hazards.
By removing the platter, you gain access to the arm adjustment mechanism and other components necessary for adjusting the turntable arm. This includes the counterweight, anti-skate control, and alignment adjustment points.
Remember to handle the platter with care and avoid touching the record surface or the delicate stylus. Grease, dirt, or fingerprints can affect playback quality and potentially damage your records or stylus.
Now that the platter is safely removed, we can proceed to the next step of adjusting the turntable arm on your Crosley turntable.
Step 2: Accessing the Arm Adjustment Mechanism
Now that the platter has been removed from your Crosley turntable, you can access the arm adjustment mechanism. This mechanism allows you to make precise adjustments to the turntable arm, including vertical tracking force (VTF) and anti-skate settings. Here’s how you can access the arm adjustment mechanism:
- Locate the tonearm, which is the long, curved component that holds the cartridge and stylus.
- Inspect the base of the tonearm, near the pivot point. You should see various control points or dials for adjusting the arm.
- Identify the counterweight, which is typically situated at the rear end of the tonearm. This component helps balance the arm and allows for adjustable tracking force.
- Loosen the counterweight by turning it counterclockwise. The counterweight may have a locking mechanism that needs to be disengaged before it can be adjusted.
- Slide the counterweight along the tonearm shaft to adjust the tracking force. Moving the counterweight towards the pivot point increases the tracking force, while moving it away reduces the tracking force.
- Set the tracking force to the recommended value specified by the cartridge manufacturer. This value is typically given in grams.
- Once you have adjusted the tracking force, tighten the counterweight by turning it clockwise. Ensure it is securely fastened to prevent any accidental movement during playback.
By accessing the arm adjustment mechanism, you can manipulate the counterweight to set the desired tracking force for your Crosley turntable. This step is crucial for achieving accurate tracking and preventing issues like skipping or excessive wear on your records.
Now that you have adjusted the tracking force, the next step is to adjust the anti-skate mechanism to ensure optimal playback performance. Read on to learn how to adjust the anti-skate on your Crosley turntable.
Step 3: Adjusting the Vertical Tracking Force (VTF)
Once you have accessed the arm adjustment mechanism on your Crosley turntable, it’s time to adjust the vertical tracking force (VTF). The VTF refers to the amount of downward force exerted by the stylus on the record surface. Proper tracking force is crucial for accurate reproduction and longevity of your vinyl records. Here’s how you can adjust the VTF:
- Ensure that the counterweight is properly positioned on the tonearm and securely tightened.
- Retrieve your tracking force gauge, as you will need it to measure the VTF.
- Place the tracking force gauge on the platter where the record would normally sit.
- Lower the tonearm gently onto the tracking force gauge. Take care not to let the stylus touch the gauge directly, as it may damage the delicate stylus tip.
- Observe the reading on the tracking force gauge. It should indicate the amount of downward force exerted by the stylus in grams.
- If the reading is higher or lower than the recommended tracking force specified by the cartridge manufacturer, you will need to make adjustments.
- To increase the tracking force, rotate the counterweight clockwise. This moves the counterweight closer to the pivot point, resulting in more downward force.
- To decrease the tracking force, rotate the counterweight counterclockwise. This moves the counterweight away from the pivot point, reducing the downward force.
- Continue making small adjustments and retesting the tracking force until it matches the recommended value specified by the cartridge manufacturer.
- Once the correct tracking force is achieved, ensure that the counterweight is securely tightened to prevent any accidental movement during playback.
By adjusting the VTF, you ensure that the stylus applies the optimal amount of pressure on the record, allowing for accurate tracking and minimizing unnecessary wear. Proper tracking force also helps reduce skipping and distortion, providing a smooth and enjoyable listening experience with your Crosley turntable.
With the VTF adjusted, it’s now time to move on to the next step: adjusting the anti-skate mechanism.
Step 4: Adjusting the Anti-Skate
Adjusting the anti-skate mechanism on your Crosley turntable is an important step to ensure accurate and balanced playback. The anti-skate mechanism counteracts the inward force applied by the stylus on the record, helping to maintain equal pressure on both groove walls. This step is crucial for reducing distortion and ensuring optimal performance. Here’s how you can adjust the anti-skate:
- Locate the anti-skate control on your turntable. It is typically a small dial or knob near the tonearm’s base or on the side of the turntable.
- Ensure that the anti-skate control is set to the neutral position, typically marked as “0” or “N”. This position indicates that no additional force is being applied to the tonearm.
- Play a record and observe its performance. Pay attention to any issues such as the stylus skipping, mistracking, or excessive distortion during playback.
- If you notice any of the aforementioned issues, it’s an indication that the anti-skate needs adjustment.
- To increase the anti-skate force, gradually turn the anti-skate control to a higher value, typically marked with a plus sign (+). This applies more outward force to counterbalance the inward force of the stylus.
- To decrease the anti-skate force, gradually turn the anti-skate control to a lower value, typically marked with a minus sign (-). This reduces the outward force exerted by the anti-skate mechanism.
- Make incremental adjustments to the anti-skate control and test the playback performance after each adjustment. The goal is to find the setting that provides smooth and distortion-free playback.
- Take note that optimal anti-skate settings may vary depending on the cartridge and stylus you are using. It’s beneficial to consult the manufacturer’s instructions or the cartridge’s user manual for any specific recommendations.
- Once you have found the optimal anti-skate setting, ensure that the control is tightened to prevent unintended adjustments during playback.
Properly adjusting the anti-skate mechanism on your Crosley turntable helps maintain optimal balance and tracking, reducing distortion and ensuring accurate reproduction of your vinyl records. With the anti-skate adjusted, you can move on to the next step: ensuring proper alignment.
Step 5: Ensuring Proper Alignment
Aligning the turntable arm on your Crosley turntable is crucial for optimal tracking and audio performance. Proper alignment ensures that the stylus accurately traces the record grooves, minimizing distortion and wear on your vinyl. Here’s how you can ensure proper alignment:
- Start by assessing the alignment method recommended for your turntable and cartridge. There are various alignment methods available, such as overhang, Stevenson, or Baerwald. Consult the manufacturer’s instructions or the cartridge’s user manual for specific guidelines.
- Obtain an alignment protractor suitable for your alignment method. There are different types available, ranging from paper-based templates to precision-made acrylic protractors. Choose one that aligns with your preferred method and provides accurate alignment measurements.
- Place the alignment protractor on the turntable platter, ensuring it is centered and level.
- Lower the tonearm onto the protractor, aligning the stylus tip with the prescribed alignment points on the protractor.
- Observe the alignment of the cartridge body, ensuring it matches the designated points or gridlines on the protractor. Adjust the cartridge position if necessary, using the provided mounting screws or other adjustment mechanisms.
- Repeat the alignment process a few times from different angles to confirm accurate alignment. Fine-tune the cartridge position as needed to achieve optimal alignment.
- Once the alignment is satisfactory, lock the cartridge in place using the mounting screws or other mechanisms provided.
Proper alignment of your turntable arm ensures that the stylus maintains an optimal angle and position within the record grooves, reducing tracking errors and improving audio fidelity. It is worth noting that alignment methods can vary, and some may require additional adjustments, such as azimuth or vertical tracking angle (VTA). Be sure to refer to the manufacturer’s instructions or seek expert advice for advanced alignment techniques.
With the turntable arm properly aligned, you have completed a crucial step in achieving optimal playback performance on your Crosley turntable. Now, let’s move on to the final step: reassembling the turntable.
Step 6: Reassembling the Turntable
After adjusting the turntable arm on your Crosley turntable, it’s time to reassemble all the components and get ready to enjoy your vinyl records. Reassembling the turntable is a straightforward process that ensures everything is securely in place for optimal performance. Here’s how you can reassemble your turntable:
- Retrieve the platter that was set aside earlier.
- Ensure that the spindle on the turntable base is clean and free from any debris.
- Align the platter’s center hole with the spindle, and lower it onto the turntable base.
- Gently rotate the platter clockwise to ensure it sits securely on the spindle.
- If your turntable has a belt-drive mechanism, reattach the drive belt to the motor pulley and the platter. Refer to the manufacturer’s instructions for specific guidelines on belt placement.
- Make sure all the connections are secure and all cables are properly connected.
- Check that the power cord is plugged into a grounded electrical outlet.
- Turn on the power to your Crosley turntable.
- Test the operation of the turntable by playing a record. Ensure that the tonearm glides smoothly across the record surface and that the audio is clear and balanced.
- If any issues arise during playback, double-check all the adjustments made to the turntable arm and consult the manufacturer’s instructions or seek professional guidance if needed.
Once you have reassembled your turntable and confirmed its proper operation, you are ready to enjoy your vinyl records with improved sound quality and precision. Regularly check and maintain the adjustment settings, as they may need periodic readjustments over time.
Proper maintenance, including cleaning your records, stylus care, and occasional re-adjustment of the turntable arm, will ensure long-lasting performance and enjoyment from your Crosley turntable.
Congratulations on successfully adjusting and reassembling your turntable! Now sit back, relax, and indulge in the rich, nostalgic sound of your vinyl collection.
Conclusion
Adjusting the turntable arm on your Crosley turntable is a crucial step in achieving optimal audio performance and preserving the quality of your vinyl records. By following the step-by-step process outlined in this guide, you have learned how to properly adjust the vertical tracking force, anti-skate, and alignment of your turntable arm.
Remember, a properly adjusted turntable arm ensures precise tracking, reduces distortion, and minimizes wear on your records and stylus. It also enhances the overall listening experience, allowing you to fully enjoy the warm and nostalgic sound that vinyl records offer.
Throughout the adjustment process, it’s important to have the necessary tools at hand, such as Allen wrenches or screwdrivers, a tracking force gauge, an anti-static brush, an alignment protractor, and tweezers. These tools enable you to make accurate adjustments and maintain your turntable’s performance.
Once you have completed the adjustments, reassembling the turntable ensures that all the components are securely in place, ready for your next listening session. Regular maintenance and periodic re-adjustments will help maintain the optimal performance of your Crosley turntable over time.
Now that you have acquired the knowledge and skills to adjust the turntable arm on your Crosley turntable, you can confidently fine-tune your setup to suit your preferences and enjoy the best possible sound quality from your vinyl collection.
So go ahead, spin some records, immerse yourself in the nostalgic vibes, and let the music transport you to a bygone era of pure analog bliss!