Home>Devices & Equipment>Turntable>How To Set Up Crosley C6 Turntable

Turntable
How To Set Up Crosley C6 Turntable
Modified: January 22, 2024
Learn how to set up the Crosley C6 Turntable and enjoy crisp sound quality. Discover the perfect setup for your new turntable and start spinning your favorite records today.
(Many of the links in this article redirect to a specific reviewed product. Your purchase of these products through affiliate links helps to generate commission for AudioLover.com, at no extra cost. Learn more)
Table of Contents
- Introduction
- Step 1: Unboxing and Parts Overview
- Step 2: Placing the Turntable
- Step 3: Connecting the Power and Audio Cables
- Step 4: Adjusting the Tonearm and Cartridge
- Step 5: Balancing the Tonearm and Setting Tracking Force
- Step 6: Installing the Belt and Platter
- Step 7: Selecting the Speed and Starting the Turntable
- Step 8: Setting up the Anti-Skate and Cueing Lever
- Step 9: Connecting External Audio Devices
- Step 10: Troubleshooting and Maintenance Tips
- Conclusion
Introduction
Welcome to the world of vinyl records and turntables! If you’re a music lover who appreciates the warm and authentic sound of vinyl, then you’re in for a treat. Turntables have made a resurgence in recent years, allowing music enthusiasts to rediscover the joy of spinning records and immersing themselves in the nostalgic experience.
In this article, we will guide you through the process of setting up the Crosley C6 turntable. The Crosley C6 is a great entry-level turntable that offers both quality sound and stylish design. Whether you’re a vinyl newbie or a seasoned collector, this guide will help you get your Crosley C6 up and running in no time.
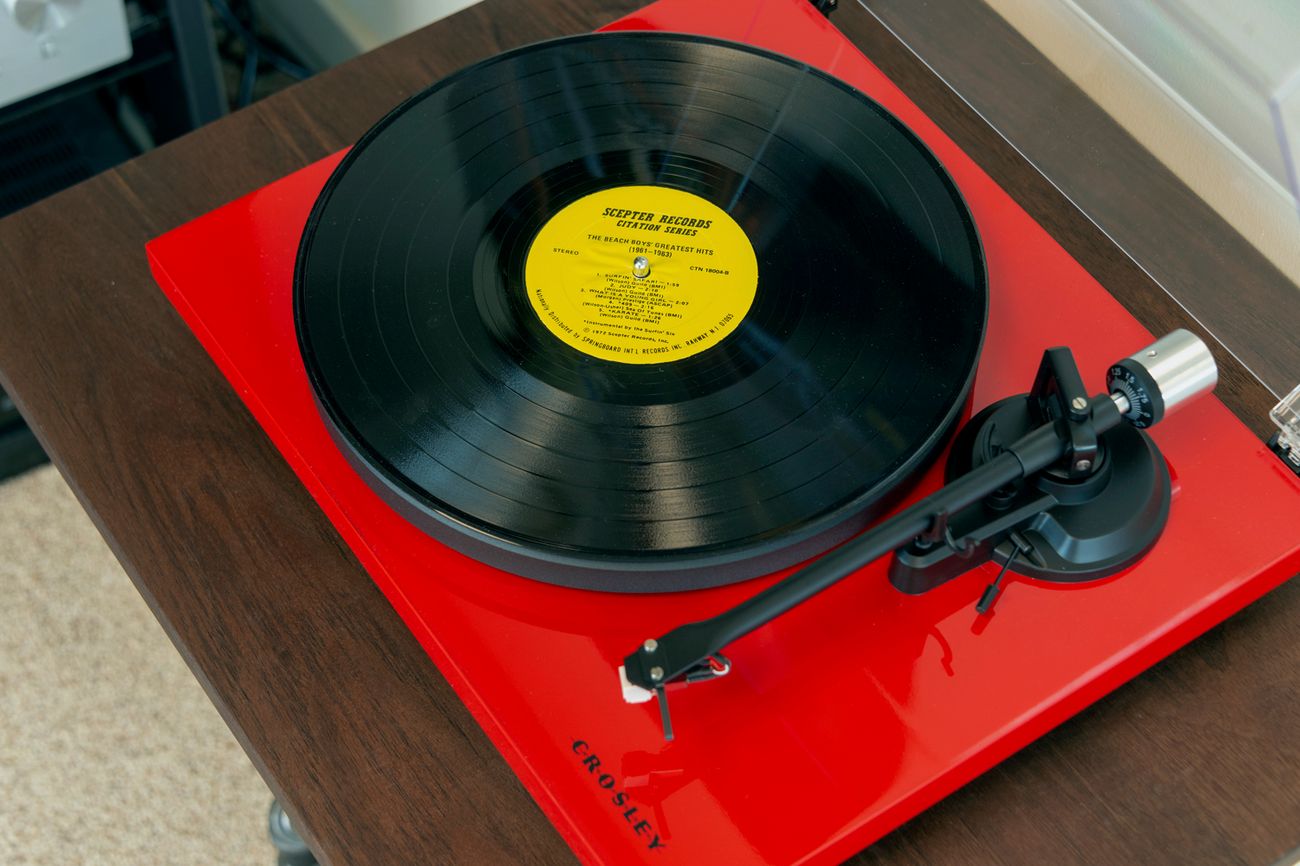
Before we dive into the setup process, let’s take a moment to understand the various components of the Crosley C6 turntable. The turntable consists of the following main parts:
- Plinth: The base of the turntable that holds all the components.
- Platter: The rotating part of the turntable where the record sits.
- Tonearm: The arm that holds the cartridge and stylus and enables the needle to track the grooves of the record.
- Cartridge: The component that converts the mechanical energy from the stylus into an electrical signal.
- Stylus: The needle that physically contacts the grooves of the record.
- Motor: The mechanism that drives the rotation of the platter at the desired speed.
- Controls: Various buttons and switches to control features like speed selection, power, and tonearm movement.
- Connectivity: Inputs and outputs for connecting the turntable to external audio devices.
Now that we have a basic understanding of the different parts of the Crosley C6, let’s move on to the step-by-step setup process. In the next section, we’ll guide you through unboxing and giving you an overview of the parts included with the turntable.
Step 1: Unboxing and Parts Overview
Before you can start setting up your Crosley C6 turntable, you’ll need to unbox it and familiarize yourself with the various parts included. Here’s a step-by-step guide to help you with the process:
- Find a suitable space: Choose a location in your home where you plan to set up your turntable. Make sure there’s enough space for the turntable itself, as well as any additional audio equipment you might want to connect to it.
- Unbox the turntable: Carefully remove the Crosley C6 turntable from its packaging, taking care not to damage any of the components.
- Check the contents: Inside the box, you should find the main turntable unit, the platter, the tonearm, the cartridge, the power adapter, and any additional accessories that come with the turntable. Double-check the contents to ensure that everything is included.
- Inspect for damage: Take a moment to inspect each component for any signs of damage or manufacturing defects. If you notice anything that doesn’t look right, contact the manufacturer or retailer for assistance.
- Read the manual: While it may be tempting to dive right into the setup process, it’s always a good idea to read the instruction manual provided by Crosley. The manual will provide you with detailed information on how to properly set up and operate your C6 turntable.
By following these steps, you’ll be well-prepared to start setting up your Crosley C6 turntable. In the next section, we’ll walk you through the process of placing the turntable in your chosen location.
Step 2: Placing the Turntable
Now that you’ve unboxed your Crosley C6 turntable and familiarized yourself with the various parts, it’s time to find the perfect spot to place your turntable. The placement of your turntable is crucial for optimal performance and enjoyment. Here are some important considerations to keep in mind:
- Stable surface: Find a flat and sturdy surface to place your turntable. It should be able to support the weight of the turntable and minimize any vibrations that could affect playback quality.
- Avoid direct sunlight: Place your turntable away from direct sunlight or any other heat sources. Excessive heat can warp your vinyl records and damage the turntable components.
- Reduce vibrations: Choose a location away from speakers or any other equipment that could cause vibrations. Vibrations can interfere with the turntable’s performance and affect sound quality.
- Dust and debris: Keep in mind that dust and debris can negatively impact the performance of your turntable. Try to choose a location that is relatively dust-free, or consider using a dust cover to protect your turntable.
- Adequate space: Make sure you have enough space around the turntable to comfortably access the controls and adjust the tonearm. You should also consider leaving some room for any additional equipment or accessories you plan to connect to the turntable.
Once you’ve identified the ideal location, go ahead and place your Crosley C6 turntable on the chosen surface. Ensure that it is level and stable. If the surface is uneven, you can use a leveling tool to make necessary adjustments.
By taking these considerations into account and placing your turntable in an optimal location, you’ll set the stage for an enjoyable listening experience. In the next section, we’ll guide you through the process of connecting the power and audio cables.
Step 3: Connecting the Power and Audio Cables
With your Crosley C6 turntable securely placed in its desired location, it’s time to connect the necessary cables to power it up and enable audio playback. Follow these steps to connect the power and audio cables:
- Power cable: Locate the power input on the back of the turntable. Take the power adapter provided with your Crosley C6 and plug it into the power input. Connect the other end of the power adapter to a power outlet. Ensure that the power outlet is easily accessible and turned on.
- Audio cables: Depending on your setup preference, the Crosley C6 offers two types of audio output connections – a built-in preamp with RCA output and a USB output for digital recording. Choose the appropriate cables for your setup needs.
- RCA output: If you plan to connect your turntable to an external amplifier or audio system with RCA inputs, take the included RCA cables and connect them to the RCA output jacks on the back of the turntable. Connect the other end of the RCA cables to the corresponding inputs on your amplifier or audio system.
- USB output: If you want to digitize your vinyl records or connect your turntable to a computer, use the included USB cable. Connect one end of the USB cable to the USB output on the back of the turntable and the other end to an available USB port on your computer.
- Grounding wire: Some turntables, including the Crosley C6, may have a grounding wire to minimize any unwanted noise or hum. If your turntable has a grounding wire, connect it to the grounding terminal on your amplifier or audio system. This step may not be necessary if your audio system does not require grounding.
Once you’ve completed these steps, your Crosley C6 turntable should be properly connected to both power and audio devices. Before moving on to the next step, make sure all cables are securely connected and positioned neatly to avoid any interference or accidental disconnection.
In the next section, we’ll discuss the process of adjusting the tonearm and cartridge for optimal playback.
Step 4: Adjusting the Tonearm and Cartridge
Now that your Crosley C6 turntable is powered up and connected, it’s time to properly adjust the tonearm and cartridge. The tonearm is responsible for holding the cartridge, which houses the stylus that tracks the grooves on your vinyl records. Here’s how you can adjust the tonearm and cartridge:
- Lower the tonearm: Gently lift the cueing lever to raise the tonearm. Carefully guide the tonearm over to the resting position above the platter. Slowly and gently lower the tonearm onto the platter without touching the stylus to the record.
- Vertical tracking angle (VTA): The vertical tracking angle is the angle at which the stylus interacts with the grooves on the record. Adjust the VTA by using the VTA adjustment mechanism, if available on your turntable model, to achieve the optimal angle for playback. Refer to your user manual for specific instructions on adjusting the VTA if necessary.
- Antiskate adjustment: The antiskate function helps keep the tonearm balanced and prevents it from drifting towards the center or outer edge of the record. If your turntable has an antiskate adjustment, set it to the same value as the tracking force (we’ll cover setting the tracking force in the next step) or follow the manufacturer’s recommendations.
- Cartridge alignment: Proper cartridge alignment is crucial for accurate tracking and optimal sound quality. Refer to your user manual for specific instructions on aligning the cartridge using alignment tools, such as a protractor or alignment gauge, if they are included with your turntable.
- Vertical tracking force (VTF): The vertical tracking force refers to the amount of pressure exerted by the stylus on the record’s grooves. Use the counterweight located at the rear of the tonearm to adjust the tracking force. Follow the manufacturer’s recommendations for the recommended tracking force for the cartridge you are using. Set the tracking force by rotating the counterweight until the tonearm is balanced and floats horizontally, parallel to the platter.
By carefully adjusting the tonearm and cartridge, you’ll ensure that the stylus tracks the grooves on your vinyl records with precision and accuracy. This will result in optimal sound quality and help prolong the lifespan of your records.
In the next step, we’ll guide you through installing the belt and platter. Stay tuned!
Step 5: Balancing the Tonearm and Setting Tracking Force
Now that you have adjusted the tonearm and cartridge alignment in the previous step, it’s time to balance the tonearm and set the tracking force. Balancing the tonearm ensures that it floats freely and is not exerting excessive pressure on the stylus, while setting the tracking force ensures proper playback without damaging your records. Follow these steps to balance the tonearm and set the tracking force:
- Ensure the turntable is powered on and the platter is spinning.
- Remove the stylus guard, if applicable, to expose the stylus.
- Locate the counterweight at the rear of the tonearm. It should have markings indicating the tracking force.
- Rotate the counterweight until the tonearm is balanced and floats parallel to the platter. It should neither be pressing down on the record nor floating above it.
- Refer to the user manual or manufacturer’s instructions to determine the recommended tracking force for your specific cartridge.
- Adjust the counterweight by rotating it to the recommended tracking force. You may need to turn it clockwise or counterclockwise to increase or decrease the tracking force.
- Once set, make sure the tonearm is still in balance and floating parallel to the platter.
By properly balancing the tonearm and setting the correct tracking force, you will ensure that the stylus maintains proper contact with the record’s grooves for accurate playback. It will also help prevent excessive wear, reduce record damage, and prolong the lifespan of your vinyl collection.
In the next step, we’ll guide you through installing the belt and platter. Stay tuned!
Step 6: Installing the Belt and Platter
Now that you have balanced the tonearm and set the tracking force, it’s time to install the belt and platter onto your Crosley C6 turntable. The belt connects the motor to the platter, allowing it to spin and play your vinyl records. Follow these steps to install the belt and platter:
- Locate the belt and ensure it is free from any twists or tangles.
- Turn the platter upside down and locate the motor spindle and the sub-platter.
- With clean hands, carefully stretch the belt around the motor spindle.
- While holding the belt in place on the motor spindle, flip the platter back to its original position.
- Ensure that the belt is properly seated on the sub-platter, which is typically a metal or plastic rim on the underside of the platter.
- Gently rotate the platter to confirm that the belt is properly attached and smoothly turning the sub-platter.
- Once confirmed, place the platter with the attached belt back onto the turntable, aligning it with the spindle in the center.
Make sure the belt is securely attached and properly aligned on both the motor spindle and sub-platter. Improper installation of the belt can result in playback issues and may affect the overall performance of your turntable.
With the belt and platter successfully installed, your Crosley C6 turntable is almost ready for action. In the next section, we’ll guide you through the process of selecting the speed and starting the turntable.
Step 7: Selecting the Speed and Starting the Turntable
Now that you have installed the belt and platter on your Crosley C6 turntable, it’s time to select the speed and start playing your vinyl records. Most turntables, including the C6, offer multiple speed options to accommodate different record formats. Follow these steps to select the speed and start the turntable:
- Locate the speed selector switch or dial on your turntable. The Crosley C6 typically offers 33 1/3, 45, and sometimes even 78 RPM (revolutions per minute) options.
- Refer to the label on the record you want to play to determine the correct speed. Most full-length albums are played at 33 1/3 RPM, while singles and EPs often require 45 RPM. 78 RPM is used for older, shellac records.
- Set the speed selector switch or dial to the appropriate speed for your record.
- Turn on the turntable’s power switch, if it is not already on.
- Gently press the start button or lever to initiate the rotation of the platter. The platter should begin spinning at the selected speed.
- With the record in hand, carefully place it onto the platter, making sure it is properly centered. Be cautious not to touch the stylus or apply any pressure on it during this process.
- If your turntable has an automatic play function, it will take over from here and gently lower the tonearm onto the record. If not, proceed to the next step.
- Gently lower the tonearm onto the record using the cueing lever. Ensure that the stylus makes contact with the outer edge of the record’s lead-in groove.
With the correct speed selected and the turntable spinning, you’re now ready to enjoy your favorite vinyl records on your Crosley C6 turntable. Sit back, relax, and let the music transport you to a bygone era.
In the next step, we’ll discuss setting up the anti-skate and cueing lever for precise tracking and cueing control. Keep reading!
Step 8: Setting up the Anti-Skate and Cueing Lever
As you continue to fine-tune your Crosley C6 turntable setup, it’s important to properly configure the anti-skate and cueing lever functions. The anti-skate adjustment helps maintain proper tracking on the record’s grooves, while the cueing lever allows for precise control when lowering and raising the tonearm. Follow these steps to set up the anti-skate and cueing lever:
- Locate the anti-skate control on your turntable. It is usually a dial or knob found near the tonearm base.
- Refer to the manufacturer’s instructions or user manual to determine the recommended anti-skate setting for your Crosley C6 turntable. This recommendation is typically based on the tracking force you’ve set previously.
- Adjust the anti-skate control to match the recommended setting. This will help counterbalance any inward or outward force exerted on the tonearm, ensuring proper tracking and minimizing distortion.
- Next, focus on the cueing lever, which allows you to raise and lower the tonearm with precision.
- Gently raise the cueing lever to lift the tonearm from the resting position.
- Hold the cueing lever steady while positioning the tonearm, aligning the stylus directly over the desired location on the record.
- To lower the tonearm, gently release the cueing lever, allowing the tonearm and stylus to descend smoothly onto the record’s surface.
- When you’re finished listening or switching records, use the cueing lever to lift the tonearm and return it to the resting position.
Properly setting up the anti-skate and cueing lever functions will enhance your overall listening experience by ensuring accurate tracking, lower distortion, and gentle, precise control over the tonearm movement. Take your time to find the right settings and get comfortable with operating these controls.
In the next step, we’ll discuss connecting external audio devices to your Crosley C6 turntable. Stay tuned!
Step 9: Connecting External Audio Devices
While the Crosley C6 turntable is capable of standalone operation, you may want to connect it to external audio devices for a more enhanced listening experience. Whether you want to amplify the sound, enjoy your records through headphones, or digitize your vinyl collection, here’s how to connect your Crosley C6 to external audio devices:
- Amplifier or Receiver: If you want to connect your turntable to an amplifier or receiver to amplify the sound, locate the RCA outputs on the back of the turntable. Take a pair of RCA cables and connect them to the RCA outputs. Connect the other ends of the RCA cables to the RCA inputs on your amplifier or receiver. Make sure to use the corresponding left and right channels.
- Powered Speakers: If you prefer using powered speakers, locate the RCA outputs on the back of the turntable. Similar to the previous step, connect a pair of RCA cables to the RCA outputs on the turntable. Connect the other ends of the RCA cables to the RCA inputs on your powered speakers.
- Headphones: If you want to listen to your records privately, some turntables, including the Crosley C6, offer a headphone output. Simply connect a pair of headphones to the headphone output jack on the turntable, and you’re ready to enjoy your vinyls without disturbing others around you.
- Computer: If you wish to digitize your vinyl records, the Crosley C6 offers a USB output that allows you to connect it directly to your computer. Use a USB cable to connect the USB output on the turntable to an available USB port on your computer. Follow the manufacturer’s instructions or use appropriate software to capture and record your vinyl audio.
By connecting your Crosley C6 turntable to external audio devices, you can create a customized listening experience tailored to your preferences. Whether you prefer a classic stereo setup, powered speakers, headphones, or digital recording, exploring these options opens up new possibilities for enjoying your vinyl collection.
In the final step, we’ll provide some troubleshooting and maintenance tips to help you keep your Crosley C6 turntable in top-notch condition. Keep reading!
Step 10: Troubleshooting and Maintenance Tips
To ensure optimal performance and longevity of your Crosley C6 turntable, it’s essential to be aware of some troubleshooting and maintenance tips. By following these guidelines, you can address common issues and keep your turntable in top-notch condition:
- Reduce vibrations: If you notice excessive vibrations or skipping during playback, make sure your turntable is placed on a stable surface. Consider using an isolation platform or turntable mat to further reduce vibrations and improve sound quality.
- Clean the stylus: Over time, dust and debris can accumulate on the stylus, affecting sound quality and potentially damaging your records. Use a soft brush or stylus cleaning brush to gently remove any dust particles or debris.
- Keep records clean: Regularly clean your vinyl records to prevent dust and dirt buildup. Use a record brush or a record cleaning solution and a soft cloth to gently remove any dust or fingerprints before playing your records.
- Check connections: If you experience audio issues or no sound at all, double-check all your cable connections. Ensure that the RCA cables are securely plugged into the correct ports on both the turntable and the connected device.
- Adjust the tracking force: If you notice distortion or skipping during playback, it might indicate an incorrect tracking force. Revisit Step 5 and ensure that the tracking force is properly set according to the manufacturer’s recommendations for your specific cartridge.
- Regular belt inspection: Periodically check the condition of the turntable belt. Over time, belts can stretch or wear out, affecting the speed and performance of your turntable. Consult your user manual or manufacturer for instructions on replacing the belt if necessary.
- Protect from dust: Use a dust cover or a record sleeve to protect your turntable from dust and debris when not in use. This helps maintain optimal performance and extends the lifespan of your turntable components.
- Store records properly: When not playing your records, store them upright in a cool and dry environment to prevent warping or damage. Avoid exposing them to direct sunlight or extreme temperature fluctuations.
- Regular maintenance: Follow the manufacturer’s recommended maintenance schedule for your turntable. This may include lubricating moving parts, cleaning internal components, or replacing wear items as needed.
- Consult the user manual: If you encounter any issues or have specific questions about your Crosley C6 turntable, always refer to the user manual or contact the manufacturer for assistance. They are your best resource for troubleshooting and guidance.
By implementing these troubleshooting and maintenance tips, you can ensure that your Crosley C6 turntable delivers optimal audio performance and continues to bring you joy as you listen to your vinyl collection for years to come.
Congratulations! You’ve completed all the steps to set up and maintain your Crosley C6 turntable. Now, sit back, relax, and enjoy the magical experience of vinyl records!
If you have any further questions or need additional assistance, feel free to reach out to the manufacturer or consult the user manual for comprehensive support.
Happy listening!
Conclusion
Congratulations on setting up your Crosley C6 turntable! You’ve taken the first step into the wonderful world of vinyl records and enjoyed the immersive experience they offer. By following the steps outlined in this guide, you’ve ensured that your Crosley C6 is properly set up, balanced, and ready to deliver high-quality sound.
Remember, the Crosley C6 turntable provides a perfect balance of performance and style, allowing you to enjoy your vinyl collection with ease. From unboxing to connecting external audio devices, adjusting the tonearm and cartridge, and troubleshooting any issues, this guide has walked you through each step of the setup process.
As you embark on your vinyl journey, take the time to explore and discover the richness and warmth that vinyl records bring to your music listening experience. Experiment with different genres, artists, and sounds, and let the vinyl experience transport you into a world of nostalgia and sonic bliss.
Don’t forget to maintain and care for your turntable. Regular cleaning, proper storage, and periodic maintenance will ensure the longevity and superior performance of your Crosley C6 turntable.
Whether you’re enjoying it alone, sharing it with friends, or using it as a centerpiece for entertaining, your Crosley C6 turntable will bring endless joy and create lasting memories.
Now, sit back, relax, and let the sound of vinyl fill your space. Cheers to many hours of listening pleasure with your Crosley C6 turntable!

