Home>Devices & Equipment>Turntable>How Do I Setup A Turntable

Turntable
How Do I Setup A Turntable
Modified: January 22, 2024
Looking to set up a turntable? Find step-by-step instructions and expert tips on how to properly set up a turntable for optimal sound quality and performance.
(Many of the links in this article redirect to a specific reviewed product. Your purchase of these products through affiliate links helps to generate commission for AudioLover.com, at no extra cost. Learn more)
Table of Contents
- Introduction
- Step 1: Gather the Necessary Equipment
- Step 2: Choose a Suitable Location
- Step 3: Set Up the Turntable Plinth and Feet
- Step 4: Attach the Tonearm and Cartridge
- Step 5: Connect the Turntable to an Amplifier or Receiver
- Step 6: Ground the Turntable (if necessary)
- Step 7: Balance the Tonearm
- Step 8: Install the Belt (for belt-driven turntables)
- Step 9: Set Tracking Force and Antiskate
- Step 10: Adjust Platter Speed (for manual turntables)
- Conclusion
Introduction
Welcome to the world of turntables – the classic and timeless way to enjoy your favorite music. Whether you’re a vinyl enthusiast or a newcomer to the world of analog sound, setting up a turntable can be an exciting and rewarding experience.
In this article, we will guide you through the process of setting up a turntable step by step, ensuring that you have the knowledge and confidence to enjoy your vinyl collection to the fullest.
A turntable is not just a piece of audio equipment; it’s a gateway to a different era of music appreciation. The warm, rich sound produced by vinyl records adds depth and character to your listening experience, taking you back to a time when music was an art form that required patience and care.
Before we dive into the setup process, it’s important to note that turntables can vary in design and functionality. While the basic setup steps are similar, make sure to consult your turntable’s user manual for specific instructions tailored to your model.
Now, let’s get started on our journey to setting up a turntable. By the end, you’ll be ready to indulge in the nostalgia and magic of vinyl.
Step 1: Gather the Necessary Equipment
Before you begin setting up your turntable, it’s essential to gather all the necessary equipment. Here’s a list of items you’ll need:
- Turntable: Choose a turntable that suits your budget and preferences. Consider factors such as drive type (belt-driven or direct-drive), features, and build quality.
- Phono Cartridge: This is the component that reads the grooves on your vinyl records. There are various types available, such as moving magnet (MM) or moving coil (MC) cartridges. Make sure it is compatible with your turntable.
- Tonearm: The tonearm holds the cartridge and allows it to track across the record. It should be properly aligned and adjustable for optimal performance.
- Platter: The platter is the rotating platform where you place your records. It should be level, sturdy, and free from any vibrations.
- Amplifier or Receiver: You’ll need an amplifier or receiver to power the audio signal from the turntable. Ensure that it has a dedicated “phono” input or a built-in phono preamp if your turntable doesn’t have one.
- Speakers: Choose speakers that complement your listening space and provide high-quality sound reproduction. Consider factors such as size, placement, and power output.
- Cables: You’ll need RCA cables to connect the turntable to the amplifier or receiver. Make sure they are of good quality to minimize signal loss.
- Level: A small bubble level can help you ensure that your turntable and platter are level for optimal performance.
Once you have gathered all the necessary equipment, you’re ready to move on to the next step: choosing a suitable location for your turntable.
Step 2: Choose a Suitable Location
Choosing the right location for your turntable is crucial for ensuring optimal sound quality and performance. Here are some factors to consider when selecting a suitable spot:
- Stability: Place your turntable on a stable and level surface. Avoid placing it on top of speakers or near vibrating objects that could affect the performance.
- Vibrations: Keep your turntable away from sources of vibrations such as heavy foot traffic areas or appliances that produce vibrations like washing machines or air conditioners. These vibrations can interfere with the playback and affect the sound quality.
- Isolation: If possible, place your turntable on a shelf or stand that provides isolation from vibrations. Alternatively, you can use vibration isolation devices or platforms to minimize any external disturbances.
- Accessibility: Ensure that the location allows easy access to the turntable’s controls and connections. This will make it convenient for you to change records, adjust settings, and perform maintenance tasks.
- Distance from Speakers: Keep your turntable at a reasonable distance from your speakers to prevent any acoustic interference. This will minimize the chance of feedback or other audio issues.
- Avoid Direct Sunlight: Protect your turntable from direct sunlight as it can cause damage to the components and affect the performance. Choose a spot that is away from windows or install window blinds or curtains to block out excessive sunlight.
By considering these factors, you can create an ideal environment for your turntable, allowing it to deliver the best possible sound quality and performance.
Once you have selected the perfect location, it’s time to move on to the next step: setting up the turntable plinth and feet.
Step 3: Set Up the Turntable Plinth and Feet
The turntable’s plinth and feet play a crucial role in providing stability and isolation from external vibrations. Follow these steps to properly set up the plinth and feet:
- Unbox and Inspect: Carefully unbox your turntable and inspect it for any visible damage. Ensure that all parts and accessories are included.
- Assemble the Plinth: If your turntable’s plinth comes disassembled, follow the manufacturer’s instructions to put it together. Make sure all screws or fasteners are tightened securely.
- Attach the Feet: Install the turntable feet to the bottom of the plinth. These feet help to isolate the turntable from vibrations in the surrounding environment. Tighten them securely, but be careful not to overtighten.
- Level the Turntable: Use a small bubble level to ensure that your turntable is level. Adjust the feet if necessary to achieve perfect balance. A level turntable helps maintain smooth playback and proper tracking of the tonearm.
- Isolate from Vibrations: If your turntable is placed on a surface that could transmit vibrations, consider using isolation pads or a dedicated isolation platform to further minimize any potential disruptions.
Properly setting up the turntable plinth and feet ensures stability and isolation, allowing your turntable to perform optimally and provide a smooth and uninterrupted listening experience.
Once you have completed the plinth and feet setup, it’s time to move on to the next step: attaching the tonearm and cartridge.
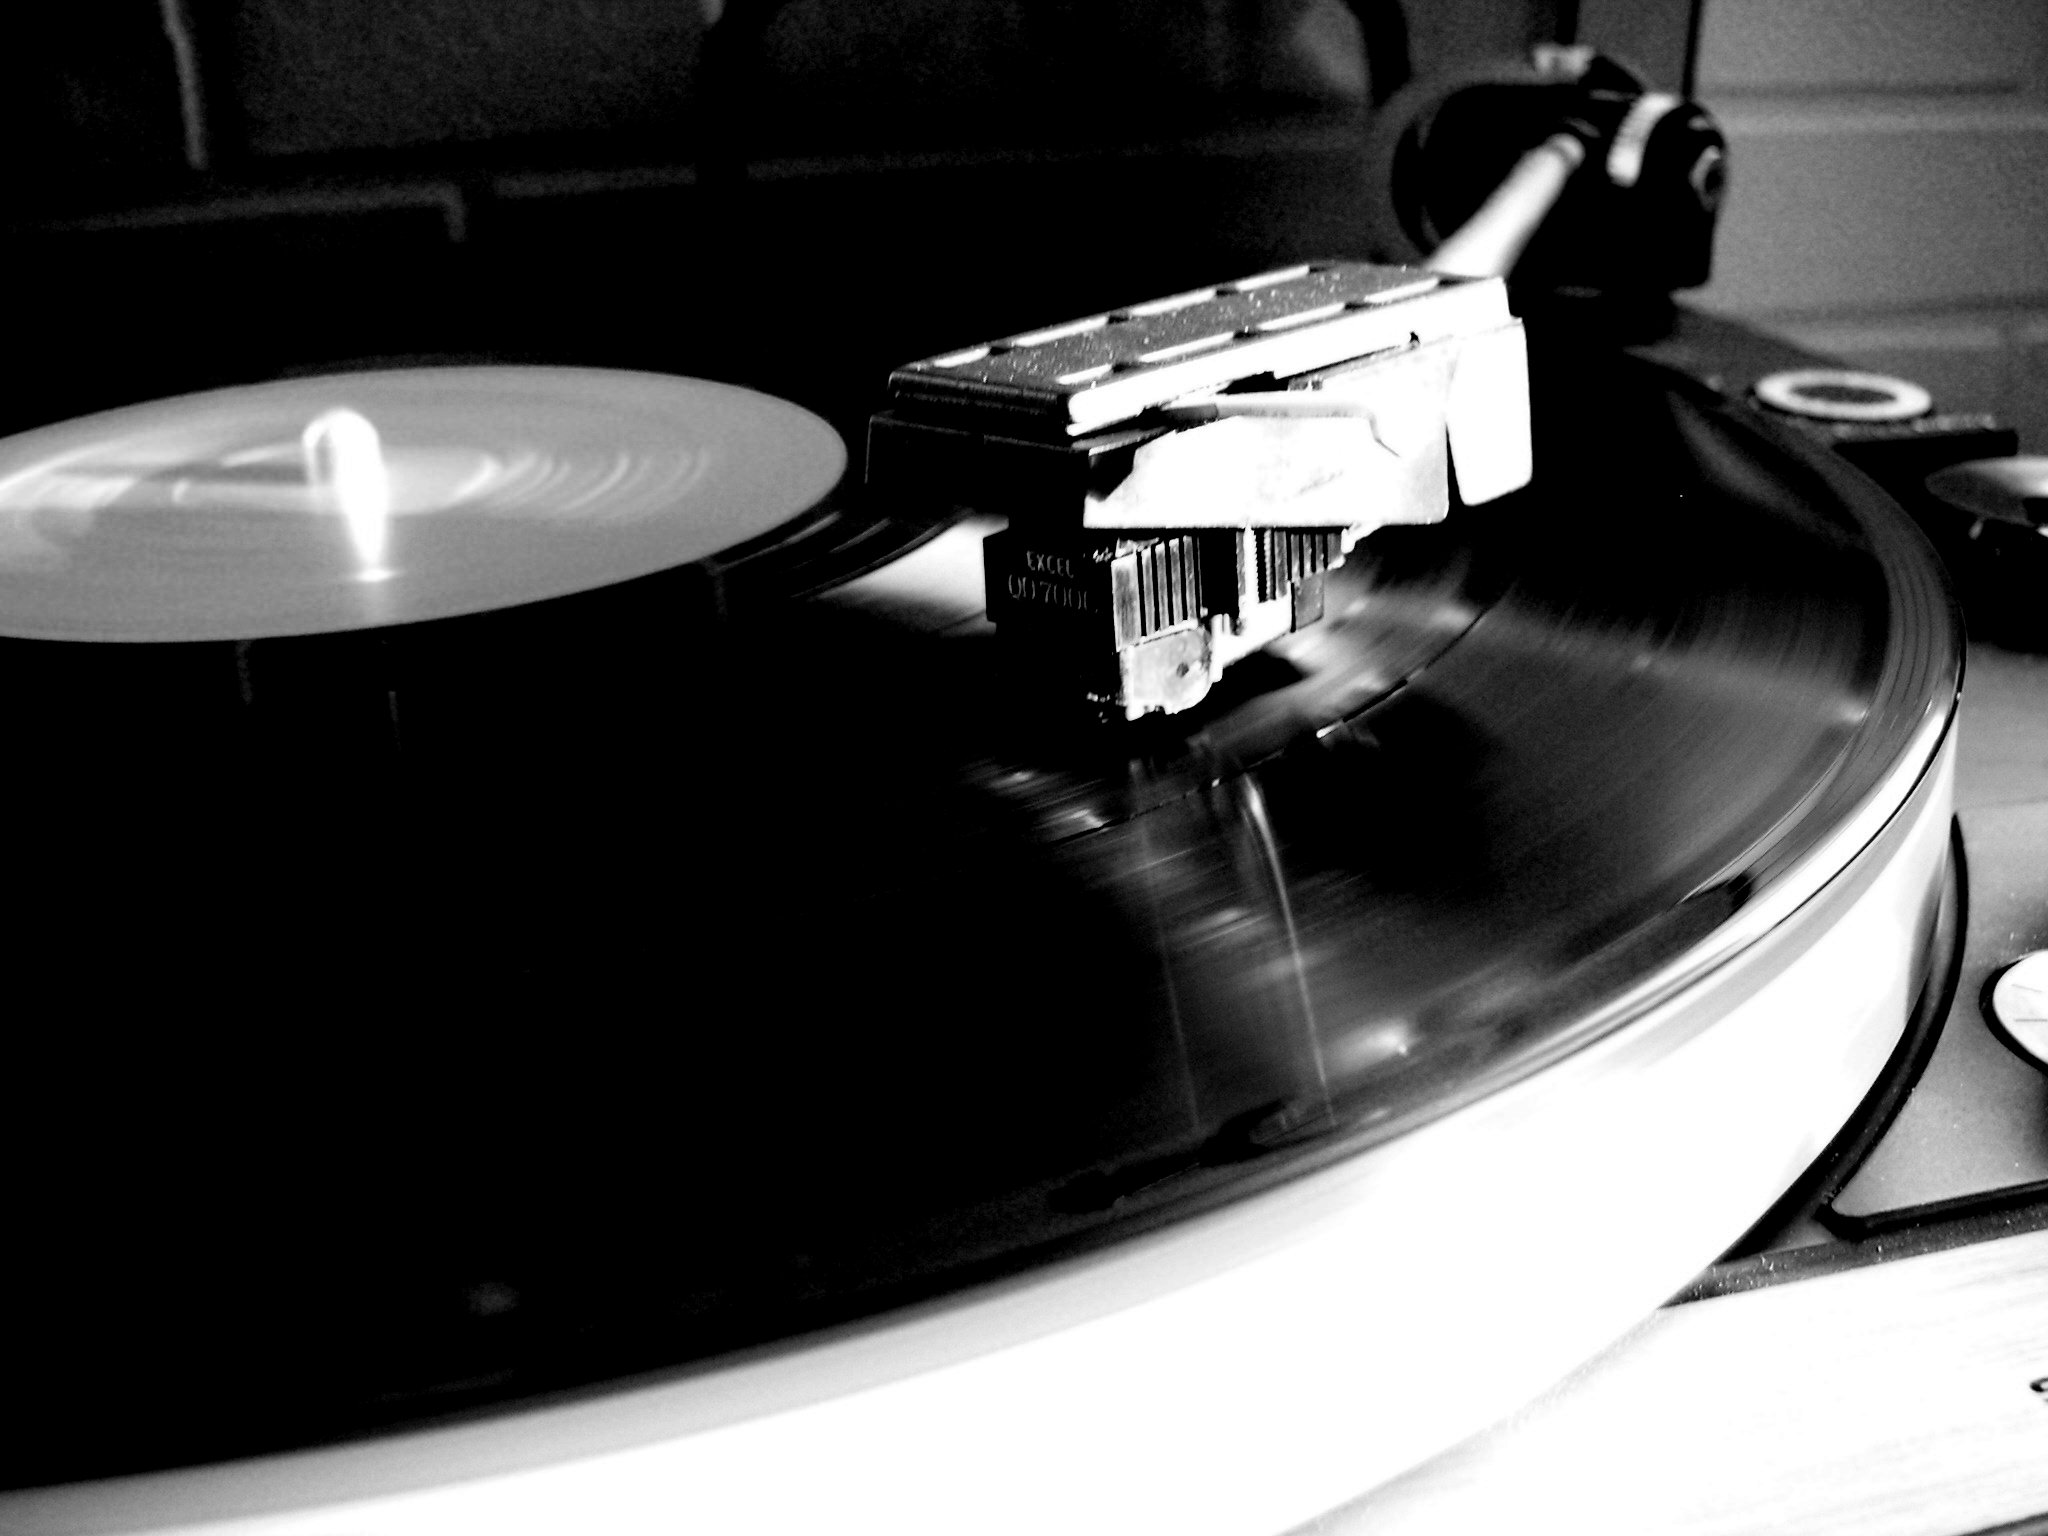
Step 4: Attach the Tonearm and Cartridge
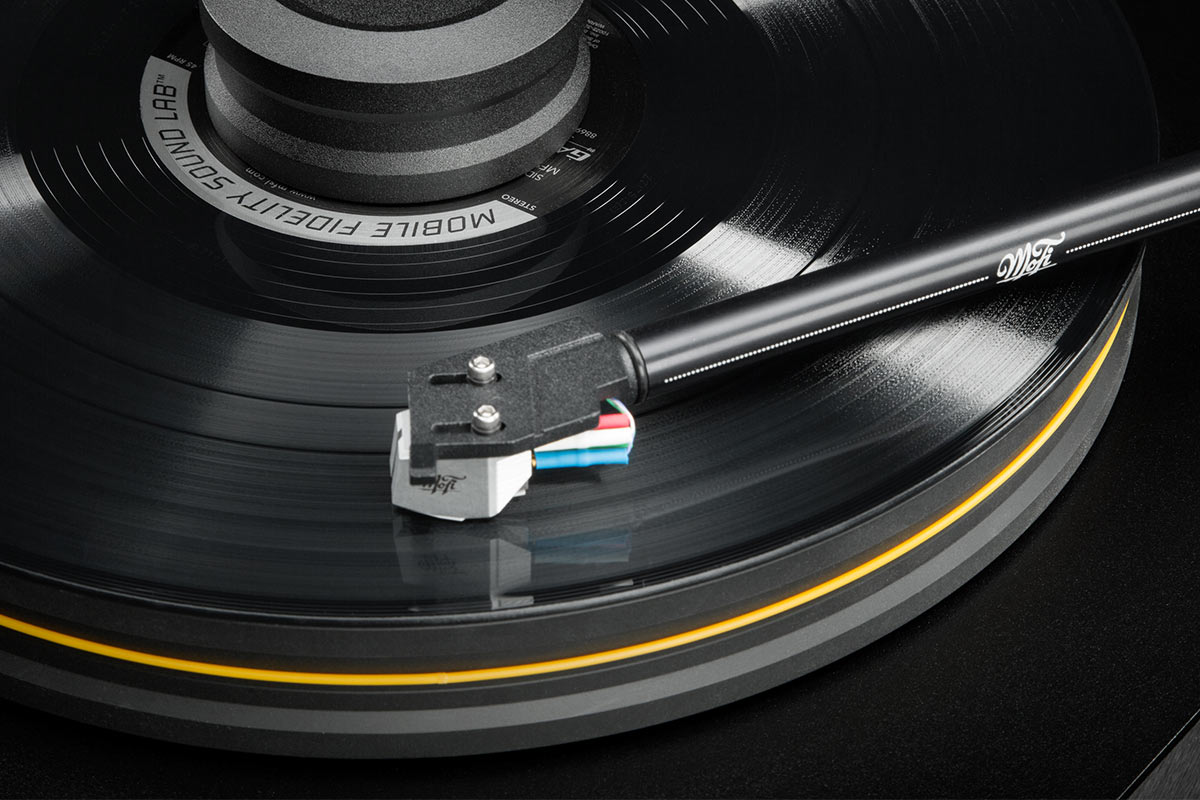
The tonearm and cartridge are vital components of your turntable that directly affect the quality of sound reproduction. Follow these steps to properly attach the tonearm and cartridge:
- Prepare the Tonearm: Ensure that the tonearm is free from any packaging materials and in the correct position for installation.
- Align the Cartridge: Align the cartridge with the tonearm according to the manufacturer’s instructions. Proper alignment is crucial for accurate tracking and optimal sound reproduction.
- Mount the Cartridge: Gently attach the cartridge to the headshell of the tonearm, making sure it is secured firmly but not overly tightened. Use the supplied screws or other mounting mechanisms provided by the manufacturer.
- Set Tracking Force: Determine the recommended tracking force for your cartridge by consulting the cartridge’s documentation or the manufacturer’s website. Adjust the counterweight on the rear of the tonearm to achieve the correct tracking force. Use a tracking force gauge if necessary for precise measurement.
- Set Antiskate: Antiskate is a mechanism that counteracts the inward force exerted on the stylus while tracking the record. Set the antiskate according to the manufacturer’s recommendations or use a test record with specific antiskate instructions.
- Check Vertical Tracking Angle (VTA): The VTA refers to the angle at which the stylus contacts the record surface. Adjust the tonearm height or utilize any VTA adjustment mechanisms provided to achieve proper alignment. Follow the manufacturer’s guidelines for optimal VTA adjustment.
Attaching the tonearm and cartridge correctly is crucial for accurate tracking and optimal sound quality. Take your time and ensure all adjustments are made precisely to maximize your listening experience.
With the tonearm and cartridge attached, it’s time to move on to the next step: connecting the turntable to an amplifier or receiver.
Step 5: Connect the Turntable to an Amplifier or Receiver
Now that you have your turntable set up, it’s time to connect it to an amplifier or receiver to amplify and playback the audio signal. Follow these steps to properly connect your turntable:
- Identify the Phono Input: Locate the phono input on your amplifier or receiver. It is typically labeled “PHONO” and is specifically designed to optimize the signal from a turntable.
- Grounding: Some turntables require grounding to reduce interference and hum. If your turntable has a grounding wire, connect it to the designated grounding screw on your amplifier or receiver.
- Connect RCA Cables: Take the RCA cables and connect them to the designated RCA output jacks on the back of your turntable. The left (white) cable should be connected to the left channel input, and the right (red) cable to the right channel input.
- Connect to the Phono Input: Attach the other end of the RCA cables to the phono input jacks on your amplifier or receiver. Ensure a secure and snug connection.
- Power On and Select Input: Power on your amplifier or receiver and select the input source that corresponds to the phono input. This may involve pressing a button or turning a dial.
Once you have successfully connected your turntable to the amplifier or receiver, you are now ready to enjoy the warm, nostalgic sound of your vinyl records.
It’s worth noting that some modern turntables may feature a built-in phono preamp, allowing you to connect them to any line-level input (such as CD, AUX, or TAPE) on your amplifier or receiver. In such cases, follow the manufacturer’s instructions for the appropriate connection method.
With the turntable successfully connected to your amplifier or receiver, it’s time to move on to the next step: grounding the turntable (if necessary).
Step 6: Ground the Turntable (if necessary)
Grounding your turntable is an important step to minimize unwanted interference and ensure optimal sound quality. Not all turntables require grounding, but if yours does, follow these steps:
- Locate the Grounding Terminal: Check your turntable’s manual or look for a designated grounding terminal on the back of the turntable. It is typically a small screw or metal post labeled “GROUND”.
- Connect the Ground Wire: If your turntable comes with a grounding wire, attach it to the grounding terminal. Loosen the screw or place the wire around the post and tighten it securely.
- Connect the Other End: Connect the other end of the grounding wire to a grounding point on your amplifier, receiver, or electrical outlet. This can be a screw on the chassis or a designated grounding terminal.
- Ensure Secure Connections: Double-check that all connections are tight and secure to maintain a good electrical connection.
Grounding your turntable helps in reducing any potential hum or noise caused by electromagnetic interference. It provides a safe path for the electrical current to flow, ensuring a clean audio signal.
Keep in mind that not all turntables require grounding, especially those with built-in phono preamps or certain types of cartridge designs. Always consult your turntable’s manual for specific grounding instructions.
With the turntable properly grounded (if necessary), it’s time to move on to the next step: balancing the tonearm.
Step 7: Balance the Tonearm
Properly balancing the tonearm is essential for accurate tracking and preventing unnecessary wear on your vinyl records. Follow these steps to balance the tonearm of your turntable:
- Set the Tonearm Height: Adjust the tonearm height using the height adjustment mechanism if available. The tonearm should be parallel to the record surface when the stylus hovers above it.
- Unlock the Tonearm Rest: If your turntable has a tonearm rest, make sure it is not locked or secured in place.
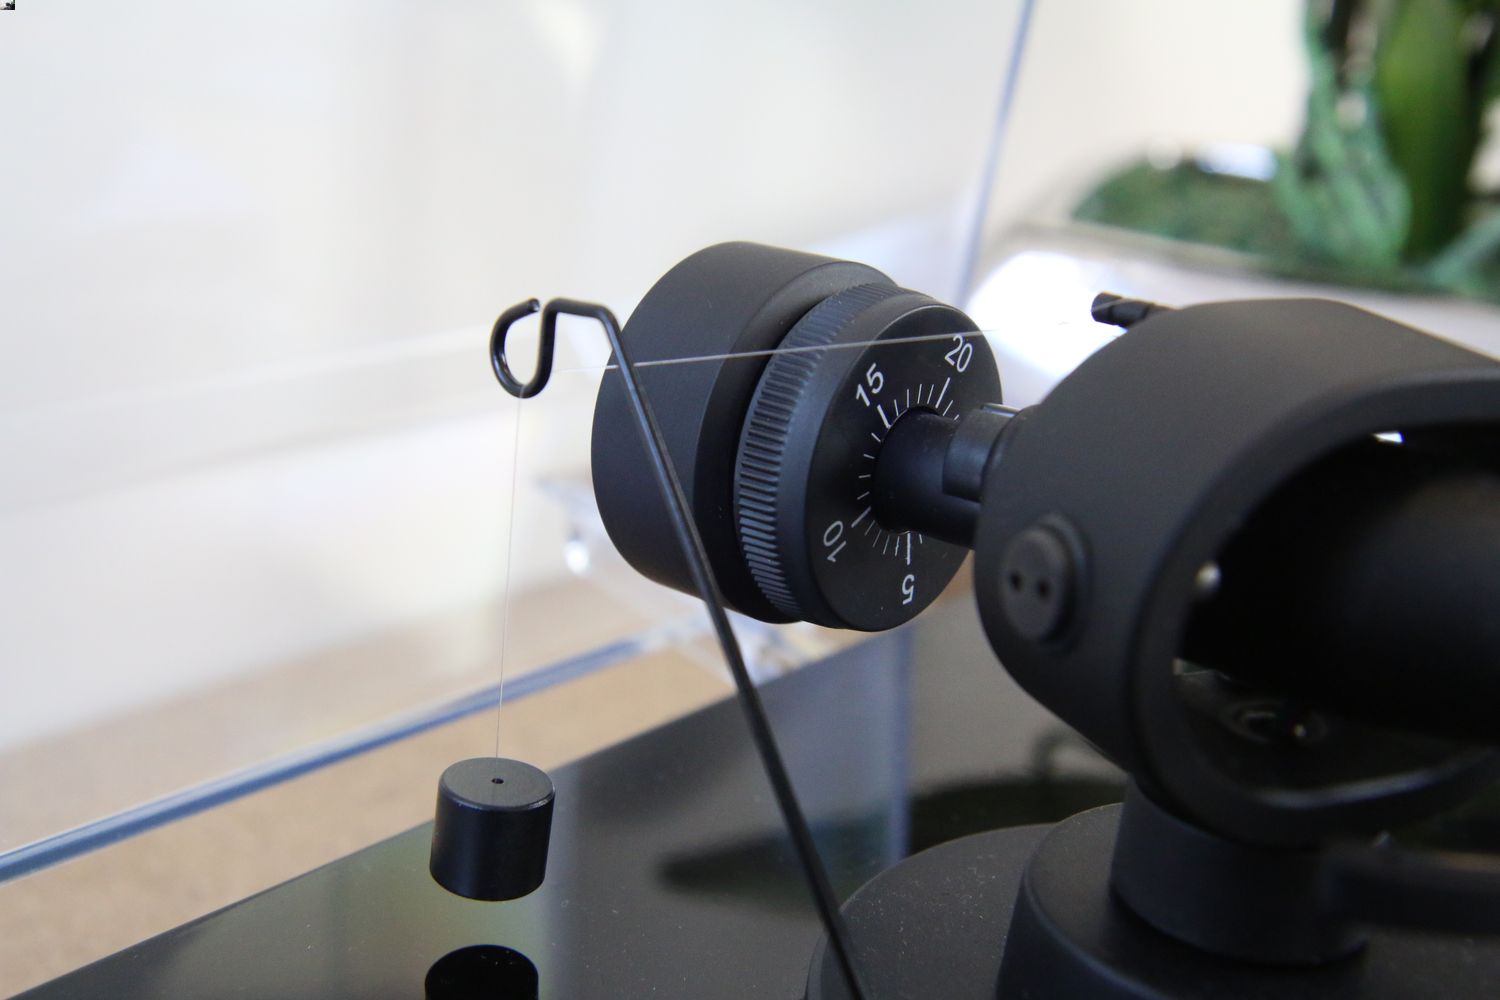
- Move the Counterweight: Slide the counterweight along the rear of the tonearm until it is positioned near the pivot point.
- Set the Tracking Force: Refer to the cartridge manufacturer’s specifications for the recommended tracking force. Rotate the counterweight to align the tracking force scale with the specified setting.
- Balance the Arm: With the tracking force set to zero, gently raise the tonearm off the rest and observe if it stays horizontal or tilts in either direction. If it tilts, adjust the counterweight until the tonearm is perfectly balanced.
- Set the Anti-Skate: Once the tonearm is balanced, adjust the anti-skate dial to match the recommended value provided by the turntable or cartridge manufacturer. This helps to prevent the stylus from exerting excessive force on one side of the groove.
Properly balancing the tonearm ensures optimal tracking and reduces the risk of damage to your records. Take your time during this process, as it directly impacts the longevity and quality of your vinyl collection.
With the tonearm balanced, it’s time to move on to the next step: installing the belt (for belt-driven turntables) or adjusting the platter speed (for manual turntables).
Step 8: Install the Belt (for belt-driven turntables)
If you have a belt-driven turntable, the belt is a critical component that connects the motor to the platter, allowing for the rotation of your vinyl records. Follow these steps to properly install the belt:
- Locate the Belt: Check the packaging of your turntable or consult the user manual to identify the belt. It is typically a rubber band-like component.
- Remove the Platter: Lift or remove the platter from the turntable base. This will expose the motor spindle and the belt placement area.
- Identify the Belt Path: Observe the turntable’s motor spindle and the inner rim of the platter to determine the belt path. There should be a designated groove or pulley for the belt to sit on.
- Stretch the Belt: Carefully stretch the belt and place it around the motor spindle. Take note of the proper tension – it should be tight enough to rotate the platter but not overly stretched.
- Place the Belt on the Platter: While keeping the belt stretched, position it onto the designated groove or pulley on the inner rim of the platter. Ensure it is properly seated and aligning with the motor spindle.
- Test the Belt: Give the platter a gentle spin to verify that the belt is properly installed and the rotation is smooth. Make any necessary adjustments to ensure the belt is properly aligned and functioning correctly.
- Reassemble the Turntable: Once you are satisfied with the belt installation and rotation, carefully place the platter back onto the turntable base. Ensure it sits securely and spins freely without any obstructions.
Properly installing the belt is crucial for the smooth rotation of your turntable’s platter and accurate playback of your vinyl records. Take care during this process to avoid damaging the belt or other components.
If your turntable uses a direct-drive mechanism, you can skip this step as they do not rely on a belt for power transmission. Instead, you can move on to the next step: setting the tracking force and antiskate.
Step 9: Set Tracking Force and Antiskate
The tracking force and antiskate are essential settings that ensure accurate tracking and minimize wear on your records. Follow these steps to properly set the tracking force and antiskate:
- Refer to Cartridge Specifications: Consult the specifications provided by the cartridge manufacturer or the turntable’s user manual for the recommended tracking force range.
- Zero the Tracking Force: Set the tonearm’s tracking force dial to zero or adjust it to its lowest setting.
- Configure the Counterweight: Slide the counterweight along the rear of the tonearm to align the tracking force indicator with the desired value within the recommended range.
- Set the Tracking Force: Rotate the counterweight until the desired tracking force value is achieved. Use a tracking force gauge for precise measurement and to ensure accuracy.
- Adjust Antiskate: Set the antiskate control to the same value as the tracking force. This helps counterbalance the inward force of the stylus during playback, maintaining a centered groove tracking.
Properly setting the tracking force and antiskate ensures the stylus accurately tracks the grooves of your records while minimizing distortion and unnecessary wear. Be sure to follow the manufacturer’s recommendations or consult the cartridge and turntable manuals for precise instructions.
Once the tracking force and antiskate are properly set, your turntable is now optimized to deliver high-quality audio playback. The final step (for manual turntables) is to adjust the platter speed for accurate and consistent rotation.
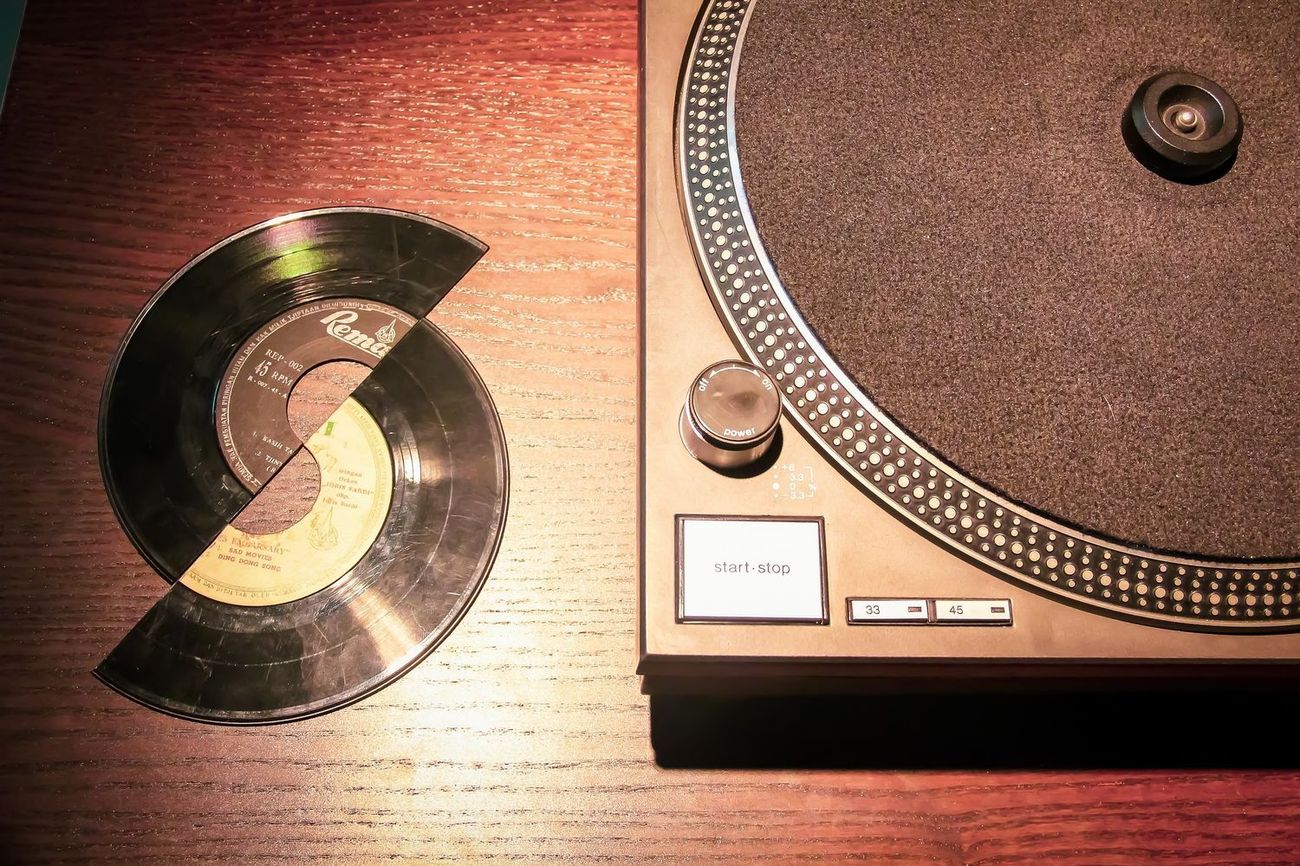
Step 10: Adjust Platter Speed (for manual turntables)
For manual turntables, ensuring accurate and consistent platter speed is crucial for maintaining the proper pitch and playback quality of your vinyl records. Follow these steps to adjust the platter speed:
- Observe the Speed Selector: Locate the speed selector switch on your turntable. It may be located on the plinth or on the side of the turntable.
- Identify the Speed Markings: Identify the markings on the speed selector corresponding to the desired rotational speed of your records. Most turntables have options for 33 1/3 RPM (standard vinyl albums) and 45 RPM (singles and some 12-inch records).
- Play a Record: Place a vinyl record with a known and stable speed onto the turntable, ensuring it is properly seated on the platter.
- Select the Speed: Set the speed selector switch to the appropriate speed marking based on the record you have on the turntable.
- Monitor the Pitch: Listen closely to the audio playback and pay attention to any noticeable changes in pitch. If the pitch sounds too high or low, the speed may need adjustment.
- Adjust the Speed: If necessary, find a separate screw or dial that controls the platter speed. Make small adjustments in either direction until the pitch sounds correct and matches the intended speed.
- Confirm Consistency: Allow the turntable to play for a few minutes and confirm that the speed remains consistent throughout the playback.
Properly adjusting the platter speed ensures accurate playback and preserves the intended sound quality of your vinyl records. Take your time and make incremental adjustments until the speed is correct and consistent.
With the platter speed properly adjusted, your turntable setup is now complete. Sit back, relax, and enjoy the warm, rich sound of your vinyl collection!
As a final note, it’s important to periodically check and recalibrate these settings as wear and tear or changes in the environment can affect their accuracy over time.
Conclusion
Congratulations! You have successfully set up your turntable and are now ready to embark on a journey of immersive and nostalgic audio experiences with your vinyl collection. By following the step-by-step guide provided in this article, you have ensured optimal performance and sound quality from your turntable.
From gathering the necessary equipment to balancing the tonearm, installing the belt (if applicable), and setting the tracking force, antiskate, and platter speed, each step is essential for achieving accurate playback and maintaining the integrity of your vinyl records. Taking the time to properly set up your turntable will greatly enhance your listening pleasure and preserve the longevity of your cherished vinyl collection.
Remember that each turntable may have its own unique features and setup requirements, so it is essential to consult your turntable’s user manual for specific instructions tailored to your model. Additionally, periodically checking and adjusting these settings will help maintain optimal performance over time.
Now, take a moment to sit back, relax, and indulge in the captivating soundscapes that vinyl records offer. Experience the warmth, depth, and character that can only be found in analog audio. Let your turntable transport you to a bygone era of music appreciation where every crackle and pop tells a story.
Enjoy your vinyl journey and happy listening!