Home>Devices & Equipment>Turntable>How To Adjust Counterweight On Turntable
Turntable
How To Adjust Counterweight On Turntable
Modified: January 22, 2024
Learn how to adjust the counterweight on your turntable for optimal performance. Our step-by-step guide will help you master the art of balancing your turntable.
(Many of the links in this article redirect to a specific reviewed product. Your purchase of these products through affiliate links helps to generate commission for AudioLover.com, at no extra cost. Learn more)
Table of Contents
Introduction
Turntables have made a remarkable resurgence in recent years, captivating music enthusiasts with their warm and rich sound. These analog gems offer a unique listening experience, bringing a sense of nostalgia and authenticity to our favorite tunes. However, to ensure optimal performance and sound quality, proper maintenance and adjustment are essential. One crucial aspect of turntable maintenance is correctly adjusting the counterweight.
The counterweight on a turntable is responsible for balancing the tonearm and applying the correct tracking force to the stylus. It ensures that the stylus sits correctly in the grooves of the record, allowing for accurate tracking and reducing unnecessary wear on both the record and stylus. Adjusting the counterweight is a straightforward process, but it requires attention to detail and a few essential tools.
In this article, we will guide you through the process of adjusting the counterweight on your turntable. By following these steps, you will be able to achieve optimal sound reproduction, prolong the life of your records, and enjoy the full potential of your turntable.
Understanding the Counterweight
The counterweight is an essential component of a turntable’s tonearm. It sits at the back end of the tonearm and serves multiple purposes. Its main function is to balance the tonearm horizontally, ensuring that it floats parallel to the record’s surface. This balanced positioning allows for optimal sound reproduction and prevents uneven wear on the stylus.
Additionally, the counterweight determines the tracking force applied to the stylus. Tracking force refers to the pressure exerted by the stylus on the record’s grooves. It is crucial to find the perfect balance between too much and too little tracking force. Insufficient tracking force can cause skipping or mistracking, while excessive force can lead to excessive wear on the stylus and the record itself.
The tracking force is typically measured in grams and can vary depending on the cartridge and stylus being used. Manufacturers of cartridges often provide a recommended range for tracking force. It is essential to check the specifications and guidelines provided by the cartridge manufacturer to ensure accurate adjustment.
When adjusting the counterweight, it is crucial to remember that small adjustments can make a significant difference in sound quality and overall performance. It may require some trial and error to find the perfect balance, as it depends on various factors such as the weight of the cartridge and the thickness of the stylus.
Now that we understand the importance of the counterweight and its role in maintaining the proper tracking force, let’s dive into the step-by-step process of adjusting it.
Tools Needed
Before you begin adjusting the counterweight on your turntable, it’s best to gather a few essential tools to ensure a smooth and successful process. Here are the tools you’ll need:
- A digital scale: To accurately measure the tracking force applied by the stylus, a digital scale capable of measuring in grams is necessary. This will give you precise readings and ensure that you are within the recommended tracking force range.
- A stylus force gauge: While not essential, a stylus force gauge can be a convenient tool to have, especially if your turntable doesn’t have a built-in scale. This device measures the tracking force and provides a digital readout.
- A clean and level surface: It is crucial to have a clean and level surface to place your turntable during the adjustment process. This will prevent any unwanted vibrations or movements that could affect the accuracy of your adjustments.
- A small screwdriver: You may need a small screwdriver to adjust the counterweight. Make sure to use the correct size and avoid applying excessive force to prevent any damage.
By having these tools ready, you’ll be well-equipped to make precise adjustments to your turntable’s counterweight and achieve optimal sound performance.
Step 1: Balancing the Turntable
Before adjusting the counterweight, it’s crucial to ensure that the turntable is properly balanced. This step is essential to achieve accurate tracking and prevent any potential damage to the stylus or the record. Here’s how to balance your turntable:
- Start by turning off your turntable and ensuring that it is on a stable and level surface.
- Lower the tonearm gently onto its rest position or use the cueing lever if your turntable has one. This will prevent any accidental movement while you work on balancing the turntable.
- Check if the tonearm floats parallel to the surface of the turntable. If it tilts towards the record or lifts away from it, it needs to be balanced.
- To balance the tonearm, locate the counterweight at the rear of the tonearm. It is typically a small knob or weight that can be moved along the tonearm shaft.
- Adjust the counterweight by moving it forward or backward along the tonearm shaft. Your goal is to find the position where the tonearm remains floating parallel to the surface of the turntable.
- Keep adjusting the counterweight until you achieve a balanced tonearm. Take your time to make small, precise adjustments until the tonearm floats effortlessly without tilting or lifting.
By ensuring that your turntable is properly balanced, you lay the foundation for accurate tracking force adjustment in the next steps. Take the time to get this step right, as it will contribute to the overall performance and longevity of your turntable.
Step 2: Adjusting the Counterweight
Once you have successfully balanced your turntable, it’s time to adjust the counterweight to achieve the recommended tracking force for your stylus. Here’s how to adjust the counterweight:
- Refer to the specifications provided by the cartridge manufacturer to determine the recommended range for tracking force. This information is crucial as it ensures that your stylus is properly aligned and tracking the grooves of the record.
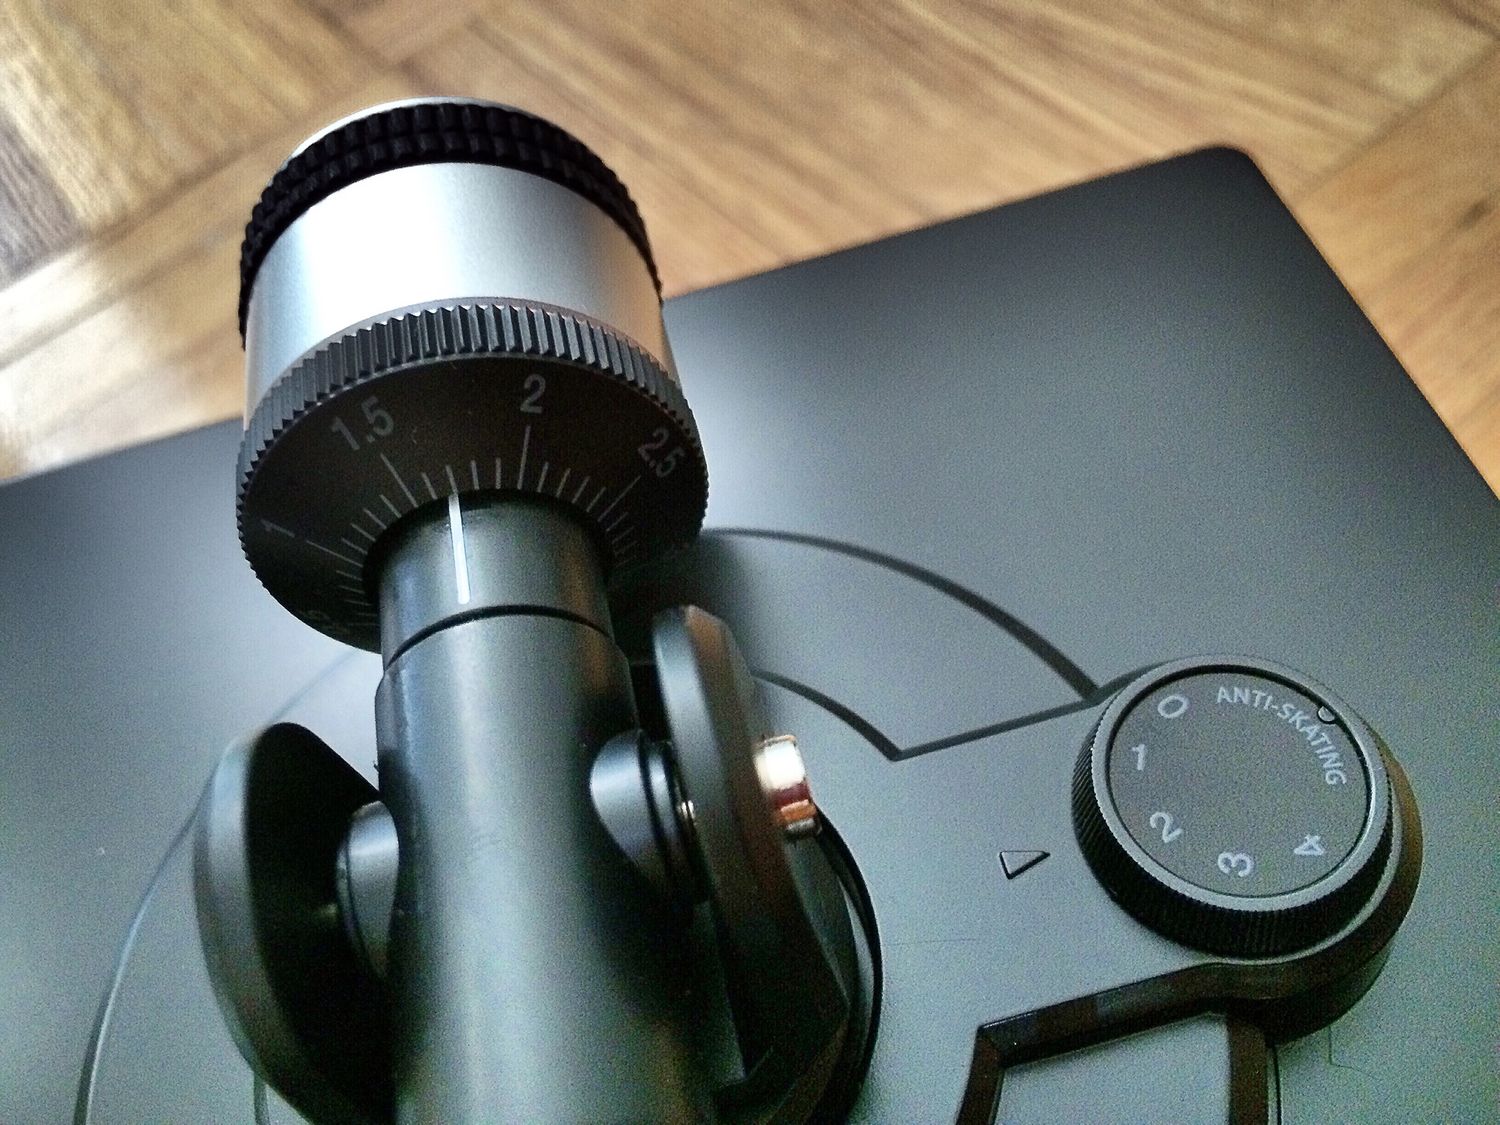
- Locate the calibration ring or scale on the counterweight. This ring typically displays the grams or milligrams used for tracking force adjustment.
- Rotate the calibration ring or scale so that the zero mark aligns with the reference point. This ensures that your initial adjustment starts from a neutral position.
- Consult the cartridge manufacturer’s recommendations to determine the initial tracking force setting. This usually falls within the specified range provided.
- While keeping an eye on the scale, rotate the entire counterweight and stylus assembly to increase or decrease the tracking force. Rotating it clockwise will increase the force, while rotating it counterclockwise will decrease it.
- Make incremental adjustments to the counterweight, taking note of the changes on the scale. Avoid making large adjustments at once to prevent potential damage to the stylus or record.
- Continue making adjustments until you reach the recommended tracking force range specified by the cartridge manufacturer.
Take your time during this step to ensure that the tracking force is set accurately. It may require several small adjustments to find the optimal balance for your specific cartridge and turntable setup.
Step 3: Tracking Force Adjustment
Once you’ve adjusted the counterweight to the recommended tracking force range, it’s time to fine-tune the tracking force to achieve optimal performance. Here’s how to adjust the tracking force on your turntable:
- Place your turntable’s tonearm back on its rest position or use the cueing lever if your turntable has one.
- Ensure that the calibration ring or scale on the counterweight aligns with the zero mark, indicating a neutral position.
- Using the stylus force gauge or digital scale, place it on the turntable’s surface and position it directly under the stylus.
- Slightly raise the front of the tonearm, allowing the stylus to rest on the stylus force gauge or digital scale. Take note of the reading displayed on the gauge or scale.
- If the reading falls within the recommended tracking force range specified by the cartridge manufacturer, you have successfully adjusted the tracking force. If not, proceed to the next step.
- If the tracking force is too light, rotate the entire counterweight and stylus assembly clockwise to increase the force. If it is too heavy, rotate it counterclockwise to decrease the force. Make small adjustments and recheck the reading on the stylus force gauge or digital scale until it falls within the recommended range.
- Repeat the process of adjusting the tracking force and checking the reading until you achieve the desired tracking force within the recommended range.
By fine-tuning the tracking force, you ensure that your stylus sits correctly in the record’s grooves, resulting in accurate tracking and optimal sound reproduction.
Step 4: Fine-tuning the Counterweight
After adjusting the tracking force, it’s time to fine-tune the counterweight to achieve the best possible performance from your turntable. This step will further optimize the balance and alignment of the tonearm. Here’s how to fine-tune the counterweight:
- Keep the turntable and tonearm in their balanced position.
- Gently rotate the calibration ring or scale on the counterweight to make small adjustments to the tracking force. Each increment or decrement corresponds to a specific change in grams or milligrams.
- Make subtle changes to the tracking force by adjusting the counterweight in either a clockwise or counterclockwise direction, depending on the desired adjustment.
- Play a well-known and high-quality record to gauge the sound quality and performance of your turntable.
- Listen closely for any signs of distortion, skipping, or excessive wear on the stylus. These issues may indicate an imbalance or misalignment in the tonearm.
- If you notice any problems, make slight adjustments to the counterweight to improve the performance. Fine-tune the tracking force until you achieve the best possible sound reproduction and minimize any issues.
- Continue fine-tuning the counterweight while testing different records to ensure consistent playback quality across various music genres and styles.
Remember to make small adjustments and take your time during this step. Fine-tuning the counterweight allows you to optimize the performance of your turntable and ensure that it faithfully reproduces the music with accuracy and clarity.
Conclusion
Properly adjusting the counterweight on your turntable is essential for achieving optimal sound quality and preserving the life of your records. By following the steps outlined in this guide, you can ensure that your turntable is properly balanced and the tracking force is set to the manufacturer’s recommended range. Fine-tuning the counterweight further enhances the performance of your turntable, allowing for accurate stylus alignment and minimizing distortion or skipping issues.
Remember to take your time during the adjustment process, making small and precise changes to the counterweight. It may require some trial and error to find the perfect balance and tracking force for your specific cartridge and stylus setup. Be patient and attentive, as even small adjustments can make a significant difference in the overall sound quality.
Regularly checking and readjusting the counterweight is important, especially if you change cartridges or stylus types. It is also a good practice to keep the turntable on a stable and level surface to prevent any unwanted vibrations or movement that could affect your adjustments.
By taking the time to properly adjust the counterweight, you can enjoy the full potential of your turntable, immersing yourself in the warm and rich sound that vinyl records have to offer. So, dust off your records, grab your favorite albums, and get ready to experience music in a whole new way with your finely tuned turntable!