Home>Devices & Equipment>Turntable>How To Adjust Pioneer PL $00 Turntable
Turntable
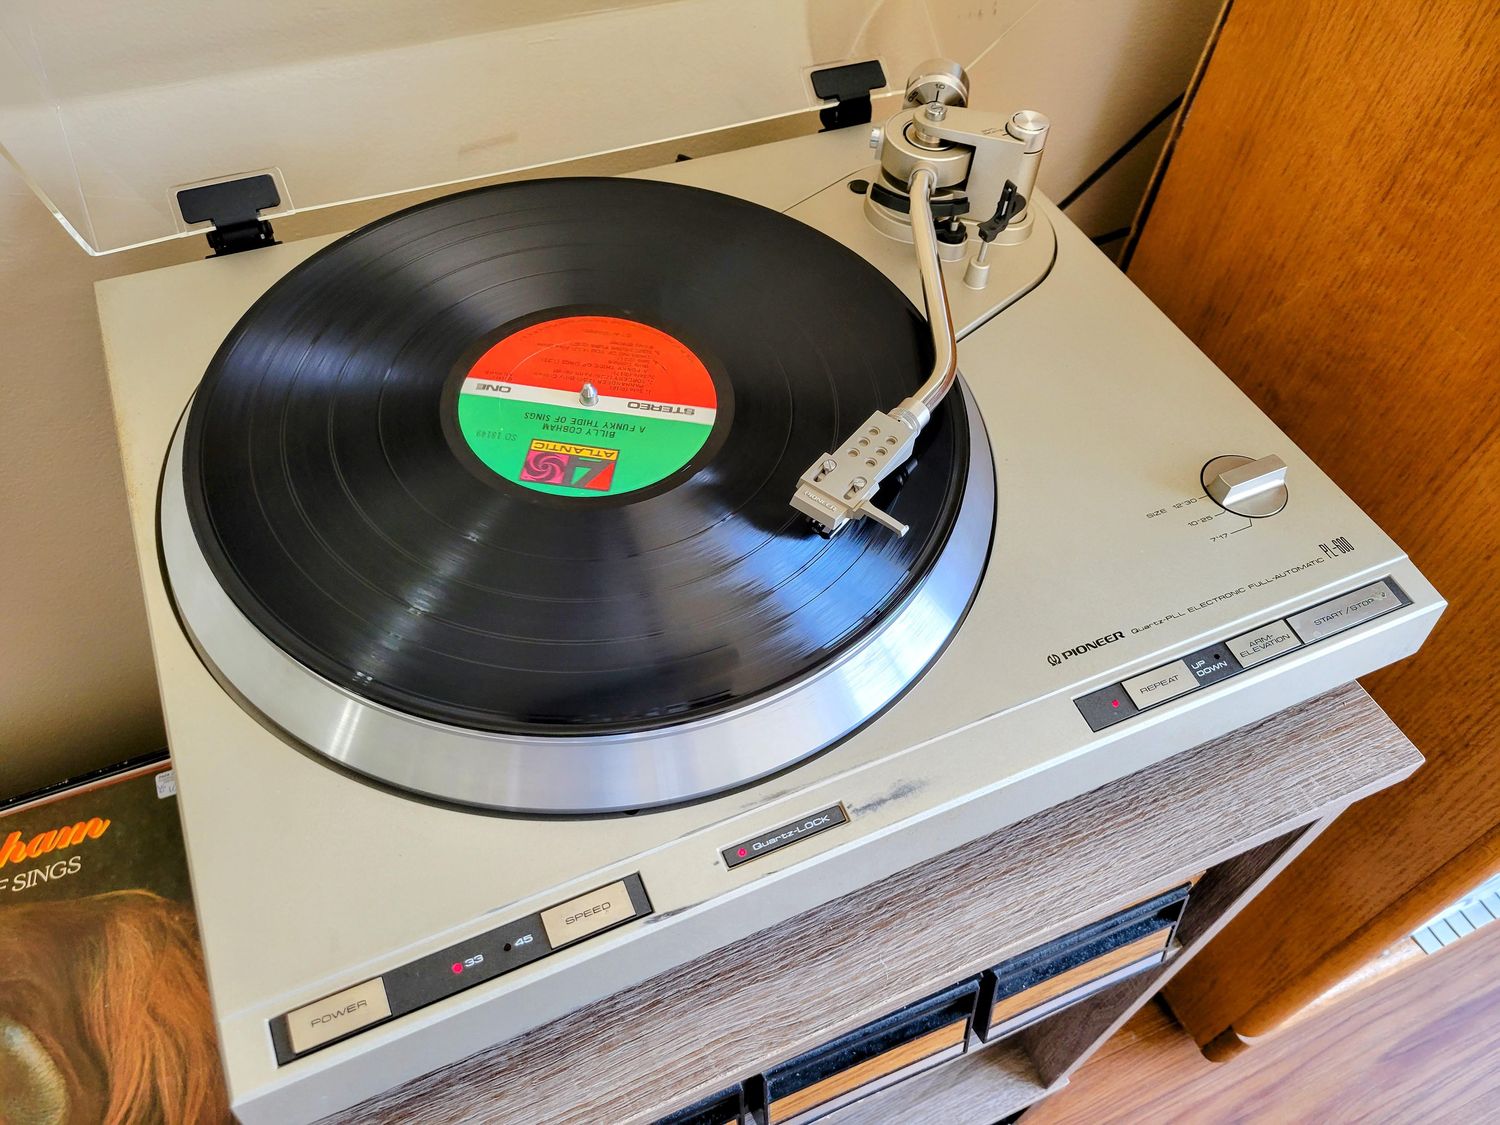
How To Adjust Pioneer PL $00 Turntable
Modified: January 22, 2024
Learn how to perfectly adjust your Pioneer PL $00 turntable with this step-by-step guide. Enhance your vinyl listening experience with our expert tips and tricks.
(Many of the links in this article redirect to a specific reviewed product. Your purchase of these products through affiliate links helps to generate commission for AudioLover.com, at no extra cost. Learn more)
Table of Contents
- Introduction
- Step 1: Gather the necessary tools and materials
- Step 2: Level the turntable
- Step 3: Adjust the tracking force
- Step 4: Set the anti-skate
- Step 5: Calibrate the cartridge alignment
- Step 6: Adjust the pitch control
- Step 7: Fine-tune the tonearm height
- Step 8: Test and listen to the turntable
- Conclusion
Introduction
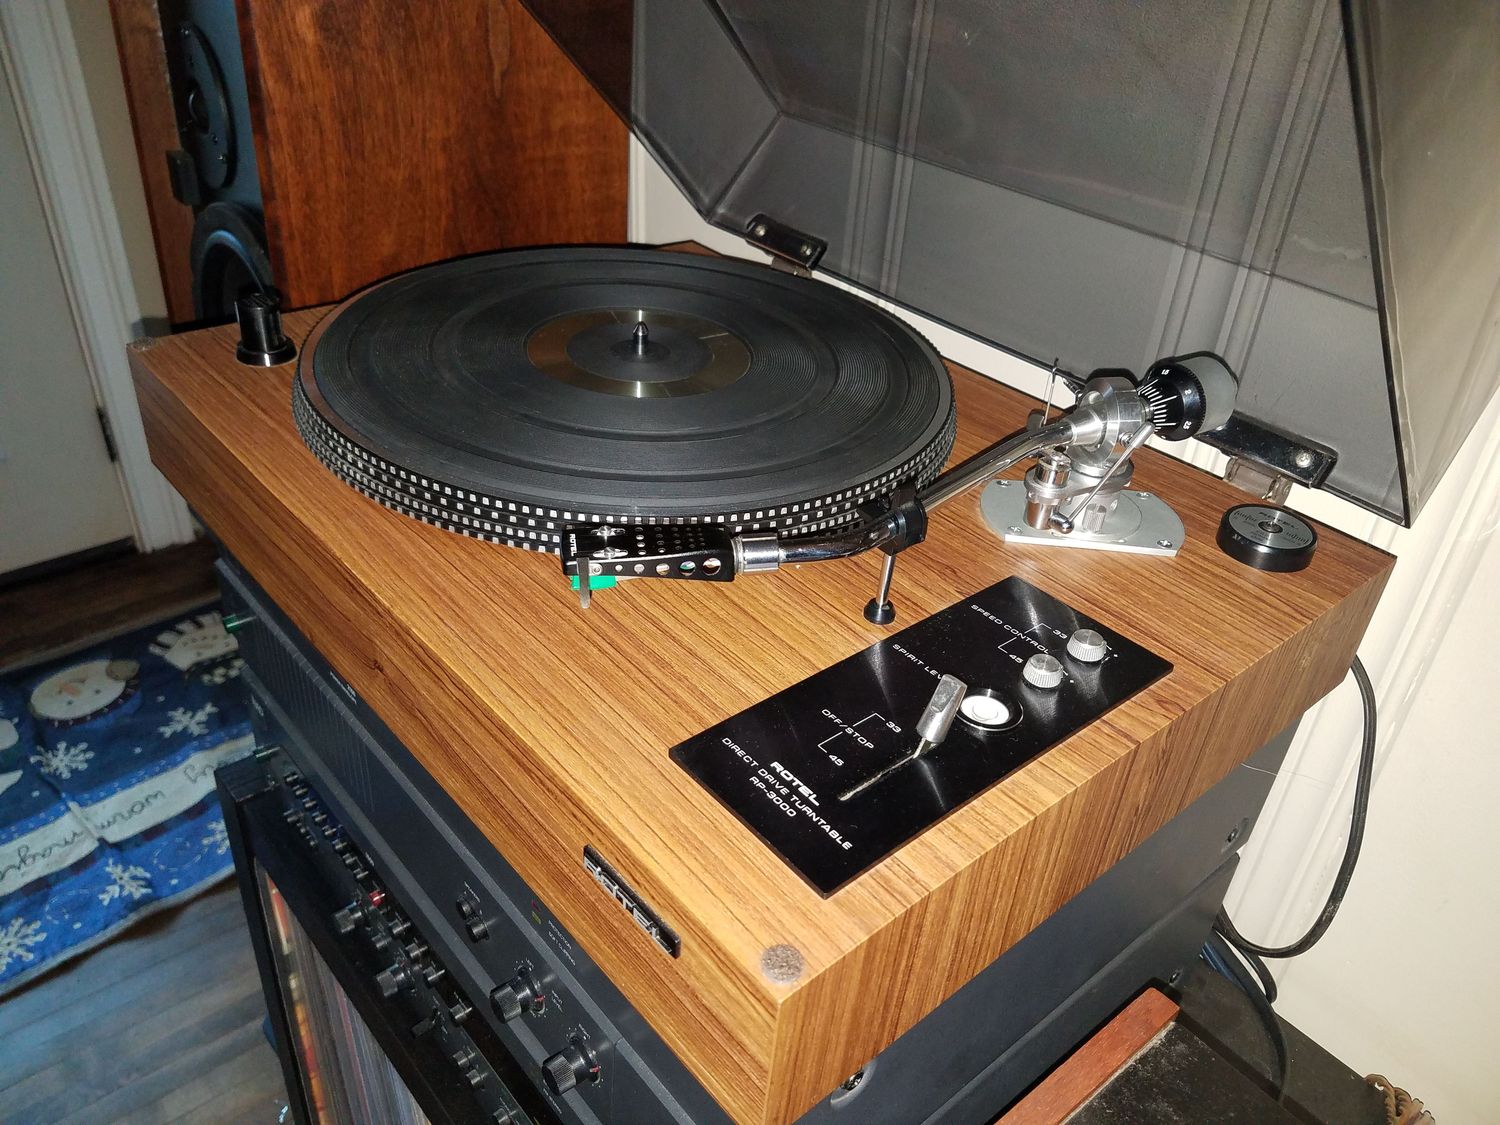
Welcome to the world of turntables, where the timeless charm of vinyl records meets the innovative technology of Pioneer PL-100. Whether you’re a seasoned audiophile or a budding vinyl enthusiast, it’s essential to ensure that your turntable is adjusted properly to get the best sound quality and performance.
Adjusting a Pioneer PL-100 turntable may seem like a daunting task, but with the right tools and a systematic approach, it can be a straightforward process. In this article, we will guide you through the step-by-step instructions to adjust your Pioneer PL-100 turntable and optimize its performance.
Before we dive into the adjustment process, it’s important to note that each turntable model may vary, so it’s always a good idea to consult your Pioneer PL-100 manual for specific instructions. Additionally, make sure you handle your turntable with care, as it is a delicate piece of equipment that requires gentle handling.
Now, let’s gather the necessary tools and materials to start adjusting your Pioneer PL-100 turntable and unlock its full potential.
Step 1: Gather the necessary tools and materials
Before you begin the adjustment process, it’s important to have the right tools and materials on hand. Here’s a list of items you will need:
- Screwdriver: You may need a small screwdriver to make certain adjustments on the turntable.
- Tracking force gauge: This tool is essential for accurately measuring the tracking force applied to the stylus. It ensures that the stylus exerts the right amount of pressure on the record.
- Anti-skate adjustment tool: The anti-skate adjustment determines the lateral force exerted on the tonearm. Some turntables have a built-in anti-skate mechanism, while others require a separate tool for adjustment.
- Cartridge alignment tool: This tool helps ensure that the cartridge is aligned properly and tracks the record grooves accurately.
- Level: A small bubble level will help you ensure that the turntable is perfectly leveled.
- Clean microfiber cloth: It’s always a good idea to have a clean microfiber cloth handy to wipe off any dust or debris from the turntable components.
Once you have gathered all the necessary tools and materials, you’re ready to move on to the next step: leveling the turntable.
Step 2: Level the turntable
Proper leveling is crucial for the optimal performance of your Pioneer PL-100 turntable. Here’s how to level it:
- Place the turntable on a sturdy, flat surface, preferably a dedicated turntable stand or shelf.
- Using a bubble level, check if the turntable is level horizontally and vertically. Adjust the position of the turntable or use shims if necessary to achieve a perfectly level surface.
- Make sure that the turntable is stable and doesn’t wobble when you gently press down on different corners. If it wobbles, readjust the leveling until it’s stable.
Having a level turntable ensures that the needle makes optimal contact with the record and helps prevent unnecessary wear and distortion.
Now that your turntable is leveled, it’s time to move on to the next step: adjusting the tracking force.
Step 3: Adjust the tracking force
The tracking force refers to the amount of pressure applied by the stylus to the record surface. It is essential to set the tracking force correctly to prevent excessive record wear and ensure accurate tracking. Follow these steps to adjust the tracking force on your Pioneer PL-100 turntable:
- Refer to your turntable’s manual to find the recommended tracking force range for your cartridge. It is usually specified in grams.
- Using the tracking force gauge, place it on the turntable platter and set it to zero.
- Next, carefully and gently lower the tonearm onto the gauge, making sure the stylus is aligned with the tracking force indicator on the gauge.
- Slowly adjust the counterweight at the back of the tonearm until the desired tracking force is achieved, based on the recommended range mentioned in the manual.
- Once the tracking force is set, lock the counterweight in place to prevent any accidental adjustments.
It’s crucial not to set the tracking force too high or too low, as it can lead to poor audio quality, increased record wear, or even damage to the stylus and cartridge. Take your time and ensure that the tracking force is within the specified range.
With the tracking force adjusted, we can now move on to the next step: setting the anti-skate.
Step 4: Set the anti-skate
The anti-skate adjustment is important to ensure that the tonearm is balanced and properly centered during playback. It helps counteract the inward force exerted on the stylus by the groove of the record. Here’s how to set the anti-skate on your Pioneer PL-100 turntable:
- Locate the anti-skate control on your turntable. It is usually a small dial or knob located near the tonearm base.
- With the tonearm in its resting position, set the anti-skate control to zero or neutral.
- Select a record with a blank or silent groove, preferably at the end of an album or a test record designed for calibration purposes.
- Start playing the silent groove and observe the tonearm’s behavior. If it tends to move towards the center of the record, the anti-skate needs adjustment.
- Gradually increase the anti-skate setting while monitoring the tonearm’s movement. The goal is to find the point where the tonearm stays centered and doesn’t skip or drag across the record surface.
It’s essential to set the anti-skate correctly to maintain proper tracking and prevent excessive wear on the record and stylus. Keep in mind that the optimal anti-skate setting may vary depending on your cartridge and stylus combination, so adjustments may be required to achieve the best performance.
With the anti-skate set, we can now move on to the next step: calibrating the cartridge alignment.
Step 5: Calibrate the cartridge alignment
Proper cartridge alignment ensures that the stylus tracks the record grooves accurately, resulting in optimal sound reproduction and minimal wear on your records. Follow these steps to calibrate the cartridge alignment on your Pioneer PL-100 turntable:
- Start by obtaining a cartridge alignment tool. These tools provide a precise guide for aligning the cartridge correctly.
- Place the alignment tool on the turntable platter, making sure it is properly centered.
- Hold the alignment tool in place and position the tonearm over it, aligning the cartridge body or stylus tip with the alignment lines or grids on the tool.
- Make adjustments by gently rotating the cartridge or the headshell if necessary to achieve proper alignment. The goal is to align the stylus with the marked points on the alignment tool.
- Double-check the alignment from different angles to ensure accuracy.
- Once the alignment is satisfactory, secure the cartridge in place, ensuring it is firmly attached to the headshell. Use the appropriate screws or locking mechanism provided.
Accurate cartridge alignment is crucial for achieving optimal sound quality and preventing unnecessary wear on your records. Take your time during this step to ensure precise alignment.
With the cartridge alignment calibrated, we can now move on to the next step: adjusting the pitch control.
Step 6: Adjust the pitch control
The pitch control on your Pioneer PL-100 turntable allows you to adjust the rotational speed of the platter, ensuring that your records play at the correct pitch. Here’s how to adjust the pitch control:
- Play a record with a known reference pitch, such as a tuning fork or a digital pitch reference.
- Listen carefully to the playback and compare it to the known reference pitch. If the pitch sounds too high or too low, you’ll need to make adjustments.
- Locate the pitch control knob or slider on your turntable, which is usually located on the front or side panel.
- Gently adjust the pitch control until the playback matches the desired reference pitch.
- Make small adjustments and fine-tune until the pitch is accurate. It’s important not to make drastic changes all at once.
Keep in mind that slight variations in pitch may occur naturally due to the aging of the motor or other factors. However, by regularly calibrating the pitch control, you can ensure that your records play at the correct speed and maintain their intended tonality.
With the pitch control adjusted, we can now move on to the next step: fine-tuning the tonearm height.
Step 7: Fine-tune the tonearm height
Fine-tuning the tonearm height is crucial for achieving proper tracking and minimizing distortion during playback. Follow these steps to adjust the tonearm height on your Pioneer PL-100 turntable:
- Begin by ensuring that the turntable is turned off and the tonearm is in its resting position.
- Locate the tonearm height adjustment mechanism, which is usually a small screw or lever near the tonearm base.
- By using the appropriate tool, carefully make small adjustments to either raise or lower the tonearm height.
- As you make adjustments, observe the tonearm’s level and parallel alignment with the record surface. The goal is to achieve a level tonearm without any noticeable tilting.
- Continue to make subtle adjustments until the tonearm is at the desired height, ensuring it maintains parallel alignment with the record surface.
It’s important to note that the ideal tonearm height may vary depending on the specific cartridge and stylus you are using. Consult your turntable’s manual or the cartridge manufacturer’s guidelines for recommended tonearm height settings.
Once you have fine-tuned the tonearm height, you are ready for the final step: testing and listening to your turntable’s performance.
Step 8: Test and listen to the turntable
After completing the adjustments, it’s time to test and listen to your Pioneer PL-100 turntable to ensure that everything is functioning correctly and producing the desired sound quality. Here’s what you should do:
- Select a record from your collection that you are familiar with and that is in good condition.
- Carefully place the record on the turntable platter, ensuring that it sits securely and is properly centered.
- Lower the tonearm onto the record, making sure that the stylus makes contact with the grooves gently and without dragging or skipping.
- Listen to the playback with attentive ears, paying attention to any distortion, tracking issues, or abnormalities in sound quality.
- Adjust the tracking force, anti-skate, or any other parameters if necessary to fine-tune the performance and achieve the best possible sound quality.
- Take note of any adjustments made and the impact they have on the playback to help you optimize future listening sessions.
By carefully testing and listening to your turntable, you can ensure that it is adjusted properly and delivering the best possible sound reproduction. Remember to take your time during this step and be patient as you fine-tune the settings to suit your preferences.
Congratulations! You’ve successfully adjusted your Pioneer PL-100 turntable for optimal performance. Enjoy your vinyl collection and revel in the rich, warm sound that this iconic format provides.
By following these step-by-step instructions and using the right tools, you can maintain and optimize the performance of your Pioneer PL-100 turntable, ensuring years of enjoyable listening experiences. Happy spinning!
Conclusion
Adjusting your Pioneer PL-100 turntable is a crucial step in maximizing its performance and getting the best possible sound quality from your vinyl records. By following the step-by-step instructions outlined in this guide and using the right tools, you can achieve precise adjustments and unlock the full potential of your turntable.
From leveling the turntable and adjusting the tracking force to setting the anti-skate and calibrating the cartridge alignment, each step plays a vital role in ensuring accurate playback and minimal wear on your records. Fine-tuning the tonearm height and adjusting the pitch control further refine the performance of your turntable, allowing you to enjoy your favorite albums with exceptional sound quality.
Remember to consult your Pioneer PL-100 manual for specific instructions related to your particular model, as adjustments may vary slightly. It’s also essential to handle your turntable with care and avoid sudden movements or mishandling that could damage its delicate components.
By investing time in adjusting your turntable properly, you can experience the full richness and warmth of vinyl records. Immerse yourself in the nostalgia of this timeless format, and enjoy the distinctive sound that only vinyl can deliver.
So, take a moment to gather the necessary tools, follow the steps outlined in this guide, and adjust your Pioneer PL-100 turntable with confidence. Let the music fill the room, and revel in the joy of a well-optimized turntable setup.
Happy listening!