Home>Devices & Equipment>Turntable>How To Pack A Turntable For Shipping
Turntable
How To Pack A Turntable For Shipping
Published: January 19, 2024
Learn how to pack a turntable for shipping with our step-by-step guide. Safely protect your valuable turntable with expert packing tips and techniques.
(Many of the links in this article redirect to a specific reviewed product. Your purchase of these products through affiliate links helps to generate commission for AudioLover.com, at no extra cost. Learn more)
Table of Contents
- Introduction
- Materials Needed
- Step 1: Removing the Turntable Platter and Tonearm
- Step 2: Securing the Dust Cover
- Step 3: Detaching the Cartridge and Headshell
- Step 4: Packaging the Turntable Base
- Step 5: Protecting the Tonearm
- Step 6: Packing the Platter
- Step 7: Packing the Cartridge and Headshell
- Step 8: Securing the Cables
- Step 9: Packaging the Dust Cover
- Step 10: Finalizing the Packaging
- Conclusion
Introduction
Welcome to our comprehensive guide on how to pack a turntable for shipping. Whether you’re moving or sending your beloved turntable to someone else, it’s crucial to ensure that it arrives safely and without any damage. Turntables are delicate devices that require careful handling, especially when being transported. By following the steps outlined in this article, you’ll be able to securely package your turntable for shipping, providing it with ample protection during transit.
Proper packaging is essential in order to prevent any mishaps during transport. The delicate components of a turntable, such as the tonearm, platter, cartridge, and delicate cables, need to be packed securely to avoid any damage from bumps, vibrations, or other potential hazards.
In this guide, we’ll provide you with a step-by-step approach to safely packing your turntable for shipping. We’ll outline the materials you’ll need and guide you through the process of detaching and securing various components of the turntable. By the end of this article, you’ll have all the knowledge you need to ensure that your turntable arrives in pristine condition.
So, let’s dive in and learn how to pack a turntable for shipping!
Materials Needed
Before you begin packing your turntable for shipping, gather the following materials to ensure a smooth and secure packing process:
- Sturdy Box: Find a box that is slightly larger than your turntable, allowing enough room for additional padding and protection inside.
- Bubble Wrap: This will be used to wrap various components of the turntable, providing cushioning and shock absorption.
- Packing Peanuts or Foam Inserts: These are essential for filling any empty spaces within the box to prevent movement during transit.
- Packing Tape: Use strong packing tape to seal the box and secure any loose components.
- Cable Ties or Twist Ties: These will be used to secure cables and prevent them from tangling or getting damaged.
- Plastic Bags: Use these to store small parts, such as screws or accessories, to prevent them from getting lost.
- Cardboard or Foam Sheets: These can be used as additional padding or reinforcement for the box.
- Shipping Labels: Have shipping labels ready with the necessary address information to attach to the box.
- Marker or Label Maker: You’ll need this to clearly label the box as fragile and indicate which side should be kept upright.
Having these materials on hand will make the packing process easier and ensure that your turntable is well-protected during transit. Now that you’re equipped with the necessary supplies, let’s move on to the step-by-step process of packing your turntable for shipping.
Step 1: Removing the Turntable Platter and Tonearm
Before you start packing your turntable, it’s important to remove the platter and tonearm. These are two of the most delicate and vulnerable parts of the turntable that need to be secured separately. Here’s how to do it:
- Power off and unplug your turntable: Make sure your turntable is turned off and disconnected from any power source to avoid any electrical mishaps.
- Remove the platter: Gently lift the platter straight up, being careful not to touch or damage the delicate stylus and tonearm. If there’s a belt connecting the platter to the motor, you may need to detach it as well.
- Secure the platter: Wrap the platter in a layer or two of bubble wrap, ensuring it is fully covered. This will protect it from any scratches or impacts during transit.
- Secure the tonearm: Use a cable tie or twist tie to secure the tonearm to the turntable base. This will prevent it from moving or bouncing around during shipping. Alternatively, you can use a tonearm rest if your turntable has one.
By removing and securing the platter and tonearm separately, you minimize the risk of them getting damaged during transit. Remember to handle these components with care and avoid any excessive force or sudden movements.
Now that you’ve secured the platter and tonearm, you can move on to the next step of packing your turntable.
Step 2: Securing the Dust Cover
The dust cover is an essential part of your turntable that helps protect the delicate components from dust, debris, and accidental damage. To ensure the dust cover remains intact and undamaged during shipping, follow these steps:
- Clean the dust cover: Before securing the dust cover, give it a thorough cleaning using a soft, lint-free cloth. Remove any fingerprints, dust, or smudges to keep it looking pristine.
- Close the dust cover: Carefully lower the dust cover down, ensuring it is fully closed. This will help prevent any potential damage to the hinges or the cover itself.
- Secure the dust cover: Use bubble wrap or foam sheets to provide an extra layer of protection around the dust cover. Wrap it gently, making sure not to apply too much pressure that could cause cracking or damage.
- Place the wrapped dust cover: Position the wrapped dust cover on top of the platter or secure it to the turntable base, depending on the design of your turntable. Add some foam inserts or packing peanuts around it to keep it in place and provide additional cushioning.
By securing the dust cover in this way, you’re ensuring that it remains protected from scratches, cracks, or any other potential damage during shipping.
With the dust cover safely secured, you’re ready to move on to the next step and prepare the cartridge and headshell for shipping.
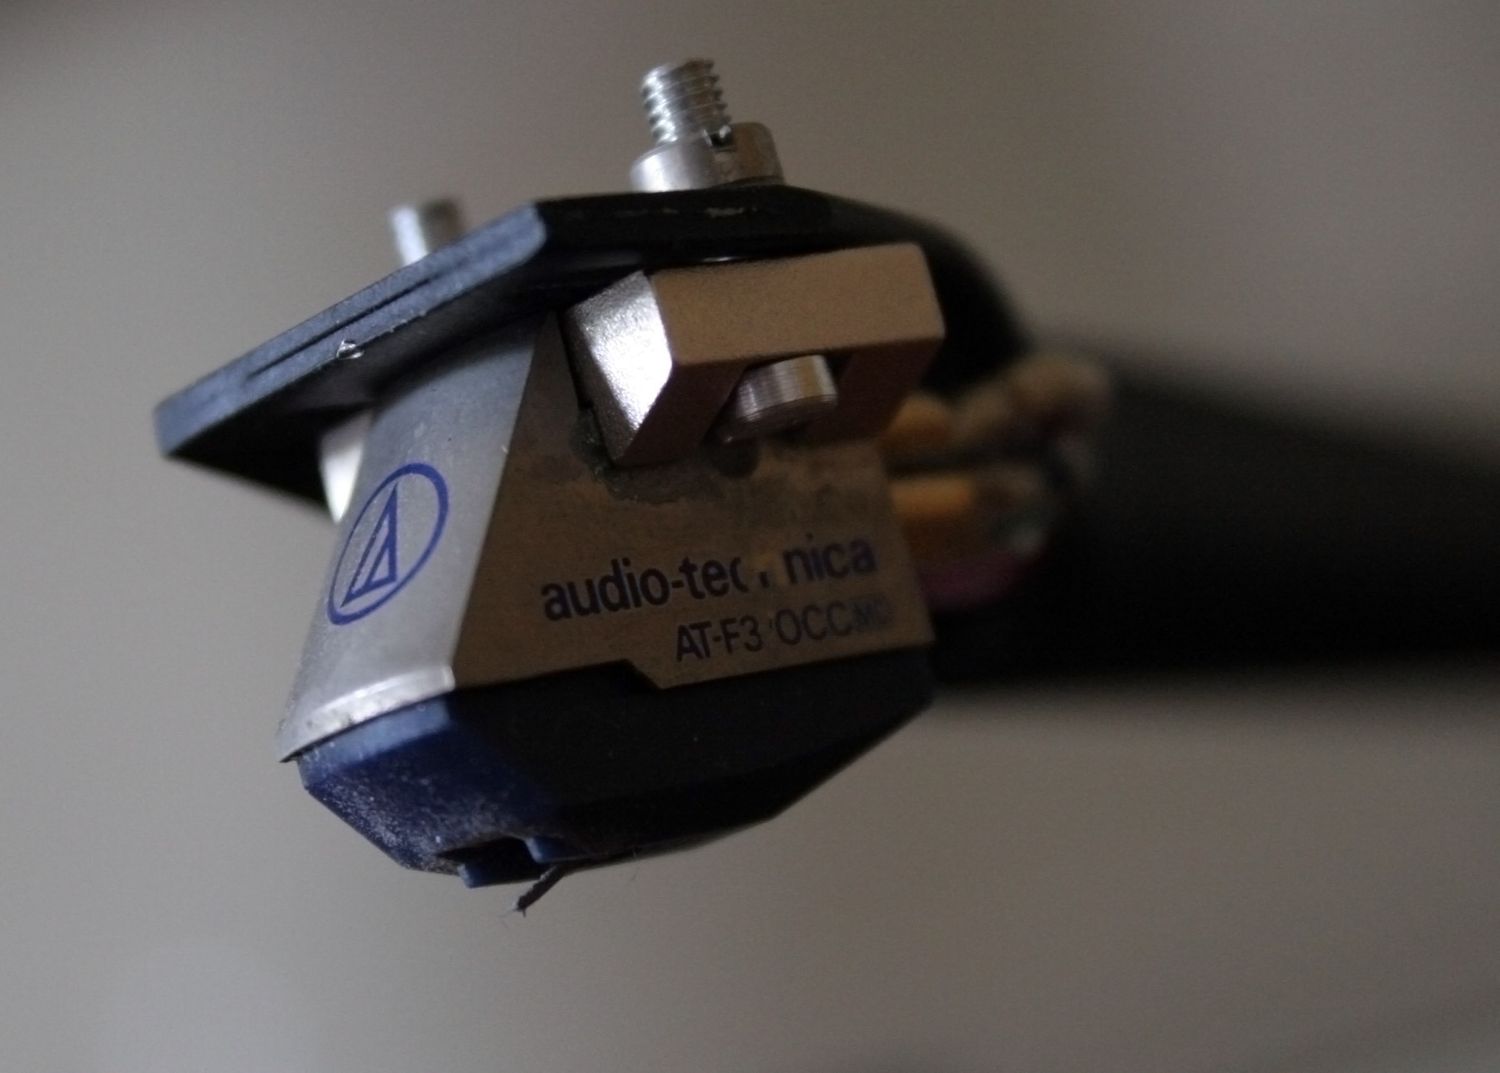
Step 3: Detaching the Cartridge and Headshell
The cartridge and headshell are sensitive components of your turntable that require careful handling. By detaching them properly, you can protect them from any potential damage during shipping. Follow these steps to safely remove and pack the cartridge and headshell:
- Power off and unplug your turntable: Ensure that your turntable is turned off and disconnected from any power source to prevent any electrical mishaps.
- Secure the tonearm: Use a tonearm lock (if available) or gently place the tonearm in its rest position to prevent any accidental movement during the cartridge detachment process.
- Loosen the screws or clips: Depending on the model of your turntable, you’ll either have screws or clips holding the cartridge and headshell in place. Loosen them using the appropriate tools (usually a screwdriver or pliers) and carefully detach the cartridge and headshell from the tonearm.
- Protect the cartridge and headshell: Wrap the cartridge and headshell with a few layers of bubble wrap or foam sheets. This will provide cushioning and prevent any accidental impacts or damage during shipping.
- Store the detached components: Place the wrapped cartridge and headshell in a small plastic bag and seal it. This will ensure that they stay together and remain protected.
Detaching the cartridge and headshell properly ensures that these delicate components are safeguarded during shipping. With this step completed, you can now move on to packaging the turntable base.
Step 4: Packaging the Turntable Base
The turntable base is the foundation of your turntable and needs to be packaged securely to prevent any damage during shipping. Follow these steps to properly package the turntable base:
- Prepare the box: Select a sturdy box that is slightly larger than the turntable base. This will allow room for additional padding and protection inside the box.
- Add cushioning material: Place a layer of packing peanuts or foam inserts at the bottom of the box. This will create a cushioning layer to absorb any impacts during transit.
- Place the turntable base: Carefully place the turntable base in the center of the box, ensuring it is positioned securely and level.
- Add more cushioning material: Fill any empty spaces around the turntable base with additional packing peanuts or foam inserts. This will prevent the turntable base from shifting or moving during shipping.
- Add reinforcement if necessary: If you have any cardboard or foam sheets, you can use them to reinforce the sides of the box. This provides extra protection against potential impacts.
- Close and seal the box: Once the turntable base is properly positioned and surrounded by cushioning material, close the box securely. Use strong packing tape to seal all edges and seams of the box to prevent it from opening during transit.
- Label the box: Clearly label the box as “Fragile” and indicate which side should be kept upright. This will ensure that handlers are aware of the delicate contents and handle the package accordingly.
By packaging the turntable base with care and providing adequate cushioning, you can minimize the risk of any damage during shipping. With this step completed, you’re ready to move on to protecting the tonearm in the next step.
Step 5: Protecting the Tonearm
The tonearm is a delicate and sensitive part of your turntable that requires special attention during packaging. By taking the necessary precautions, you can ensure that the tonearm remains safe and secure during shipping. Follow these steps to protect the tonearm:
- Secure the tonearm rest: If your turntable has a tonearm rest, make sure it is locked in place to prevent any accidental movement of the tonearm during transit.
- Wrap the tonearm: Gently wrap the tonearm with a layer of bubble wrap or foam sheets. Ensure that the wrap is snug but not too tight, as excessive pressure can cause damage to the tonearm.
- Secure the wrap: Use a small piece of tape or a twist tie to secure the bubble wrap or foam around the tonearm. This will prevent it from unwrapping during shipping.
- Position the tonearm: Carefully position the wrapped tonearm on top of the turntable base, making sure it is securely in place. If needed, you can use foam inserts or packing peanuts to provide additional support.
- Inspect and adjust: Take a moment to inspect the tonearm and make any necessary adjustments to ensure it is properly protected. Ensure that it is not in contact with any other components that could cause damage during transit.
By properly wrapping and securing the tonearm, you can minimize the risk of any damage occurring during shipping. With the tonearm protected, you’re now ready to move on to packing the platter in the next step.
Step 6: Packing the Platter
The platter is a crucial component of your turntable that requires careful handling and protection during shipping. To ensure it remains secure and undamaged, follow these steps to pack the platter:
- Clean the platter: Before packing the platter, give it a thorough cleaning using a soft, lint-free cloth. Remove any dust, fingerprints, or debris.
- Wrap the platter: Take a layer or two of bubble wrap and gently wrap it around the platter. Ensure that the entire surface of the platter is covered, providing cushioning against impacts.
- Secure the wrap: Use a small piece of tape or a twist tie to secure the bubble wrap in place. Make sure it is snug but not too tight, as excessive pressure can cause damage to the platter.
- Place the wrapped platter: Position the wrapped platter securely on top of the turntable base, ensuring it is centered and well-supported. You can use foam inserts or packing peanuts to provide additional cushioning and stability if needed.
- Inspect and adjust: Take a moment to inspect the platter and make any necessary adjustments to ensure it is properly protected. Ensure that it is not in contact with any other components that could cause damage during transit.
By properly wrapping and securing the platter, you minimize the risk of any damage occurring during shipping. With the platter packed securely, you’re now ready to move on to packing the cartridge and headshell in the next step.
Step 7: Packing the Cartridge and Headshell
The cartridge and headshell are delicate components of your turntable that require special care and protection during shipping. By packing them properly, you can avoid any potential damage and ensure their safe arrival. Here’s how to pack the cartridge and headshell:
- Inspect the cartridge and headshell: Before packing, visually inspect the cartridge and headshell for any visible damage. If you notice any issues, it’s best to consult a professional before proceeding.
- Wrap the cartridge and headshell: Use a layer or two of bubble wrap or foam sheets to wrap the cartridge and headshell. Make sure they are fully covered and securely cushioned.
- Secure the wrap: Use a small piece of tape or a twist tie to secure the bubble wrap or foam around the cartridge and headshell. This will prevent any movement or unwrapping during shipping.
- Store the wrapped components: Place the wrapped cartridge and headshell in a small plastic bag and seal it. This will ensure that they stay together and remain protected.
- Position the bagged components: Carefully position the bagged cartridge and headshell in a secure spot, either on top of the turntable base or inside the packaging box, depending on the available space and design of your turntable. Add additional cushioning like foam inserts or packing peanuts if necessary.
By properly wrapping and securing the cartridge and headshell, you reduce the risk of any damage occurring during shipping. Take the time to ensure they are well-protected before moving on to the next step.
Step 8: Securing the Cables
The cables of your turntable need to be properly secured to prevent any tangling or damage during shipping. By taking the time to secure the cables, you can ensure that they remain intact and in good condition. Here’s how to secure the cables:
- Gather the cables: Group all the cables together, including the power cord and any other audio cables that are connected to your turntable.
- Bundle the cables: Use a cable tie or twist tie to gently bundle the cables together. Make sure they are not too tight to avoid damaging the cables.
- Tape the cables to the turntable base: Once the cables are bundled, use a small piece of tape to secure them to the turntable base. This will prevent them from moving around or getting tangled during shipping.
- Protect the cable ends: If the cables have exposed ends or connectors, protect them by wrapping them with a layer of bubble wrap or foam sheets. This will prevent any potential damage to the connectors during transit.
By properly securing and protecting the cables, you minimize the risk of any tangling, snags, or damage occurring during shipping. Take the time to ensure that the cables are well-organized and securely fastened before moving on to the next step.
Step 9: Packaging the Dust Cover
The dust cover of your turntable needs to be properly packaged to prevent any scratches, cracks, or damage during shipping. Protecting the dust cover ensures that it arrives in the same condition as when you packed it. Here’s how to package the dust cover:
- Inspect the dust cover: Before packaging, carefully inspect the dust cover for any existing damage. If you notice any cracks or weak spots, consider using additional protective measures or consulting a professional for repairs.
- Clean the dust cover: Use a soft, lint-free cloth to gently clean the dust cover. Remove any dust, fingerprints, or smudges to keep it looking its best.
- Wrap the dust cover: Take a layer or two of bubble wrap or foam sheets and wrap them around the dust cover. Ensure that all sides of the dust cover are adequately covered, providing cushioning and protection against impacts.
- Secure the wrap: Use a small piece of tape to secure the bubble wrap or foam sheets in place. Make sure it is snug but not too tight, so as not to apply excessive pressure that could cause damage to the dust cover.
- Place the wrapped dust cover: Position the wrapped dust cover inside the packaging box. If space allows, place it on top of the turntable base or in a separate compartment, ensuring it is securely positioned and will not shift during shipping.
- Add additional padding: Fill any empty spaces in the packaging box with packing peanuts or foam inserts to provide extra cushioning around the dust cover. This will help absorb any shocks or impacts that may occur during transit.
- Close and seal the box: Once the dust cover is properly positioned and surrounded by padding, close the packaging box and seal it securely with strong packing tape. Ensure that all edges and seams are properly sealed to prevent any accidental opening during shipping.
By properly packaging the dust cover, you can minimize the risk of any damage occurring during shipping. With this step completed, your turntable is almost ready for safe transit to its destination.
Step 10: Finalizing the Packaging
Now that you have carefully packed and secured all the components of your turntable, it’s time to finalize the packaging to ensure its safe transit. Follow these steps to complete the packaging:
- Recheck everything: Before sealing the box, take a moment to double-check that all components are properly packed and secured. Ensure that nothing is loose or at risk of moving during transit.
- Add final cushioning: If there are any empty spaces within the box, fill them with additional packing peanuts or foam inserts. This will provide extra cushioning and prevent any movement inside the box.
- Close and seal the box: Once you’re satisfied with the arrangement, carefully close the packaging box and seal it securely using strong packing tape. Make sure all edges and seams are properly secured to prevent any accidental opening during shipping.
- Label the box: Clearly label the box with shipping labels that include the necessary address information. Use a marker or label maker to indicate that the contents are fragile and indicate which side should be kept upright.
- Inspect the package: Before sending the package off, take a final look to ensure that the box is properly sealed and labeled. Shake the box gently to check for any movement or shifting inside. If you detect any issues, open the box and make the necessary adjustments.
- Choose a reliable shipping service: Select a reputable shipping carrier that specializes in fragile items and provides insurance for extra protection. Ensure that the package is handled with care throughout the shipping process.
- Keep the tracking information: Once your package is on its way, make a note of the tracking number provided by the shipping carrier. This will allow you to monitor its progress and stay informed on its expected delivery date.
By following these final steps, your turntable is securely packaged and ready for shipping. With proper care during handling and transit, your turntable should arrive at its destination in excellent condition.
Conclusion
Properly packing a turntable for shipping is crucial to ensure its safety during transit. By following the step-by-step guide outlined in this article, you can securely package your turntable and minimize the risk of any damage occurring. Here’s a quick recap of the steps:
- Remove the turntable platter and secure the tonearm.
- Secure the dust cover with proper wrapping and padding.
- Detach the cartridge and headshell, and wrap them for protection.
- Package the turntable base with cushioning material.
- Protect the tonearm with careful wrapping and positioning.
- Wrap and secure the platter to prevent any scratches or impacts.
- Pack the cartridge and headshell in a sealed bag.
- Secure the cables to prevent tangling or damage.
- Package the dust cover with proper wrapping and padding.
- Finalize the packaging by sealing the box and adding necessary labels.
Remember to choose a reliable shipping service that specializes in fragile items and offers insurance for extra protection. Keep track of the shipping progress using the provided tracking number.
By taking the time to pack your turntable properly, you can enjoy peace of mind knowing that it will arrive at its destination in the same immaculate condition as when you sent it. Whether you’re moving or sending your turntable to someone else, following these steps will ensure a safe and secure journey for your beloved turntable.