Home>Devices & Equipment>Turntable>How To Replace Turntable Cartridge
Turntable
How To Replace Turntable Cartridge
Modified: January 22, 2024
Learn how to easily replace the turntable cartridge in a few simple steps. Enhance your audio experience with a new cartridge for your turntable.
(Many of the links in this article redirect to a specific reviewed product. Your purchase of these products through affiliate links helps to generate commission for AudioLover.com, at no extra cost. Learn more)
Table of Contents
Introduction
Turntables have been making a comeback in recent years, captivating audiophiles and music enthusiasts with their warm, nostalgic sound. A crucial component of any turntable is the cartridge, which houses the needle responsible for reading the grooves on your vinyl records. Over time, the cartridge may wear out or become damaged, leading to a decrease in sound quality or even skipping. When this happens, it’s important to know how to replace the turntable cartridge to keep your vinyl listening experience at its best.
In this guide, we will take you through the step-by-step process of replacing a turntable cartridge. Whether you’re a seasoned vinyl enthusiast or a beginner, you’ll find the instructions easy to follow and the necessary tools and materials readily available.
Before we dive into the process, it’s important to note that turntable cartridges come in various types and models. It’s essential to ensure that the replacement cartridge you purchase is compatible with your specific turntable model. Refer to your turntable’s user manual or consult with an expert if you’re unsure about compatibility.
Now, let’s gather our tools and materials and get started on replacing the turntable cartridge!
Step 1: Gathering the necessary tools and materials
Before you can begin replacing the turntable cartridge, you’ll need to gather a few essential tools and materials. Having everything prepared beforehand will ensure a smooth and efficient cartridge replacement process. Here’s what you’ll need:
- New turntable cartridge: Make sure to choose a cartridge that is compatible with your turntable model. There are various options available, ranging from entry-level to high-end cartridges, catering to different audio preferences and budgets.
- Screwdriver: Check the type and size of the screws holding the cartridge to your turntable arm. Depending on your turntable model, you may need a Phillips or flathead screwdriver to remove or install the cartridge.
- Alignment protractor: This tool helps you align the new cartridge properly to ensure optimal tracking and sound quality. You can find alignment protractors specific to your turntable model or opt for a universal one.
- Tweezers: These are useful for handling small components, such as tiny screws or wires, with precision. Make sure to use non-magnetic tweezers to avoid damaging the delicate cartridge components.
- Rubbing alcohol and cotton swabs: These are useful for cleaning the contacts and connections between the cartridge and turntable. Remove any dirt, dust, or residue to ensure a stable and clear audio signal.
- User manual or online resources: It’s always a good idea to have your turntable’s user manual handy, as it may contain specific instructions for removing and installing the cartridge. If you don’t have the manual, you can often find valuable resources and guides online.
Once you have gathered all the necessary tools and materials, you’re ready to proceed to the next step: removing the old cartridge.
Step 2: Removing the old cartridge
Now that you have all the necessary tools and materials prepared, it’s time to remove the old turntable cartridge. Follow these step-by-step instructions to safely and effectively remove the cartridge:
- Start by powering off your turntable and disconnecting it from any power source. This ensures your safety and prevents any accidental damage to the turntable or cartridge.
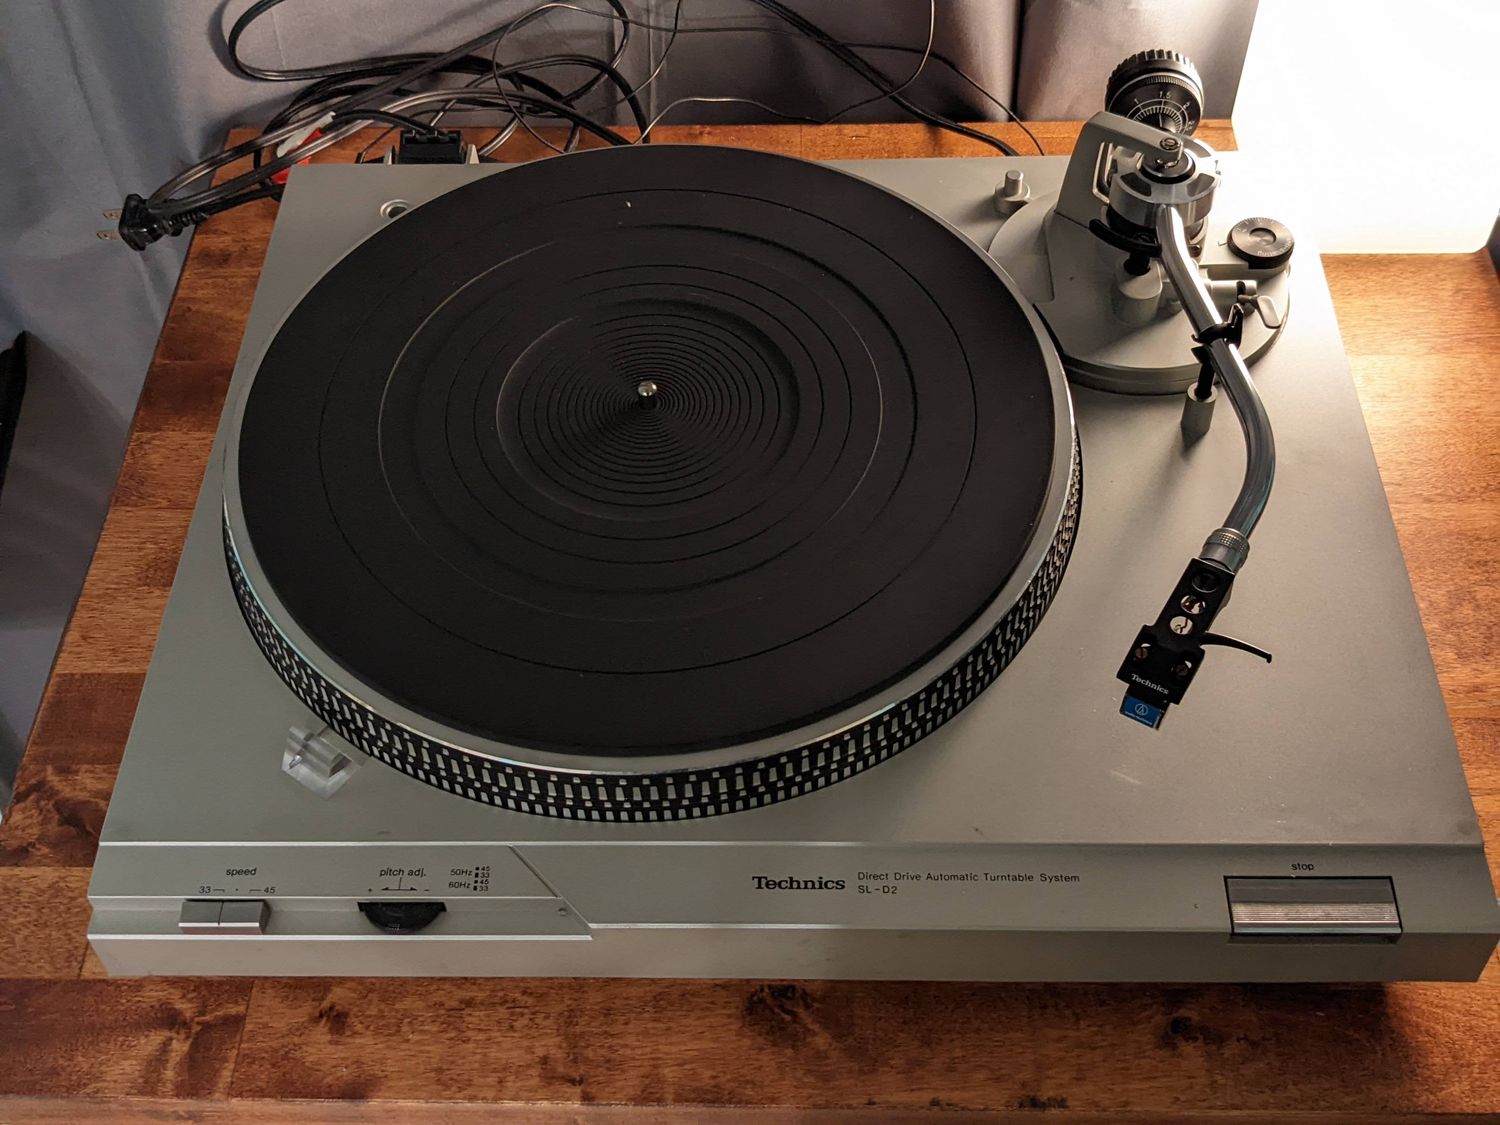
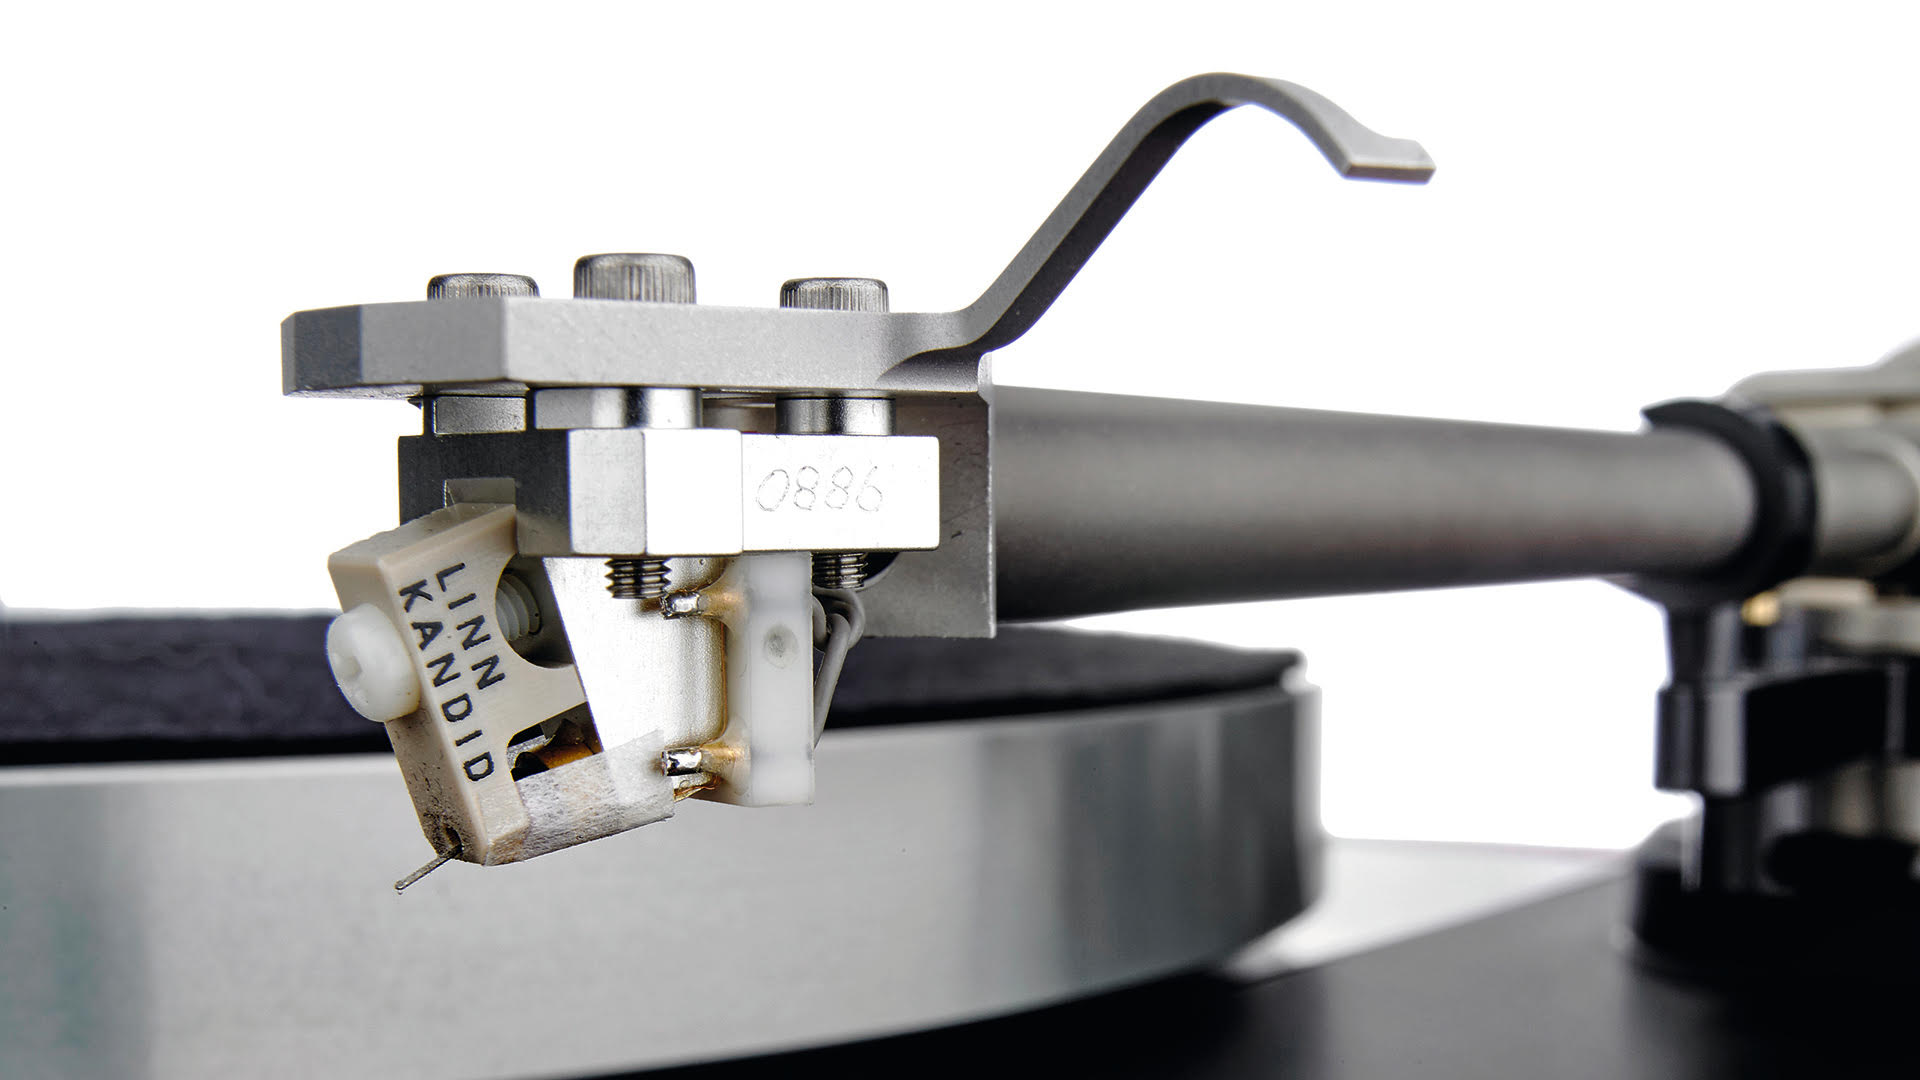
- Refer to your turntable’s user manual or consult online resources to locate the cartridge. It is typically found at the end of the turntable tonearm, where the stylus is attached.
- Using the appropriate screwdriver, carefully unscrew the screws that secure the cartridge to the tonearm. Make sure to keep the screws in a safe place to avoid losing them.
- Gently lift the old cartridge from the tonearm, taking care not to damage any wires or connections. If the cartridge seems stuck, check for any additional screws or clips that might be holding it in place.
- Once the old cartridge is removed, inspect the wires and connections for any damage or wear. If you notice any issues, it may be necessary to replace or repair the wiring before installing the new cartridge.
- Before installing the new cartridge, it’s a good practice to clean the tonearm and the area where the cartridge attaches. Use a soft cloth and some rubbing alcohol to remove any dust or debris.
With the old cartridge successfully removed and the tonearm cleaned, you’re now ready to move on to the next step: installing the new cartridge.
Step 3: Installing the new cartridge
With the old turntable cartridge safely removed, it’s time to install the new cartridge. Follow these step-by-step instructions to ensure a proper and secure installation:
- Start by carefully unpacking the new cartridge from its packaging. Handle it by the sides to avoid touching the stylus or other delicate components.
- Examine the bottom of the new cartridge and locate the small pins or connectors. These will align with the corresponding connectors on the tonearm.
- Align the pins or connectors on the cartridge with the connectors on the tonearm. Ensure that they are properly aligned before proceeding to the next step.
- Once the cartridge is aligned, gently lower it onto the tonearm, ensuring that the pins or connectors make a secure connection.
- Once the cartridge is in place, use the screws you removed earlier to secure it to the tonearm. Be careful not to overtighten the screws, as this could damage the cartridge or tonearm.
- Double-check the alignment of the cartridge to ensure that it is parallel to the record groove. This will help to achieve proper tracking and prevent unnecessary wear on your vinyl records.
Now that the new cartridge is installed, it’s time to move on to the next step: adjusting the tracking force.
Step 4: Adjusting the tracking force
After installing the new turntable cartridge, it’s essential to adjust the tracking force to ensure optimal performance and prevent unnecessary wear on your vinyl records. The tracking force refers to the amount of pressure applied by the stylus on the record’s grooves. Follow these steps to adjust the tracking force:
- Refer to your turntable’s user manual or consult online resources to determine the recommended tracking force range for your specific cartridge. This information is crucial as it ensures that you’re not applying too much or too little pressure.
- Locate the tracking force adjustment mechanism on your turntable. It can typically be found near the base of the tonearm or on the cartridge itself.
- With the turntable powered on and a record placed on the platter, gently lift the tonearm and position it over the record’s surface.
- Adjust the tracking force by rotating the tracking force adjustment dial or sliding the counterweight along the tonearm. Follow the manufacturer’s instructions to increase or decrease the tracking force based on the recommended range for your cartridge.
- After making the necessary adjustments, carefully lower the tonearm onto the record’s surface. It should rest gently without dragging or bouncing.
- Listen to the playback and assess the tracking force. If you hear any distortion or skipping, you may need to fine-tune the tracking force further until you achieve an optimal, balanced sound.
Remember to take your time while adjusting the tracking force, as it greatly impacts the audio quality and longevity of your vinyl records. With the tracking force properly set, you can now move on to the final step: aligning the cartridge.
Step 5: Aligning the cartridge
Proper alignment of the turntable cartridge is crucial for accurate tracking and optimal sound quality. Follow these steps to align your newly installed cartridge:
- Start by obtaining an alignment protractor specific to your turntable model or a universal one that suits your cartridge type.
- Place the alignment protractor on the turntable’s platter and secure it in place, making sure it is centered and level.
- Rotate the turntable’s platter to align the cartridge’s stylus with the gridlines on the protractor.
- Observe the alignment of the stylus tip with the two points on the protractor. Adjust the cartridge position by using the screws or mechanisms provided, carefully maintaining the correct overhang and offset angles.
- Once the cartridge is aligned according to the protractor, tighten any screws or locking mechanisms to secure it in place.
- Remove the alignment protractor from the turntable’s platter.
Proper alignment ensures that the stylus tracks accurately across the record’s grooves, minimizing distortion and maximizing sound quality.
It’s important to note that aligning a turntable cartridge can be a delicate process. If you are unsure or uncomfortable performing the alignment yourself, it is recommended to seek assistance from a professional or someone experienced in turntable setup.
With the cartridge properly aligned, your turntable is ready to provide you with an exceptional vinyl listening experience. Enjoy the warm and immersive sound that only a well-maintained and properly aligned cartridge can deliver!
Conclusion
Replacing a turntable cartridge may seem like a daunting task, but with the right tools, knowledge, and careful attention to detail, it can be a rewarding and straightforward process. By following the steps outlined in this guide, you can ensure that your turntable continues to deliver high-quality sound and preserve the life of your precious vinyl collection.
Remember, before starting the cartridge replacement process, always check the compatibility of the new cartridge with your turntable model. It’s essential to choose a cartridge that suits your audio preferences and budget.
Gathering the necessary tools and materials, removing the old cartridge, installing the new one, adjusting the tracking force, and aligning the cartridge are all critical steps in the replacement process. Take your time and follow the instructions carefully to achieve the best possible sound reproduction from your turntable.
If you are unsure about any step or encounter difficulties during the process, it’s always a good idea to consult your turntable’s user manual or seek guidance from an experienced professional. They can provide valuable insights and assistance to ensure a successful cartridge replacement.
With a fresh cartridge installed and properly aligned, you’ll be able to fully appreciate the warmth, richness, and nuanced sound characteristic of vinyl records. So, dust off your favorite albums, get ready to immerse yourself in music, and enjoy the analog audio experience that turntables offer.
Happy listening!