Home>Devices & Equipment>Turntable>How To Build A Powered Turntable

Turntable
How To Build A Powered Turntable
Published: January 19, 2024
Learn how to build a powered turntable and enhance your audio experience. Master the art of assembling and customizing your own turntable with our step-by-step guide.
(Many of the links in this article redirect to a specific reviewed product. Your purchase of these products through affiliate links helps to generate commission for AudioLover.com, at no extra cost. Learn more)
Table of Contents
- Introduction
- Step 1: Gather the necessary materials
- Step 2: Preparing the base
- Step 3: Assembling the turntable motor
- Step 4: Installing the rotating platform
- Step 5: Connecting the motor to the power source
- Step 6: Building the tonearm
- Step 7: Installing the tonearm and cartridge
- Step 8: Fine-tuning and calibrating the turntable
- Step 9: Testing and troubleshooting
- Conclusion
Introduction
Turntables have long been valued by music enthusiasts for their warm, rich sound and nostalgic charm. While there are many great turntables available on the market, building your own powered turntable can be a rewarding and fulfilling project. Not only will you have the opportunity to customize and personalize your turntable, but you’ll also gain a deeper understanding of its inner workings.
In this article, we will guide you through the step-by-step process of building your own powered turntable. From gathering the necessary materials to fine-tuning the calibration, we will cover all the essential aspects of building a turntable that will deliver exceptional audio quality.
Before we dive into the construction process, it’s important to note that building a turntable requires patience, attention to detail, and basic knowledge of electronics. If you’re new to DIY projects or are unsure about working with electrical components, it’s advisable to seek assistance or consult a professional. Safety should always be a top priority when working with electrical equipment.
With that said, let’s get started on your journey to building a powered turntable that will bring your vinyl collection to life.
Step 1: Gather the necessary materials
Before you can start building your powered turntable, you’ll need to gather all the necessary materials. Here’s a list of the essential components you’ll need:
- A turntable plinth: This is the base or platform on which the turntable’s components will be mounted. It should be sturdy and resistant to vibrations.
- A turntable motor: The motor is responsible for spinning the record. You can choose between belt-drive or direct-drive motors, depending on your preference.
- A rotating platform: This is the part where the record sits and rotates. It should be smooth and well-balanced to ensure accurate playback.
- A tonearm: The tonearm holds the cartridge and stylus, allowing it to track the grooves on the record. It should be adjustable for tracking force and anti-skate.
- A cartridge: The cartridge is mounted on the tonearm and contains the needle (stylus) that reads the grooves on the record. There are different types of cartridges available, each with its own sound characteristics.
- A preamp: The preamp boosts the low-level signal from the cartridge and prepares it for amplification. Some turntables have built-in preamps, while others require an external one.
- An amplifier: The amplifier takes the signal from the preamp and amplifies it to a level that can be played through speakers or headphones.
- Speakers or headphones: These are the devices that will produce the sound. Choose high-quality speakers or headphones to ensure the best audio experience.
- Wires and cables: You’ll need various wires and cables to connect the different components together. Make sure to use high-quality cables to minimize signal loss.
Additionally, you may want to consider purchasing or building a turntable isolation platform or feet to further reduce vibrations and improve sound quality. Some other optional accessories include a record cleaning kit, a dust cover, and a stylus force gauge for precise tracking force adjustment.
Once you have gathered all the necessary materials, you’ll be ready to move on to the next step: preparing the base for your turntable.
Step 2: Preparing the base
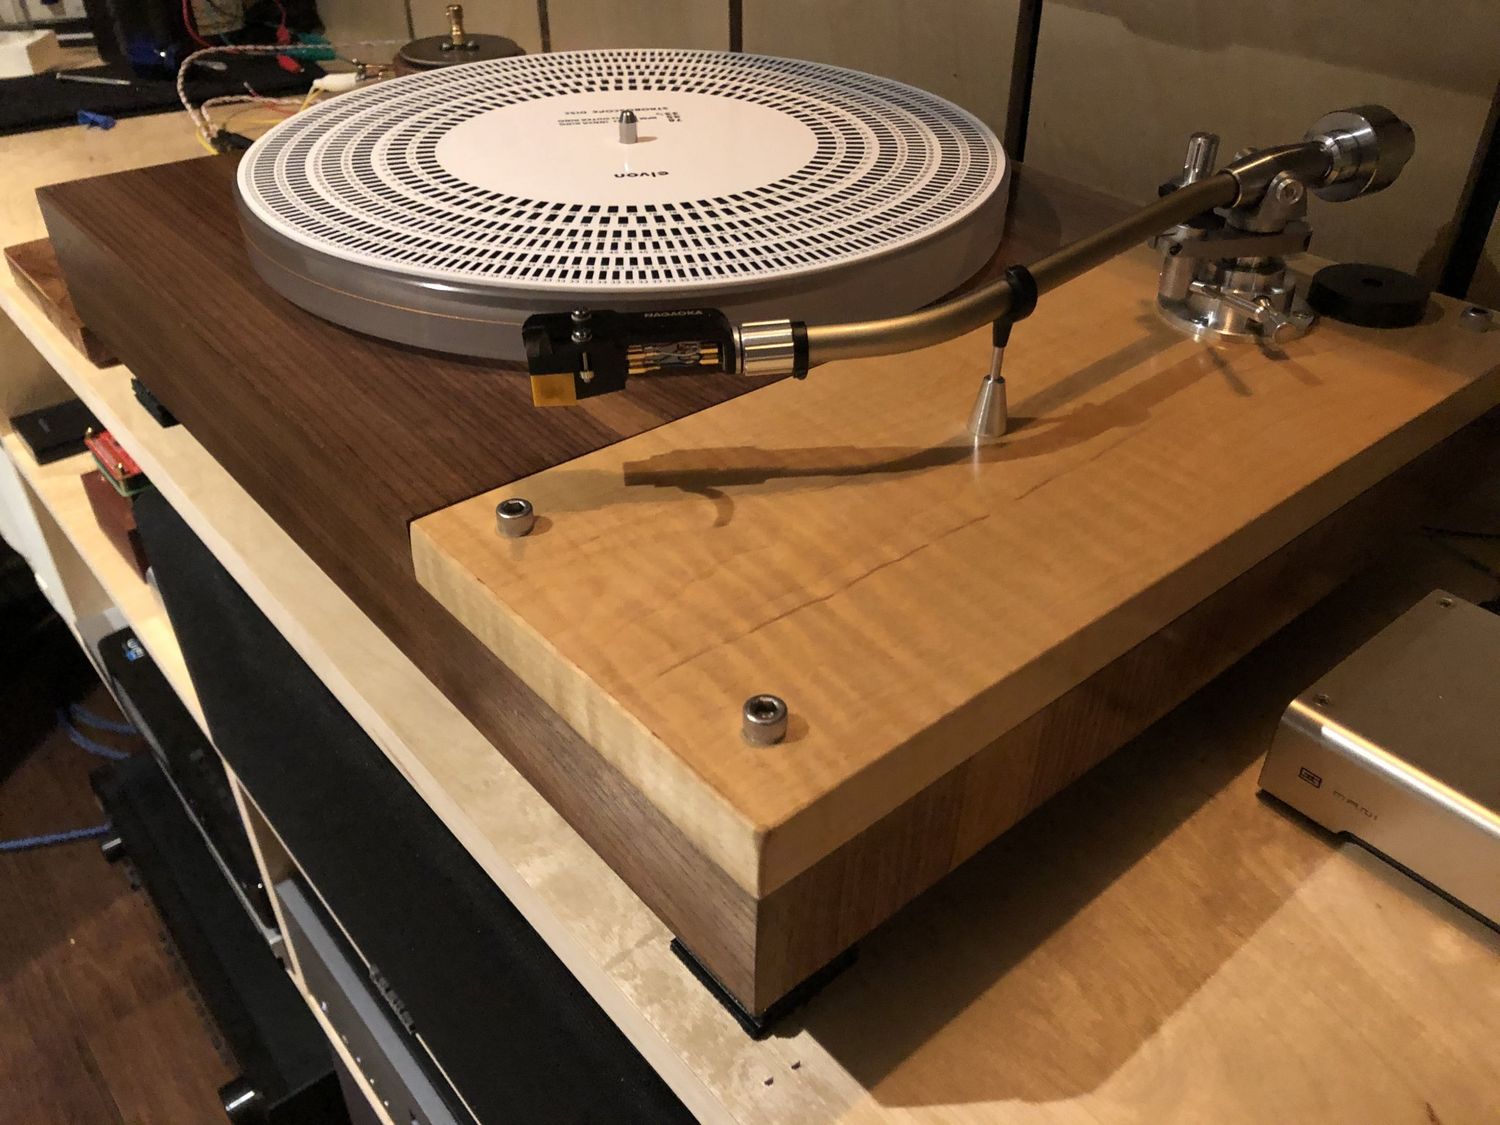
Before you can start assembling the components of your powered turntable, it’s important to prepare the base, also known as the turntable plinth. The plinth serves as a foundation for the motor, rotating platform, and tonearm, and should be sturdy enough to minimize vibrations and provide stability.
Here are the steps to prepare the base:
- Select a suitable material: Choose a material for the plinth that is rigid and vibration-resistant. Common choices include wood, acrylic, or a combination of both. Avoid materials that easily transmit vibrations, such as metal or glass.
- Design and shape the plinth: Consider the dimensions and overall design of your turntable. The plinth should be large enough to accommodate all the components comfortably. Take into account the dimensions of the rotating platform, motor, and tonearm when designing the plinth.
- Measure and cut the materials: Once you have decided on the design, measure and mark the dimensions of the plinth onto the chosen material. Use appropriate tools, such as a saw or router, to cut the material to the desired shape and size.
- Sand and smooth the edges: After cutting the material, sand the edges and surfaces of the plinth to ensure a smooth finish. This will help prevent any splinters or rough edges that could damage the components or interfere with the performance of the turntable.
- Drill holes for component mounting: Determine the placement of the motor, rotating platform, and tonearm on the plinth. Use a drill and appropriate-sized drill bits to create holes for mounting these components. Ensure that the holes are accurately aligned and properly sized for a secure fit.
- Apply a finish: Depending on the material used for the plinth, you may choose to apply a finish to enhance its appearance and provide protection. Popular finishes for wooden plinths include varnish or lacquer, while acrylic plinths may benefit from polishing or buffing.
Remember to work in a well-ventilated area and wear appropriate safety gear, such as gloves and eye protection, when handling tools and materials. Additionally, take your time and work with precision to ensure that the base is prepared to the highest standard.
Once the base is ready, you can proceed to the next step: assembling the turntable motor.
Step 3: Assembling the turntable motor
The turntable motor is a crucial component responsible for spinning the record accurately and at the desired speed. Assembling the motor properly is essential for the smooth operation of your powered turntable. Here’s how you can assemble the turntable motor:
- Prepare the motor mounting plate: Place the motor mounting plate on the designated area of the plinth, as determined during the base preparation step. Ensure that the plate is level and centered for optimal performance.
- Attach the motor to the mounting plate: Depending on the type of motor you have, follow the manufacturer’s instructions to securely fasten the motor onto the mounting plate. This may involve using screws, mounting brackets, or other provided hardware.
- Connect the drive system: If you are using a belt-drive turntable, attach the belt to the motor pulley and the turntable platter. Make sure the belt is properly tensioned and aligned for smooth operation. For a direct-drive turntable, ensure that the motor spindle is securely connected to the platter.
- Adjust motor positioning: Fine-tune the motor’s position to ensure proper alignment and tension of the belt or direct-drive mechanism. This may involve adjusting the mounting plate or using spacers to achieve optimal performance.
- Secure and test the assembly: Once you are satisfied with the motor assembly, secure all the connections and fastenings. Give the motor a test spin to ensure that it operates smoothly and maintains the correct speed. If any issues arise, troubleshoot and make necessary adjustments.
It’s important to follow the specific instructions provided by the manufacturer of your motor and turntable components. Additionally, consider investing in an accurate speed measuring device or strobe disc to verify the speed of your turntable and make any necessary adjustments.
Once the motor assembly is complete, you can move on to the next step: installing the rotating platform.
Step 4: Installing the rotating platform
The rotating platform, also known as the platter, is the part of the turntable where the record sits and spins. Installing the rotating platform correctly is crucial for smooth and accurate playback. Here’s how you can install the rotating platform:
- Prepare the platter: If your turntable came with a ready-made platter, ensure that it is clean and free from any dust or debris. If you are using a DIY platter, make sure it is properly finished and polished to minimize any surface imperfections that could affect the performance.
- Locate the spindle: Locate the spindle at the center of the turntable plinth. This is where the platter will sit and rotate. Ensure that the spindle is clean and free from any obstacles that could hinder the rotation.
- Place the platter on the spindle: Carefully place the platter onto the spindle, ensuring that it sits securely and evenly. Depending on your turntable design, the platter may lock into place or rest on a bearing for smooth rotation. Follow the manufacturer’s instructions for proper installation.
- Check for levelness: Use a spirit level or similar tool to check the levelness of the platter. It should be horizontal and free from any wobbling. If needed, adjust the plinth or the feet of the turntable for proper alignment.
- Test the rotation: Spin the platter by hand to ensure smooth and balanced rotation. It should spin freely without any resistance or wobble. If there are any issues, check for obstructions or misalignment and make any necessary adjustments.
It’s important to note that some turntables may have additional features or mechanisms related to the rotating platform, such as a belt tension adjustment or a sub-platter. Consult the manufacturer’s instructions or documentation for specific details on installing and calibrating these components.
Once the rotating platform is installed and functioning correctly, you can move on to the next step: connecting the motor to the power source.
Step 5: Connecting the motor to the power source
Connecting the motor to the power source is a crucial step in setting up your powered turntable. This ensures that the motor receives the necessary power to spin the platter and play your vinyl records. Here’s how you can connect the motor to the power source:
- Identify the power requirements: Check the specifications of your turntable motor to determine its power requirements. This includes the voltage and current needed for proper operation. Ensure that your power source meets these requirements.
- Prepare the power cable: If your motor has a detachable power cable, make sure it is in good condition and free from any damage. If not, ensure that the wires are properly connected to the motor, and there are no loose connections or exposed wires.
- Connect the power cable: Plug one end of the power cable into the designated power input on the motor. Make sure the connection is secure and snug. If your turntable has a power switch, ensure it is in the off position before proceeding.
- Connect to the power source: Plug the other end of the power cable into a suitable power outlet or power strip. Double-check that the voltage matches the requirements of your motor. If your turntable has a power switch, you may now turn it on.
- Test the motor: Once the power is connected, give the motor a spin to ensure it starts up smoothly and operates at the correct speed. Listen for any unusual noises or vibrations. If you encounter any issues, double-check the connections and consult the manufacturer’s instructions for troubleshooting.
It’s important to handle electrical connections with caution and prioritize safety. Ensure that all connections are secure and free from any exposed wires that could pose a risk of electric shock or short circuits.
Once the motor is properly connected to the power source and functioning correctly, you can proceed to the next step: building the tonearm.
Step 6: Building the tonearm
The tonearm plays a crucial role in tracking the grooves of the record and transmitting the audio signals to the cartridge. Building the tonearm correctly is essential for accurate and precise playback. Here’s how you can build the tonearm:
- Assemble the tonearm components: Start by gathering all the necessary components for the tonearm, including the main tonearm tube, counterweight, headshell, and wiring. Ensure that these components are compatible with each other and follow the specifications provided by the manufacturer.
- Attach the headshell: Connect the headshell to the end of the tonearm tube using the provided mounting hardware. Ensure that it is securely fastened but not overly tightened, as it may cause damage to the tonearm or cartridge.
- Install the counterweight: Attach the counterweight to the opposite end of the tonearm. The counterweight helps balance the tonearm and apply the appropriate tracking force. Consult the manufacturer’s instructions for proper installation and adjustment of the counterweight.
- Connect the wiring: Depending on the specific design of your tonearm, you may need to connect the wiring between the headshell and the other end of the tonearm. Take care to follow the correct wiring configuration to ensure proper functioning.
- Balance the tonearm: With the tonearm assembled, proceed to balance it properly. Adjust the counterweight and the position of the tonearm on its mount until it is in equilibrium. This helps ensure accurate tracking and prevents excessive wear on the stylus and record.
- Adjust the tracking force: Consult the cartridge manufacturer’s specifications to determine the recommended tracking force for your cartridge. Use the provided tools or a stylus force gauge to adjust the counterweight and apply the appropriate tracking force.
Building the tonearm requires precision and attention to detail. Take your time to ensure that all the components are securely attached, and the tonearm is properly balanced and adjusted. Following the manufacturer’s instructions is crucial for optimal performance.
Once the tonearm is built and properly adjusted, you can move on to the next step: installing the tonearm and cartridge to your turntable.
Step 7: Installing the tonearm and cartridge
Installing the tonearm and cartridge is a key step in the construction of your powered turntable. Proper installation ensures accurate tracking of the record and optimal performance of your audio setup. Here’s how you can install the tonearm and cartridge:
- Prepare the tonearm mount: Locate the tonearm mount on the plinth of your turntable. Ensure that it is clean and free from any dust or debris that could interfere with the installation.
- Align the tonearm: Align the tonearm with the designated tonearm mount, ensuring that it is parallel to the record and positioned correctly for optimal tracking. Consult the manufacturer’s instructions for any specific alignment guidelines for your turntable model.
- Secure the tonearm: Once aligned, secure the tonearm to the tonearm mount using the provided mounting hardware or locking mechanism. Ensure that the tonearm is held firmly in place but can still move freely and smoothly across the record’s surface.
- Attach the cartridge: Follow the manufacturer’s instructions for attaching the cartridge to the headshell of the tonearm. Most cartridges require the use of small screws or clips to secure them in place. Take care not to overtighten or damage the cartridge during this process.
- Check alignment and tracking force: Double-check the alignment of the cartridge within the headshell and make any necessary adjustments to ensure that it is in line with the record grooves. Additionally, reconfirm the tracking force based on the cartridge manufacturer’s recommendations and adjust the counterweight if needed.
- Set anti-skate: Anti-skate is a mechanism that counteracts the force pulling the tonearm towards the center of the record. Consult the manufacturer’s instructions for your turntable’s anti-skate adjustment and set it according to the recommended settings.
It’s vital to handle the cartridge with care and avoid touching the delicate stylus (needle) to prevent damage. Additionally, using a stylus force gauge can help ensure accurate tracking force and protect both the stylus and records.
Once the tonearm and cartridge are installed correctly, you can proceed to the next step: fine-tuning and calibrating your turntable.
Step 8: Fine-tuning and calibrating the turntable
Fine-tuning and calibrating your turntable ensures optimal performance and accurate playback of your vinyl records. This step allows you to adjust various settings and parameters to achieve the best sound quality. Here’s how you can fine-tune and calibrate your turntable:
- Set the tracking force: Using a stylus force gauge, adjust the counterweight to set the tracking force for your cartridge. Refer to the cartridge manufacturer’s specifications for the recommended tracking force range and set it accordingly. This ensures that the stylus exerts the optimal pressure on the record grooves for accurate tracking and minimal wear.
- Adjust anti-skate: Fine-tune the anti-skate mechanism to counteract the inward force on the tonearm caused by the record groove. Refer to the turntable’s manual for instructions on adjusting the anti-skate mechanism. Proper anti-skate calibration helps reduce distortion and ensures the stylus tracks the record accurately.
- Check azimuth alignment: Azimuth refers to the horizontal alignment of the cartridge’s stylus. Use an azimuth alignment tool to ensure the stylus is perfectly perpendicular to the record surface. This adjustment helps optimize stereo imaging and channel balance.
- Calibrate the speed: Use a speed measurement tool or a strobe disc to check the accuracy of the turntable’s speed. Many turntables have pitch controls or speed adjustment knobs that allow you to fine-tune the speed if necessary. Ensure that the turntable is spinning at the correct speed (usually 33 1/3 or 45 RPM) to avoid pitch variation and distortion.
- Check for vibrations: Eliminate or minimize any sources of vibrations that could affect the performance of your turntable. Place the turntable on a stable surface, away from speakers or other equipment that may cause vibrations. Consider using isolation platforms or feet to further reduce external vibrations.
- Ensure proper grounding: Proper grounding helps minimize unwanted noise and interference. Check that your turntable’s grounding wire is securely connected to the grounding terminal on an amplifier or receiver. This helps dissipate any static buildup and provides a clean audio signal.
During the fine-tuning and calibrating process, it’s important to make adjustments gradually and methodically. Take your time to listen to the changes and make incremental adjustments as needed. Keep in mind that different turntables and cartridges may have specific calibration procedures, so consult the manufacturer’s instructions for detailed guidelines.
Once you have fine-tuned and calibrated your turntable, you’re ready to move on to the final step: testing and troubleshooting.
Step 9: Testing and troubleshooting
After completing the construction and calibration of your powered turntable, it’s time to test its performance and troubleshoot any potential issues that may arise. This step ensures that your turntable is functioning optimally and delivering the best possible audio quality. Here’s how you can test and troubleshoot your turntable:
- Verify playback: Place a vinyl record onto the platter and start the turntable. Listen carefully to the playback to ensure there are no skips, excessive noise, or distortion. Check that the music sounds clear and well-balanced across both stereo channels.
- Inspect cartridge alignment: Examine the cartridge’s alignment visually. Ensure that the stylus is properly aligned with the record grooves. If you notice any misalignment or uneven wear on the stylus, consult the manufacturer’s instructions for cartridge alignment and make necessary adjustments.
- Check for unwanted noise: Listen for any unwanted noise or vibration coming from the turntable during playback. This could include motor noise, mechanical sounds, or electrical interference. Identify the source of the noise and take appropriate steps to minimize or eliminate it, such as adjusting the motor placement or improving grounding.
- Monitor speed stability: Continuously monitor the speed stability of your turntable while playing records. Use a strobe disc or speed measurement tool to ensure that the turntable maintains a consistent speed throughout. If you notice any speed fluctuations, make adjustments to the speed controls or consult a professional for further assistance.
- Address tracking issues: If you experience tracking issues where the stylus skips or jumps across the record grooves, check the tracking force, anti-skate, and cartridge alignment. Incorrect settings in any of these areas can result in tracking problems. Make adjustments carefully and test playback again to verify improved tracking performance.
- Consult manufacturer support: If you encounter persistent issues or difficulties in troubleshooting, reach out to the manufacturer’s support team for guidance and assistance. They can provide specific troubleshooting steps or recommend authorized service centers if necessary.
Remember, the testing and troubleshooting process may take some time and experimentation to identify and resolve any issues. Be patient and methodical in your approach, allowing for adjustments and fine-tuning as needed. It’s also beneficial to consult online forums or seek advice from experienced turntable enthusiasts who may have encountered similar issues.
By thoroughly testing and troubleshooting your turntable, you can ensure its optimal performance and enjoy high-quality audio playback for years to come.
With the completion of step 9, you have successfully built and fine-tuned your powered turntable. Now, sit back, relax, and immerse yourself in the warm, nostalgic sound of vinyl records!
Conclusion
Congratulations! You have successfully built your own powered turntable. By following the step-by-step process outlined in this guide, you now have a custom-made turntable that can deliver exceptional sound quality and bring new life to your vinyl collection.
Building a turntable can be a challenging and rewarding experience. Not only have you gained a deeper understanding of the inner workings of a turntable, but you’ve also personalized and customized it to your preferences. From selecting the materials and assembling the components to fine-tuning the calibration, each step was essential in creating a high-performing and enjoyable audio system.
Remember to regularly maintain and care for your turntable to ensure its longevity and continued performance. Keep the stylus clean, regularly dust off the platter and records, and periodically check for any mechanical issues or misalignment.
Now that you have a fully functional turntable, it’s time to sit back, relax, and enjoy the warm and immersive sound of your favorite vinyl records. Experience the depth, richness, and authenticity that vinyl audio can provide. Rediscover the joy of owning physical music and the unique character that each record brings to your listening sessions.
Building a turntable opens up a world of possibilities for further exploration and customization. You can experiment with different cartridges, tonearms, and even explore advanced upgrades such as record weight or phono stage enhancements.
Remember to continue exploring the world of turntables, vinyl records, and audio equipment. Join communities of fellow turntable enthusiasts, attend local vinyl fairs, and dive deeper into this timeless and captivating hobby.
Thank you for embarking on this journey to build a powered turntable. We hope that these steps and guidance have empowered you to create a turntable that brings new life and enjoyment to your music collection. Happy listening!

