Home>Devices & Equipment>Turntable>How To Align Cartridge On Turntable
Turntable
How To Align Cartridge On Turntable
Modified: January 22, 2024
Learn how to align the cartridge on your turntable for optimal sound quality. Expert tips and step-by-step instructions to ensure precise tracking and accurate playback.
(Many of the links in this article redirect to a specific reviewed product. Your purchase of these products through affiliate links helps to generate commission for AudioLover.com, at no extra cost. Learn more)
Table of Contents
- Introduction
- Understanding Cartridge Alignment
- Tools Required for Cartridge Alignment
- Step 1: Preparing the Turntable
- Step 2: Setting Up the Alignment Protractor
- Step 3: Adjusting the Overhang
- Step 4: Adjusting the Azimuth
- Step 5: Adjusting the Vertical Tracking Angle (VTA)
- Step 6: Fine-tuning the Alignment
- Conclusion
Introduction
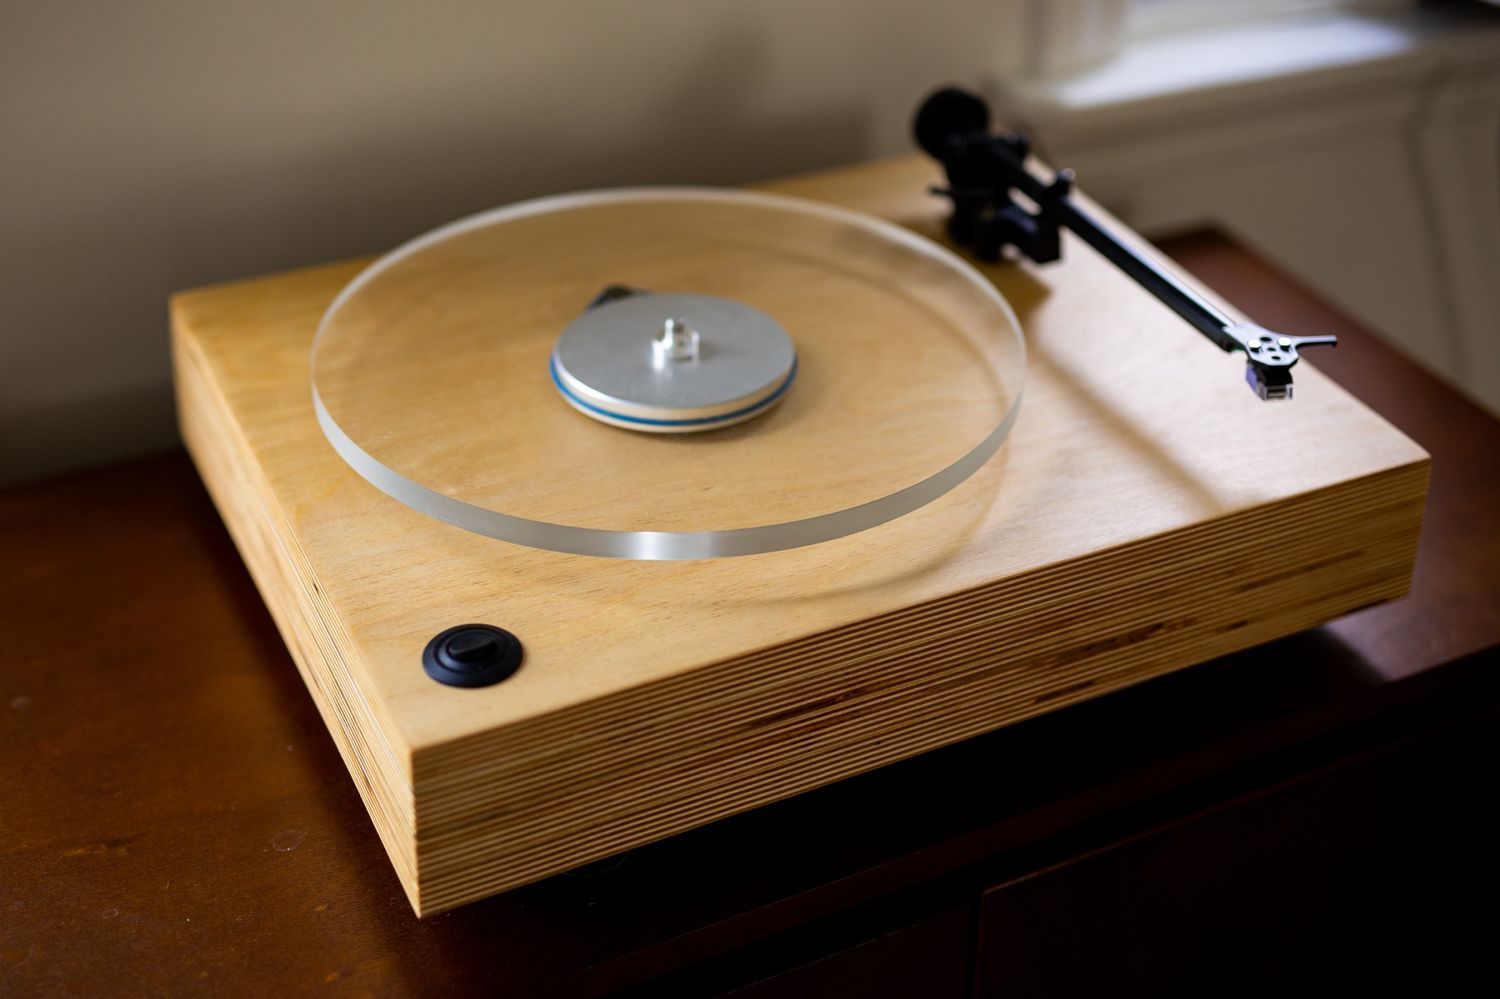
Welcome to the world of turntables – the epitome of vinyl listening experience. Whether you are just starting your journey with vinyl or an avid audiophile, one crucial aspect of enjoying your records to the fullest is ensuring proper cartridge alignment. The cartridge, which holds the stylus or needle, plays a key role in extracting the music from the grooves of your vinyl records with precision and accuracy.
Proper cartridge alignment is essential to achieve optimal sound reproduction, minimize distortion, and extend the lifespan of your records and stylus. It ensures that the stylus tracks the record grooves at the correct angle and depth, resulting in balanced frequency response and channel separation.
In this article, we will delve into the intricacies of cartridge alignment and guide you through the step-by-step process of aligning your cartridge for enhanced music playback. Whether you have a brand new turntable or have just replaced your cartridge, aligning it correctly will significantly improve your listening experience.
Before we dive into the alignment process, let’s briefly understand the different factors involved in achieving proper cartridge alignment:
- Overhang: The distance that the stylus extends beyond the center spindle of the turntable.
- Azimuth: The alignment of the cartridge in relation to the record surface, ensuring that the stylus remains perpendicular to the grooves.
- Vertical Tracking Angle (VTA): The angle at which the stylus meets the record surface, affecting the tonal balance and tracking performance.
To ensure accurate alignment, you will need a few essential tools. Let’s take a look at what you’ll need:
Understanding Cartridge Alignment
Before we begin the process of aligning your cartridge, it is important to have a solid understanding of why it is necessary and the impact it can have on your vinyl listening experience. The alignment of the cartridge directly affects the accuracy of tracking and playback, ultimately determining the quality of sound reproduction.
There are three main aspects to consider when it comes to cartridge alignment: overhang, azimuth, and vertical tracking angle (VTA).
Overhang: Overhang refers to the distance that the stylus extends beyond the center spindle of the turntable. This distance is crucial for proper stylus tracking and groove engagement. If the overhang is not set correctly, it can result in inaccuracies in tracking and distortion in sound reproduction. It’s important to note that different turntables and cartridges may have specific overhang requirements, so it’s crucial to consult the manufacturer’s guidelines or specifications.
Azimuth: Azimuth refers to the alignment of the cartridge in relation to the record surface. Proper azimuth ensures that the stylus remains perpendicular to the grooves, allowing for accurate tracking and minimizing distortion. When the azimuth is misaligned, it can cause channel imbalance and impact the stereo image. Correcting the azimuth will result in improved soundstage and overall sonic performance.
Vertical Tracking Angle (VTA): VTA refers to the angle at which the stylus meets the record surface. It affects the tonal balance and tracking performance. Incorrect VTA can lead to distorted sound and uneven frequency response. It’s essential to set the correct VTA to achieve optimal sound reproduction.
By understanding these three aspects of cartridge alignment, you can appreciate the importance of ensuring accurate alignment. Now that we have covered the fundamentals, let’s move on to the tools required for the alignment process.
Tools Required for Cartridge Alignment
Aligning your cartridge requires a few essential tools to ensure precise and accurate alignment. These tools will help you measure and adjust the various parameters of cartridge alignment. Here are the tools you will need:
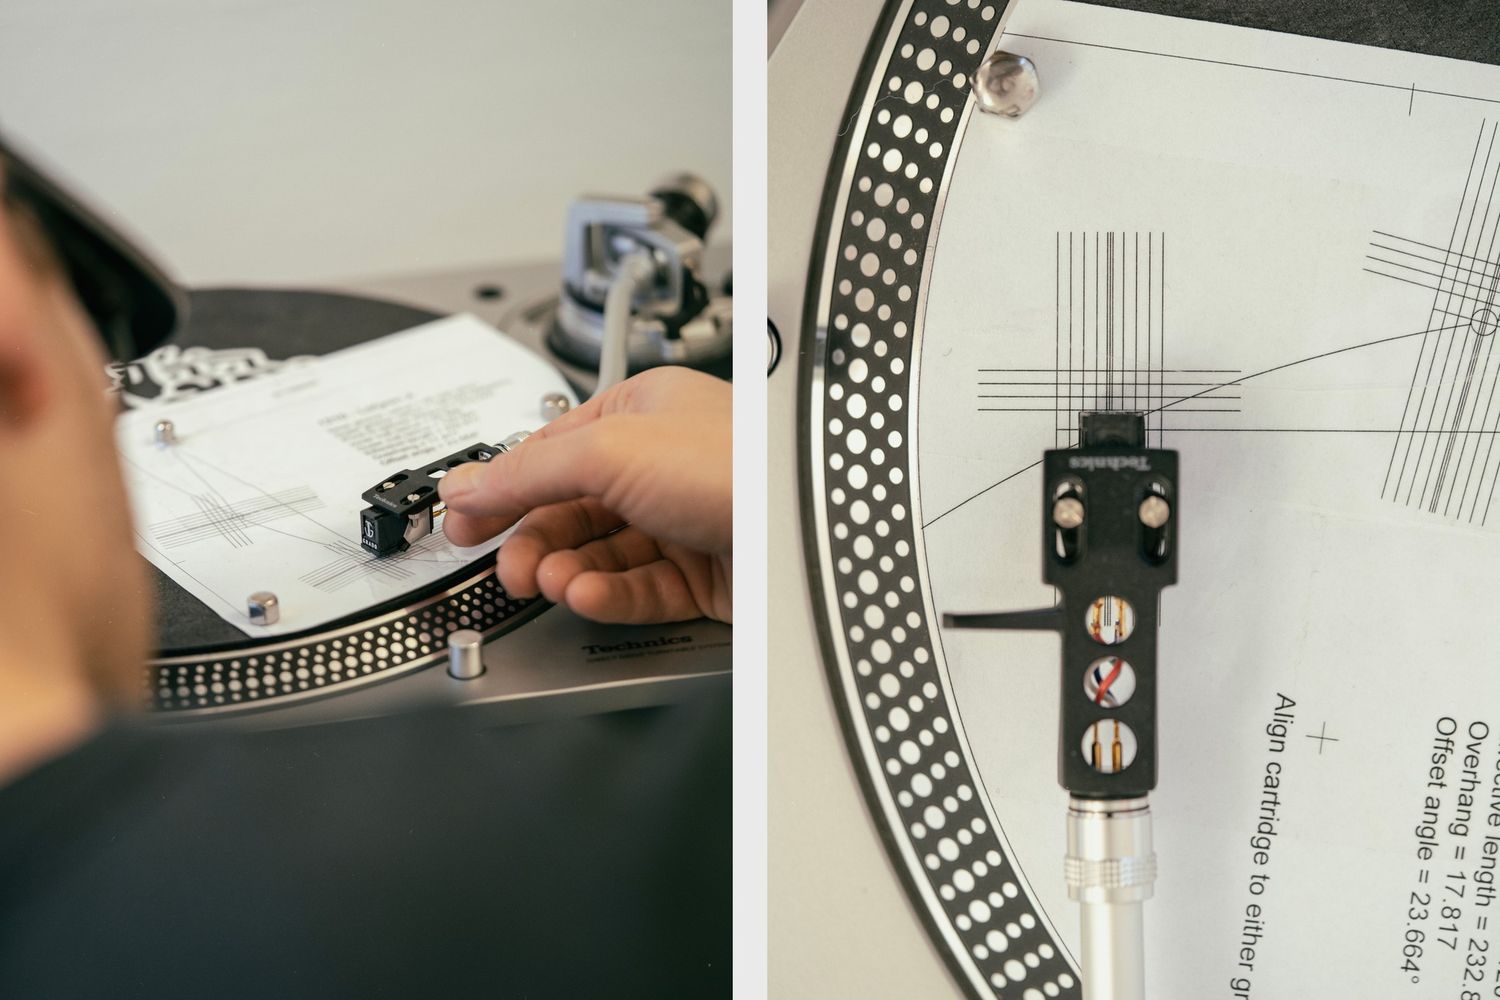
- Alignment Protractor: An alignment protractor is a printed template that helps you align your cartridge accurately. It typically consists of circular grids or lines that represent the inner and outer grooves of the record. The alignment protractor provides reference points and positioning guides to set the overhang and azimuth correctly.
- Tracking Force Gauge: A tracking force gauge is used to measure the vertical tracking force applied by the stylus to the record. The appropriate tracking force depends on the specific cartridge model and is usually specified by the manufacturer. It’s crucial to set the tracking force accurately to prevent excessive wear on your records and stylus.
- Leveling and Height Adjustments: Depending on your turntable model, you may need additional tools to ensure proper leveling and height adjustments. A bubble level helps you determine if your turntable is level, which plays a role in achieving accurate azimuth alignment. You may also require a tonearm height gauge or spacer to set the correct VTA.
- Screwdrivers and Allen wrenches: Some turntables and cartridges may require screws or allen wrenches for making adjustments. These tools will come in handy for adjusting the cartridge mounting screws, headshell, or tonearm components during the alignment process.
- Magnifying Glass or Loupe: While not strictly necessary, a magnifying glass or loupe can be useful for inspecting the stylus and cartridge alignment during the process. It enables you to closely examine the stylus position and verify correct alignment.
Having these tools on hand will ensure that you have everything you need to align your cartridge accurately. Now that we have the required tools ready, let’s move on to the step-by-step procedure for aligning your cartridge.
Step 1: Preparing the Turntable
Before you begin aligning your cartridge, it’s essential to prepare your turntable to ensure optimal conditions for the alignment process. Follow these steps to get your turntable ready:
- Clean the platter and mat: Start by removing any dust, debris, or fingerprints from the platter and turntable mat. A clean surface will help prevent any interference during the alignment process.
- Ensure a stable surface: Place your turntable on a stable and level surface. Use a bubble level to check if it is perfectly level. A level turntable ensures accurate azimuth alignment.
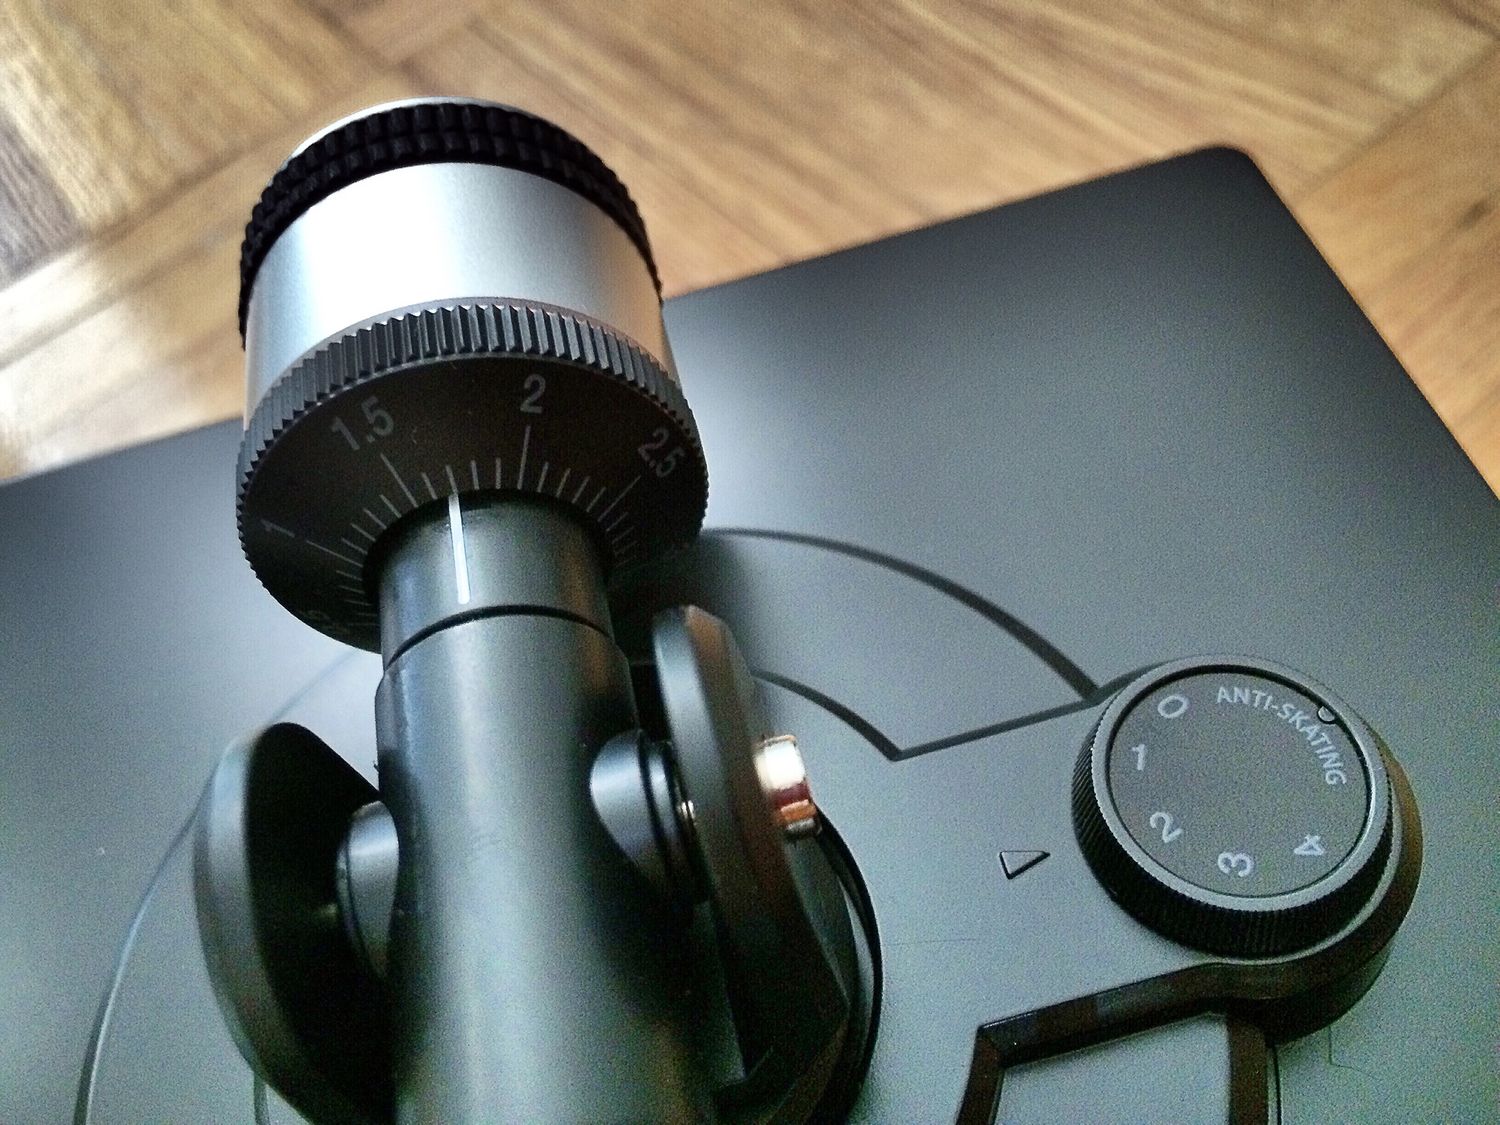
- Calibrate the tracking force: Use a tracking force gauge to calibrate the tracking force. By referring to the cartridge’s specifications, set the desired tracking force meticulously. Adjust the counterweight on the tonearm accordingly to achieve the correct tracking force.
- Prepare the alignment protractor: Download and print an alignment protractor specific to your turntable model. Ensure that the protractor is printed accurately without any distortion or resizing. Carefully cut out the protractor, keeping the circular grid or lines intact.
- Disable anti-skate and cueing mechanisms: Disable any anti-skate or cueing mechanisms that may interfere with the alignment process. This allows for free movement of the tonearm during the alignment procedure.
By following these steps, you will prepare your turntable for the cartridge alignment process. Once your turntable is properly set up, you can move on to the next step, which involves setting up the alignment protractor.
Step 2: Setting Up the Alignment Protractor
Now that your turntable is prepared, it’s time to set up the alignment protractor. The alignment protractor provides the necessary reference points and guidelines for accurate cartridge alignment. Follow these steps to set up the alignment protractor:
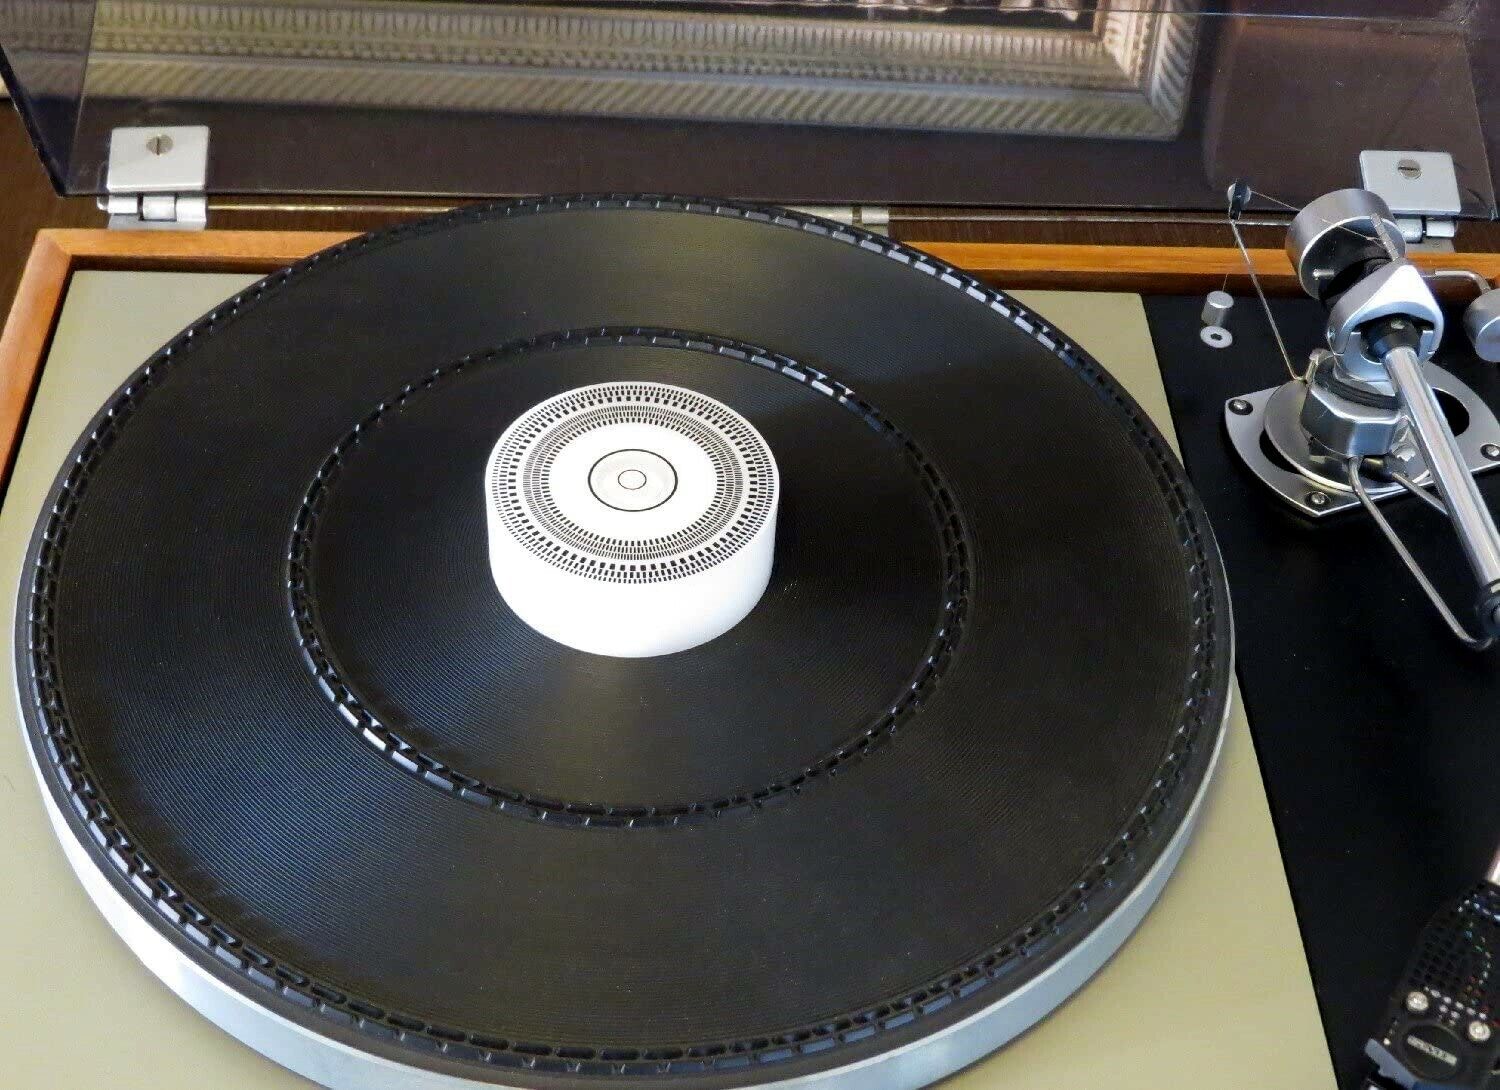
- Place the protractor on the platter: Carefully place the alignment protractor on the platter of your turntable. Ensure that it sits flat and centered, with the spindle hole aligning with the center spindle of the turntable.
- Secure the protractor in place: Use a small piece of adhesive or tape to secure the alignment protractor to the platter. This ensures that the protractor remains fixed in position during the alignment process.
- Align the cartridge body: Lower the tonearm onto the alignment protractor, ensuring that the cartridge body aligns with the corresponding reference points on the protractor. The stylus should be resting on the outermost grooves of the protractor.
- Find the optimal overhang position: Look for the specified overhang distance that corresponds to your turntable and cartridge model. Slide the cartridge forward or backward along the headshell until the stylus aligns with the specified overhang position. This ensures that the stylus tip is correctly positioned relative to the center spindle.
- Check the azimuth alignment: While the tonearm is still lowered, visually inspect the alignment of the stylus and check if it remains perpendicular to the grid lines or circular grooves on the alignment protractor. Adjust the azimuth if necessary by loosening the mounting screws and rotating the cartridge slightly.
By carefully following these steps, you will set up the alignment protractor correctly and position the cartridge for the alignment process. With the protractor in place, you are ready to move on to the next step: adjusting the overhang.
Step 3: Adjusting the Overhang
With the alignment protractor set up, it’s time to adjust the overhang of your cartridge. The overhang refers to the distance that the stylus extends beyond the center spindle of the turntable. Follow these steps to adjust the overhang properly:
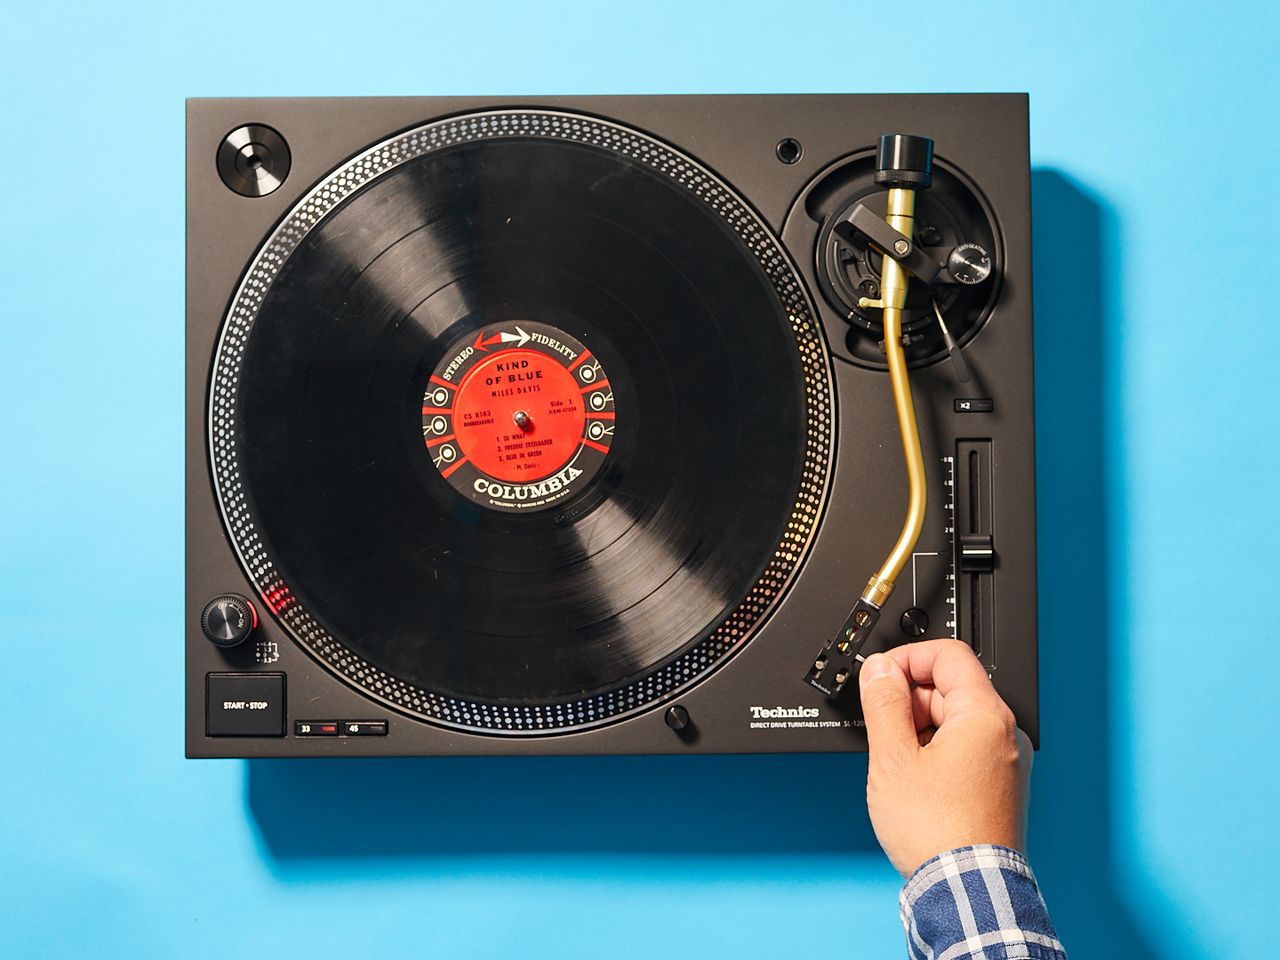
- Loosen the cartridge mounting screws: Using a screwdriver or Allen wrench, gently loosen the cartridge mounting screws. This allows for adjustment of the cartridge within the headshell.
- Slide the cartridge: With the screws loosened, carefully slide the cartridge along the headshell either forward or backward to align the stylus with the specified overhang position on the alignment protractor. Ensure that the stylus tip is accurately positioned relative to the center spindle of the turntable.
- Tighten the cartridge mounting screws: Once the overhang is set, tighten the cartridge mounting screws, ensuring that the cartridge remains securely fixed in position. Be careful not to overtighten as it may damage the cartridge or headshell.
- Verify alignment: After tightening the screws, verify the alignment of the stylus by visually inspecting its position in relation to the grid lines or circular grooves on the alignment protractor. It should be aligned precisely according to the reference points.
By following these steps, you will adjust the overhang of your cartridge accurately. This ensures that the stylus tracks the record grooves at the correct angle and engagement, minimizing distortion and maximizing sound quality. With the overhang set, you can move on to the next step: adjusting the azimuth.
Step 4: Adjusting the Azimuth
Once the overhang is properly adjusted, the next step is to ensure the correct azimuth alignment. Azimuth refers to the alignment of the cartridge in relation to the record surface, ensuring that the stylus remains perpendicular to the grooves. Follow these steps to adjust the azimuth:
- Visually inspect the stylus position: Lower the tonearm with the cartridge onto the alignment protractor. Look closely at the stylus tip and visually inspect its alignment in relation to the grid lines or circular grooves on the protractor. Note if the stylus appears to be tilted or misaligned.
- Loosen the cartridge mounting screws: If adjustment is required, use a screwdriver or Allen wrench to gently loosen the cartridge mounting screws while the tonearm is still lowered. This allows for the rotation of the cartridge within the headshell.
- Rotate the cartridge: Carefully rotate the cartridge slightly clockwise or counterclockwise to achieve proper azimuth alignment. The goal is to align the stylus perfectly perpendicular to the record surface, minimizing distortion and maximizing channel separation.
- Verify alignment: After making the adjustment, visually inspect the stylus position again to ensure that it now appears perpendicular to the grid lines or circular grooves on the alignment protractor. If necessary, fine-tune the azimuth by making further small adjustments.
- Tighten the cartridge mounting screws: Once the correct azimuth alignment is achieved, tighten the cartridge mounting screws securely while the tonearm is still lowered. Be cautious not to overtighten as it may damage the cartridge or headshell.
By following these steps, you will achieve proper azimuth alignment, ensuring that the stylus remains perpendicular to the record grooves for precise tracking and accurate sound reproduction. With the azimuth adjusted, it’s time to move on to the next step: adjusting the Vertical Tracking Angle (VTA).
Step 5: Adjusting the Vertical Tracking Angle (VTA)
Vertical Tracking Angle (VTA) refers to the angle at which the stylus meets the record surface. It plays a crucial role in achieving optimal tonal balance and tracking performance. Follow these steps to adjust the VTA of your cartridge:
- Check the recommended VTA: Consult the manufacturer’s specifications or guidelines for the recommended VTA for your specific cartridge and tonearm combination. This information will help you set the VTA correctly.
- Locate the VTA adjustment mechanism: Depending on your turntable model, there may be a VTA adjustment mechanism located on the tonearm base or elsewhere. Familiarize yourself with this mechanism as it will be used to make the necessary adjustments.
- Make VTA adjustments: Use the VTA adjustment mechanism to raise or lower the tonearm, thus adjusting the VTA. Follow the manufacturer’s instructions for your particular turntable to properly make the adjustments. Gradually make small adjustments, checking the VTA along the way.
- Check the alignment: After each adjustment, visually inspect the stylus position to ensure that it rests parallel to the record surface. The goal is to achieve a level alignment that ensures optimal tracking and accurate sound reproduction.
- Listen and fine-tune: Once the VTA is adjusted, listen to a selection of records and evaluate the sound quality. If necessary, fine-tune the VTA by making slight adjustments to achieve the best tonal balance and tracking performance.
By following these steps, you can adjust the Vertical Tracking Angle (VTA) of your cartridge to optimize the overall sound quality and performance. A properly adjusted VTA ensures accurate stylus tracking and enhances the vinyl listening experience.
With the VTA adjusted, you have successfully completed the major steps of aligning your cartridge. However, there may be additional fine-tuning adjustments you can make to further optimize the alignment. Let’s explore those in the next step.
Step 6: Fine-tuning the Alignment
After completing the main steps of cartridge alignment, you can further fine-tune the alignment to achieve the best possible sound quality and performance. Fine-tuning allows you to make subtle adjustments to optimize tracking, reduce distortion, and enhance overall clarity. Follow these steps to fine-tune the alignment:
- Listen and evaluate: Play a variety of well-recorded tracks and critically listen to the sound quality. Pay attention to factors such as clarity, dynamics, channel separation, and overall tonal balance. Identify any issues that need improvement.
- Make small adjustments: Based on your evaluation, make small adjustments to the cartridge alignment parameters like overhang, azimuth, or VTA to address any issues or imbalances in the sound. Document each adjustment to keep track of the changes made.
- Repeat the listening process: After each adjustment, listen to different tracks again to assess the impact of the changes. Take note of any improvements or regressions in the sound quality.
- Iterate as necessary: Continuously fine-tune and iterate the alignment process until you achieve the desired sound quality and performance. It may take several adjustments to find the perfect balance that suits your personal preferences.
- Consult experts or resources: If you encounter difficulties or have specific concerns, consider reaching out to experienced turntable enthusiasts or consult reputable online resources. They can provide valuable insights and advice to help you optimize your cartridge alignment.
Fine-tuning the alignment is a process of trial and error, as it involves subjective assessment of sound quality. Trust your ears and take your time to carefully refine the alignment until you are fully satisfied with the results.
With the alignment fine-tuned, you have successfully completed the entire process of aligning your cartridge. Proper alignment ensures accurate tracking, reduces distortion, and enhances the overall sonic performance of your turntable setup. Happy listening!
Conclusion
Proper cartridge alignment is paramount for achieving optimal sound quality and maximizing your vinyl listening experience. By aligning your cartridge correctly, you ensure accurate tracking, minimize distortion, and extend the longevity of your records and stylus. Through the steps outlined in this guide, you can confidently align your cartridge and unlock the true potential of your turntable setup.
Starting with a solid understanding of cartridge alignment, including factors such as overhang, azimuth, and vertical tracking angle (VTA), allows you to grasp the importance of each parameter. Equipped with the necessary tools, such as an alignment protractor, tracking force gauge, and adjustment mechanisms, you are ready to begin the aligning process.
With step-by-step instructions for preparing your turntable, setting up the alignment protractor, adjusting the overhang, azimuth, and VTA, you have the foundation to achieve accurate alignment. By fine-tuning the alignment and critically listening to the results, you can further optimize the sound quality to suit your preferences.
Remember, the alignment process may require patience and iteration as you make gradual adjustments and assess the impact on sound reproduction. Trust your ears and don’t hesitate to seek guidance from knowledgeable individuals or resources along the way.
With your cartridge properly aligned, you can now enjoy your vinyl records with confidence, knowing that you are extracting the best possible sound from your collection. So, take the time to align your cartridge and immerse yourself in the rich, warm sound that vinyl has to offer.
Happy listening!