Home>Events & Info>Playback>How To Turn Off Mic Playback
Playback
How To Turn Off Mic Playback
Modified: January 22, 2024
Learn how to disable microphone playback on your device with our step-by-step guide. Stop unwanted audio feedback and improve your audio experience.
(Many of the links in this article redirect to a specific reviewed product. Your purchase of these products through affiliate links helps to generate commission for AudioLover.com, at no extra cost. Learn more)
Table of Contents
Introduction
Microphone playback refers to a feature that allows you to hear your own voice or audio input through your speakers or headphones. While this can be useful in certain situations, such as for monitoring your audio during live recordings or video calls, there may be times when you want to turn off mic playback.
Disabling mic playback can help to eliminate echo or feedback issues, improve audio quality, or simply prevent you from hearing your own voice while speaking into the microphone. Whether you’re using a built-in microphone on your computer or an external one, there are various methods you can use to turn off mic playback and enjoy a more streamlined audio experience.
In this article, we will explore different methods to disable mic playback on your Windows computer. We will cover steps that you can take using the sound settings, sound control panel, and even disabling mic playback in specific applications. Additionally, we will touch on updating audio drivers and disconnecting external microphones, which can also affect mic playback settings.
So, if you’re ready to take control of your audio output and turn off mic playback, continue reading to learn how.
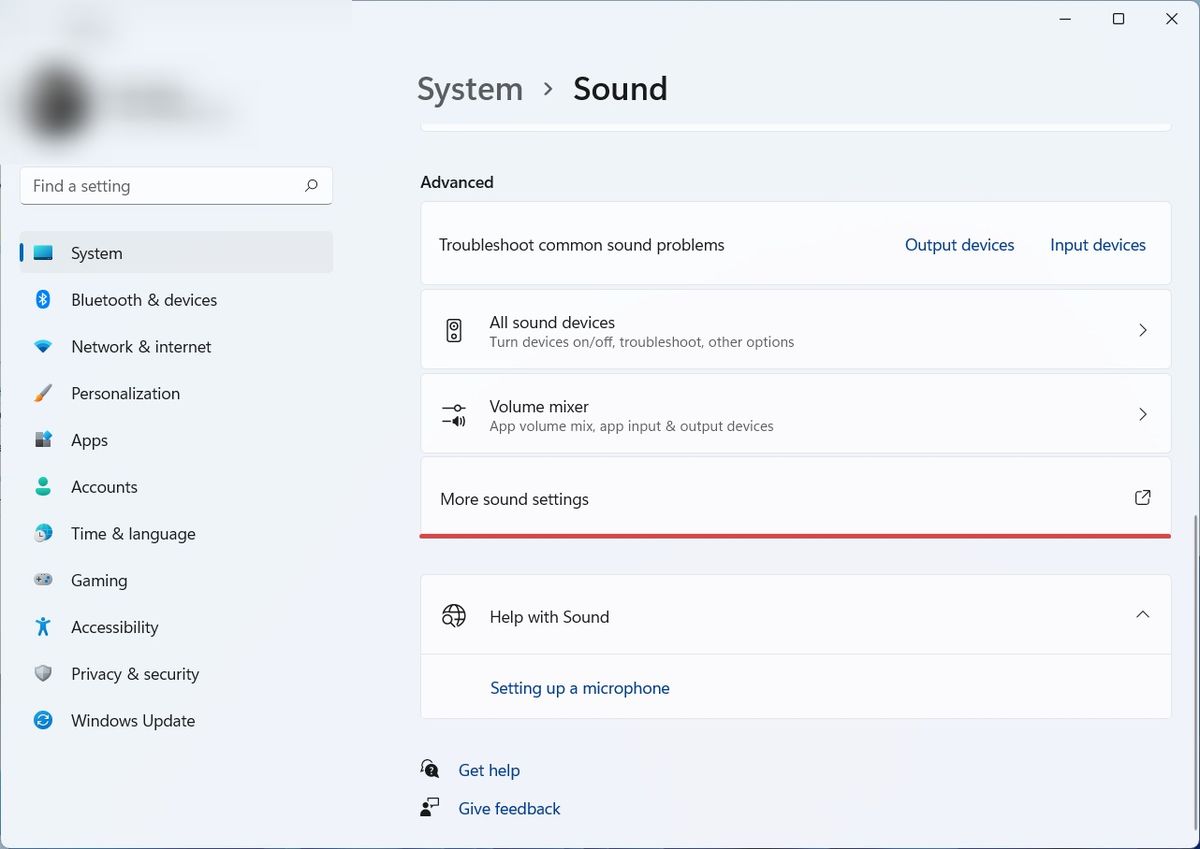
Method 1: Using the Sound Settings
One of the simplest and most common methods to turn off mic playback is by using the sound settings on your Windows computer. Here’s how you can do it:
- Open the Start menu and click on the “Settings” icon.
- In the Settings window, select the “System” option.
- From the left-hand menu, click on “Sound.”
- Scroll down to the “Input” section and locate your microphone device.
- Click on your microphone device to expand its settings.
- Under the microphone settings, you should see a toggle for “Listen to this device.”
- Toggle off the “Listen to this device” option. This will disable mic playback.
Once you’ve followed these steps, mic playback should be turned off, and you will no longer hear your own voice or audio input through your speakers or headphones.
Keep in mind that the exact layout and options in the sound settings may vary depending on your Windows version. If you’re having trouble finding the microphone settings or disabling mic playback, you can try searching for “Sound settings” in the Windows search bar for more specific instructions.
This method is a quick and straightforward way to disable mic playback and can be easily reversed if you decide to turn it back on in the future.
Method 2: Using the Sound Control Panel
If you prefer to use the Sound Control Panel, you can also disable mic playback using this method. Here’s how:
- Right-click on the volume icon in the system tray on your taskbar and select “Sounds.”
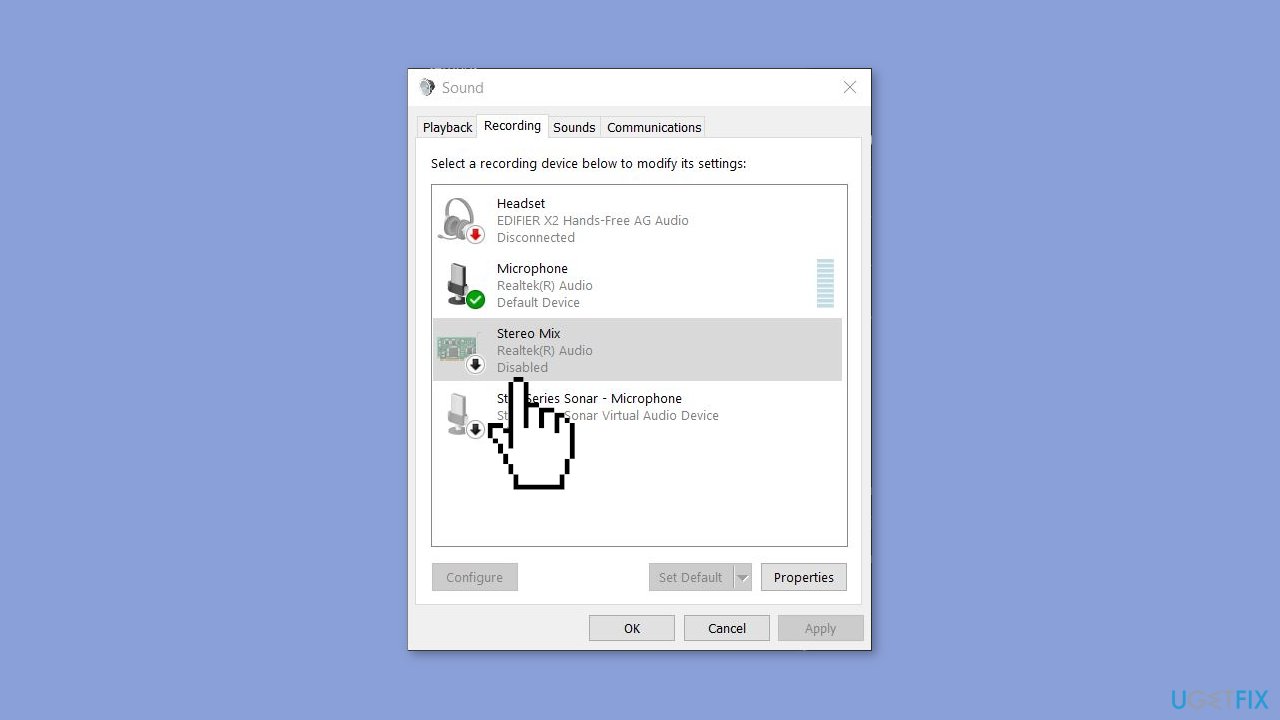
- In the Sound window, navigate to the “Recording” tab.
- Locate your microphone device from the list of recording devices.
- Click on your microphone device and click the “Properties” button.
- In the Properties window, go to the “Listen” tab.
- Uncheck the box for “Listen to this device.”
- Click “Apply” and then click “OK” to save the changes.
By following these steps, you will effectively disable mic playback through the Sound Control Panel.
Using the Sound Control Panel can be particularly helpful if you prefer a more in-depth approach to managing audio settings on your Windows computer. It provides additional options and settings that allow you to fine-tune your audio experience.
It’s important to note that the steps described here are for Windows 10. If you’re using a different version of Windows, the steps may vary slightly. In such cases, you can search for “Sound Control Panel” in the Windows search bar for specific instructions tailored to your operating system.
Method 3: Disabling Mic Playback in Specific Apps
While you may want to keep mic playback enabled for most applications, there may be certain apps where you prefer to disable it. Fortunately, many applications provide their own settings to control mic playback. Here’s how you can disable mic playback in specific apps:
- Open the application in which you want to disable mic playback.
- Look for the app’s settings or preferences menu.
- Navigate to the audio or microphone settings within the app.
- Search for an option related to mic playback or monitoring.
- Toggle off or disable any setting that enables mic playback in the app.
- Save the settings and exit the app’s preferences or settings menu.
By following these steps, you can disable mic playback specifically for the chosen application. This way, you can enjoy mic playback in other apps while preventing it in applications where it’s not needed or preferred.
It’s important to note that not all applications provide the option to disable mic playback individually. In such cases, you may need to rely on system-wide settings or explore alternative solutions, such as using virtual audio cables or third-party software, to manage mic playback on a more granular level.
Remember to refer to the specific application’s documentation or support resources if you’re having trouble locating the mic playback settings. The steps can vary depending on the software you’re using.
Method 4: Updating Audio Drivers
If you’re experiencing issues with mic playback on your Windows computer, it could be due to outdated or incompatible audio drivers. Updating your audio drivers can help resolve such problems and improve overall system performance. Here’s how you can update your audio drivers:
- Open the Start menu and type “Device Manager” in the search bar.
- Click on the “Device Manager” app from the search results.
- In the Device Manager window, expand the “Sound, video, and game controllers” section.
- Locate your audio device or sound card from the list (it may be named differently depending on your system).
- Right-click on the audio device and select “Update driver.”
- Choose the option to search automatically for updated driver software.
- Allow Windows to search for and install the latest driver for your audio device.
- Follow the on-screen instructions to complete the driver update process.
Once the driver update is complete, restart your computer to apply the changes. This should ensure that you have the most up-to-date audio drivers installed, which can potentially resolve any issues related to mic playback.
If Windows is unable to find an updated driver for your audio device, you can visit the manufacturer’s website and download the latest driver manually. Make sure to choose the driver specific to your audio device and Windows version.
Updating your audio drivers is a recommended step in troubleshooting mic playback issues, as outdated drivers can cause compatibility problems and affect the functionality of your audio devices.
Method 5: Disconnecting External Microphones
If you’re using an external microphone, such as a USB or analog mic, disconnecting it can be an effective way to disable mic playback. By disconnecting the external microphone, you will prevent the audio input from being played back through your speakers or headphones. Here’s how you can do it:
- If your external microphone is connected via USB, simply unplug the USB cable from your computer.
- If your external microphone is connected via a 3.5mm audio jack, unplug the cable from the audio input port on your computer or audio interface.
Once you have disconnected the external microphone, mic playback should be turned off, and you will no longer hear your audio input through your speakers or headphones.
This method is particularly useful if you’re using an external microphone for specific situations, such as recording or video conferencing, and you want to disable mic playback when it’s not needed. By disconnecting the external microphone, you can ensure a focused and streamlined audio experience.
Remember to reconnect the external microphone when you’re ready to use it again and enable mic playback if desired.
If you’re using a built-in microphone on your computer or a headset with an integrated microphone, this method may not be applicable, as there is no physical disconnect option. In such cases, you can refer to the previous methods mentioned in this article to disable mic playback.
Conclusion
Disabling mic playback on your Windows computer can be a useful way to improve your audio experience and eliminate any unwanted feedback or echo. Whether you’re using the built-in microphone or an external one, there are several methods you can employ to turn off mic playback.
In this article, we explored five methods to disable mic playback:
- Using the sound settings
- Using the sound control panel
- Disabling mic playback in specific apps
- Updating audio drivers
- Disconnecting external microphones
Each method offers a different approach, allowing you to choose the one that suits your preferences and specific situation the best.
Remember, the steps and options may vary slightly depending on your Windows version and the specific apps or devices you’re using. It’s always a good idea to refer to the documentation or support resources for more detailed instructions.
Whether you’re a content creator, gamer, or simply someone who wants to control their audio output, being able to turn off mic playback can significantly improve your overall audio experience. By following the methods outlined in this article, you can enjoy clear and focused audio without the distraction of hearing your own voice or input through your speakers or headphones.
So go ahead and explore these methods to disable mic playback on your Windows computer, and enjoy a seamless and immersive audio experience.