Home>Events & Info>Playback>How To Give Playback Volume On Mic
Playback
How To Give Playback Volume On Mic
Modified: January 22, 2024
Learn how to adjust the playback volume on your microphone to ensure clear and balanced sound output. Follow our step-by-step guide for optimal audio experience.
(Many of the links in this article redirect to a specific reviewed product. Your purchase of these products through affiliate links helps to generate commission for AudioLover.com, at no extra cost. Learn more)
Table of Contents
Introduction
When it comes to using a mic for playback, getting the volume just right is essential. Whether you’re a podcaster, a musician, or simply using a microphone for voice chat, having control over the playback volume can greatly enhance your audio experience. Adjusting the playback volume on a mic allows you to ensure that you can hear yourself clearly and have a comfortable listening experience without any distortion or unwanted noise.
In this article, we will guide you through the process of adjusting the playback volume on a mic. We will provide step-by-step instructions on how to access the playback volume settings, adjust the volume level, and test the playback volume to ensure it meets your requirements. Additionally, we will offer some troubleshooting tips to help you overcome common issues you may encounter along the way.
Whether you’re a beginner or have some experience with audio equipment, this guide will help you navigate through the playback volume settings and make the necessary adjustments to achieve optimal sound quality. So without further ado, let’s dive into the world of playback volume on a mic!
Step 1: Accessing Playback Volume Settings
Before you can adjust the playback volume on your mic, you need to access the playback volume settings. Here’s how you can do it:
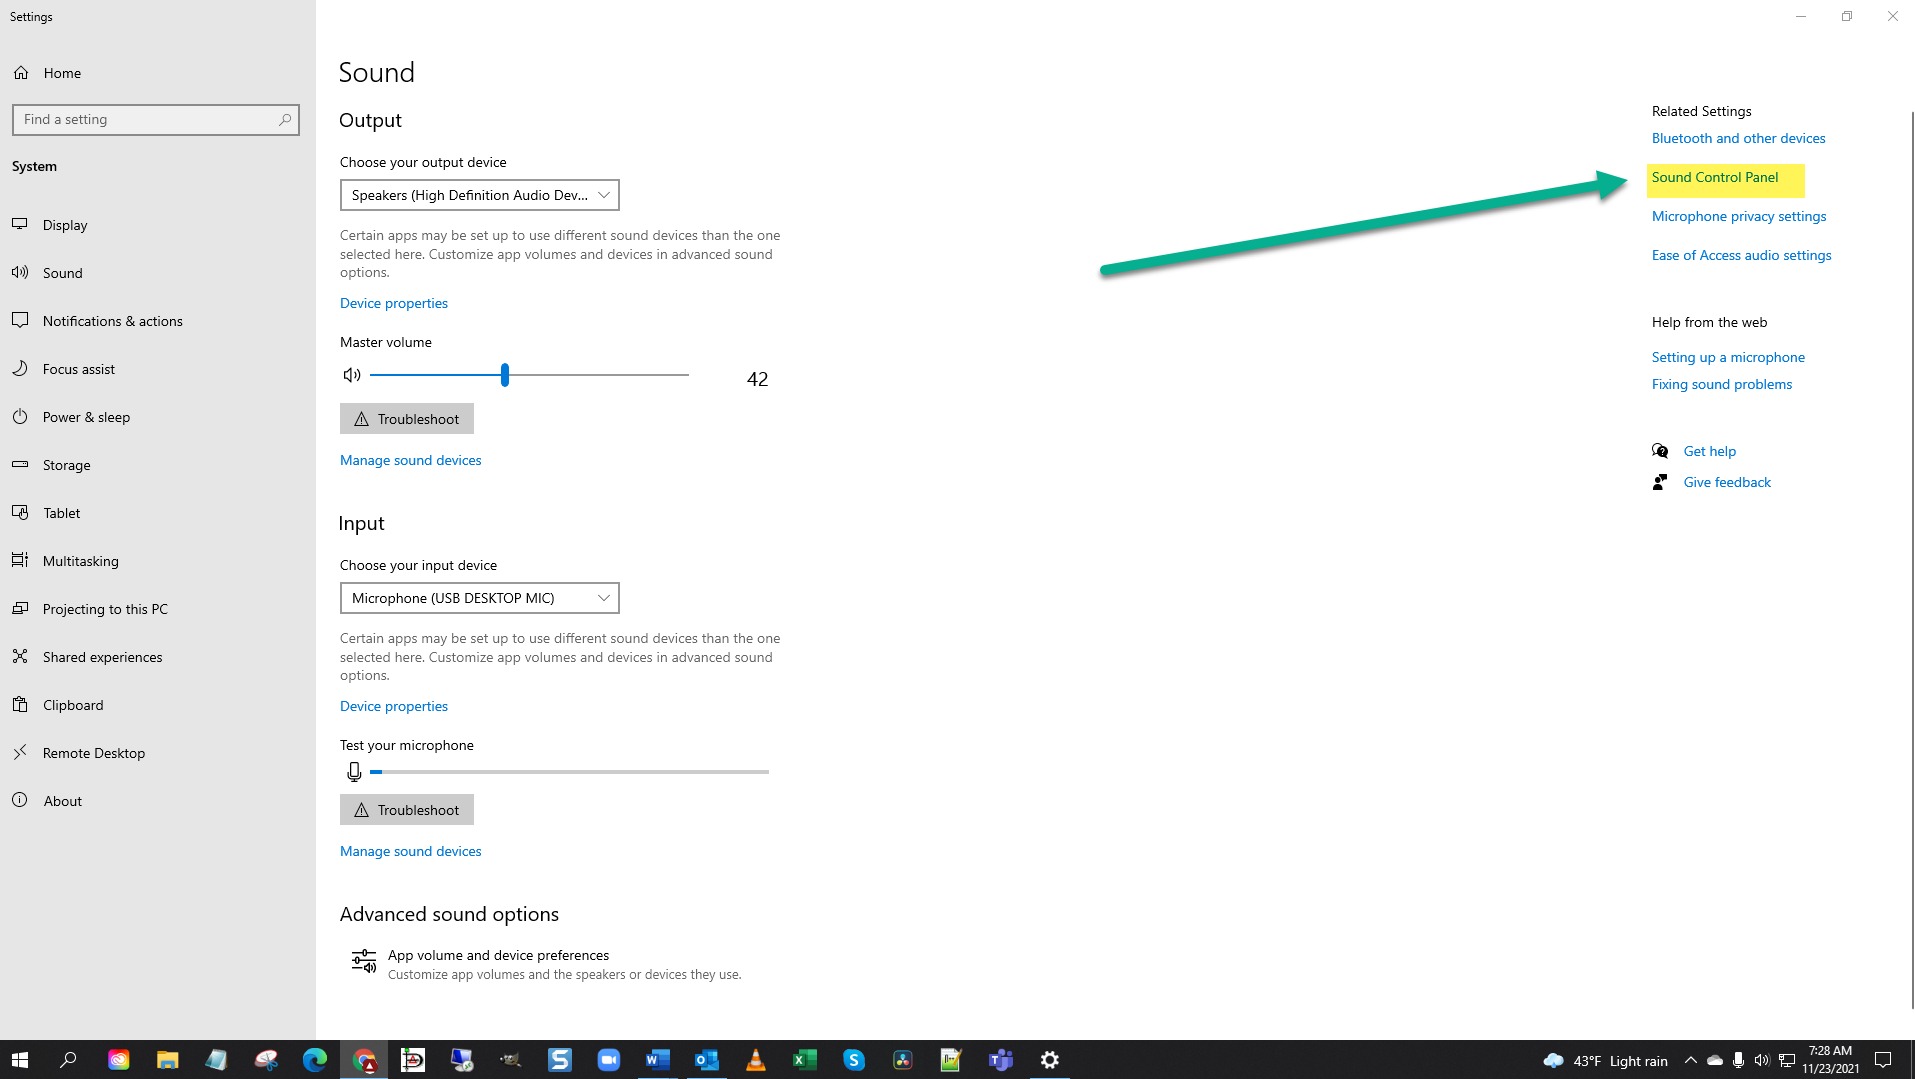
- Open your computer’s Control Panel or System Preferences, depending on your operating system.
- Navigate to the “Sound” or “Audio” settings.
- Look for a tab or option specifically related to the recording or microphone settings. It may be labeled as “Recording,” “Input,” or something similar.
- Once you’ve found the recording or microphone settings, locate the option for playback volume or playback devices.
- Click on the option to open the playback volume settings.
Alternatively, you may also find the playback volume settings through your audio settings menu if you’re using a specific audio driver or software associated with your microphone.
It’s important to note that the exact steps to access the playback volume settings may vary depending on your operating system and the specific audio setup you are using. However, the general process outlined here should give you a good starting point to locate the playback volume settings.
Now that you know how to access the playback volume settings, let’s move on to adjusting the volume in the next step.
Step 2: Adjusting the Playback Volume on Mic
Once you have accessed the playback volume settings, it’s time to adjust the volume level on your mic. Follow these steps to make the necessary adjustments:
- Within the playback volume settings, locate the specific microphone device that you want to adjust. It may be listed by its name or as “microphone” or “recording device.”
- Click on the microphone device to select it.
- Adjust the playback volume slider or knob associated with the selected microphone device. Moving the slider or knob to the right will increase the volume, while moving it to the left will decrease the volume.
- As you adjust the playback volume, you may notice a visual representation of the volume level, such as a horizontal indicator or a series of bars. Keep an eye on this indicator to gauge the volume level as you make adjustments.
- Continue adjusting the playback volume until you reach a level that is comfortable for you to hear without distortion or unwanted noise.
It’s worth mentioning that some systems may offer additional options within the playback volume settings, such as an equalizer or audio effects. Feel free to explore these options and experiment with different settings to further enhance your audio playback experience.
Once you are satisfied with the playback volume adjustments, it’s time to move on to the next step where we will test the playback volume.
Step 3: Testing the Playback Volume
After adjusting the playback volume on your mic, it’s important to test the volume level to ensure that it meets your requirements. Here’s how you can test the playback volume:
- Open an audio recording or playback software on your computer. This could be a music player, a video conferencing application, or any software that allows you to play back audio.
- Choose a audio file or content that you are familiar with and play it back through your mic.
- Listen to the playback and evaluate the volume level. Is it too soft? Is it too loud? Listen for any distortion or unwanted noise.
- If the volume level is not to your liking, return to the playback volume settings and make further adjustments until you achieve the desired volume and audio quality.
- Continue testing different audio files or content to ensure that the playback volume remains consistent across different sources.
During the testing phase, it’s important to pay attention to prominent audio cues or speech in the playback. Make sure that the playback volume is balanced and allows you to hear all the important details without straining your ears.
If you are using the playback volume on a mic for live performances or conversations, consider conducting tests with a friend or colleague to get their feedback on the playback volume and make adjustments accordingly.
Once you are satisfied with the playback volume and have successfully tested it across different sources, you are now ready to make use of your mic with the optimal volume level.
Step 4: Troubleshooting Common Issues
While adjusting the playback volume on your mic, you may encounter some common issues. Here are a few troubleshooting tips to help you overcome these issues:
- If you notice that the playback volume is too low even after adjusting it to the maximum level, check if there are any physical obstructions on or around the microphone. Clear away any debris or objects that may be blocking the sound waves and try adjusting the volume again.
- If the playback volume is too loud and causes distortion, reduce the volume level and test it again. Additionally, make sure that the microphone is not positioned too close to your mouth, as this can result in distortions and unwanted noises.
- If you are using a USB microphone, ensure that it is properly connected to your computer’s USB port. Sometimes, a loose or faulty connection can cause issues with the playback volume. Try reconnecting the microphone or using a different USB port to see if it resolves the problem.
- If you have made adjustments to the playback volume settings but the changes do not take effect, try restarting your computer. Sometimes, a restart can help refresh the system’s settings and resolve any software-related issues.
- If you are still facing issues with the playback volume, consider updating the drivers for your microphone. Visit the manufacturer’s website and look for the latest driver updates for your specific microphone model. Install the updated drivers and test the playback volume again.
If none of these troubleshooting tips solve your playback volume issues, it may be worth contacting the manufacturer’s customer support for further assistance. They will be able to provide specific guidance based on your microphone model and help resolve any technical issues you may be experiencing.
By following these troubleshooting tips, you can tackle common playback volume issues and ensure that your mic delivers optimal audio quality for your needs.
Conclusion
Adjusting the playback volume on your mic is a crucial step in ensuring a quality audio experience. By following the steps outlined in this guide, you can easily access and adjust the playback volume settings on your mic, test the volume level, and troubleshoot common issues that may arise.
Remember, finding the right playback volume is a matter of personal preference and specific audio requirements. Take the time to experiment with different volume levels and test the playback with various audio sources to achieve the desired results.
Additionally, don’t hesitate to reach out to the manufacturer’s customer support if you encounter any technical difficulties or require further assistance. They have the expertise to help you address specific issues related to your microphone model.
With the playback volume on your mic properly adjusted, you can now enjoy clear and balanced audio in your podcasts, music recordings, voice chats, and more. So go ahead, explore the playback volume settings, unleash the full potential of your mic, and elevate your audio experience to new heights.