Home>Instruments>Bass>How To Mic Bass Amp
Bass
How To Mic Bass Amp
Modified: January 22, 2024
Learn how to properly mic your bass amp for optimal sound quality. Discover essential techniques for capturing the deep and rich tones of your bass guitar.
(Many of the links in this article redirect to a specific reviewed product. Your purchase of these products through affiliate links helps to generate commission for AudioLover.com, at no extra cost. Learn more)
Table of Contents
Introduction
When it comes to recording or amplifying a bass guitar, one of the key factors in capturing its full-bodied, powerful sound is mic placement on the bass amp. The right microphone and proper placement technique can make all the difference in achieving a rich, dynamic tone that accurately represents the instrument.
In this article, we will delve into the world of mic placement for bass amps, exploring various techniques and considerations to optimize your bass recordings or live performances. Whether you’re a bassist looking to capture your unique sound in the studio or a sound engineer aiming to achieve a fantastic live mix, understanding how to mic a bass amp is essential.
Before diving into the specifics of mic placement, it’s important to understand the different types of microphones commonly used for capturing bass guitar. Dynamic microphones such as the popular Shure SM57 are known for their durability, versatility, and ability to handle high sound pressure levels. Condenser microphones, on the other hand, are more sensitive and can capture finer details and nuances. Ribbon microphones are also frequently used for bass amps, known for their smooth frequency response and warm tone.
Now that we have a basic understanding of microphone types, let’s explore the various mic placement techniques that can help you achieve the best results when recording or amplifying a bass amp.
Choosing the Right Microphone
When it comes to choosing the right microphone for capturing the sound of a bass amp, there are several factors to consider. The type of microphone, polar pattern, and frequency response all play a significant role in capturing the unique tone of the bass guitar.
Dynamic microphones, such as the Shure SM57, are a popular choice for miking bass amps. They are rugged, can handle high sound pressure levels, and provide a punchy and focused sound. Their directional polar pattern helps to isolate the sound source and reduce background noise.
However, if you’re looking for a more detailed and nuanced sound, condenser microphones might be a better option. They have a wider frequency response and higher sensitivity, which allows them to capture the subtle harmonics and textures of the bass guitar. Condenser mics like the Neumann U87 or AKG C414 are commonly used for recording bass in professional studios.
Ribbon microphones can also be a great choice for miking bass amps. They are known for their smooth frequency response and natural, vintage-like sound. Ribbons can add a touch of warmth and character to the bass tone, making them a preferred choice for many engineers and bassists.
Ultimately, the choice of microphone will depend on the specific sound you’re going for. It’s always a good idea to experiment with different microphones and find the one that best captures the desired characteristics of your bass amp.
Placement Techniques
Now that we have the right microphone selected, let’s dive into some placement techniques that can help capture the best sound from your bass amp.
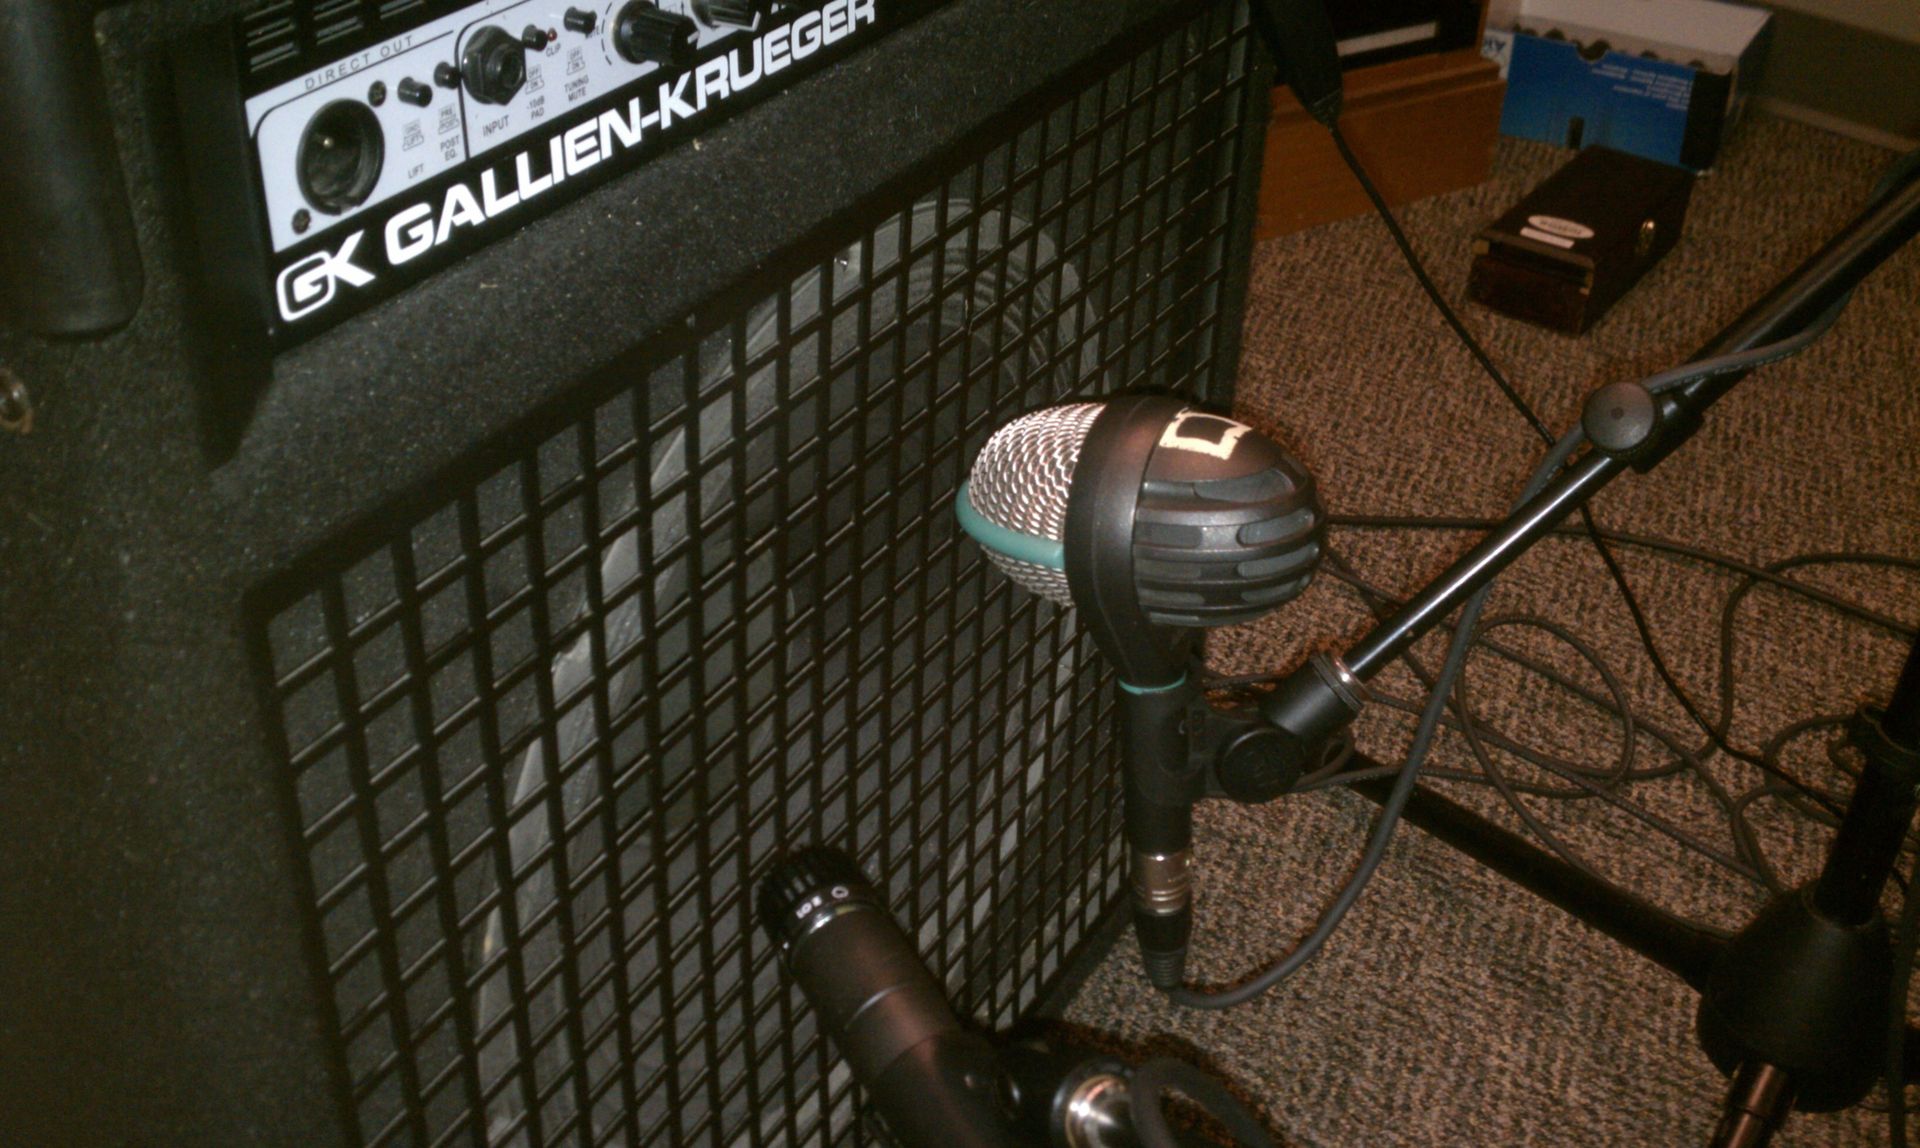
1. Directly in Front of the Speaker Cone: Placing the microphone right in front of the bass amp’s speaker cone is a common technique. This position captures the direct sound of the speaker and produces a more focused and aggressive tone. Experiment with different distances from the cone to find the sweet spot that best suits your desired sound.
2. Off-Axis Placement: Another technique to consider is placing the microphone slightly off-axis from the speaker cone. This can help to reduce harshness or excessive brightness in the tone. Experiment with angling the microphone slightly off-center or tilting it to the side to find the right balance of direct sound and off-axis coloration.
3. Distance from the Amp: The distance between the microphone and the bass amp plays a significant role in the captured sound. Placing the microphone closer to the speaker produces a more focused and intense tone, while moving it further away adds more room ambience and natural reverb. Experiment with different distances to find the desired balance based on the room and the sound you’re looking to achieve.
4. Experimenting with Mic Placement: Don’t be afraid to experiment with different mic placements to find the best sound for your bass amp. Moving the microphone slightly to the left or right of the speaker cone can alter the stereo image and create a wider sound. Additionally, raising or lowering the microphone height can affect the balance of low-end frequencies. Trust your ears and try different positions until you achieve the desired tone.
Remember, every bass amp and room combination is unique, so it’s important to take the time to experiment and find the placement technique that best captures the sound you’re after. Trust your ears and don’t hesitate to make adjustments until you’re satisfied with the captured tone.
Directly in Front of the Speaker Cone
One of the most commonly used placement techniques for miking a bass amp is positioning the microphone directly in front of the speaker cone. This technique allows for a focused and direct sound capture, emphasizing the fullness and power of the bass guitar.
When placing the microphone in front of the speaker cone, it is important to consider the distance from the cone. Moving the microphone closer to the cone will result in a more pronounced and intense tone, while placing it farther away will capture more of the room ambience and natural reverb.
Experiment with different distances to find the sweet spot that best suits your desired sound. Start by placing the microphone a few inches away from the cone and listen to the results. Gradually move the microphone closer or further away and listen for any changes in tone or dynamics.
It’s important to note that the exact distance will vary depending on the specific bass amp, speaker, and room acoustics. Trust your ears and make adjustments until you find the optimal position that captures the desired tone and character of your bass amp.
Another factor to consider when placing the microphone directly in front of the speaker cone is the angle at which it is positioned. Experiment with angling the microphone slightly off-center or tilting it to the side. This can help to achieve a more balanced frequency response and reduce any harsh or unwanted frequencies.
Additionally, it’s worth noting that different areas of the speaker cone can produce slightly different tonal characteristics. The center of the cone usually produces a punchy and focused sound, while the edges may add a touch of brightness or coloration. Experimenting with mic placement across the cone can help you to shape the tone to your liking.
Remember to always listen critically and trust your ears when placing the microphone directly in front of the speaker cone. Take the time to experiment with different distances, angles, and positions to find the sweet spot that captures the true essence of your bass amp.
Off-Axis Placement
While placing the microphone directly in front of the speaker cone is a common technique, sometimes you may want to explore off-axis mic placement for your bass amp. This technique involves positioning the microphone slightly off-center from the speaker cone, resulting in a different tonal character and capturing a broader sound image.
Off-axis placement can help to reduce any harshness or excessive brightness in the bass tone, creating a smoother and more balanced sound. By angling the microphone slightly away from the center of the cone, you can minimize the high-frequency content and achieve a more rounded and vintage-like tone.
Experiment with different angles and positions to find the right off-axis placement for your desired sound. You can try tilting the microphone slightly to the side, pointing it towards the edge of the speaker cone, or even positioning it at a diagonal angle. Each adjustment will have a subtle impact on the tonal characteristics, so take the time to listen and make adjustments until you find the sweet spot.
Off-axis placement is particularly useful if you’re aiming for a more natural and open sound, as it allows for a wider capture of the bass amp’s tone and room ambience. It can also add depth and dimension to your recordings or live mix, creating a more immersive listening experience.
It’s important to note that off-axis placement may not work as effectively with every bass amp and speaker combination. Some speakers have a more pronounced off-axis roll-off, meaning the tone may become excessively dark or muffled when moving too far off-center. Experimentation is key to finding the optimal off-axis placement for your specific setup.
Remember, mic placement is subjective, and there are no hard rules. Trust your ears and listen critically to determine the tonal characteristics produced by off-axis placement. It may take some trial and error to find the sweet spot that complements your bass amp and captures the desired sound.
Ultimately, off-axis mic placement offers a creative approach to capturing your bass amp’s sound, allowing for nuanced and unique tones that can enhance your recordings or live performances. Don’t be afraid to explore this technique and unleash the hidden sonic possibilities of your bass amp.
Distance from the Amp
When miking a bass amp, the distance between the microphone and the speaker plays a crucial role in capturing the desired sound. The positioning of the microphone in relation to the amp affects the balance between direct sound and room ambience, as well as the overall tonal characteristics.
Placing the microphone closer to the amp will result in a more focused and intense tone. This positioning emphasizes the sound coming directly from the speaker cone, capturing the full impact of the bass guitar’s low-end frequencies. The close proximity also minimizes any room reflections or ambience, providing a more isolated sound.
On the other hand, moving the microphone further away from the amp introduces more of the room ambience into the mix. This can add natural reverb, depth, and a sense of space to the recorded or amplified sound. The increased distance allows the sound to develop more before being captured, resulting in a more open and spacious tone.
Experiment with different distances to find the sweet spot that best suits your desired sound. Start by placing the microphone a few inches away from the amp and listen to how it affects the tone. Then, gradually move the microphone closer or further away and listen for any changes in the overall character of the bass sound.
It’s important to consider the room acoustics when determining the distance from the amp. Large rooms with more natural reverberation might benefit from a slightly greater distance, allowing the room to contribute to the overall sound. In smaller or less acoustically favorable spaces, keeping the microphone closer to the amp can help to minimize any unwanted reflections or reverberations that may muddy the bass tone.
Keep in mind that the ideal distance will vary depending on the specific bass amp, speaker, and room characteristics. Trust your ears and make adjustments until you find the optimal position that captures the desired tone and balances the direct sound with the desired amount of room ambience.
Remember that mic placement is a subjective process, and what works for one situation may not work for another. Trust your ears and experiment with different distances to discover the perfect positioning that brings out the best in your bass amp.
By finding the ideal distance from the amp, you can shape the overall sound of your bass recordings or live performances and create a more dynamic and engaging listening experience.
Experimenting with Mic Placement
When it comes to miking a bass amp, there is no one-size-fits-all approach. Each bass amp has its own unique characteristics, and the room acoustics can vary significantly. This is why it’s crucial to experiment with mic placement to find the sweet spot that captures the desired tone and brings out the best in your bass amp.
1. Move the microphone left or right: By placing the microphone slightly to the left or right of the speaker cone, you can alter the stereo image and create a wider sound. This technique can add dimension and depth to your recordings, particularly when using dual microphones or capturing a stereo soundfield. Experiment with different positions and listen for tonal variations.
2. Vary the height: Raising or lowering the microphone’s height relative to the speaker cone can significantly impact the balance of low-end frequencies. Lowering the microphone closer to the floor can capture more bass frequencies, while raising it towards the top of the speaker cabinet can result in a tighter and punchier sound. Explore different height positions to find the optimal balance for your desired bass tone.
3. Try unconventional placements: Don’t be afraid to think outside the box and try unconventional mic placements. For example, positioning the microphone at the back of the amp can capture a different tonal character, emphasizing the amp’s natural resonance and bringing out unique textures. Be open to experimentation and let your creativity guide you.
4. Take note of the room’s characteristics: The room in which you are recording or performing can greatly impact the sound. Listen for any reflections, resonances, or unwanted ambience that may affect the overall bass tone. If you notice any issues, try adjusting the mic placement or experimenting with acoustic treatment to improve the sound quality.
5. Trust your ears: Ultimately, the most important tool in finding the perfect mic placement is your ears. Listen critically and trust your instincts. Take the time to make small adjustments, listen, and compare different placements until you achieve the desired sound. Remember, what may work for one situation may not work for another, so don’t be afraid to tweak and modify until you find the ideal placement.
Experimenting with mic placement is an essential part of capturing the best possible sound from your bass amp. By exploring different positions, heights, and unconventional techniques, you can tailor the tone to suit your musical style and achieve a more dynamic and captivating bass sound.
Handling Low Frequencies
When miking a bass amp, handling low frequencies is a crucial consideration. Bass guitars produce powerful low-end frequencies that can pose challenges when it comes to capturing a clear and balanced sound. Proper mic placement and additional tools can help you effectively handle and capture the low frequencies of your bass amp.
1. Positioning the microphone: Placing the microphone closer to the bass amp’s speaker cone can help capture the full impact and definition of the low-end frequencies. The proximity to the cone focuses the mic on the direct sound and minimizes any room reflections. Experiment with different distances to find the sweet spot that produces a balanced and powerful bass tone.
2. Off-axis placement: When dealing with low frequencies, off-axis mic placement can be particularly useful. Positioning the microphone slightly off-center from the speaker cone can reduce any potential boominess or muddiness that can occur with direct on-axis placement. Experiment with different angles to find the position that provides the best balance of low-end clarity and overall tonal character.
3. Use a high-pass filter: Incorporating a high-pass filter in your signal chain can help control excessive low frequencies. This filter cuts off frequencies below a certain point, allowing you to retain the essential low-end presence while eliminating any unwanted rumble or muddiness. Adjust the cutoff frequency to strike the right balance and ensure a clean and focused bass sound.
4. Consider using a dedicated bass microphone: Some manufacturers offer microphones specifically designed for bass instruments. These microphones are tailored to handle the low-frequency range more effectively, focusing on capturing the fullness and richness of the bass guitar. Experimenting with a dedicated bass microphone can provide a more accurate and detailed reproduction of your bass amp’s sound.
5. Monitor and adjust: It’s crucial to constantly monitor the sound and make adjustments as needed. Listen carefully for any excessive low-end build-up, boomy or muddy tones, or any loss of definition. Use your ears to guide you and make the necessary changes in mic placement, EQ settings, or other techniques to maintain a well-balanced and controlled bass sound.
Handling low frequencies requires careful attention and fine-tuning to capture the full potential of your bass amp. By implementing proper mic placement techniques, utilizing high-pass filters, considering dedicated bass microphones, and regularly monitoring and adjusting, you can achieve a solid, defined, and punchy bass tone that enhances your recordings or live performances.
Using a DI Box
When it comes to recording or amplifying a bass guitar, using a DI (Direct Injection) box can be an invaluable tool. A DI box allows you to route the bass guitar’s signal directly to a mixing console, audio interface, or PA system, bypassing the need for a microphone on the bass amp. This can offer several benefits and control over the bass tone.
1. Capture a clean and direct signal: Using a DI box allows you to capture a clean and direct signal from your bass guitar. By connecting the instrument directly to the DI box, you avoid any coloration or variations introduced by the bass amp and room acoustics. This can be particularly useful in situations where you want a clean and transparent bass tone, such as in a recording studio or when performing in venues with poor room acoustics.
2. Eliminate mic placement and room acoustics factors: Miking a bass amp can be challenging, especially if you’re dealing with low frequencies and room reflections. By using a DI box, you bypass the need for mic placement and room acoustics considerations, ensuring a consistent and controlled sound. This can save you time and hassle in achieving a desirable bass tone, especially in live sound reinforcement scenarios.
3. Flexibility in tone shaping: DI boxes often offer various options for tone shaping and signal processing. Many DI boxes have built-in EQ controls, amp modeling, and other features that allow you to tweak and sculpt the bass tone to your liking. This provides flexibility and the ability to experiment with different sounds and styles without relying solely on the characteristics of a bass amp.
4. Isolation and noise reduction: Another advantage of using a DI box is its ability to isolate the bass guitar signal from any noise or interference that may be present in the amplifier or room. This can result in a cleaner and more professional-sounding recording or live sound mix, free from any unwanted buzz or hum.
5. Compatibility with different audio systems: DI boxes are designed to provide a balanced signal output that can be easily connected to various audio systems, such as mixing consoles, audio interfaces, or PA systems. This ensures compatibility and allows you to achieve consistent and high-quality results in different recording or performance environments.
Using a DI box offers a versatile and reliable method for capturing and shaping the bass guitar’s sound. Whether you’re looking for a clean and direct tone, a consistent sound in various venues, or the flexibility to shape your bass tone, a DI box can be a valuable addition to your setup. Experiment with different settings and explore the possibilities that a DI box provides, and unlock a world of creativity and control for your bass recordings and live performances.
Common Mistakes to Avoid
When it comes to miking a bass amp, there are several common mistakes that can hinder the quality and accuracy of the captured sound. Being aware of these pitfalls can help you avoid them and achieve the best possible bass tone in your recordings or live performances.
1. Improper microphone placement: Placing the microphone too close or too far from the bass amp can result in an unbalanced or distorted tone. Experiment with different distances and angles to find the sweet spot that captures the desired sound. Avoid placing the microphone too close to prevent overwhelming low-end frequencies or too far to lose detail and presence.
2. Ignoring room acoustics: Room acoustics play a significant role in shaping the overall sound when miking a bass amp. Be aware of any reflections, resonances, or unwanted room ambience that may color the bass tone. Consider using acoustic treatments or experimenting with different room locations to minimize any negative impact on the sound quality.
3. Using improper microphone types: Not all microphones are ideal for miking bass amps. Dynamic microphones are commonly used due to their ability to handle high sound pressure levels, but condenser or ribbon microphones can also be suitable depending on the desired tone. Select the appropriate microphone type that complements the characteristics of your bass amp and captures the desired bass sound accurately.
4. Neglecting signal processing: Proper signal processing can enhance and shape the bass tone. Utilize equalization (EQ) to adjust the frequency response, compression to control dynamics, and effects like reverb or delay to add depth and ambience as needed. Experiment with different settings to achieve the desired bass tone, but be mindful of not overdoing it and compromising the natural sound of the instrument.
5. Failing to communicate with the bassist: Communication with the bassist is essential to capture their intended sound. Discuss their preferences and listen to their feedback during sound checks or recording sessions. Work together to find the best mic placement, EQ settings, and overall tone that accurately represents their playing style and musical vision.
6. Not monitoring and adjusting: Continuously monitor the sound and make adjustments as necessary. Regularly listen and critically evaluate the captured bass tone. If it sounds boomy, muddy, or lacks definition, make appropriate changes in mic placement, EQ settings, or other techniques to address the issues. Never underestimate the importance of a well-balanced and controlled bass sound in the overall mix.
By avoiding these common mistakes, you can ensure a more accurate and high-quality capture of the bass amp’s sound. Take the time to experiment, listen attentively, and communicate effectively to achieve the best possible bass tone that represents the true essence of the instrument and enhances your music.
Conclusion
Miking a bass amp is an art that requires careful consideration and experimentation to achieve the desired tone. By choosing the right microphone, exploring various placement techniques, and avoiding common mistakes, you can capture the full-bodied, powerful sound of the bass guitar in your recordings or live performances.
When it comes to selecting a microphone, consider the specific characteristics and tonal qualities you’re aiming for. Dynamic microphones like the Shure SM57 are versatile and durable, while condenser or ribbon microphones can provide a more detailed and nuanced sound. Choose the microphone that best suits your bass amp and desired tone.
Experimentation is key to finding the optimal mic placement. Placing the microphone directly in front of the speaker cone emphasizes the direct sound and can result in a focused and aggressive tone. Off-axis placement or adjusting the distance from the amp can offer different tonal characteristics and depth to the sound. Don’t be afraid to think outside the box and try different positions to find the sweet spot that complements your bass amp.
Handling low frequencies requires careful attention, considering factors like mic placement, off-axis positioning, and using tools like high-pass filters to control excessive bass. By managing the low frequencies effectively, you can achieve a well-balanced and defined bass tone that enhances your recordings or live mixes.
Additionally, using a DI box can provide a clean and direct signal, eliminate room acoustics issues, and offer flexibility in tone shaping. Don’t hesitate to explore the benefits of using a DI box and experiment with its features for optimal bass sound.
Avoid common mistakes such as improper mic placement, ignoring room acoustics, using incorrect microphone types, neglecting signal processing, and failing to communicate with the bassist. By being mindful of these factors and continuously monitoring and adjusting, you can ensure a well-captured and controlled bass sound.
In conclusion, miking a bass amp requires a combination of technical knowledge, artistic intuition, and attentive listening. By employing the techniques and considerations discussed in this article, you can achieve a rich, dynamic, and captivating bass tone that accurately represents the unique sound of your bass guitar. So, grab your microphone, experiment, and enjoy the process of capturing the powerful essence of the bass guitar in your recordings and performances.