Home>Instruments>Drums>How To Record Drums With Ableton Live 11
Drums
How To Record Drums With Ableton Live 11
Modified: February 16, 2024
Learn how to record drums with Ableton Live 11 and create professional drum tracks. Discover essential tips and techniques for capturing the perfect drum sound.
(Many of the links in this article redirect to a specific reviewed product. Your purchase of these products through affiliate links helps to generate commission for AudioLover.com, at no extra cost. Learn more)
Table of Contents
Introduction
Are you ready to take your drum recordings to the next level with Ableton Live 11? Whether you're a seasoned drummer or a budding musician, capturing the perfect drum sound is essential for achieving professional-quality recordings. In this comprehensive guide, we'll delve into the intricacies of recording drums with Ableton Live 11, exploring everything from setting up your drum kit to selecting the right microphones and optimizing your recordings.
Drums are the heartbeat of any musical composition, providing depth, rhythm, and energy. With Ableton Live 11, you have a powerful tool at your disposal to harness the full potential of your drumming skills. From rock and pop to jazz and electronic music, the versatility of Ableton Live 11 empowers you to create captivating drum tracks across various genres.
In this guide, we'll walk you through the process of setting up your drum kit for recording, configuring Ableton Live 11 to optimize your recording environment, selecting the ideal microphones for capturing the nuances of your drum performance, and executing the recording process with precision. Additionally, we'll explore the crucial steps of editing and processing your drum tracks within Ableton Live 11, ensuring that your recordings stand out with clarity and impact.
Whether you're aiming to lay down dynamic drum solos, craft intricate rhythms, or simply capture the raw energy of live drumming, this guide will equip you with the knowledge and techniques to elevate your drum recordings to new heights. So, grab your drumsticks, fire up Ableton Live 11, and let's embark on a journey to unlock the full potential of your drumming prowess.
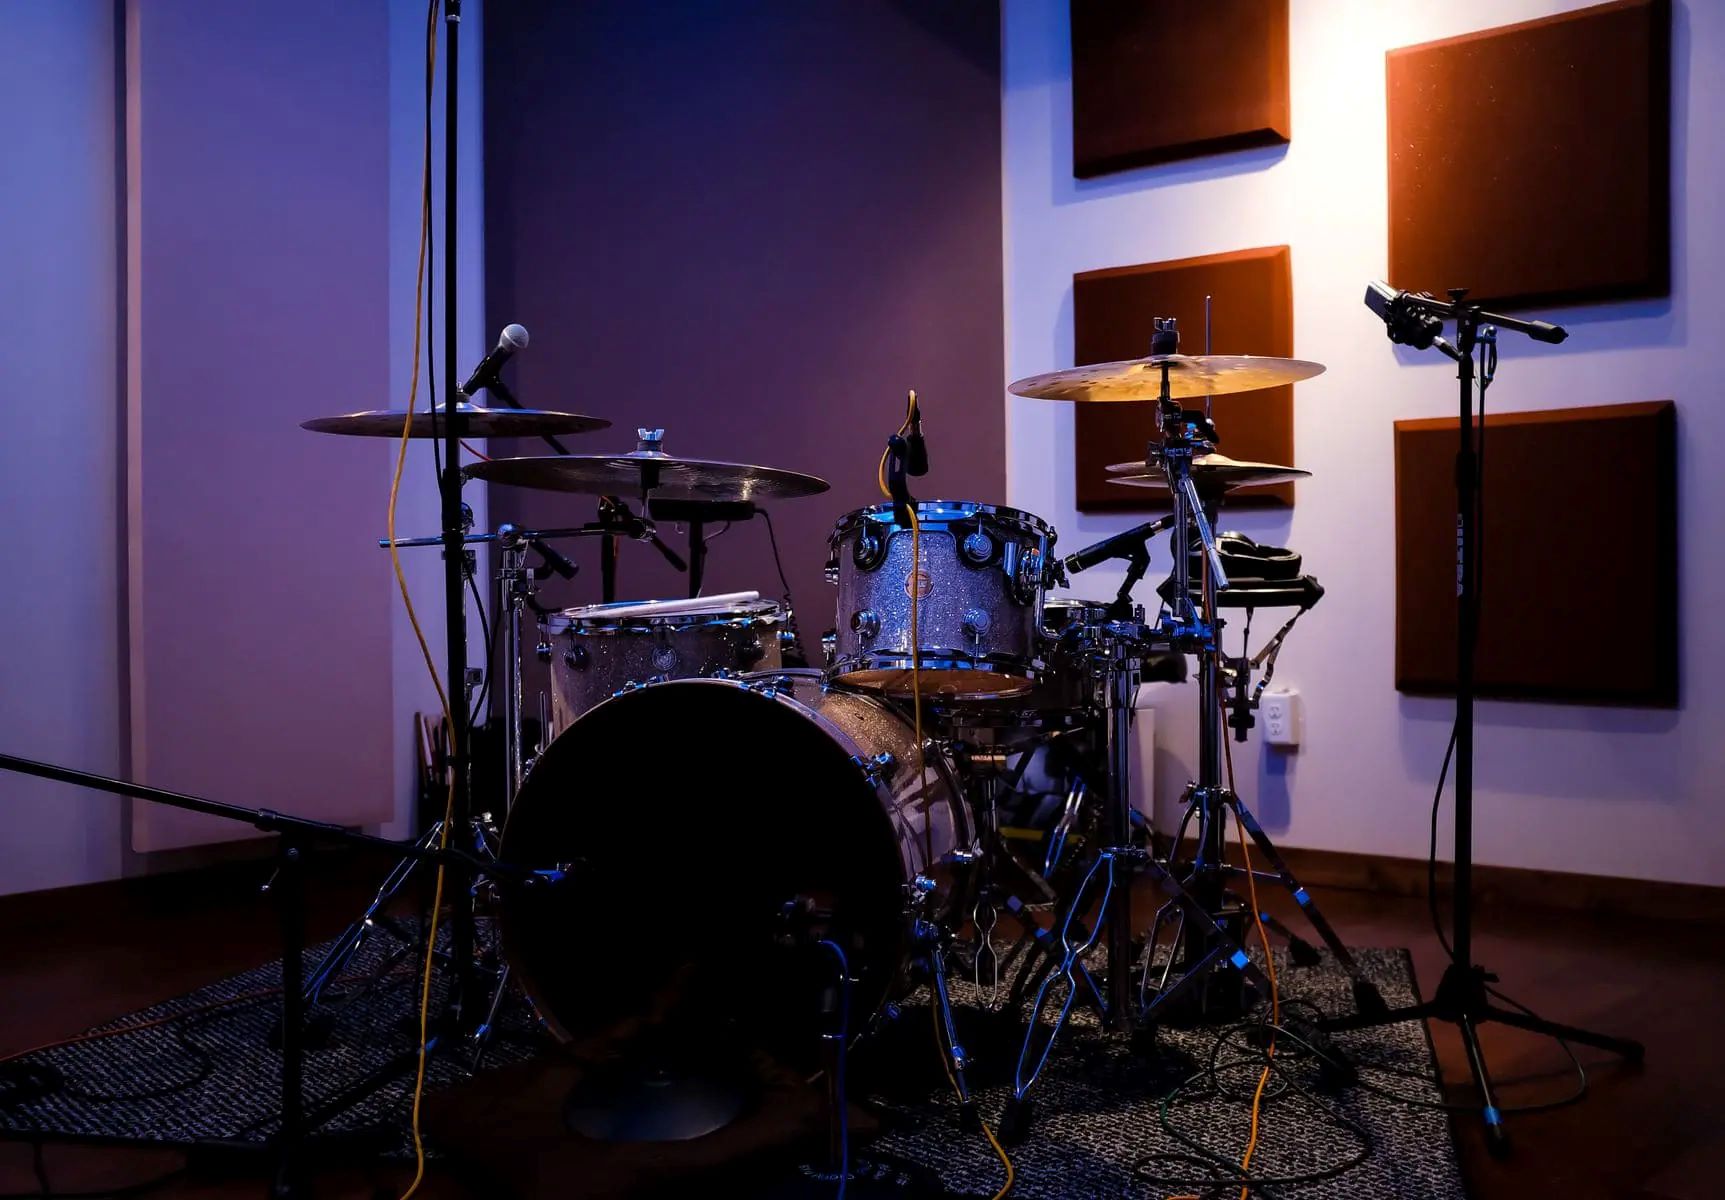
Setting Up Your Drum Kit
Before diving into the recording process, it’s crucial to ensure that your drum kit is properly set up to deliver the best possible sound. Start by inspecting each component of your drum kit, including the snare drum, bass drum, toms, cymbals, and hardware, to make sure everything is in optimal condition. Tighten any loose hardware, replace worn drumheads, and tune the drums to achieve a balanced and resonant sound.
Next, consider the physical layout of your drum kit. Position the drums and cymbals ergonomically to suit your playing style and ensure easy access during recording. Experiment with different configurations to find the setup that allows you to play comfortably while facilitating smooth microphone placement for recording purposes.
Furthermore, pay attention to the acoustics of the room where you’ll be recording. If possible, choose a space with good natural acoustics or consider using acoustic treatment to minimize unwanted reflections and reverberations. This will contribute to a cleaner and more controlled sound during the recording process.
Additionally, take the time to fine-tune the overall sound of your drum kit. Experiment with different drumhead types, tuning methods, and damping techniques to achieve the desired tone for your recordings. Remember that the sound of your drum kit will greatly influence the final outcome of your recordings, so it’s worth investing time in perfecting the setup.
By meticulously preparing your drum kit for recording, you set the stage for capturing exceptional drum performances with Ableton Live 11. A well-maintained and thoughtfully arranged drum kit forms the foundation for achieving professional-quality drum recordings that shine with clarity and character.
Setting Up Ableton Live 11
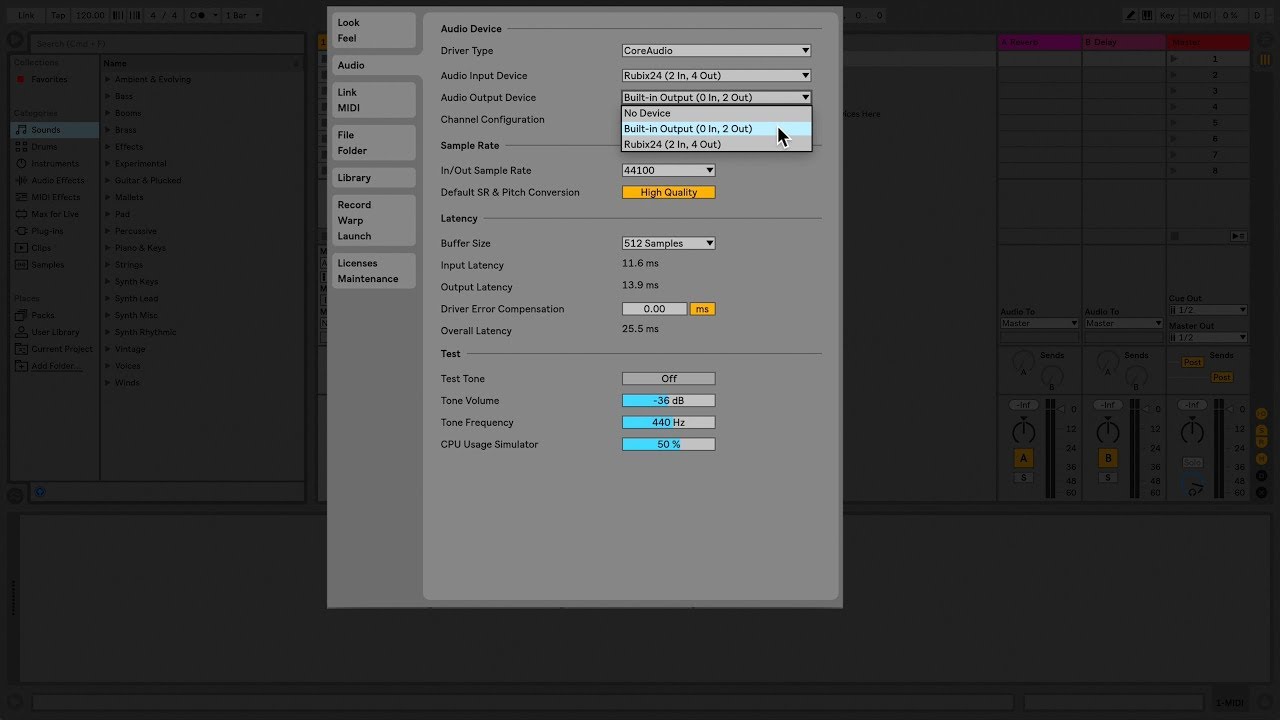
Before embarking on your drum recording journey with Ableton Live 11, it’s essential to configure the software to create an optimal environment for capturing your drum performances. Start by ensuring that your version of Ableton Live 11 is up to date, as software updates often include improvements to audio processing and recording capabilities.
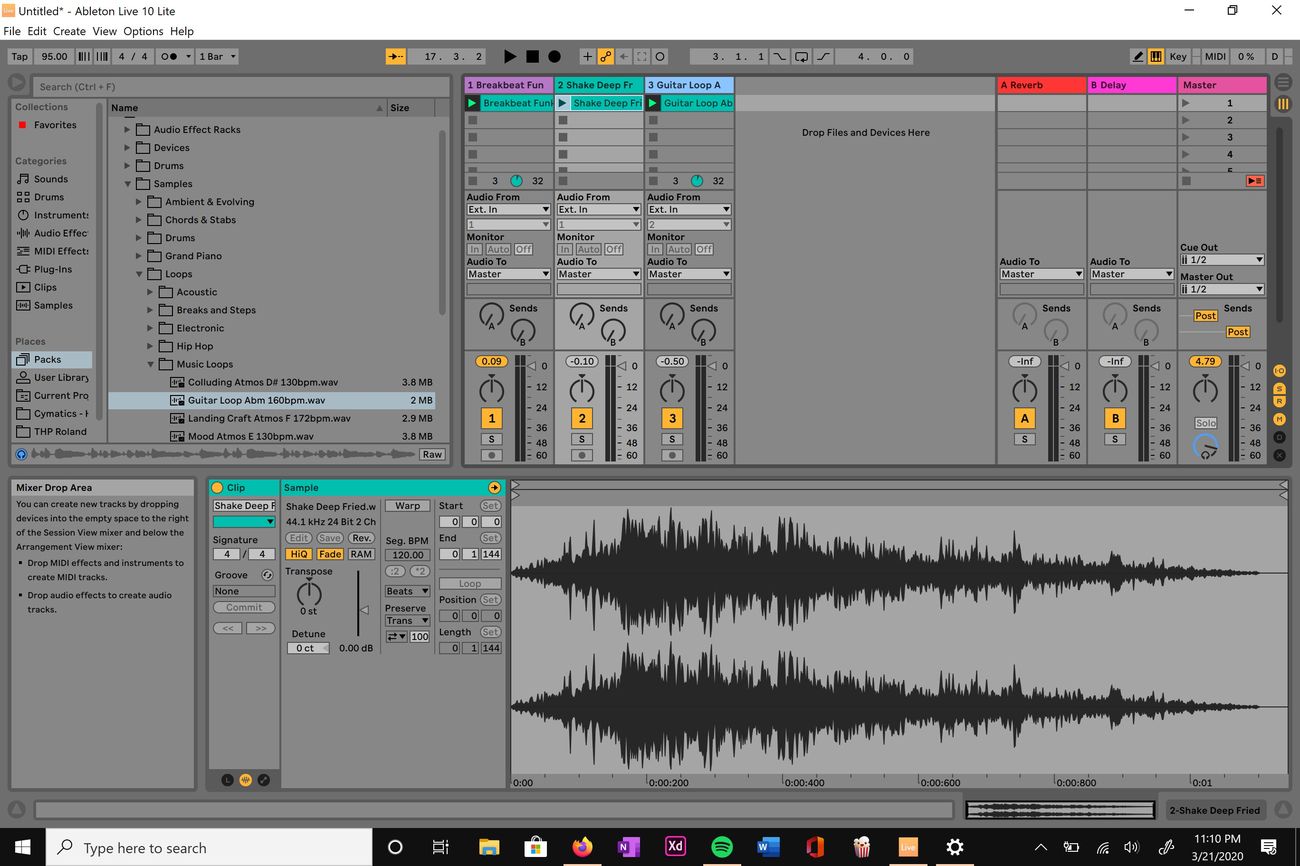
Once you’ve confirmed that you’re running the latest version of Ableton Live 11, take some time to customize the software’s settings to align with your specific recording requirements. Configure the audio input and output settings to match your audio interface and monitoring system, ensuring seamless communication between your drum kit, microphones, and Ableton Live 11.
Next, familiarize yourself with the various recording and monitoring options available in Ableton Live 11. Explore the software’s input and output routing capabilities to establish a clear signal path for your drum recordings. Additionally, consider setting up headphone cue mixes if you plan to monitor the recordings using headphones during the tracking process.
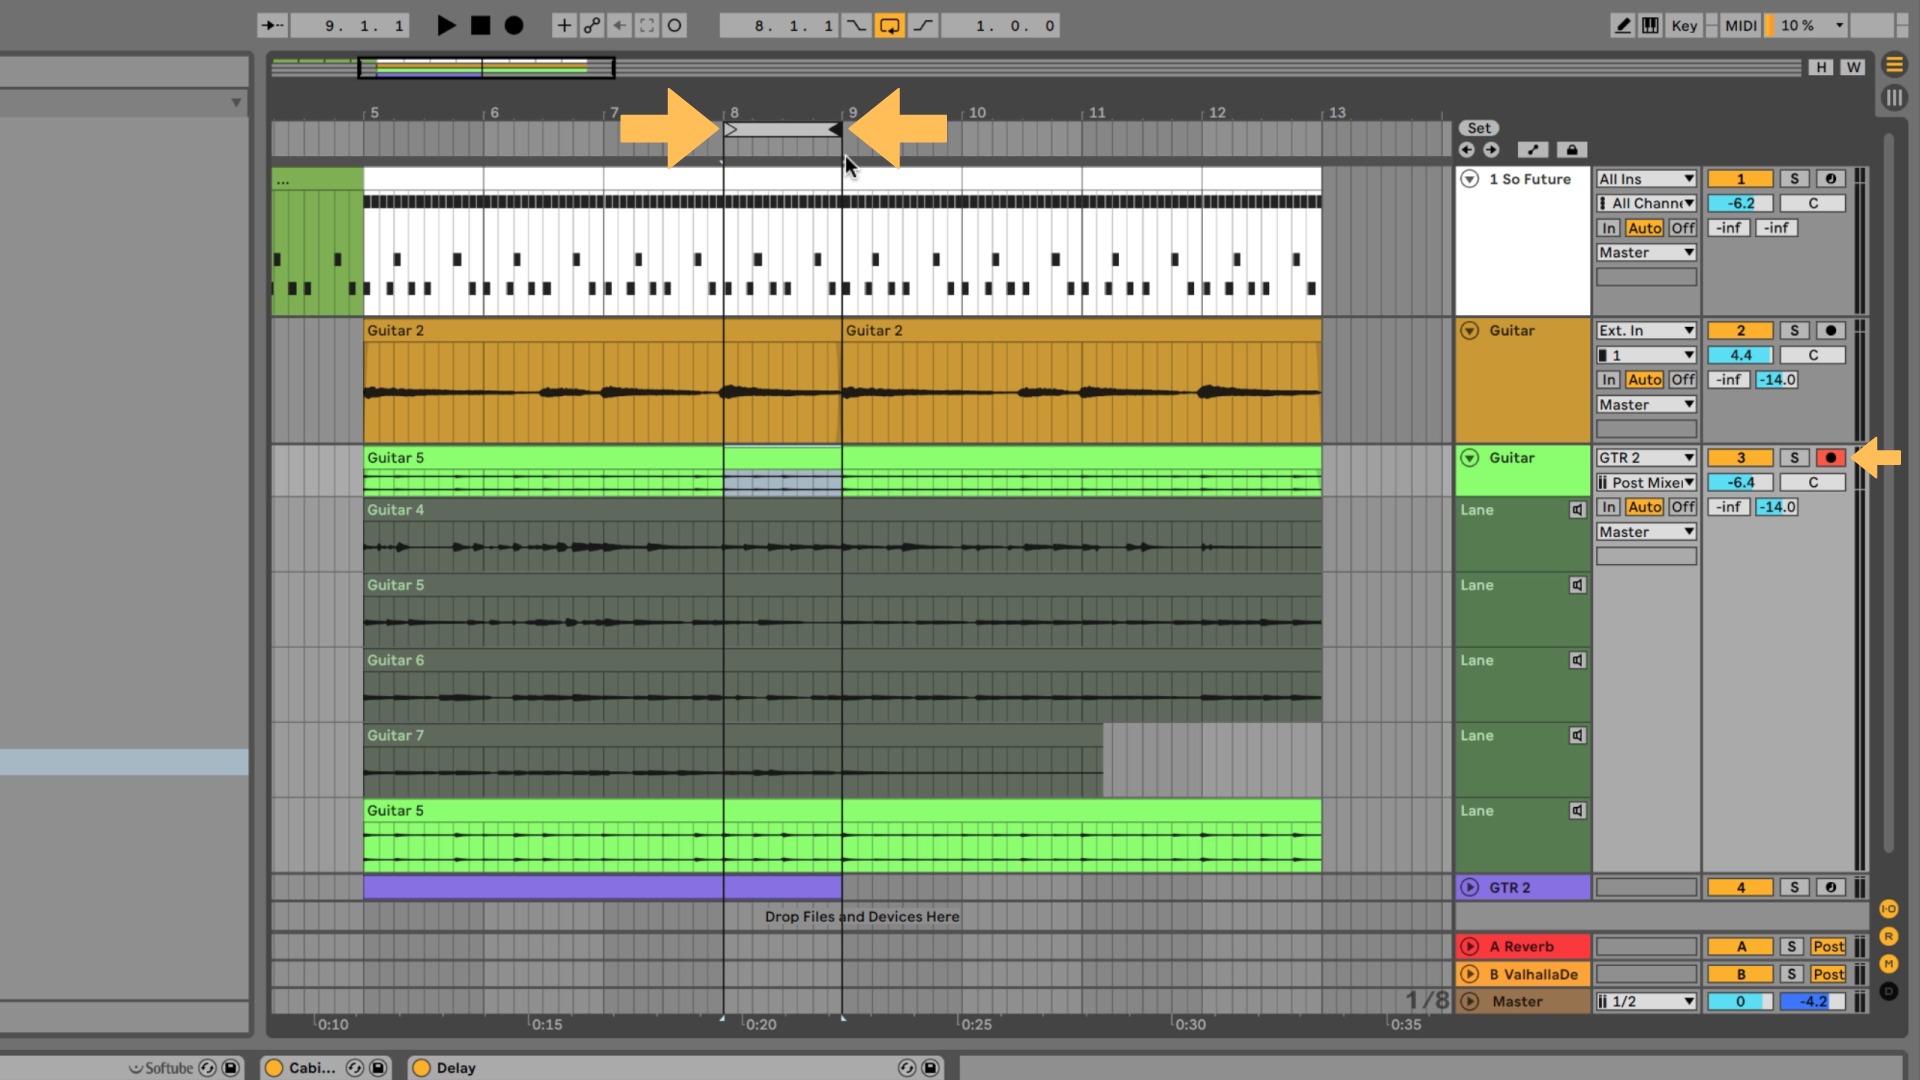
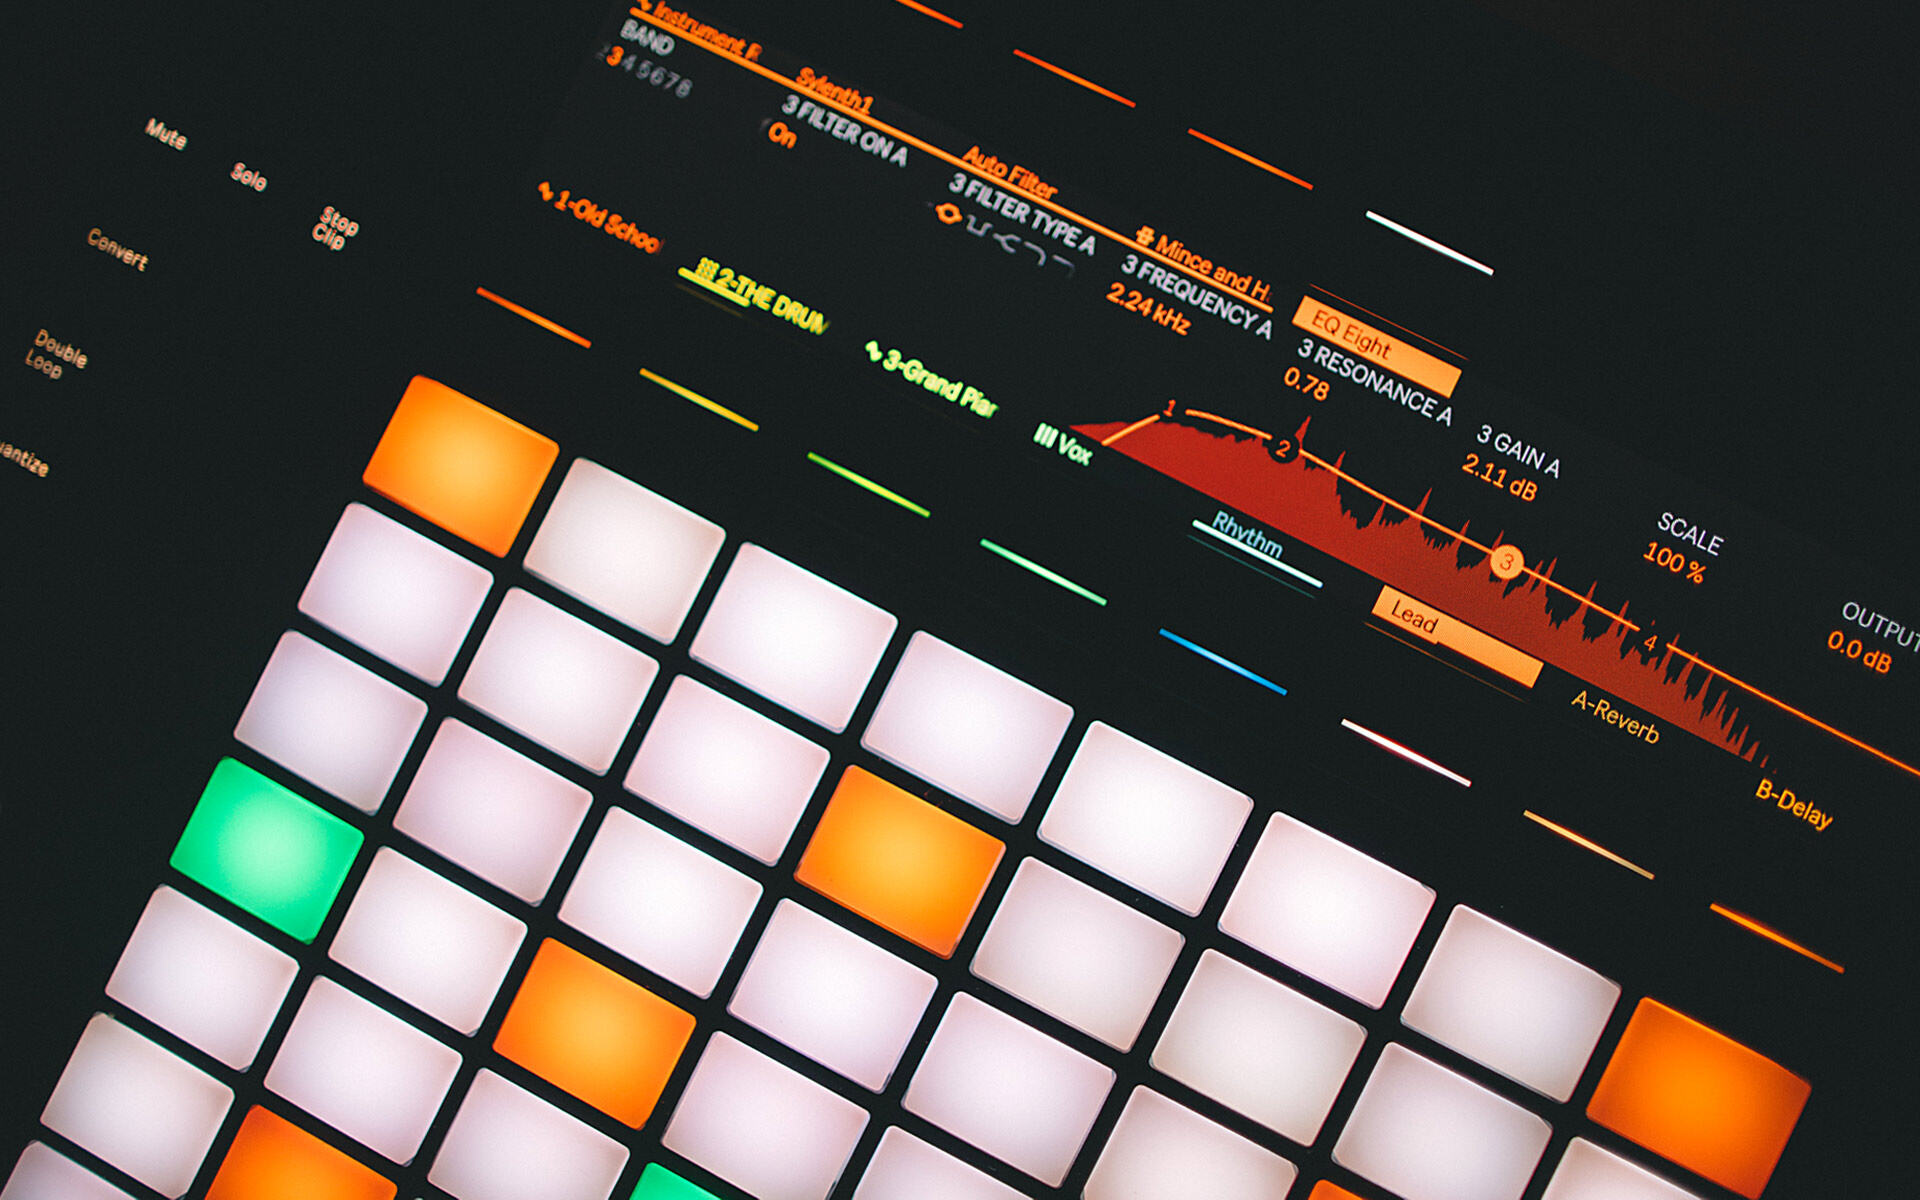
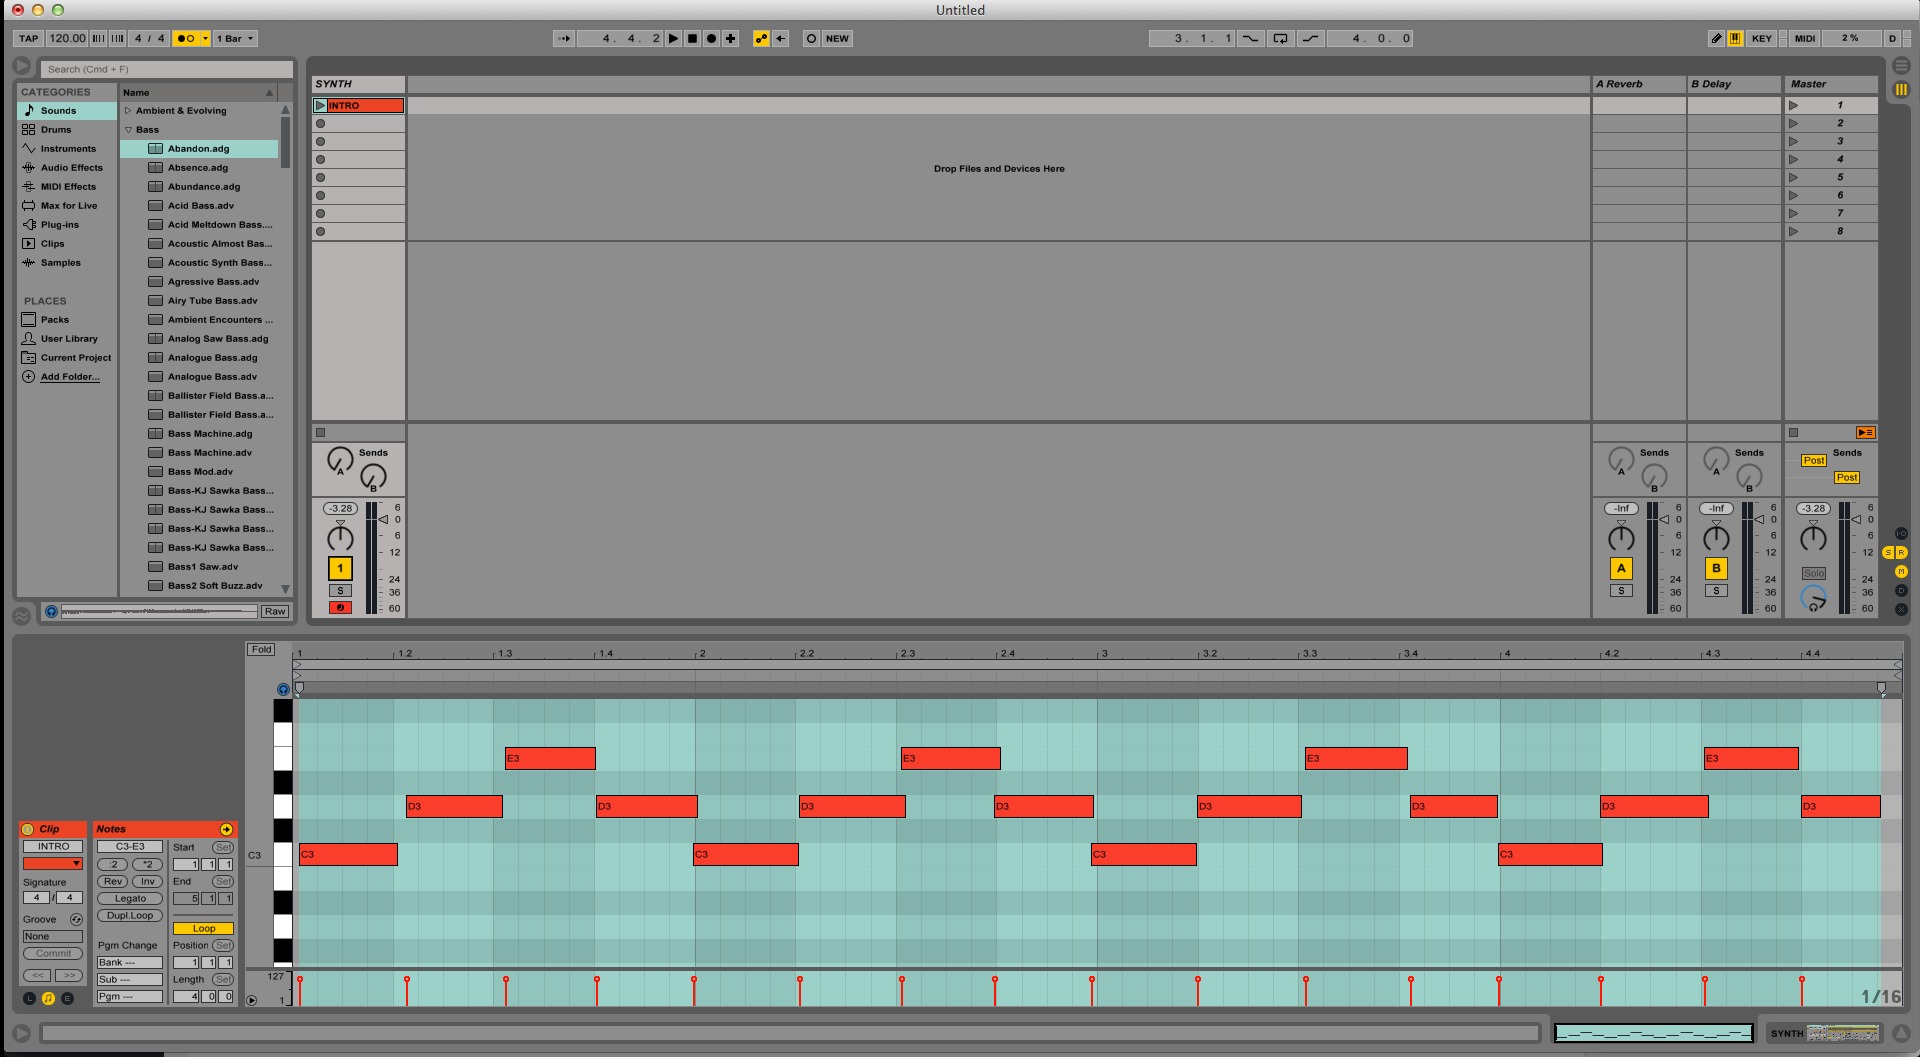
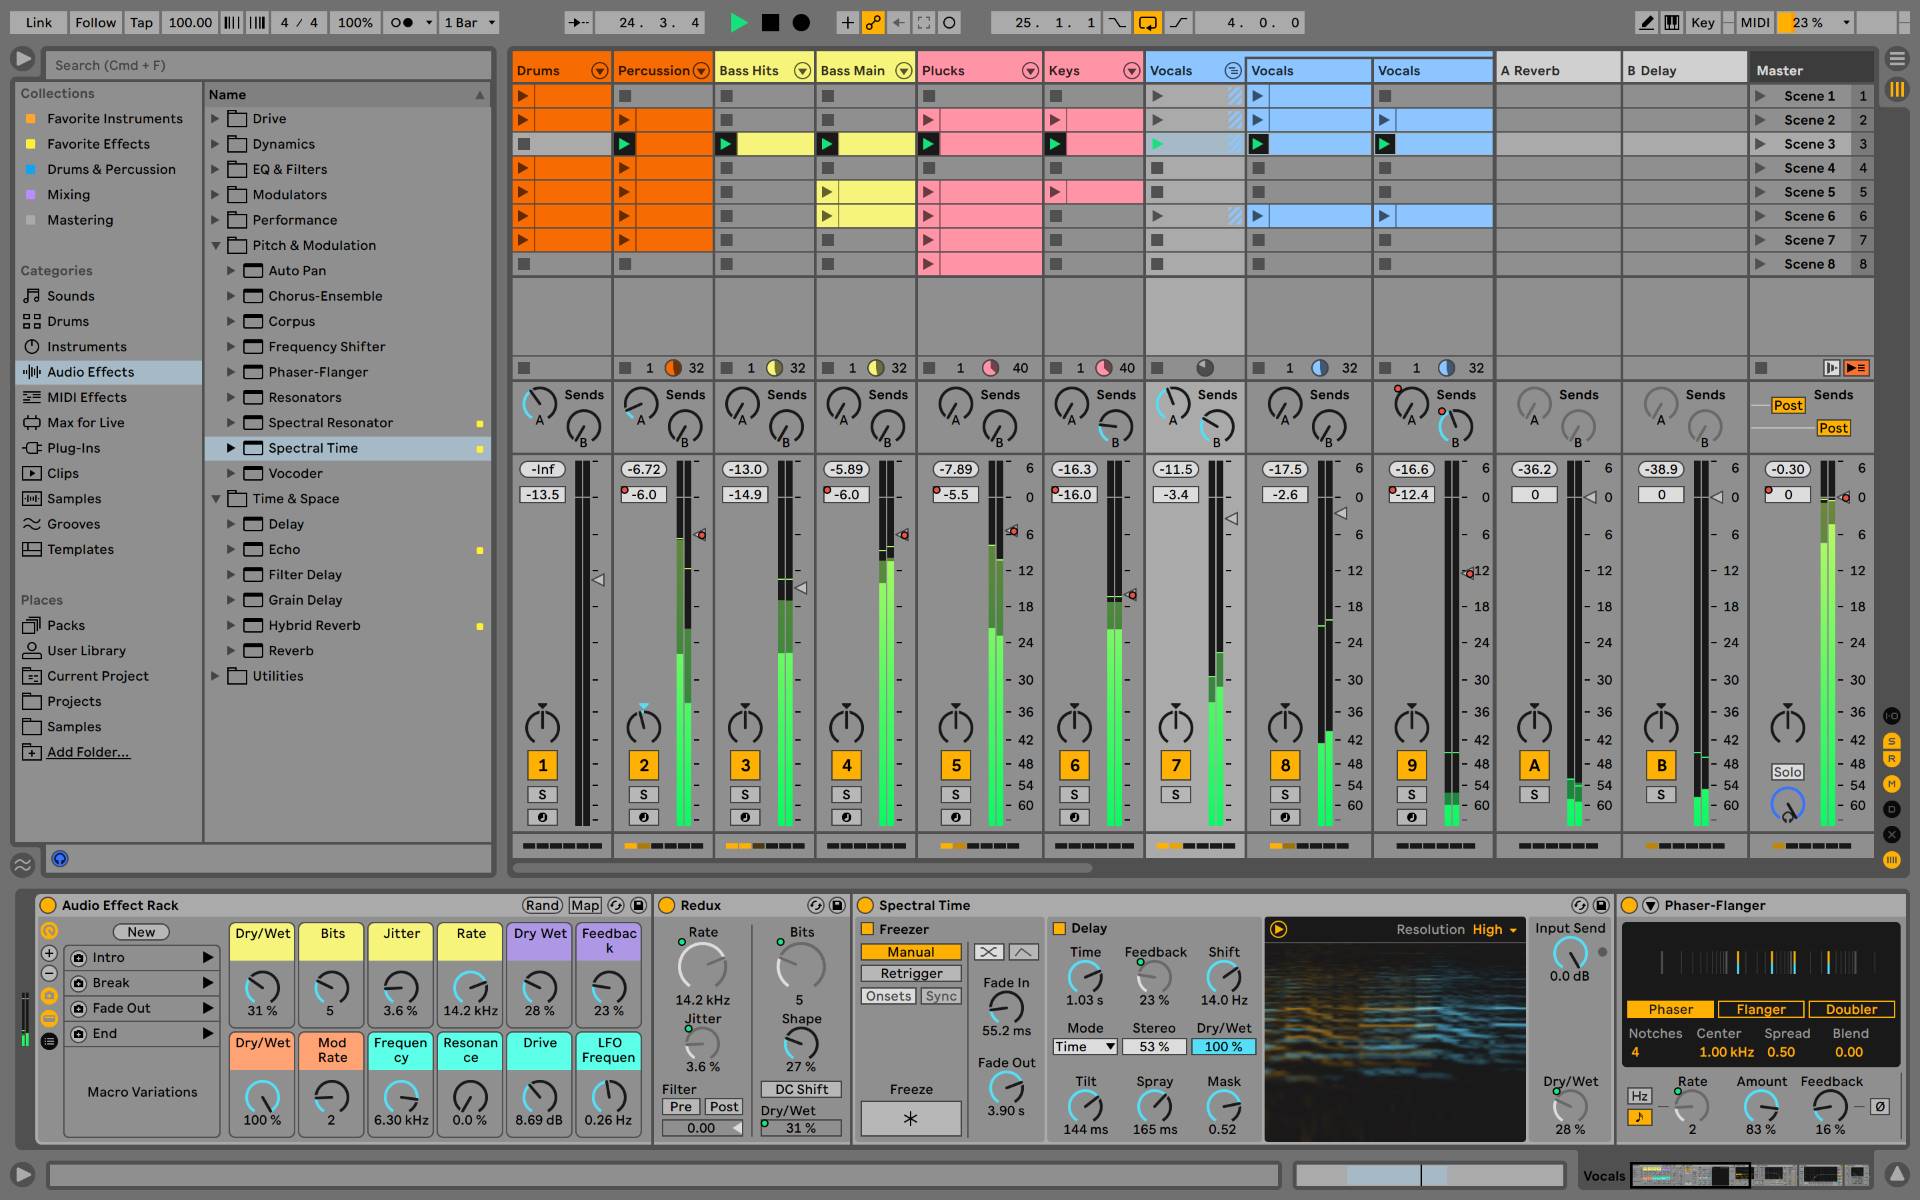
Furthermore, take advantage of Ableton Live 11’s flexible session view to organize your drum recordings efficiently. Create dedicated tracks for each drum component, such as the kick, snare, toms, and cymbals, allowing you to capture and process individual drum elements with precision. Utilize color-coding and labeling to keep your session well-organized and easy to navigate during recording and editing.
Moreover, familiarize yourself with Ableton Live 11’s array of audio effects and processing tools, as these will play a crucial role in shaping the sound of your drum recordings. Experiment with EQ, compression, reverb, and other effects to enhance the tonal characteristics of your drum tracks, adding depth and polish to your recordings.
By setting up Ableton Live 11 to align with your specific drum recording needs, you lay the groundwork for a seamless and productive recording experience. With the software primed and ready, you can focus on delivering captivating drum performances while harnessing the full potential of Ableton Live 11’s recording and processing capabilities.
Choosing the Right Microphones
When it comes to recording drums, selecting the appropriate microphones is paramount to capturing the nuances and power of your drum kit. Each component of the drum kit, including the kick drum, snare drum, toms, and cymbals, requires specific microphone types to faithfully reproduce their unique sonic characteristics.
For the kick drum, a dynamic microphone with a tailored low-frequency response is often preferred to capture the deep and punchy sound of the kick drum beater. Microphones such as the Shure Beta 52A or AKG D112 are popular choices for capturing the low-end impact of the kick drum, providing clarity and definition to the recorded sound.
When it comes to the snare drum, a dynamic microphone with high SPL (sound pressure level) handling is essential to capture the sharp transients and crisp snare sound. The Shure SM57 is a renowned industry standard for snare drum miking, known for its ability to capture the snare’s crack and body with precision.
For the toms, dynamic microphones with a tailored frequency response to accentuate the body and resonance of the drums are commonly used. Microphones such as the Sennheiser e604 or Audix D2 are favored for their ability to capture the full tonal range of the toms while withstanding the high SPL produced during aggressive drumming.
When it comes to overhead miking for capturing the cymbals and overall drum kit ambience, condenser microphones are often preferred for their extended high-frequency response and transient accuracy. Microphones like the AKG C414 or Neumann U87 are popular choices for capturing the shimmering detail and spatial depth of the cymbals and overall drum kit sound.
It’s important to note that the selection and placement of microphones greatly influence the final drum sound, so take the time to experiment with different microphone options and positions to find the combination that best complements your drumming style and the sonic characteristics of your drum kit.
By carefully choosing the right microphones for each drum component, you set the stage for capturing expressive and well-defined drum recordings that showcase the full sonic spectrum of your performances.
Placing Microphones for Drum Recording
Strategically placing microphones around your drum kit is essential for capturing a balanced and cohesive sound that accurately represents the dynamics and nuances of your drumming. Each drum component requires specific microphone placement to ensure optimal sound capture and minimal bleed from neighboring drums and cymbals.
When miking the kick drum, position the microphone just inside the drum’s sound hole, pointing toward the spot where the beater makes contact with the drumhead. This placement allows the microphone to capture the low-end thump and resonance of the kick drum while minimizing bleed from the rest of the kit.
For miking the snare drum, place the microphone slightly above the drumhead, angled toward the center of the snare to capture the full-bodied sound and crisp attack of the drum. Experiment with different distances and angles to find the sweet spot that accentuates the snare’s character without picking up excessive bleed from the surrounding drums.
When miking the toms, position the microphones above each drum, angled toward the center of the drumhead to capture the full tonal range and resonance of the toms. Adjust the microphone placement to minimize bleed and ensure that each tom is captured distinctly without interference from neighboring drums.
When it comes to overhead miking, consider using a stereo pair of microphones positioned above the drum kit to capture the overall ambience, stereo image, and cymbal detail. Experiment with different overhead mic configurations, such as spaced pair or coincident pair, to achieve a balanced and spacious representation of the entire drum kit.
Additionally, consider incorporating room mics to capture the natural acoustics and spatial depth of the drum kit within the recording environment. Place these microphones strategically in the recording space to capture the reverberation and natural ambiance, adding depth and dimension to the overall drum sound.
Remember that microphone placement significantly influences the tonal balance and clarity of your drum recordings. Take the time to experiment with different mic positions, listen critically, and make adjustments to achieve a well-balanced and cohesive drum sound that faithfully represents your drumming performance.
By thoughtfully placing microphones for drum recording, you can capture the full sonic spectrum of your drum kit while minimizing unwanted bleed and achieving a cohesive and impactful drum sound in your recordings.
Setting Levels and Testing
Once your drum kit is meticulously set up and the microphones are strategically placed, it’s time to focus on setting levels and conducting thorough testing to ensure that your drum recordings will capture the full range and dynamics of your performances.
Begin by adjusting the input levels of each microphone to achieve a balanced and consistent signal. Use the preamp gain on your audio interface or mixer to set appropriate levels for each drum component, ensuring that the signal remains well below clipping while capturing the nuances and transients of your drumming.
As you adjust the input levels, pay close attention to the dynamic range of your drum performances. Test the levels by playing both soft and loud passages on the drums to ensure that the microphones can accurately capture the full spectrum of your playing dynamics without overloading the input signal.
Simultaneously, monitor the input levels within Ableton Live 11 to ensure that the recorded signals are well within the optimal range. Utilize the software’s level meters and monitoring tools to keep a close eye on the input levels, making adjustments as needed to maintain a healthy signal while avoiding distortion or clipping.
Once the initial levels are set, conduct a comprehensive sound check by playing through various drum patterns and fills to evaluate the overall balance and tonal characteristics of the drum recordings. Listen critically to the captured sound through your monitoring system or headphones, making note of any imbalances or anomalies that may require further adjustments.
During the testing phase, pay particular attention to the interaction between the individual drum microphones and the overall coherence of the drum sound. Ensure that the kick, snare, toms, and cymbals are well-balanced and blend harmoniously to create a unified drum sound that accurately reflects the nuances of your playing.
Additionally, consider experimenting with microphone polar patterns and phase alignment to optimize the interaction between the drum microphones and minimize phase cancellations that can affect the clarity and impact of the recorded drum sound.
By meticulously setting levels and conducting thorough testing, you can fine-tune the balance and fidelity of your drum recordings, ensuring that every subtle nuance and dynamic expression of your drumming is faithfully captured with precision and clarity.
Recording the Drum Tracks
With your drum kit primed, microphones strategically placed, and levels carefully adjusted, it’s time to embark on the exhilarating process of recording your drum tracks in Ableton Live 11. As you prepare to capture your performances, it’s essential to approach the recording process with focus, creativity, and a keen ear for detail.
Before commencing the recording session, take a moment to center yourself and visualize the musical journey you’re about to embark on. Whether you’re laying down a driving rock beat, intricate jazz rhythms, or experimental electronic grooves, channeling your musical intent and energy into the recording process can elevate the emotional impact of your drum performances.
As you begin recording, strive for consistency and precision in your drumming. Maintain a steady tempo, focus on dynamics, and strive for expressive and controlled playing to ensure that each drum performance is captured with clarity and impact. Embrace the nuances of your playing, infusing each beat and fill with your unique musical personality.
Throughout the recording process, maintain a keen awareness of the overall sonic balance and interaction between the drum components. Listen attentively to the blend of the kick, snare, toms, and cymbals, making subtle adjustments as needed to enhance the cohesion and musicality of the drum tracks.
Embrace the creative possibilities offered by Ableton Live 11 as you record your drum performances. Experiment with different microphone combinations, processing techniques, and effects to sculpt the sonic character of your drum tracks, adding depth, dimension, and sonic richness to your recordings.
Furthermore, consider utilizing Ableton Live 11’s session view to capture multiple takes of your drum performances, allowing you to explore different creative avenues and select the most compelling takes for your final recordings. Embrace the freedom to experiment, improvise, and push the boundaries of your drumming as you lay down your tracks.
As you immerse yourself in the recording process, maintain an open and receptive mindset, allowing for spontaneity and musical exploration. Embrace the imperfections and idiosyncrasies of your drum performances, recognizing that these elements can infuse your recordings with character and authenticity.
Ultimately, the recording process is a celebration of your musical expression and creativity. Approach each take with passion, intention, and a commitment to capturing the essence of your drumming, knowing that your recordings will resonate with the vibrancy and energy of your performances.
Editing and Processing Drum Tracks
Once you’ve captured your drum performances in Ableton Live 11, the next phase involves refining and enhancing the recorded tracks through meticulous editing and creative processing. This stage allows you to shape the sonic characteristics of your drum recordings, ensuring that they stand out with clarity, impact, and musicality.
Begin by reviewing the recorded drum tracks with a critical ear, identifying sections that may benefit from editing to tighten the timing, enhance the dynamics, or remove any unwanted artifacts. Utilize Ableton Live 11’s intuitive editing tools to fine-tune the performance, adjusting individual hits, refining transitions, and aligning the rhythmic elements to achieve a polished and cohesive drum sound.
As you delve into the editing process, consider the creative possibilities offered by Ableton Live 11’s array of audio effects and processing tools. Experiment with EQ to sculpt the tonal balance of the drums, enhancing the clarity of individual components and shaping the overall drum sound to suit the musical context of your recordings.
Explore the dynamic potential of compression to control the transients and sustain of the drum tracks, adding punch and consistency to the overall drum sound. Utilize parallel compression techniques to achieve a powerful and impactful drum sound while retaining the natural dynamics and expressiveness of your performances.
Furthermore, consider integrating reverbs and spatial effects to infuse your drum recordings with depth, dimension, and ambience. Experiment with different reverb types and settings to create a sense of space and envelopment, enhancing the immersive quality of your drum tracks within the mix.
Delve into the realm of creative processing by experimenting with modulation effects, transient shaping, and harmonic saturation to add character and color to your drum recordings. Embrace the freedom to push the boundaries of traditional drum sound, exploring unconventional processing techniques to infuse your recordings with sonic intrigue and personality.
As you navigate the processing stage, maintain a balance between technical precision and artistic expression. Strive to honor the integrity of your original drum performances while leveraging the creative potential of Ableton Live 11’s processing tools to elevate the sonic impact and emotional resonance of your drum tracks.
Ultimately, the editing and processing phase is an opportunity to refine and elevate your drum recordings, infusing them with depth, character, and sonic richness. Embrace the creative journey of sculpting your drum tracks, knowing that each nuanced adjustment and artistic choice contributes to the vibrant tapestry of your musical expression.
Conclusion
Congratulations on embarking on a captivating journey to unlock the full potential of drum recording with Ableton Live 11. Throughout this guide, we’ve explored the intricate process of capturing dynamic and expressive drum performances, from meticulously setting up your drum kit to harnessing the creative power of Ableton Live 11 to shape your drum recordings with precision and artistry.
As you’ve discovered, the art of drum recording extends far beyond technical proficiency; it’s a celebration of musical expression, creativity, and the profound connection between rhythm and emotion. By meticulously preparing your drum kit, selecting the right microphones, and thoughtfully placing them for optimal capture, you’ve set the stage for capturing the full sonic spectrum of your drumming prowess.
Throughout the recording process, you’ve channeled your musical intent and energy into each performance, embracing the nuances, dynamics, and expressive qualities of your drumming. With Ableton Live 11 as your creative companion, you’ve ventured into the realm of sonic sculpting, utilizing a diverse array of processing tools and effects to enhance the clarity, impact, and emotional resonance of your drum recordings.
As you reflect on this immersive journey, remember that the essence of drum recording lies in the authenticity and emotive power of your performances. Embrace the imperfections, the spontaneity, and the idiosyncrasies of your drumming, recognizing that these elements infuse your recordings with character and vitality.
Whether you’ve captured driving rock beats, intricate jazz rhythms, or experimental electronic grooves, your drum recordings are a testament to your musical passion and creativity. Each nuanced adjustment, artistic choice, and sonic exploration has contributed to the vibrant tapestry of your musical expression, shaping your drum recordings into captivating sonic narratives.
As you continue to refine your drum recordings and embark on future musical endeavors, carry forward the spirit of creativity, curiosity, and unwavering dedication to your craft. Embrace the boundless possibilities of drum recording with Ableton Live 11, knowing that your unique musical voice has the power to captivate, inspire, and resonate with audiences around the world.
So, with your drumsticks in hand and Ableton Live 11 as your creative canvas, continue to explore, innovate, and infuse your drum recordings with the depth, emotion, and sonic brilliance that define your musical journey. The world eagerly awaits the rhythmic tales you’ll weave and the sonic landscapes you’ll sculpt with your extraordinary drum recordings.