Home>Production & Technology>Metronome>How To Run A Metronome For Drummer Ableton Live
Metronome
How To Run A Metronome For Drummer Ableton Live
Modified: February 20, 2024
Learn how to effectively use a metronome for drumming in Ableton Live. Improve your timing and rhythm with this step-by-step guide.
(Many of the links in this article redirect to a specific reviewed product. Your purchase of these products through affiliate links helps to generate commission for AudioLover.com, at no extra cost. Learn more)
Table of Contents
Introduction
Playing drums requires impeccable timing and rhythm. To keep your drumming on point, a metronome is an essential tool. A metronome is a device or software that produces regular beats at a set tempo, helping musicians maintain a consistent tempo and improve their timing skills.
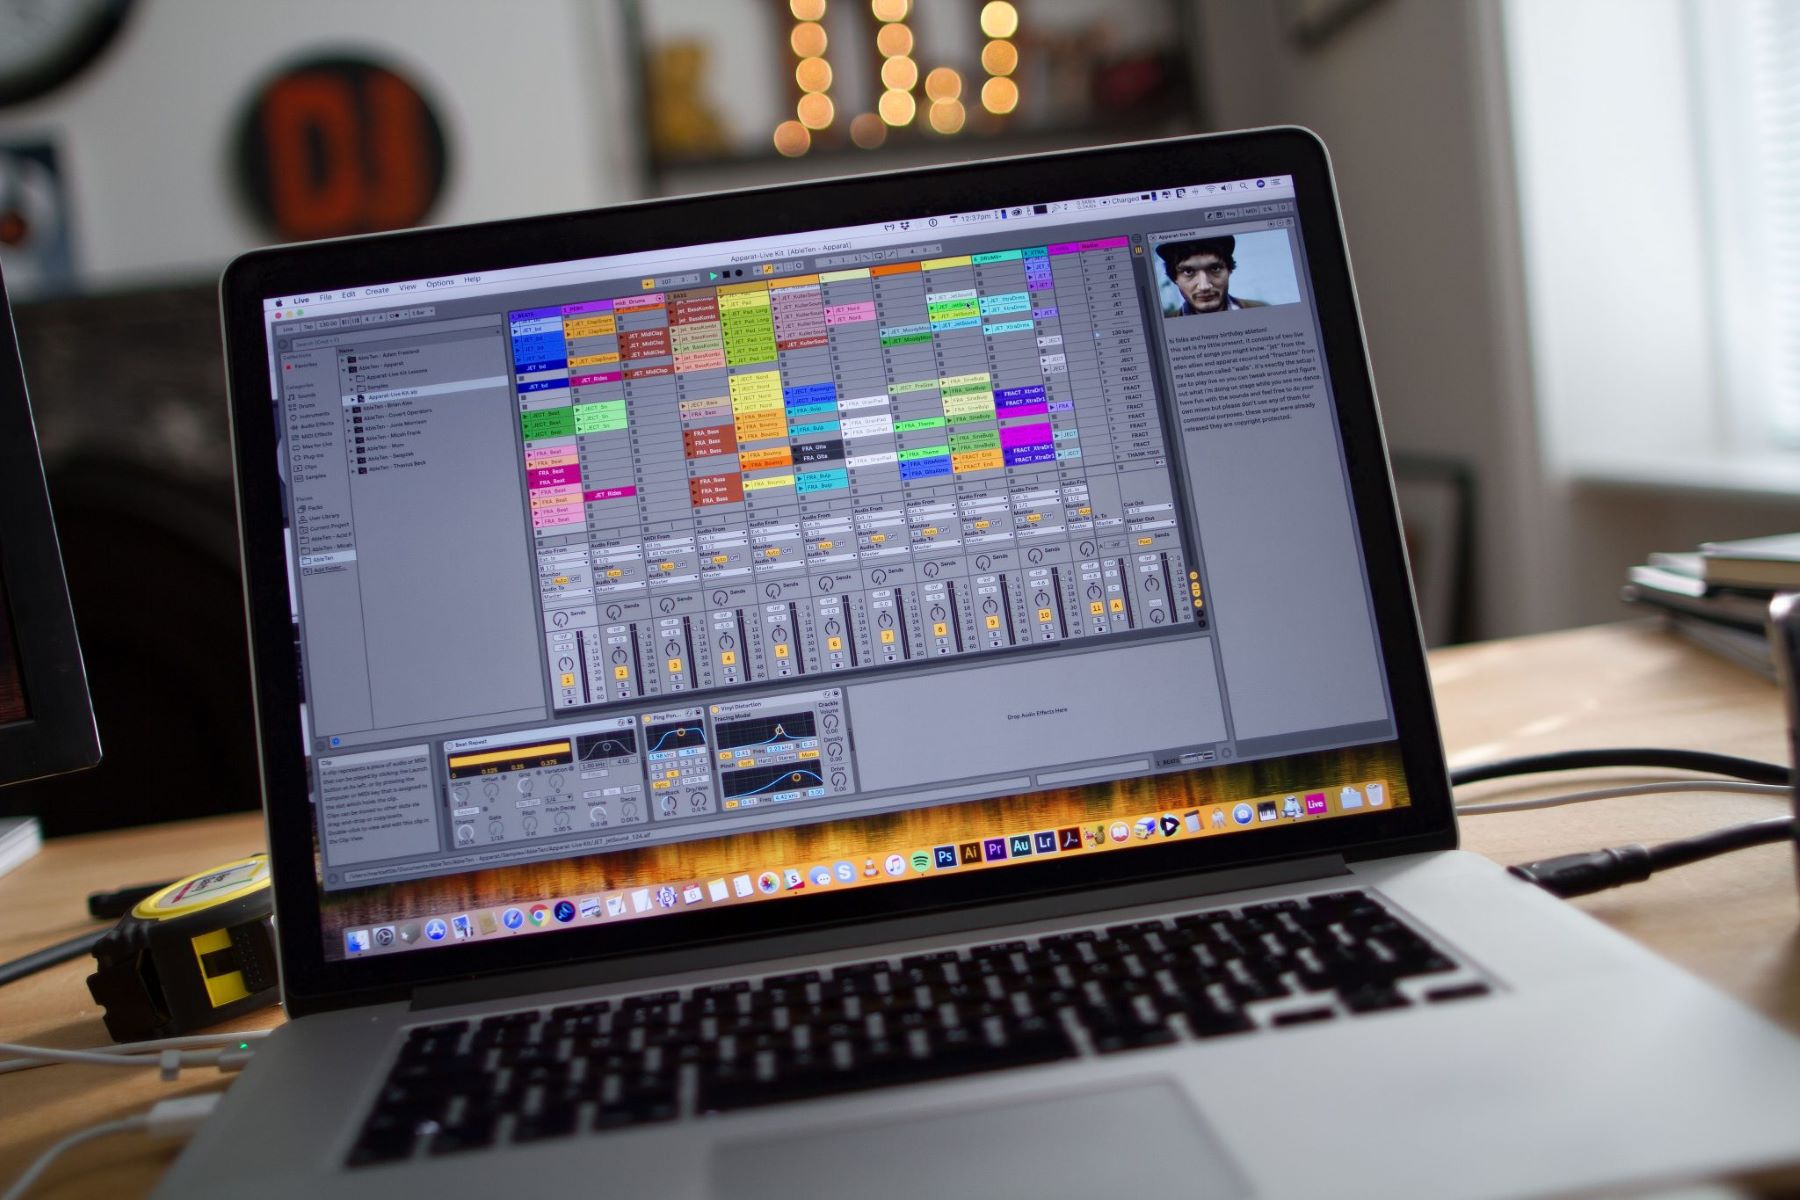
In this article, we will explore how to run a metronome specifically for drummers using Ableton Live software. Ableton Live is a powerful digital audio workstation widely used by musicians and producers for composing, recording, and performing music.
Whether you’re a beginner or an experienced drummer, using a metronome can greatly enhance your playing. It can help you develop a solid sense of timing, improve tempo control, and provide a steady reference point while practicing or performing. Plus, using a metronome in conjunction with Ableton Live opens up a world of creative possibilities to enhance your drumming.
In the following sections, we will guide you through the process of setting up Ableton Live, installing a metronome device, adjusting the tempo, selecting the right metronome sound, syncing with external devices, customizing the metronome settings, using automation to control the metronome, and provide some tips and tricks specifically tailored for drummers.
So, if you’re ready to take your drumming to the next level, let’s dive in and explore how to run a metronome for drummers using Ableton Live!
Setting up Ableton Live
Before we can start running a metronome in Ableton Live, we need to make sure the software is properly set up. Follow these steps to get started:
- Download and install Ableton Live: Visit the official Ableton website and download the latest version of Ableton Live. Follow the installation instructions to install the software on your computer.
- Launch Ableton Live: Once the installation is complete, launch the Ableton Live application on your computer.
- Create a new project: Click on “File” from the menu bar and select “New Live Set” to create a new project. This will open a new empty project where we can set up the metronome.
- Set the project tempo: In the Ableton Live interface, you will see a master tempo control at the top center of the screen. Click on it and enter your desired tempo. The tempo is measured in Beats Per Minute (BPM), which represents the speed of the metronome’s beats.
Once you have completed these steps, you are ready to proceed with installing a metronome device in Ableton Live. Having the correct project tempo is crucial as the metronome will synchronize with this tempo to provide accurate timing cues for your drumming.
Now that Ableton Live is set up, let’s move on to the next step: installing a metronome device.
Installing a Metronome Device
Ableton Live offers a variety of options for installing metronome devices to enhance your drumming experience. Here’s how you can install a metronome device in Ableton Live:
- Open the Live Devices Browser: On the left side of the Ableton Live interface, you will find the Live Devices Browser. Click on the small triangle icon to expand the browser.
- Navigate to the Instruments category: In the Live Devices Browser, scroll down and locate the “Instruments” category. Click on it to expand the list of available instruments.
- Choose a metronome device: Look for a metronome device in the list of available instruments. Ableton Live offers several built-in metronome devices, such as “Simple Delay,” “Impulse,” or “Operator.” Select the metronome device that you prefer by clicking on it.
- Drag and drop the metronome device into the workspace: After selecting the metronome device, click and drag it from the Live Devices Browser into the main workspace of Ableton Live.
Once you have successfully installed a metronome device, you will see it appear as a device in the main workspace of Ableton Live. You can now proceed to adjust the tempo and customize the metronome settings to suit your drumming needs.
It’s worth noting that Ableton Live also supports third-party metronome plugins. If you have a preferred metronome plugin that you would like to use with Ableton Live, you can install it following the specific instructions provided by the plugin developer.
Now that you have a metronome device installed in Ableton Live, let’s move on to the next step: adjusting the tempo.
Adjusting the Tempo
One of the fundamental aspects of using a metronome is setting the tempo, which determines the speed at which the beats are played. Ableton Live offers a straightforward way to adjust the tempo according to your preferences. Here’s how:
- Locate the master tempo control: In the Ableton Live interface, you will find the master tempo control at the top-center of the screen. It displays the current tempo of your project.
- Click on the tempo field: To adjust the tempo, click on the tempo field in the master tempo control. This will activate the field for editing.
- Enter the desired tempo: Enter the desired tempo using your computer keyboard or by clicking and dragging the tempo slider. The tempo is measured in Beats Per Minute (BPM), indicating the number of beats played per minute.
As a drummer, it’s essential to choose a tempo that suits the specific piece of music you are playing or practicing. The tempo can vary depending on the genre, style, and energy level of the music. Slower tempos are often used for ballads or slower genres, while faster tempos are typical for genres like rock or jazz.
Experiment with different tempos to find the ideal pace for your drumming. It’s also worth noting that some musical compositions may indicate a specific tempo, so be sure to check the sheet music or communicate with other musicians if you are playing in a band or ensemble.
Once you have adjusted the tempo, the metronome in Ableton Live will play beats at your specified tempo, providing a consistent reference for your drumming. Now that the tempo is set, let’s move on to selecting the right metronome sound.
Choosing the Metronome Sound
When using a metronome, the sound it produces plays a crucial role in helping you stay on beat and maintain a consistent rhythm. Ableton Live offers various options for choosing the metronome sound that suits your preferences. Here’s how you can select the right metronome sound:
- Select the metronome device: Locate the metronome device that you installed in Ableton Live. Click on the device to access its settings and controls.
- Explore the sound options: Within the metronome device, you will find a range of sound options to choose from. These can vary depending on the specific metronome device you selected.
- Preview the sounds: Take some time to preview the available metronome sounds by clicking on them within the device. This will allow you to hear how each sound will sound during playback.
- Select the desired metronome sound: Once you have found a metronome sound that you prefer, click on it to select it as the active sound for the metronome device.
It’s important to choose a metronome sound that is clear, distinct, and easily distinguishable from the other sounds in your music. This will help you stay in sync with the metronome and avoid any confusion during your drumming sessions.
Some common metronome sound options include clicks, ticks, beeps, and even musical sounds like woodblocks or cowbells. Experiment with different sounds to find one that resonates with your drumming style and preferences.
Additionally, Ableton Live allows you to modify and customize the metronome sound further using audio effects and processing. You can apply effects such as reverb, delay, or EQ to add a unique sonic character to the metronome sound.
Once you have selected the right metronome sound, you’re ready to move forward. In the next section, we’ll explore how to sync the metronome with external devices.
Syncing with External Devices
Syncing your metronome with external devices can be beneficial, especially if you’re performing with other musicians or using additional hardware in your drumming setup. Ableton Live offers several options to synchronize your metronome with external devices. Here’s how you can accomplish this:
- Connect your external device: Ensure that the external device you want to sync with Ableton Live, such as a drum machine, MIDI controller, or hardware synthesizer, is properly connected to your computer.
- Enable MIDI sync in Ableton Live: In Ableton Live, navigate to the preferences menu by selecting “Live” on Mac or “Options” on Windows, and choosing “Preferences.” Go to the “Link/MIDI” tab. Make sure the “Sync” button is enabled for the MIDI port connected to your external device.
- Configure the external device: Depending on the specific external device, you may need to adjust its MIDI settings to sync with Ableton Live. Consult the user manual or documentation of your device to learn how to enable MIDI sync.
- Start the metronome: Begin playing the metronome in Ableton Live by clicking on the play button or using the appropriate keyboard shortcut.
With the metronome running and the external device properly synced, you will experience tight timing synchronization between Ableton Live and your external gear. This ensures that all instruments, including your drumming performance, stay perfectly in time with each other.
Syncing with external devices opens up a world of possibilities for enhancing your drumming setup. You can integrate drum machines or trigger samples from your MIDI controller, allowing you to expand your sound palette and create intricate rhythmic patterns.
It’s worth mentioning that Ableton Live also supports other synchronization protocols like Ableton Link, which allows you to sync multiple devices running Ableton Live or other Link-enabled software over a wireless network.
Now that you know how to sync the metronome with external devices, let’s continue with customizing the metronome settings in Ableton Live to further tailor it to your drumming needs.
Customizing the Metronome Settings
Ableton Live provides a range of options to customize the metronome settings, allowing you to personalize your drumming experience. Here are some ways you can customize the metronome settings in Ableton Live:
- Adjust the metronome volume: Control the volume of the metronome by adjusting the level within the metronome device or using the volume control in Ableton Live’s mixer. This allows you to find the right balance between the metronome and your drums.
- Change the metronome pattern: Some metronome devices in Ableton Live offer the ability to change the pattern of the beats. You can experiment with different rhythmic patterns to match the feel and style of the music you’re playing.
- Apply audio effects: Enhance the metronome sound by applying audio effects such as reverb, delay, or distortion. This can add more depth and character to the metronome, making it more enjoyable to play along with.
- Use different time signatures: Ableton Live allows you to set different time signatures for your project. This means you can configure the metronome to play in various time signatures, such as 4/4, 3/4, or even more complex meters.
- Create multiple metronome tracks: If you need different metronome sounds or settings for specific sections of your drumming, you can create multiple metronome tracks in Ableton Live. This gives you the flexibility to have different customized metronome setups throughout your performance or practice session.
By customizing the metronome settings, you can tailor it to suit your drumming style, genre, and personal preferences. This level of customization enables you to create a metronome experience that complements your playing and helps you stay focused and inspired.
Remember, the goal is to find the right balance between the metronome and your drumming. The metronome should provide a steady rhythm to guide your playing without overpowering or distracting you.
Now that you know how to customize the metronome settings in Ableton Live, let’s explore how you can use automation to control the metronome and create dynamic drumming performances.
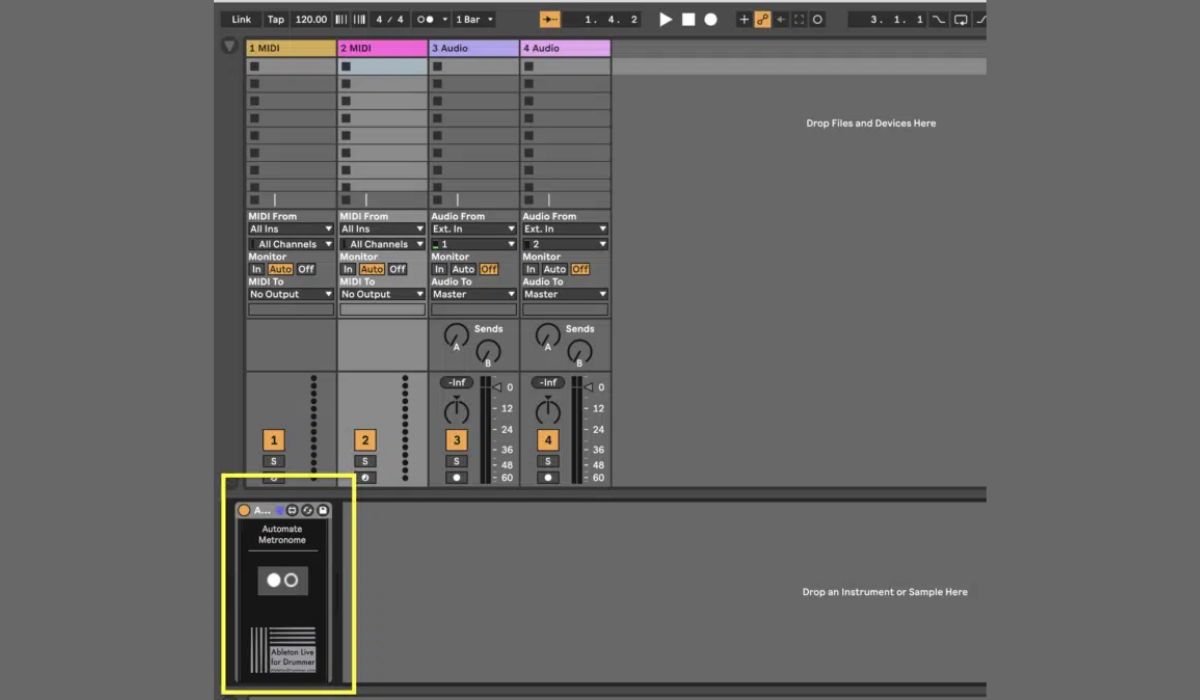
Using Automation to Control the Metronome
Ableton Live offers powerful automation capabilities that allow you to control the metronome settings dynamically throughout your drumming performances. Automation enables you to make precise changes to the metronome’s parameters over time, adding a dynamic and expressive element to your drumming. Here’s how you can use automation to control the metronome in Ableton Live:
- Create an automation lane: Select the metronome device in Ableton Live and open its automation lane. This can be done by clicking on the small triangle next to the device’s name or using the keyboard shortcut.
- Choose the parameter to automate: In the metronome’s automation lane, you will find a list of parameters that you can automate. This can include volume, panning, sound selection, pattern changes, or any other available parameter.
- Draw or record automation: Use the automation tools in Ableton Live to draw or record the desired automation curve for the selected parameter. You can create smooth transitions, dramatic changes, or intricate patterns using the automation features.
- Refine and edit automation: Fine-tune the automation curves by adjusting the control points or using automation editing tools. This allows you to precisely control the metronome’s behavior and response to your drumming.
- Experiment and iterate: Don’t be afraid to experiment with different automation ideas. Try out various automation curves, parameter combinations, and timing variations to create unique and captivating metronome performances.
By using automation, you can add dynamic shifts, accents, and variations to the metronome, enhancing your drumming performances with a sense of live energy and expression. Automation allows you to create engaging and exciting moments that captivate your audience and elevate your drumming skills.
Remember to save your automation settings within your Ableton Live project, so you can easily recall and recreate your customized metronome performances for future rehearsals, recordings, or live shows.
Now that you understand how to use automation to control the metronome, let’s move on to some tips and tricks specifically tailored for drummers.
Tips and Tricks for Drummers
As a drummer, using a metronome can greatly enhance your skills and elevate your drumming performances. Here are some valuable tips and tricks that can help you make the most out of practicing with a metronome in Ableton Live:
- Start slow and gradually increase the tempo: Begin practicing with the metronome at a comfortable tempo and gradually increase the speed over time. This allows you to build your confidence, control, and timing gradually.
- Focus on subdivisions: Pay attention to the subdivisions of each beat, whether it’s quarter notes, eighth notes, or sixteenth notes. This will help you develop a strong internal pulse and improve your precision and accuracy.
- Experiment with different metronome sounds: Try using different metronome sounds to add variety and stimulate your creativity. Changing the sound can influence your playing approach and inspire new rhythmic ideas.
- Incorporate different time signatures: Practice with different time signatures to expand your rhythmic vocabulary. Experiment with odd meters or uncommon time signatures to challenge yourself and improve your versatility.
- Create grooves or drum patterns: Instead of simply playing along with a steady click, try programming drum patterns or grooves that complement the metronome. This helps you develop coordination and explore different rhythmic patterns.
- Use the metronome as a creative tool: Think beyond mere timekeeping and consider the metronome as a creative element in your drumming. Experiment with syncopation, polyrhythms, or playing accents and ghost notes in sync with the metronome.
- Practice with different styles of music: Use the metronome to practice playing various genres and styles of music. This will help you develop adaptability and versatility as a drummer.
- Record and analyze your practice sessions: Record your drumming practice sessions and listen back to analyze your timing and overall performance. This allows you to identify areas for improvement and track your progress over time.
- Practice with a band: Collaborate with other musicians and practice playing along with a full band using the metronome. This simulates real-life performance situations and improves your ability to stay in sync with other instruments.
- Be patient and consistent: Finally, remember that using a metronome is a long-term investment in your drumming skills. Be patient, stay committed, and incorporate regular metronome practice into your drumming routine.
By implementing these tips and incorporating the metronome into your drumming practice, you will develop a solid sense of timing, improve your rhythm, and become a more reliable and versatile drummer.
Now that you have an array of tips and tricks at your disposal, put them into practice and unleash your drumming potential!
Conclusion
Using a metronome is a valuable practice tool for drummers, and with the power of Ableton Live, you have endless possibilities to enhance your drumming experience. Throughout this article, we’ve explored the process of running a metronome for drummers in Ableton Live, covering various aspects from setup to customization.
Ableton Live offers a user-friendly interface and a wide range of metronome devices to choose from. You can adjust the tempo, select the perfect metronome sound, and sync with external devices to create a seamless drumming experience. Additionally, you have the flexibility to customize the metronome settings, apply automation for dynamic control, and utilize various tips and tricks specifically designed for drummers.
Practicing with a metronome not only improves your timing and rhythm, but it also helps you develop a strong sense of pulse, precision, and overall musicality. By incorporating the metronome into your practice routine, you’ll become a more confident and consistent drummer.
Remember, the key to effective metronome practice is to start slow, gradually increase the tempo, and focus on subdivisions. Experiment with different metronome sounds, time signatures, and creative approaches to make your practice sessions more engaging and inspiring.
Whether you’re a beginner or an experienced drummer, the metronome is an invaluable tool that can take your drumming skills to new heights. Embrace the metronome, embrace the rhythm, and let the beats guide your drumming journey.
So, grab your drumsticks, fire up Ableton Live, and let the metronome drive your drumming prowess!