Home>Production & Technology>Acoustic>How To Fix A Dead Fret On An Acoustic Guitar

Acoustic
How To Fix A Dead Fret On An Acoustic Guitar
Published: March 11, 2024
Learn how to fix a dead fret on your acoustic guitar with our step-by-step guide. Get your guitar playing like new again!
(Many of the links in this article redirect to a specific reviewed product. Your purchase of these products through affiliate links helps to generate commission for AudioLover.com, at no extra cost. Learn more)
Table of Contents
Introduction
Acoustic guitars are beloved for their warm, resonant tones and their ability to create beautiful melodies that resonate with the soul. However, even the most cherished acoustic guitar can encounter issues that affect its playability and sound quality. One common problem that guitarists may encounter is a dead fret. When a fret on an acoustic guitar produces little to no sound when pressed, it can be frustrating and hinder the overall performance of the instrument.
In this comprehensive guide, we will delve into the intricacies of identifying and addressing dead frets on acoustic guitars. Whether you are a seasoned musician or a novice player, understanding how to troubleshoot and resolve this issue is essential for maintaining the optimal condition of your instrument. By following the step-by-step instructions and gaining insights into the causes of dead frets, you will be equipped with the knowledge and skills to breathe new life into your acoustic guitar.
Join us on this journey as we explore the nuances of acoustic guitar maintenance and learn how to revive a dead fret, restoring the harmonious resonance that makes this instrument a timeless treasure. Let's embark on this musical adventure and unlock the secrets to revitalizing the soulful melodies that emanate from the heart of an acoustic guitar.
Identifying the Dead Fret
Identifying a dead fret on an acoustic guitar is crucial for resolving the issue and restoring the instrument's optimal playability. A dead fret is characterized by a lack of resonance and sustain when the corresponding string is fretted at a particular position on the fretboard. This can impede the overall sound quality and performance of the guitar, making it essential to pinpoint the specific fret causing the problem.
To identify a dead fret, start by playing each note on every fret of each string, paying close attention to the sustain and clarity of the sound produced. A dead fret will exhibit a noticeable lack of sustain and resonance compared to the surrounding frets. You may also notice a muted or dull sound when the string is fretted at the problematic position.
Another method to identify a dead fret is to use a guitar tuner to check the intonation at each fret. A dead fret may cause the pitch to be significantly off at that particular fret, indicating an issue with the fret's ability to produce the correct note.
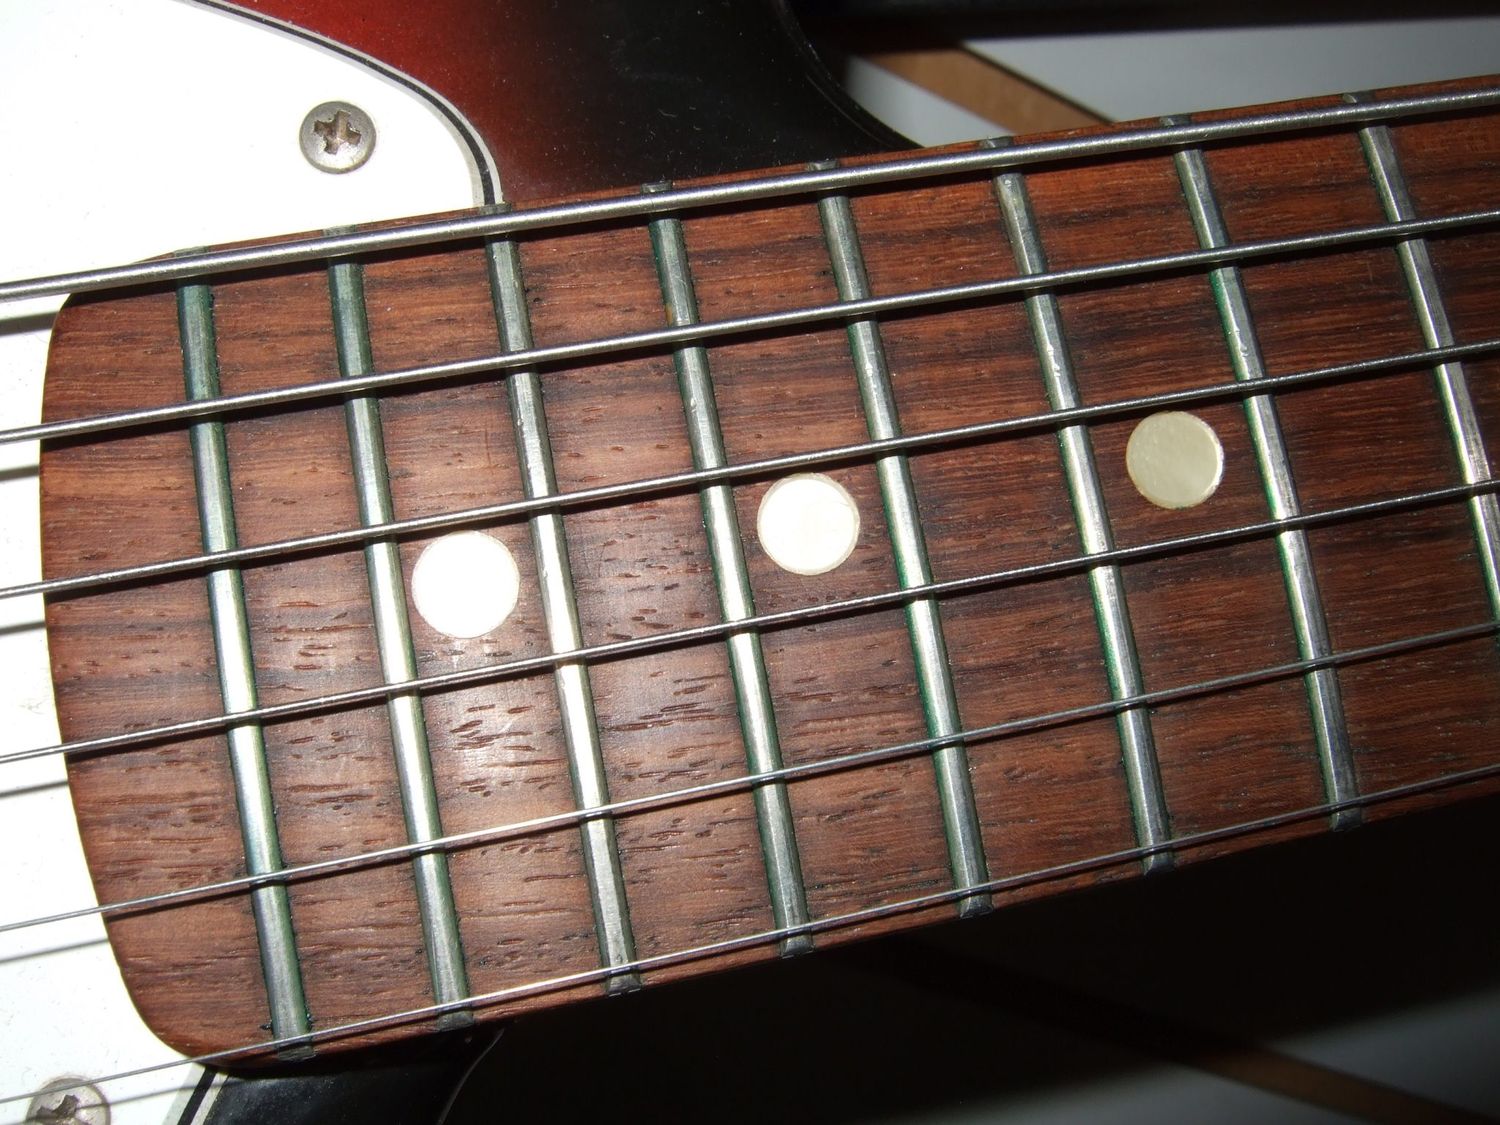
Furthermore, visually inspecting the fretboard under good lighting can also reveal signs of wear, unevenness, or damage on the fret that could be contributing to the dead fret issue. Look for any indentations, grooves, or irregularities on the fret that may be affecting its ability to make proper contact with the string.
In some cases, a dead fret may be caused by a buildup of dirt, grime, or corrosion on the fret or the strings, leading to poor contact and reduced vibration. This can be identified by examining the fret and string for any visible debris or discoloration.
By carefully examining the fretboard, listening for sustain and clarity, checking intonation, and inspecting for physical signs of wear, you can effectively identify the dead fret that requires attention. Once the problematic fret has been identified, you can proceed to understand the underlying causes and take the necessary steps to address the issue and restore the optimal functionality of your acoustic guitar.
Causes of Dead Frets
Dead frets can be attributed to various factors that affect the functionality and playability of an acoustic guitar. Understanding the underlying causes of dead frets is essential for effectively addressing the issue and restoring the instrument to its optimal condition. Let's explore the common culprits behind dead frets:
-
Fret Wear and Compression: Over time, the frets on an acoustic guitar can experience wear and compression, especially in areas where frequent finger pressure is applied during playing. This wear can lead to uneven fret surfaces, resulting in dead spots where the string fails to make proper contact with the fret. Additionally, the compression of fret material can diminish its ability to maintain consistent contact with the strings, leading to dead frets.
-
Fret Corrosion and Oxidation: Exposure to moisture, oils from the fingers, and environmental elements can cause frets to corrode and oxidize. This corrosion can create a barrier between the strings and the frets, inhibiting proper vibration and resonance. As a result, dead frets may emerge, causing a loss of sustain and clarity at specific fret positions.
-
Uneven Fret Height: In some cases, the frets on an acoustic guitar may become uneven due to factors such as changes in humidity and temperature. Uneven fret height can lead to inconsistencies in string contact, resulting in dead frets where the string fails to produce the intended note. This issue is particularly prevalent in guitars with frets that have not been leveled and dressed to maintain uniform height across the fretboard.
-
String Indentations and Wear: Prolonged use of the same fret positions, particularly with heavy playing styles, can cause the strings to create indentations in the fret material. These indentations can impede the strings' ability to vibrate freely, leading to dead spots on the fretboard. Additionally, worn-out strings can contribute to dead frets by producing uneven pressure and reduced vibration against the frets.
-
Buildup of Dirt and Grime: Accumulation of dirt, oils, and grime on the fretboard and frets can hinder the strings' ability to make proper contact with the frets. This buildup can dampen the vibration of the strings, resulting in dead frets and a loss of resonance.
By recognizing these common causes of dead frets, guitarists can take proactive measures to address and mitigate these issues, ensuring that their acoustic guitars maintain optimal playability and sound quality.
Tools and Materials Needed
To effectively address and resolve dead frets on an acoustic guitar, it is essential to gather the appropriate tools and materials that will facilitate the fret repair process. By ensuring that you have the necessary items at your disposal, you can approach the task with confidence and precision. Here is a comprehensive list of the tools and materials needed to fix a dead fret:
Tools:
-
Fret Rocker: This specialized tool is used to check for uneven frets by rocking it over the frets and identifying any high or low spots that may be causing dead frets.
-
Fret Crowning File: A fret crowning file is essential for reshaping and leveling the frets, ensuring that they maintain a consistent and rounded profile for optimal string contact.
-
Fret End File: This tool is used to smooth and round the edges of the frets after they have been leveled, preventing sharp edges that can cause discomfort during playing.
-
Fret Tang Nippers: These nippers are utilized to trim the fret tangs, ensuring a proper fit and alignment of the frets within the fret slots.
-
Fret Puller: A fret puller is necessary for removing the old fret wire from the fretboard, allowing for the replacement of damaged or worn frets.
-
Fret Hammer: This specialized hammer is used to gently tap and seat the new fret wire into the fret slots, ensuring a secure and stable fit.
-
Fret Slot Cleaning Tool: This tool aids in cleaning out debris and residue from the fret slots, preparing them for the installation of new fret wire.
-
Straight Edge: A straight edge is essential for checking the overall levelness of the fretboard and identifying any areas of unevenness that may contribute to dead frets.
-
Fret Leveling Beam: This tool is used to level the frets across the fretboard, ensuring uniform height and proper string contact.
-
Micro Mesh Pads: These abrasive pads are utilized for polishing and smoothing the frets after they have been leveled and crowned, enhancing their playability and longevity.
Materials:
-
Replacement Fret Wire: Depending on the extent of the dead fret issue, having replacement fret wire on hand is essential for addressing severely worn or damaged frets.
-
Masking Tape: Masking tape is used to protect the fretboard and body of the guitar from accidental scratches and damage during the fret repair process.
-
Adhesive: A small amount of adhesive, such as super glue or cyanoacrylate, may be needed to secure the new fret wire in place.
-
Steel Wool: Steel wool is useful for cleaning and polishing the frets, removing any oxidation or residue that may impede string vibration.
-
Fretboard Conditioner: Applying fretboard conditioner after the repair process can help nourish and protect the fretboard wood, maintaining its integrity and preventing drying or cracking.
By ensuring that you have these essential tools and materials at your disposal, you can confidently embark on the journey to revive the dead frets on your acoustic guitar, restoring its playability and resonance to their full potential.
Step-by-Step Guide to Fixing a Dead Fret
-
Assess the Severity of the Dead Fret: Begin by identifying the specific fret causing the issue and assessing the severity of the dead spot. Determine whether the dead fret can be remedied through fret maintenance or if it requires the replacement of the fret wire.
-
Prepare the Work Area: Lay down a clean and well-lit workspace to carry out the fret repair process. Use masking tape to protect the fretboard and body of the guitar from accidental scratches and damage during the repair.
-
Remove the Old Fret Wire: Utilize a fret puller to carefully remove the old fret wire from the fretboard. Exercise caution to avoid damaging the fretboard surface during this process.
-
Clean the Fret Slot: Use a fret slot cleaning tool to remove any debris and residue from the fret slot, ensuring a clean and smooth surface for the installation of the new fret wire.
-
Install the New Fret Wire: Cut a piece of replacement fret wire to match the length of the fret slot. Apply a small amount of adhesive, such as super glue, to secure the new fret wire in place. Use a fret hammer to gently tap and seat the new fret wire into the fret slot, ensuring a secure and stable fit.
-
Level and Crown the Frets: Utilize a fret leveling beam to level the frets across the fretboard, ensuring uniform height and proper string contact. Use a fret crowning file to reshape and round the frets, optimizing their contact with the strings.
-
Smooth the Fret Edges: Use a fret end file to smooth and round the edges of the frets, preventing sharp edges that can cause discomfort during playing.
-
Polish the Frets: Use steel wool and micro mesh pads to polish and smooth the frets, removing any oxidation or residue that may impede string vibration. This step enhances the playability and longevity of the frets.
-
Clean and Condition the Fretboard: After the fret repair process, use a fretboard conditioner to nourish and protect the fretboard wood, maintaining its integrity and preventing drying or cracking.
-
Test the Repaired Fret: Once the fret repair process is complete, test the repaired fret by playing each note on the affected string at the repaired fret position. Ensure that the fret now produces clear and sustained tones, indicating a successful repair.
By following this comprehensive step-by-step guide, you can effectively address and resolve dead frets on your acoustic guitar, restoring its playability and resonance to their full potential.
Testing the Fixed Fret
After completing the meticulous process of addressing a dead fret on an acoustic guitar, it is crucial to thoroughly test the repaired fret to ensure that it now functions optimally and contributes to the instrument's overall playability and sound quality.
To begin the testing process, gently press down on the string at the repaired fret position and pluck the string with your picking hand. Listen attentively to the produced note, paying close attention to its sustain, clarity, and resonance. A successfully repaired fret will yield a clear and sustained tone, free from any muted or dull characteristics that were indicative of the previous dead fret condition.
Next, proceed to play various musical passages and chords that involve the repaired fret position, assessing the string's interaction with the fret and the resulting sound. Pay attention to the consistency of the note across different playing techniques, such as fingerpicking, strumming, and bending. A well-repaired fret will exhibit uniformity in tone and sustain, allowing for seamless integration into musical compositions and performances.
Furthermore, utilize a guitar tuner to verify the accuracy of the note produced at the repaired fret position. The tuner will provide precise feedback on the pitch and intonation, ensuring that the repaired fret enables the string to produce the correct note without any deviations or inconsistencies.
As you test the fixed fret, consider experimenting with varying degrees of string pressure and playing dynamics to gauge the fret's responsiveness and resilience. A proficiently repaired fret will exhibit stability and reliability, accommodating different playing styles and techniques with consistent tonal output.
In addition to auditory assessment, visually inspect the repaired fret and surrounding areas for any signs of irregularities or issues. Ensure that the fret wire is securely seated and aligned within the fret slot, with no protrusions or sharp edges that could impede playing comfort and performance.
Finally, engage in an extended playing session, exploring the full range of the fretboard and incorporating the repaired fret into musical expressions across different genres and styles. By immersing yourself in the instrument's sonic capabilities, you can gain a comprehensive understanding of the repaired fret's functionality and its seamless integration into your musical endeavors.
By conducting thorough and comprehensive testing of the fixed fret, you can confidently ascertain the success of the repair process and revel in the restored playability and resonance of your acoustic guitar. This meticulous approach ensures that the instrument is primed to deliver captivating melodies and harmonious tones, reaffirming its status as a cherished companion in musical journeys.
Conclusion
In conclusion, the journey to fix a dead fret on an acoustic guitar is a meticulous yet rewarding endeavor that empowers guitarists to restore the instrument's playability and resonance. By identifying the dead fret, understanding its underlying causes, and following a comprehensive step-by-step guide, musicians can breathe new life into their beloved acoustic guitars. The process begins with a keen assessment of the dead fret, utilizing both auditory and visual cues to pinpoint the specific fret causing the issue. Once identified, the causes of dead frets, including fret wear, corrosion, uneven fret height, string wear, and dirt buildup, shed light on the factors contributing to this common guitar ailment.
Equipped with the necessary tools and materials, guitarists can embark on the meticulous process of addressing the dead fret, involving the removal of old fret wire, installation of new fret wire, leveling, crowning, and polishing the frets, and conditioning the fretboard. Each step is crucial in revitalizing the fret's functionality and ensuring its seamless integration into the instrument's sonic landscape. Thorough testing of the repaired fret, encompassing auditory, visual, and technical assessments, serves as the final validation of the successful repair, affirming the instrument's restored playability and tonal integrity.
Ultimately, the journey to fix a dead fret on an acoustic guitar transcends the technical aspects of fret maintenance, embodying a profound connection between the musician and their instrument. It is a testament to the dedication and care invested in preserving the soulful melodies and harmonious resonance that emanate from the heart of an acoustic guitar. As the repaired fret resonates with clarity and sustains the notes with unwavering precision, it symbolizes the enduring bond between the musician and their instrument, poised to embark on countless musical odysseys.
In the realm of acoustic guitar maintenance, the ability to address dead frets and restore the instrument's optimal functionality is a testament to the musician's craftsmanship and reverence for their musical companion. With each meticulously repaired fret, the acoustic guitar is poised to weave captivating melodies and timeless harmonies, enriching the musical tapestry with its renewed vitality. As guitarists embrace the artistry of fret repair, they honor the legacy of the acoustic guitar as a timeless treasure, resonating with the echoes of past performances and the promise of countless musical journeys yet to unfold.

