Home>Production & Technology>Acoustic>How To Fix Fret Buzz On Acoustic Guitar
Acoustic
How To Fix Fret Buzz On Acoustic Guitar
Published: March 12, 2024
Learn how to eliminate fret buzz on your acoustic guitar with our step-by-step guide. Discover effective solutions and enjoy a buzz-free playing experience.
(Many of the links in this article redirect to a specific reviewed product. Your purchase of these products through affiliate links helps to generate commission for AudioLover.com, at no extra cost. Learn more)
Table of Contents
Introduction
Dealing with fret buzz on your acoustic guitar can be a frustrating experience for any musician. The unpleasant buzzing sound that occurs when a string makes contact with a fret can significantly affect the overall playability and tone of the instrument. However, fret buzz is a common issue that can be resolved with the right knowledge and tools. In this comprehensive guide, we will explore the various causes of fret buzz on acoustic guitars and provide step-by-step instructions on how to address this issue effectively.
Fret buzz can stem from a variety of factors, including changes in humidity and temperature, improper setup, or natural wear and tear on the instrument. Understanding the root cause of the fret buzz is crucial in determining the appropriate solution. By examining the neck relief, action, nut, saddle, frets, and bridge, you can identify and address the specific issues contributing to the fret buzz.
Whether you are a seasoned guitarist or a beginner, learning how to fix fret buzz on your acoustic guitar is a valuable skill that can enhance your playing experience and prolong the life of your instrument. With the right techniques and a bit of patience, you can restore your guitar's optimal playability and enjoy a buzz-free performance. Let's delve into the details of understanding and resolving fret buzz to ensure that your acoustic guitar produces the beautiful, clear tones it was designed for.
Understanding Fret Buzz
Fret buzz is a common issue that plagues many acoustic guitar players, causing frustration and hindering the instrument's performance. It occurs when a vibrating guitar string makes contact with a fret, resulting in an undesirable buzzing or rattling sound. This phenomenon can detract from the clarity and sustain of the notes, ultimately affecting the overall playability and tone of the guitar.
Several factors can contribute to fret buzz, and understanding these root causes is essential for effective resolution. Changes in humidity and temperature can impact the guitar's neck and body, leading to shifts in the instrument's setup and contributing to fret buzz. Additionally, natural wear and tear on the guitar, as well as improper setup, can exacerbate this issue.
One of the primary causes of fret buzz is an inadequate amount of space between the strings and the frets, known as the "action." If the action is too low, the strings may come into contact with the frets, resulting in buzzing. Furthermore, an excessively bowed or back-bowed neck, referred to as "neck relief," can also lead to fret buzz. In some cases, the nut, saddle, high frets, or bridge of the guitar may be contributing factors to the buzzing sound.
By understanding the various factors that can lead to fret buzz, guitarists can effectively diagnose and address the issue. This knowledge empowers players to identify the specific areas of the guitar that require adjustment or repair, ultimately restoring the instrument's optimal playability and sound quality.
In the following sections, we will delve into the step-by-step process of diagnosing and resolving fret buzz on an acoustic guitar. By examining the neck relief, action, nut, saddle, frets, and bridge, players can pinpoint the root causes of the fret buzz and implement the necessary adjustments to eliminate this common nuisance. With a clear understanding of fret buzz and its contributing factors, guitarists can confidently tackle this issue and restore their instrument to its full potential.
Tools and Materials Needed
To effectively address fret buzz on an acoustic guitar, you will need a few essential tools and materials to diagnose and resolve the issue. Having the right equipment at your disposal will enable you to make precise adjustments and ensure that your guitar is set up for optimal playability and tone. Here are the tools and materials you will need:
1. Capo:
A capo is a fundamental tool for diagnosing fret buzz, as it allows you to isolate specific areas of the fretboard and test for buzzing on individual frets. By placing the capo on different frets and playing each string, you can identify the precise locations where fret buzz occurs.
2. Straightedge:
A straightedge, such as a precision straightedge or a notched straightedge, is essential for assessing the neck relief and identifying any irregularities that may contribute to fret buzz. This tool enables you to determine if the neck is properly aligned and whether adjustments are necessary to achieve the ideal curvature.
3. Feeler Gauges:
Feeler gauges are thin, precise measuring tools that are used to assess the gap between the strings and the frets, known as the action. By measuring the action at various points along the fretboard, you can determine if the strings are too close to the frets, leading to buzzing.
4. Truss Rod Wrench:
A truss rod wrench is necessary for adjusting the truss rod, which controls the neck's curvature. This tool allows you to make precise adjustments to the neck relief, ensuring that it is properly aligned to mitigate fret buzz.
5. Nut Files:
Nut files are specialized tools used to adjust the slots in the nut, where the strings rest. By carefully filing the nut slots to the appropriate depth, you can optimize the string height and prevent buzzing at the nut.
6. Saddle Files:
Saddle files are used to adjust the height and curvature of the saddle, which impacts the action and string height at the bridge. By shaping the saddle to the correct specifications, you can eliminate buzzing caused by improper saddle alignment.
7. Fret Rocker:
A fret rocker is a precision tool used to detect high frets by assessing their levelness across the fretboard. Identifying and addressing high frets is crucial for eliminating fret buzz and ensuring consistent playability.
8. String Action Gauge:
A string action gauge provides precise measurements of the string height at various points along the fretboard. This tool is essential for determining if the action is within the optimal range and for making necessary adjustments to prevent fret buzz.
By having these tools and materials on hand, you can confidently diagnose and address fret buzz on your acoustic guitar, restoring its playability and tone to their full potential.
Step 1: Check the Neck Relief
The neck relief, also known as the neck curvature, plays a crucial role in the playability and overall performance of an acoustic guitar. It refers to the slight bow or curvature of the neck, which directly impacts the clearance between the strings and the frets. An inadequate or excessive amount of neck relief can contribute to fret buzz, affecting the guitar's tone and playability.
To check the neck relief, you will need a straightedge, such as a precision straightedge or a notched straightedge. Begin by removing the guitar's strings to ensure unobstructed access to the neck. Place the straightedge along the length of the fretboard, spanning from the first fret to the last fret. This allows you to assess the curvature of the neck and identify any irregularities.
Ideally, the neck should exhibit a slight curvature, with a small gap between the straightedge and the frets around the 7th to 9th frets. This curvature facilitates the optimal clearance between the strings and the frets, preventing buzzing while allowing for comfortable playability. If the gap between the straightedge and the frets is too large, the neck may be excessively bowed, potentially causing high action and string buzzing. Conversely, if there is minimal to no gap, the neck may be back-bowed, leading to similar issues.
Using a truss rod wrench, which is designed to adjust the truss rod, you can make precise alterations to the neck relief. If the neck is excessively bowed, tightening the truss rod will straighten the neck and reduce the curvature, thereby increasing the clearance between the strings and the frets. Conversely, if the neck is back-bowed, loosening the truss rod will introduce a slight curvature, addressing the insufficient clearance and potential buzzing.
It is essential to make incremental adjustments to the truss rod, allowing the neck to acclimate to each alteration before further adjustments are made. Careful monitoring of the neck relief throughout the adjustment process is crucial to achieving the optimal curvature and mitigating fret buzz effectively.
By checking and adjusting the neck relief, guitarists can address one of the primary contributors to fret buzz, ensuring that their acoustic guitar maintains the ideal playability and tone. This foundational step sets the stage for further diagnostics and adjustments, ultimately leading to a buzz-free and enjoyable playing experience.
Step 2: Adjust the Action
The action of an acoustic guitar refers to the height of the strings above the frets, directly influencing playability and fret buzz. When the action is too low, the strings may come into contact with the frets, resulting in a buzzing sound. Conversely, excessively high action can make the guitar more challenging to play. Therefore, achieving the optimal string height is crucial for eliminating fret buzz and ensuring comfortable playability.
To adjust the action, begin by measuring the string height at various points along the fretboard using a string action gauge. Typically, the action is assessed at the 12th fret, where the string height should fall within a specific range to facilitate smooth playability without buzzing. If the action is too low, adjustments are necessary to increase the string height and prevent contact with the frets.
The saddle of the guitar, located at the bridge, plays a pivotal role in determining the action. Using saddle files, carefully shape the saddle to achieve the desired string height. By filing the saddle to the appropriate curvature and height, you can effectively raise the strings, mitigating fret buzz and optimizing playability.
In some cases, the nut, where the strings rest at the headstock end of the fretboard, may also require adjustment to address the action. Using nut files, carefully adjust the depth of the nut slots to ensure that the strings are positioned at the optimal height. This meticulous adjustment prevents buzzing at the nut and contributes to the overall playability of the guitar.
Throughout the action adjustment process, it is essential to make incremental alterations, carefully monitoring the string height and playability after each adjustment. By achieving the ideal action, guitarists can eliminate fret buzz and ensure that their acoustic guitar delivers clear, resonant tones with comfortable playability.
Addressing the action of the guitar is a critical step in resolving fret buzz, as it directly impacts the clearance between the strings and the frets. By making precise adjustments to the action, players can optimize the playability of their acoustic guitar, ultimately enhancing their musical experience.
Step 3: Check the Nut and Saddle
The nut and saddle of an acoustic guitar play a pivotal role in determining the string height and overall playability of the instrument. These components directly influence the clearance between the strings and the frets, making them critical factors in addressing fret buzz. By carefully examining and adjusting the nut and saddle, guitarists can effectively mitigate buzzing and optimize the guitar's performance.
Checking the Nut:
The nut, located at the headstock end of the fretboard, is where the strings rest before extending along the length of the guitar. To assess the nut's impact on fret buzz, begin by examining the depth of the nut slots for each string. Using nut files, carefully adjust the depth of the slots to ensure that the strings are positioned at the optimal height. This meticulous adjustment prevents buzzing at the nut and contributes to the overall playability of the guitar.
Checking the Saddle:
The saddle, situated at the bridge of the guitar, is equally instrumental in determining the string height and action. By inspecting the curvature and height of the saddle, guitarists can identify any irregularities that may contribute to fret buzz. Using saddle files, carefully shape the saddle to achieve the desired string height. By filing the saddle to the appropriate curvature and height, you can effectively raise the strings, mitigating fret buzz and optimizing playability.
Making Precise Adjustments:
When addressing the nut and saddle, it is essential to make precise adjustments to achieve the ideal string height and clearance. Incremental alterations should be made, carefully monitoring the playability and tone of the guitar after each adjustment. By ensuring that the nut and saddle are properly aligned and adjusted, guitarists can eliminate fret buzz and create an instrument that delivers clear, resonant tones with comfortable playability.
By meticulously checking and adjusting the nut and saddle, guitarists can address critical factors contributing to fret buzz, ultimately enhancing the playability and tone of their acoustic guitar. These adjustments, when combined with thorough assessments of the neck relief and action, form a comprehensive approach to resolving fret buzz and optimizing the performance of the instrument.
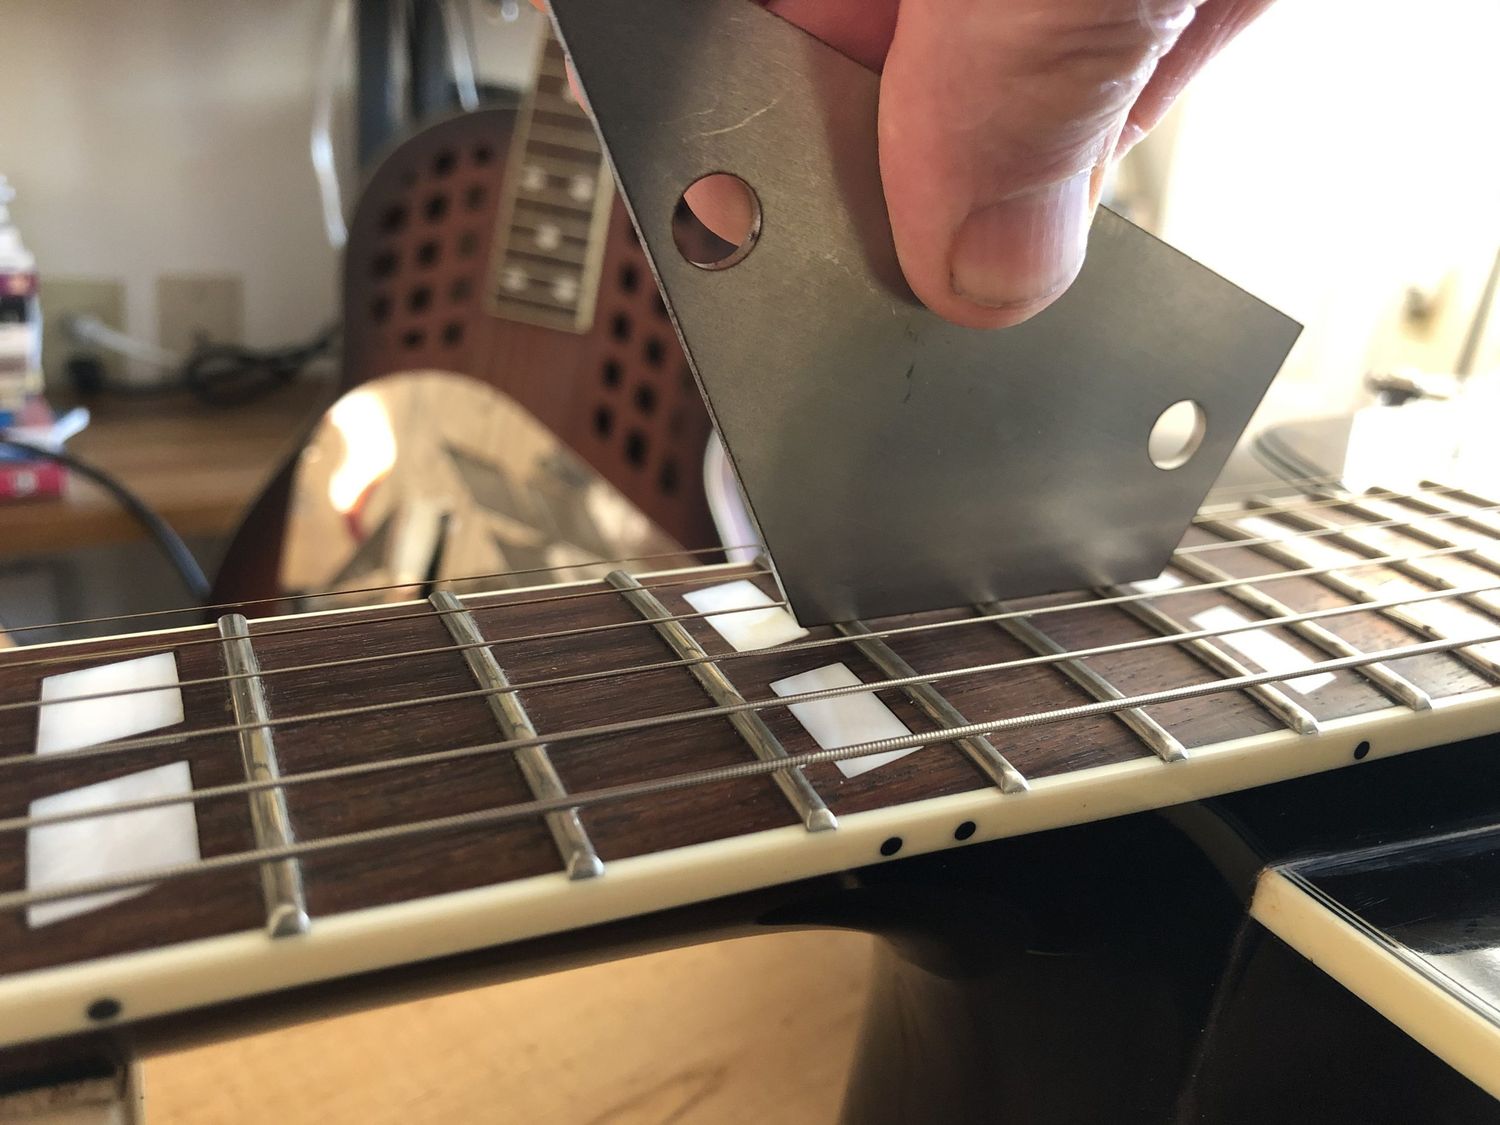
Step 4: Check for High Frets
High frets can significantly contribute to fret buzz on an acoustic guitar, impacting the playability and tonal quality of the instrument. When a fret is higher than the surrounding frets, it can cause the string to make contact with it, resulting in unwanted buzzing and diminished sustain. Therefore, identifying and addressing high frets is crucial for restoring the optimal performance of the guitar.
To check for high frets, a precision tool known as a fret rocker is utilized. The fret rocker is designed to assess the levelness of the frets across the fretboard, allowing guitarists to pinpoint any irregularities that may be causing fret buzz. By placing the fret rocker over three frets at a time and applying gentle pressure, any high frets will become apparent as the tool pivots on the surrounding lower frets.
Once high frets are identified, targeted adjustments can be made to rectify the issue. This process involves carefully leveling the high frets to ensure that they align with the surrounding frets, creating a uniform and smooth fretboard surface. This meticulous leveling process requires precision and attention to detail to achieve the desired result.
Using specialized fret leveling files and abrasive materials, the high frets are carefully and gradually leveled to match the height of the surrounding frets. This process demands patience and precision to avoid over-leveling and maintain the integrity of the frets. After leveling, the frets are meticulously crowned and polished to restore their original shape and ensure a smooth playing surface.
By addressing high frets, guitarists can eliminate the source of fret buzz and restore the playability and tonal clarity of their acoustic guitar. This meticulous process of identifying, leveling, crowning, and polishing high frets is essential for achieving a buzz-free and enjoyable playing experience.
In summary, checking for high frets and implementing targeted adjustments is a critical step in resolving fret buzz on an acoustic guitar. By meticulously leveling and shaping the frets, guitarists can eliminate buzzing and restore the instrument's optimal playability and tone.
Step 5: Check the Bridge
The bridge of an acoustic guitar is a critical component that directly influences the string height, action, and overall resonance of the instrument. When addressing fret buzz, it is essential to thoroughly examine the bridge to ensure that it is properly configured and functioning optimally.
One of the primary considerations when checking the bridge is the saddle, which plays a pivotal role in determining the string height and action. The saddle's curvature and height directly impact the clearance between the strings and the frets, making it a crucial factor in addressing fret buzz. By carefully assessing the saddle's alignment and condition, guitarists can identify any irregularities that may contribute to buzzing and diminished playability.
In some cases, the saddle may require adjustment to achieve the optimal string height and clearance. Using specialized saddle files, guitarists can meticulously shape the saddle to ensure that the strings are positioned at the appropriate height, mitigating fret buzz and enhancing the overall playability of the guitar. This meticulous adjustment process demands precision and attention to detail to achieve the desired string height and action.
Additionally, the bridge's structural integrity and alignment should be thoroughly examined to ensure that it is securely affixed to the guitar body. Any looseness or instability in the bridge can lead to unwanted vibrations and buzzing, impacting the instrument's tonal quality and playability. By carefully inspecting the bridge and addressing any structural issues, guitarists can eliminate potential sources of fret buzz and ensure that the bridge contributes to the guitar's optimal resonance and sustain.
Furthermore, the condition of the bridge and its impact on the guitar's overall tone should be considered. Over time, the bridge may experience wear and tear, affecting its ability to transmit string vibrations to the guitar body. By assessing the bridge's condition and making any necessary repairs or adjustments, guitarists can optimize the instrument's tonal clarity and sustain, mitigating potential sources of fret buzz and enhancing the overall playing experience.
In summary, checking the bridge of an acoustic guitar is a critical step in addressing fret buzz and optimizing the instrument's performance. By meticulously examining the saddle, assessing the bridge's structural integrity, and considering its impact on the guitar's tone, guitarists can effectively mitigate fret buzz and ensure that their acoustic guitar delivers clear, resonant tones with comfortable playability.
Conclusion
In conclusion, addressing fret buzz on an acoustic guitar is a multifaceted process that requires careful assessment and targeted adjustments to various components of the instrument. By understanding the root causes of fret buzz and implementing the appropriate solutions, guitarists can restore their acoustic guitar to its optimal playability and tone.
The comprehensive approach to resolving fret buzz encompasses a series of critical steps, including checking the neck relief, adjusting the action, examining the nut and saddle, addressing high frets, and thoroughly assessing the bridge. Each of these steps plays a pivotal role in identifying and mitigating the specific factors contributing to fret buzz, ultimately enhancing the instrument's performance.
By meticulously checking and adjusting the neck relief, guitarists can ensure that the curvature of the neck facilitates the ideal clearance between the strings and the frets, preventing buzzing and optimizing playability. Additionally, making precise adjustments to the action, nut, and saddle allows players to achieve the optimal string height and clearance, eliminating fret buzz and enhancing the overall playability of the guitar.
Furthermore, the process of checking for high frets and implementing targeted adjustments is essential for creating a uniform and smooth fretboard surface, eliminating buzzing, and restoring the instrument's tonal clarity. Thoroughly examining the bridge, including the saddle and its impact on the guitar's resonance, ensures that potential sources of fret buzz are identified and addressed, contributing to the instrument's optimal performance.
By following these comprehensive steps and leveraging the necessary tools and materials, guitarists can effectively diagnose and resolve fret buzz, ultimately enhancing their playing experience and the longevity of their acoustic guitar. The ability to address fret buzz empowers musicians to maintain their instruments in peak condition, ensuring that they continue to deliver clear, resonant tones with comfortable playability.
In essence, the process of fixing fret buzz on an acoustic guitar is a valuable skill that allows guitarists to take proactive measures in maintaining and optimizing their instruments. By understanding the nuances of fret buzz and implementing the appropriate adjustments, musicians can enjoy a buzz-free and enjoyable playing experience, allowing their acoustic guitars to shine with clarity and resonance.