Home>Production & Technology>Acoustic>How To Put A Strap On A Acoustic Guitar
Acoustic
How To Put A Strap On A Acoustic Guitar
Published: March 12, 2024
Learn how to properly put a strap on your acoustic guitar with our step-by-step guide. Ensure comfort and stability while playing your acoustic guitar.
(Many of the links in this article redirect to a specific reviewed product. Your purchase of these products through affiliate links helps to generate commission for AudioLover.com, at no extra cost. Learn more)
Table of Contents
Introduction
Adding a strap to your acoustic guitar can significantly enhance your playing experience, providing comfort and stability while performing standing up. Whether you're a seasoned musician or just starting your musical journey, knowing how to properly attach a strap to your acoustic guitar is essential. This simple yet crucial skill ensures that your instrument remains secure and well-positioned during practice sessions, rehearsals, and live performances.
In this comprehensive guide, we will walk you through the step-by-step process of attaching a strap to your acoustic guitar. From gathering the necessary materials to adjusting the strap to your preferred length, you'll gain valuable insights that will empower you to confidently and securely attach a strap to your cherished instrument.
By following these instructions, you'll be able to seamlessly transition from sitting to standing while playing your acoustic guitar, allowing you to move freely and express your musical creativity without any hindrances. So, let's dive into the process and equip ourselves with the knowledge and skills needed to put a strap on an acoustic guitar with ease and precision.
Step 1: Gather the necessary materials
Before embarking on the process of attaching a strap to your acoustic guitar, it's essential to gather the required materials. Ensuring that you have the right tools at your disposal will streamline the entire process and contribute to a secure and reliable attachment. Here's a comprehensive list of the necessary materials:
-
Acoustic Guitar: The first and most crucial item on the list is, of course, your acoustic guitar. Ensure that the guitar is in good condition, with no loose parts or structural issues that could affect the attachment of the strap.
-
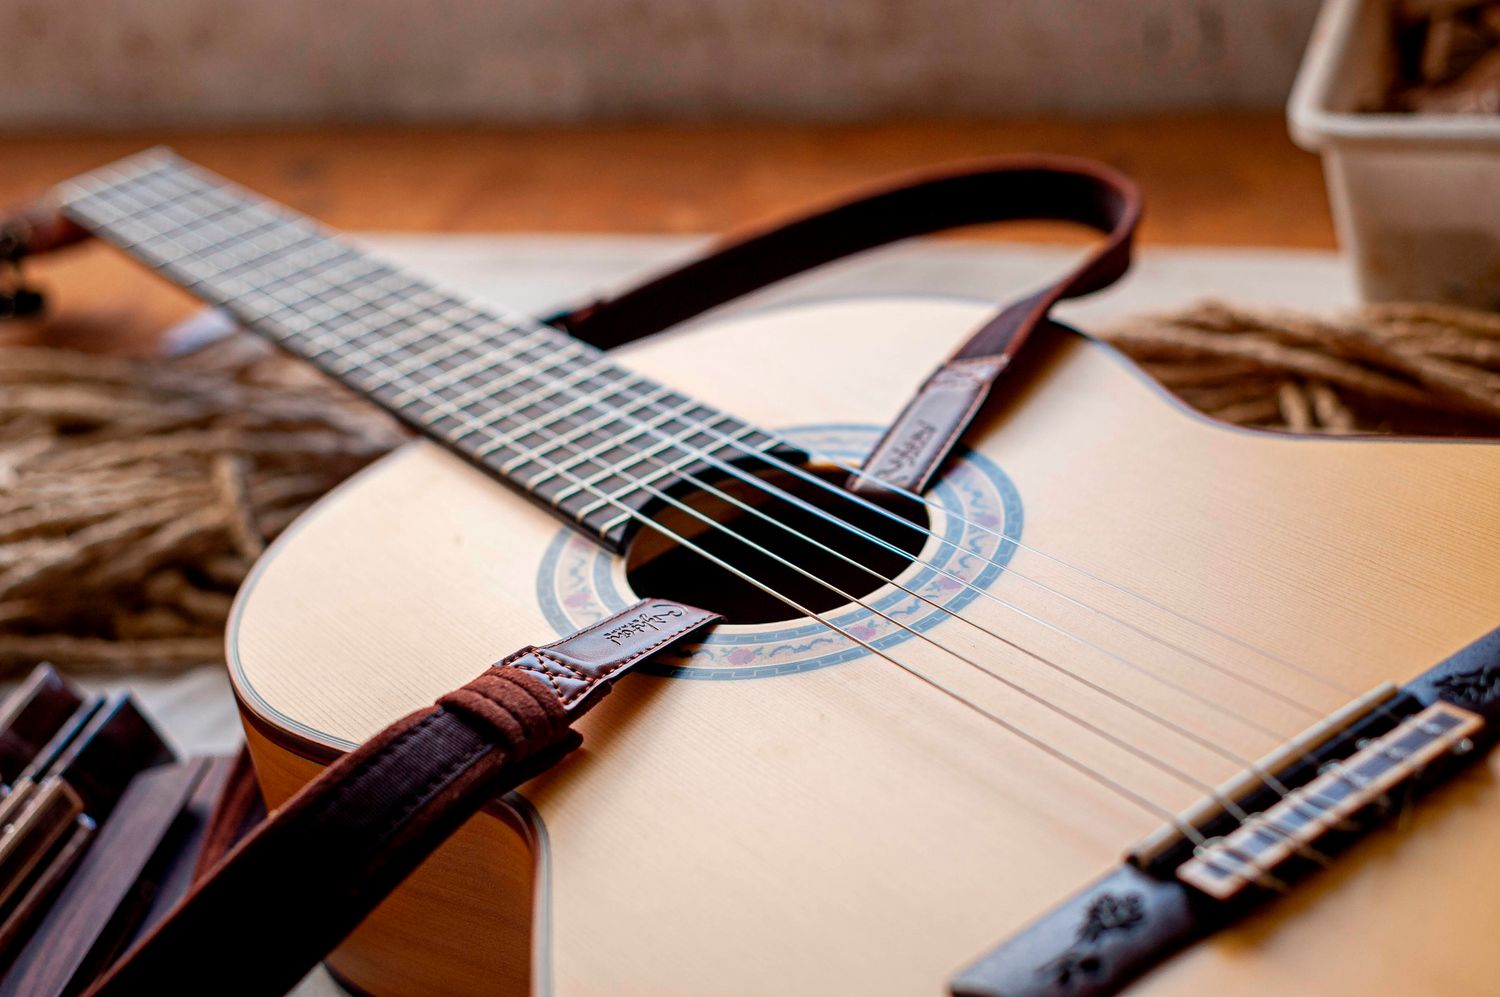
Guitar Strap: Select a high-quality guitar strap that aligns with your preferences in terms of material, width, and design. Whether you opt for a classic leather strap, a durable nylon strap, or a stylish woven strap, choosing one that resonates with your style and comfort is key.
-
Strap Button: If your acoustic guitar doesn't have a pre-installed strap button at the bottom, you'll need to acquire one. This small but essential component provides a secure anchor point for one end of the guitar strap.
-
String Winder (Optional): While not mandatory, a string winder can be helpful if you need to remove the guitar's endpin to install the strap button. It facilitates the process of loosening and tightening the strings, simplifying the attachment of the button.
-
Screwdriver: Depending on the type of strap button you're using, a screwdriver may be necessary for installation. Ensure that you have the appropriate screwdriver size to fit the screws included with the strap button.
-
Towel or Cloth: Having a towel or cloth on hand can be useful for protecting the guitar's finish during the installation process. It provides a layer of protection against accidental scratches or damage.
By gathering these essential materials, you'll be well-prepared to proceed with confidence to the next step of attaching the strap button to the bottom of your acoustic guitar. With everything in place, you're ready to embark on this practical and rewarding endeavor.
Step 2: Attach the strap button to the bottom of the guitar
Attaching the strap button to the bottom of your acoustic guitar is a pivotal step in ensuring a secure and stable connection for your guitar strap. If your guitar already has a strap button installed, you can skip this step and proceed to Step 3. However, if your guitar lacks a strap button, follow these detailed instructions to successfully attach one.
-
Prepare the Guitar: Lay your acoustic guitar on a flat and stable surface, ensuring that it is well-supported to prevent any accidental movement during the installation process. Placing a soft towel or cloth underneath the guitar can provide an added layer of protection for the instrument's finish.
-
Locate the Installation Area: Identify the ideal placement for the strap button on the bottom of the guitar. This area is typically located at the end of the guitar's body, opposite the neck. It's essential to choose a position that allows the strap to hang comfortably without obstructing your playing or causing imbalance.
-
Remove the Endpin: If your acoustic guitar features an endpin that covers the strap button installation area, you'll need to remove it. A string winder can be helpful for this step, as it facilitates the loosening and tightening of the endpin, allowing for easy removal.
-
Install the Strap Button: Once the endpin is removed, you can proceed to install the strap button. Position the strap button at the chosen location and align it with the endpin hole. If the button comes with screws, utilize the appropriate screwdriver to securely fasten it to the guitar's body. Exercise caution to avoid over-tightening the screws, as this could potentially damage the guitar's wood.
-
Test the Stability: After attaching the strap button, gently tug on the strap to ensure that it is firmly anchored to the guitar. Confirm that the button is securely in place and can support the weight of the guitar without any signs of instability.
By following these steps with precision and care, you'll successfully attach the strap button to the bottom of your acoustic guitar, laying the foundation for a reliable connection with your guitar strap. With this crucial component in place, you're now ready to proceed to the next step of attaching the other end of the strap to the neck of the guitar.
Step 3: Attach the other end of the strap to the neck of the guitar
With the strap button securely attached to the bottom of your acoustic guitar, the next vital step is to affix the other end of the strap to the neck of the instrument. This ensures a balanced and stable connection, allowing you to comfortably play your guitar while standing. Follow these detailed instructions to successfully attach the strap to the neck of your acoustic guitar.
-
Select the Attachment Point: Begin by identifying the attachment point on the neck of your guitar. This is typically located where the neck meets the body of the guitar. Look for a sturdy and reliable location that allows the strap to hang comfortably without obstructing your hand movements while playing.
-
Thread the Strap: Take the end of the guitar strap without the buckle and thread it through the attachment point on the neck of the guitar. Ensure that the strap is threaded securely to prevent any slippage or instability during use.
-
Adjust the Length: Before finalizing the attachment, consider the desired length of the strap. This is a personal preference and can vary based on your playing style and comfort. Experiment with different lengths to find the optimal position that allows you to play the guitar comfortably while standing.
-
Secure the Attachment: Once you've determined the ideal length, secure the attachment by looping the end of the strap back through the buckle or fastening mechanism. Ensure that it is firmly secured to prevent any accidental detachment while playing.
-
Test the Stability: With the strap securely attached to the neck of the guitar, gently apply pressure to ensure that it can support the weight of the instrument without slipping or causing imbalance. Confirm that the strap provides a stable and reliable connection, allowing you to move and play with confidence.
By following these steps with precision and attention to detail, you'll successfully attach the other end of the strap to the neck of your acoustic guitar. This crucial process ensures that your guitar remains securely positioned while standing, empowering you to play and perform with ease and comfort. With the strap firmly attached at both ends, you're now ready to proceed to the final step of adjusting the length of the strap to your preferred comfort level.
Step 4: Adjust the length of the strap
Once the strap is securely attached to both the bottom of the guitar and the neck, the next crucial step is to adjust the length of the strap to ensure optimal comfort and playability. Proper adjustment of the strap length is essential for maintaining a balanced and ergonomic playing position while standing. Follow these detailed instructions to effectively adjust the length of the strap to your preferred comfort level.
-
Evaluate Playing Position: Before making any adjustments, stand up with the guitar strapped on and assess the initial length of the strap. Pay attention to how the guitar hangs and the positioning of your hands and arms. This initial evaluation will provide valuable insights into the adjustments needed to achieve a comfortable and natural playing position.
-
Experiment with Length: Begin by experimenting with different strap lengths to find the most comfortable and ergonomic position. Adjust the strap length gradually, allowing yourself to get a feel for how each adjustment impacts your playing posture and comfort. Take note of any tension or strain in your arms, shoulders, or back, as these are indicators of an improper strap length.
-
Optimal Playing Height: Strive to position the guitar at a height that allows for effortless fretting and strumming. The ideal length is one that enables you to maintain a relaxed and natural playing posture without having to strain or contort your body. Aim for a position where the guitar body is comfortably within reach, and your fretting hand can move freely along the neck without excessive stretching.
-
Consider Movement: Take into account any anticipated movements or performance dynamics that may require adjustments to the strap length. If you anticipate energetic movements or dynamic playing styles, ensure that the strap length accommodates these actions without hindering your performance.
-
Secure the Adjustment: Once you've found the optimal length, secure the adjustment by fastening the strap buckle or mechanism firmly. Double-check the security of the attachment to prevent any unexpected slippage or loosening during play.
-
Test and Refine: After securing the adjustment, test the new strap length by playing various chords, scales, and songs. Pay attention to your overall comfort and freedom of movement. If necessary, make minor refinements to the length to fine-tune the playing position.
By following these steps and taking the time to adjust the strap length to your specific comfort and playing style, you'll ensure that your acoustic guitar is positioned optimally for standing play. A well-adjusted strap length not only enhances your playing experience but also contributes to a more enjoyable and expressive musical performance. With the strap length tailored to your preferences, you're now ready to stand and play your acoustic guitar with confidence and comfort.
Conclusion
In conclusion, mastering the art of attaching a strap to your acoustic guitar is a fundamental skill that enhances your musical journey, allowing you to seamlessly transition from sitting to standing while playing. By following the step-by-step process outlined in this guide, you've gained valuable insights into the essential techniques and considerations for securely attaching a guitar strap. From gathering the necessary materials to adjusting the strap to your preferred length, each step contributes to a secure and comfortable playing experience.
Successfully attaching a strap to your acoustic guitar not only provides practical benefits but also opens up new possibilities for expressive and dynamic performances. The added stability and freedom of movement afforded by a well-attached strap empower you to fully immerse yourself in your music, whether you're practicing, recording, or performing live.
Furthermore, the process of attaching a strap to your acoustic guitar fosters a deeper connection with your instrument, as you become intimately familiar with its components and how they contribute to your playing experience. This hands-on approach to guitar maintenance and customization instills a sense of ownership and pride in your instrument, strengthening the bond between musician and guitar.
As you embark on your musical endeavors, remember that the attachment of a guitar strap is not merely a technical task but a reflection of your individual style and comfort preferences. Whether you opt for a classic leather strap, a vibrant woven design, or a sleek nylon strap, your choice is a personal statement that adds a touch of personality to your instrument.
By understanding the nuances of attaching a strap to your acoustic guitar and customizing it to your liking, you've taken a significant step toward creating a playing experience that is uniquely tailored to your needs and preferences. This newfound knowledge empowers you to adapt to various playing environments and performance scenarios with confidence and ease.
In essence, the process of attaching a strap to your acoustic guitar is a practical and rewarding endeavor that enhances your musical journey, providing comfort, stability, and freedom of movement. With your guitar securely strapped on, you're poised to unleash your creativity and musical expression, knowing that your instrument is firmly positioned to support your artistic vision. So, go ahead, stand tall, and let your music resonate with the world.