Home>Production & Technology>Audiophile>How To Rip CDs Audiophile

Audiophile
How To Rip CDs Audiophile
Modified: March 8, 2024
Learn how to rip CDs like an audiophile and enhance your music listening experience with our step-by-step guide. Discover the best techniques and software for achieving high-quality audio files.
(Many of the links in this article redirect to a specific reviewed product. Your purchase of these products through affiliate links helps to generate commission for AudioLover.com, at no extra cost. Learn more)
Table of Contents
- Introduction
- Understanding Audiophile CD Ripping
- Equipment and Tools Required
- Choosing the Right CD Drive
- Configuring CD Ripping Software
- Selecting the Ideal Audio Format
- Adjusting Sample Rate and Bit Depth
- Handling Metadata and Album Art
- Organizing and Managing Ripped Files
- Advanced Tips and Techniques
- Conclusion
Introduction
Welcome to the world of audiophile CD ripping! If you are a passionate music lover who appreciates the highest quality audio, then you have come to the right place. In this article, we will explore the art and science of ripping CDs with a focus on achieving the best sound reproduction for your digital music collection.
CD ripping refers to the process of converting audio tracks from a compact disc into digital files that can be stored, played, and enjoyed on various devices. While the task may seem straightforward, achieving audiophile-grade sound quality requires attention to detail, proper equipment, and the right software settings.
By following the techniques and tips outlined in this article, you will be able to preserve the pristine sound of your CDs and create high-fidelity digital copies. Whether you are a casual listener or a seasoned audiophile, this guide will help you take your music experience to a whole new level.
Before we delve into the technical aspects of CD ripping, it’s essential to understand the benefits it offers. By ripping your CDs, you can:
- Preserve your music collection: CDs are susceptible to scratches, loss, or damage over time. By ripping them, you can create a digital backup and ensure your cherished music is safe.
- Convenience and accessibility: Digital music files can be easily stored and accessed on various devices, including smartphones, tablets, computers, and portable music players. You can enjoy your music library anytime, anywhere.
- Improved sound quality: By ripping CDs using lossless audio formats, such as FLAC or WAV, you can retain the full fidelity of the original recording. This allows you to experience the music the way it was intended by the artist.
- Customization and organization: Digital music files offer flexibility in terms of creating custom playlists and organizing your music library based on your preferences.
Now that you understand the benefits of CD ripping let’s dive deeper into the process and explore the steps to achieve audiophile-quality results.
Understanding Audiophile CD Ripping
Before we embark on the journey of audiophile CD ripping, it’s important to have a clear understanding of what it entails and why it is different from regular CD ripping. Audiophile CD ripping goes beyond simply converting audio tracks from a CD to digital files. It aims to preserve the highest possible audio quality and ensure a faithful reproduction of the original recording.
When it comes to audiophile CD ripping, several factors come into play:
- Lossless vs. Lossy Compression: Audiophiles often prefer using lossless audio formats, such as FLAC or WAV, over the more commonly used lossy formats like MP3 or AAC. Lossless formats retain all the audio data from the CD, resulting in a bit-for-bit copy of the original recording.
- Bit Depth and Sample Rate: Audiophile CD ripping allows you to choose the optimal bit depth and sample rate for your audio files. Bit depth determines the dynamic range and accuracy of the digital audio, while sample rate refers to the number of audio samples captured per second. Higher bit depth and sample rates can result in improved audio quality, but they also increase file size.
- Metadata and Album Art: Audiophiles pay attention to every detail, and that includes making sure the ripped files have accurate metadata and high-quality album artwork. Properly tagging your files will enhance organization, ease of navigation, and overall enjoyment of your music library.
- Error Correction: Audiophile CD ripping software often includes advanced error correction algorithms to compensate for any errors or imperfections that may be present on the CD. This ensures a more accurate and reliable rip, minimizing any potential loss of audio quality.
Another crucial aspect of audiophile CD ripping is the selection of equipment and tools. This includes having a high-quality CD drive with a reliable digital audio extraction (DAE) mechanism to ensure accurate and precise reading of the disc. Additionally, using specialized CD ripping software that offers customizable settings and advanced features will allow you to achieve the best possible results.
Now that we have established the foundations of audiophile CD ripping, let’s move on to exploring the necessary equipment and tools required to embark on this audio adventure.
Equipment and Tools Required
Embarking on the audiophile CD ripping journey requires the right equipment and tools to ensure a seamless and high-quality ripping experience. Let’s take a look at what you’ll need:
- A CD Drive: The first essential component is a reliable and high-quality CD drive. Look for a drive that supports digital audio extraction (DAE) and has a reputation for accurate and precise reading of CDs. External USB CD drives are convenient options as they can be easily connected to your computer.
- Computer: A computer with sufficient processing power and storage capacity is essential. Ensure that your computer has an available USB port to connect the CD drive. Ideally, it should meet or exceed the recommended system requirements of the CD ripping software you plan to use.
- Quality Interconnects: To ensure optimal audio transfer from your CD drive to the computer, invest in high-quality interconnect cables. Look for cables that minimize signal loss and interference, such as shielded RCA or coaxial cables.
- CD Ripping Software: Choose reliable and feature-rich CD ripping software that supports lossless audio formats, offers customization options, and includes error correction algorithms. Popular options include Exact Audio Copy (EAC), dBpoweramp, and XLD for Windows, macOS, and Linux, respectively.
- Metadata and Album Art Software: While it’s not mandatory, using software specifically designed for managing metadata and adding album artwork can greatly enhance your overall ripping and organization experience. Popular choices include MusicBrainz Picard and Mp3tag.
- Storage: As you begin ripping CDs, you will need sufficient storage space to accommodate your digital music collection. Invest in external hard drives or network-attached storage (NAS) devices with ample capacity to store and backup your ripped files.
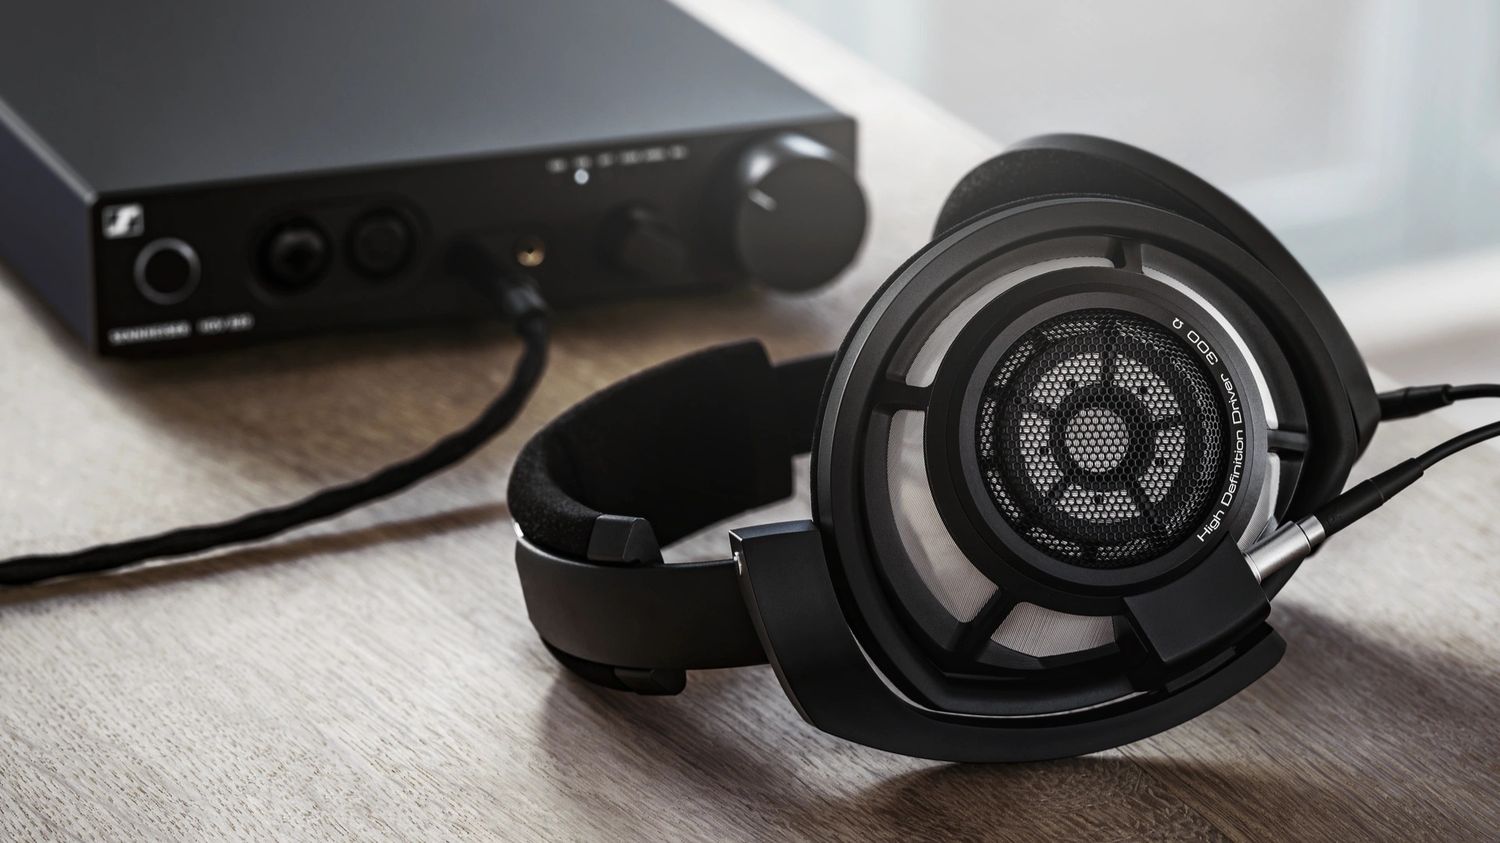
- Headphones or Speakers: To truly appreciate the quality of your ripped audio files, invest in high-quality headphones or speakers. Look for options that offer accurate sound reproduction, a wide frequency response, and low distortion.
Remember, the quality of your equipment and tools will significantly impact the overall result. Investing in reliable and high-quality components will ensure a smooth and accurate ripping process, leading to exceptional audio quality.
Now that we have covered the necessary equipment and tools, the next step is to choose the right CD drive for your audiophile CD ripping journey. Let’s dive into the selection process in the next section.
Choosing the Right CD Drive
When it comes to audiophile CD ripping, choosing the right CD drive is crucial for achieving accurate and reliable results. The quality and capabilities of the CD drive can greatly impact the overall sound quality of your ripped audio files. Here are some factors to consider when selecting the perfect CD drive for your needs:
- Digital Audio Extraction (DAE) Capabilities: Look for a CD drive that has excellent DAE capabilities. It should be capable of reading the audio data from the disc accurately and without errors. This ensures that the ripped files are an exact replica of the original audio.
- Read Speed: While ripping a CD, the read speed of the drive plays an important role. A higher read speed can result in faster ripping times; however, it’s essential to strike a balance. A drive that reads at a moderate speed (e.g., 8x or 12x) ensures more accurate data extraction and reduces the chances of errors.
- Buffer Underrun Protection: Buffer underrun protection is a critical feature that prevents interruptions and errors during the ripping process. Look for a CD drive that offers buffer underrun protection to ensure a smooth and uninterrupted ripping experience.
- Compatibility: Ensure that the CD drive you choose is compatible with your computer’s operating system. Check for driver availability and any necessary firmware updates to ensure smooth integration with your ripping software.
- Build Quality: Opt for a CD drive that is well-built and durable. Look for trusted brands that have a reputation for producing reliable and long-lasting drives.
It’s worth noting that not all CD drives are created equal, and some may perform better than others in terms of audio extraction accuracy and error correction. Researching and reading customer reviews can provide valuable insights into the performance and reliability of different CD drives.
Some popular CD drives that audiophiles often prefer include the Plextor PX-891SAF, TEAC CD-WR890MKII, and the ASUS DRW-24B1ST. These drives have been widely recognized for their excellent DAE capabilities, reliability, and overall performance.
Now that you have a better understanding of what to look for in a CD drive for your audiophile CD ripping journey, it’s time to move on to configuring your CD ripping software. We’ll explore the various settings and options you need to adjust for optimal results in the next section.
Configuring CD Ripping Software
Configuring your CD ripping software correctly is essential to achieve optimal audio quality and accuracy during the ripping process. The specific settings may vary depending on the software you choose, but here are some key considerations to keep in mind:
- Audio Format: Select a lossless audio format, such as FLAC or WAV, to ensure maximum audio quality. These formats offer bit-for-bit replication of the original audio, preserving all the details and nuances of the recording.
- Error Correction: Enable the error correction feature in your ripping software to compensate for any scratches or defects on the CD. This helps minimize audio errors and ensures a more accurate rip.
- Bit Depth and Sample Rate: Set the desired bit depth and sample rate for your ripped audio files in accordance with your preferences. Higher values, such as 24-bit depth and 96kHz sample rate, can provide greater resolution and detail but result in larger file sizes.
- Normalization: Normalization is the process of adjusting the volume levels of the audio files to a consistent level. Consider enabling this feature to ensure uniform volume across your music collection.
- Metadata Retrieval: Configure your ripping software to retrieve accurate metadata, including track names, artist information, album details, and album artwork. This will help keep your music library organized and visually appealing.
- Output Folder and File Naming: Specify the output folder where your ripped files will be saved. Additionally, set up the file naming convention to ensure your files are organized and easy to locate within your music library.
- Quality vs. Speed: Depending on your preferences and available hardware resources, you may have the option to adjust the ripping speed. Opting for a slower, more precise ripping speed can result in better audio quality, while faster speeds prioritize quicker ripping times.
Remember to consult the documentation or user guide for your specific CD ripping software to understand the available settings and features in more detail. Each software may have its own unique interface and options.
Keep in mind that configuring your CD ripping software is an iterative process. It’s a good idea to rip a few test CDs with different settings and listen to the results before proceeding to rip your entire music collection. This way, you can fine-tune your settings based on your personal preferences and the capabilities of your audio equipment.
With your CD ripping software properly configured, the next step is to select the ideal audio format and adjust the sample rate and bit depth to achieve the desired level of audio quality. We’ll explore these aspects in the following section.
Selecting the Ideal Audio Format
When it comes to selecting the ideal audio format for your ripped CDs, there are a few factors to consider, including audio quality, file size, and compatibility with your devices. Here are some popular audio formats to choose from:
- FLAC (Free Lossless Audio Codec): FLAC is a widely used lossless audio format that offers high-quality audio compression. It provides a bit-for-bit replication of the original audio while reducing file size without any loss in audio quality. FLAC files are supported by a wide range of devices and media players.
- ALAC (Apple Lossless Audio Codec): ALAC is the Apple equivalent of FLAC and offers similar lossless audio compression. It provides excellent audio quality and is compatible with Apple devices and applications such as iTunes.
- WAV (Waveform Audio File Format): WAV is an uncompressed and lossless audio format that preserves the original audio quality without any compression. WAV files are larger in size but offer the highest level of audio fidelity. Most devices and media players support WAV playback.
- AIFF (Audio Interchange File Format): AIFF is a lossless audio format primarily used by Apple devices and software applications. It offers similar audio quality as WAV files and is commonly used in professional audio production.
- MP3 (MPEG Audio Layer-3): While MP3 is a lossy audio format that sacrifices some audio quality for smaller file sizes, it remains popular due to widespread device compatibility and convenient file sharing. It is a suitable choice for those who prioritize storage efficiency over audiophile-grade sound.
For audiophile purposes, FLAC and WAV are often preferred due to their lossless nature and excellent audio quality. However, keep in mind that FLAC files can be compressed to about 50-70% of the original size, making them a good compromise between audio quality and storage space.
When selecting the ideal audio format, consider the storage capacity of your devices, the available storage space, and the playback capabilities of your equipment. If you have ample storage space and a high-end audio setup, WAV files may be the best choice for uncompromised audio fidelity. If you need a balance between quality and file size, FLAC is a recommended option.
It’s worth noting that some devices and media players may have limitations in terms of audio format compatibility. Before committing to a specific format, ensure that your playback devices and software support your chosen audio format to ensure seamless playback and enjoyment of your ripped music collection.
Now that you have selected the audio format for your rips, let’s explore the sample rate and bit depth adjustments to further enhance the audio quality in the next section.
Adjusting Sample Rate and Bit Depth
Sample rate and bit depth are two important parameters that greatly influence the audio quality of your ripped files. Fine-tuning these settings allows you to strike a balance between audio fidelity and file size. Let’s delve into each parameter:
- Sample Rate: Sample rate refers to the number of audio samples captured per second. The standard sample rate for CDs is 44.1kHz. However, some audiophiles prefer higher sample rates, such as 96kHz or 192kHz, as they capture more audio detail. Keep in mind that higher sample rates also result in larger file sizes. Consider your target playback devices’ capabilities and the storage capacity you have available when deciding on the sample rate.
- Bit Depth: Bit depth determines the dynamic range and accuracy of the audio. CDs have a standard bit depth of 16 bits. However, choosing a higher bit depth, such as 24 bits, allows for greater audio detail and a wider dynamic range. Similar to sample rate, higher bit depths also result in larger file sizes. It’s important to consider the capabilities of your playback devices and the size of your storage when deciding on the bit depth.
When adjusting the sample rate and bit depth, it’s recommended to adhere to the capabilities of your audio equipment and the format you have chosen for your ripped files. For instance, some devices may not support sample rates higher than 48kHz or bit depths higher than 16 bits.
It’s important to note that increasing the sample rate and bit depth does not magically improve the audio quality if the original recording was not produced at those higher specifications. In some cases, it might even introduce unnecessary file size increments without a significant audible difference.
As a general guideline, if you have a high-end audio setup and want to maximize the audio quality, consider opting for a higher sample rate and bit depth. However, if you have limited storage space or your playback equipment has limitations, sticking with the standard CD sample rate of 44.1kHz and 16-bit depth can still provide excellent audio quality.
Experimentation is key when adjusting sample rates and bit depths. Rip a few tracks at different settings and listen to them critically to determine what works best for your personal taste and equipment. Finding the right balance will ensure an optimal listening experience for your ripped music collection.
Next, let’s explore how to handle metadata and album art to enhance the organization and visual appeal of your digital music library.
Handling Metadata and Album Art
When ripping CDs, it’s essential to handle metadata and album art properly to ensure an organized and visually appealing digital music library. Metadata includes information such as track names, artist details, album titles, and genre tags. Album art refers to the cover art associated with each album. Here’s how you can effectively handle metadata and album art:
- Automatic Metadata Retrieval: Most CD ripping software can automatically retrieve metadata from online databases like MusicBrainz. Ensure that your ripping software is configured to retrieve accurate and complete metadata for each CD you rip. This will save you the time and effort of manually entering all the track details.
- Manual Editing: In some cases, the automatic metadata retrieval may not provide accurate or complete information. In such instances, you may need to manually edit the metadata to ensure accuracy. This includes correcting track names, entering featured artists, specifying composers, and adjusting album and genre information.
- Album Artwork: Album art adds visual appeal to your digital music library. Ripping software typically allows you to associate album art with each ripped CD. You can either let the software retrieve the album art automatically or manually add it yourself. Ensure that the album art is of high quality and accurately represents the album being ripped.
- Consistent and Organized Naming: When ripping multiple CDs, it’s important to establish a consistent naming convention for your ripped files. This allows for easy browsing and searching within your music library. A common naming convention includes using the track number, song title, and artist name in the file name.
- Tags and Sorting: Utilize the metadata tags available in your ripping software to specify additional information, such as composers, featured artists, and release years. This helps with sorting and filtering your music library based on specific criteria.
Taking the time to ensure accurate metadata and high-quality album artwork greatly enhances your overall music listening experience. It enables you to easily navigate and find your favorite tracks, view the associated album covers, and appreciate the aesthetic appeal of your digital music library.
Now that you have a well-organized digital music library with accurate metadata and album art, it’s important to learn how to effectively organize and manage your ripped files. We’ll cover this topic in the next section.
Organizing and Managing Ripped Files
Proper organization and management of your ripped files are crucial for easy navigation and a hassle-free music library. Here are some tips on how to effectively organize and manage your digital music collection:
- Create a Consistent Folder Structure: Establish a consistent folder structure for your ripped files. You can organize them by artist, album, genre, or any other category that suits your preferences. A well-structured folder system makes it easier to locate specific albums or artists.
- File Naming Convention: Use a consistent file naming convention for your ripped files. Including track number, song title, and artist name in the filename can make it easier to identify and sort your music files.
- Backup your Ripped Files: As with any valuable digital content, it is crucial to back up your ripped music files regularly. Consider using external hard drives, cloud storage, or a dedicated network-attached storage (NAS) device to ensure a secure and redundant backup of your music collection.
- Metadata Editing: Review and edit metadata as necessary to ensure accuracy and consistency across your library. Correct any incorrect information and ensure that all the relevant details, such as track titles, album names, and artist names, are correctly entered.
- Genre Tagging: Assign appropriate genre tags to your music files to make it easier to browse and filter your collection based on musical genres. This enhances your ability to create dynamic playlists or explore specific genres at any given time.
- Duplicate Detection and Removal: Regularly scan your music library for duplicate files. Duplicate files can take up unnecessary storage space and clutter your library. Utilize duplicate file detection software or built-in features in your music management software to identify and remove duplicate tracks.
- Regular Maintenance: Stay on top of your music library’s organization by performing regular maintenance tasks. This includes updating metadata, fixing any inconsistencies, and adding any missing album art. Regular maintenance helps keep your music library organized and enjoyable to navigate.
Investing time in organizing and managing your ripped files will pay off in the long run. A well-structured and properly maintained music library allows for a seamless and immersive audio experience. It enables you to easily find and enjoy your favorite music whenever the mood strikes.
Now that you’ve learned how to organize and manage your ripped files effectively, let’s explore some advanced tips and techniques that can further enhance your audiophile CD ripping experience.
Advanced Tips and Techniques
For those seeking to take their audiophile CD ripping experience to the next level, here are some advanced tips and techniques that can further enhance the quality and enjoyment of your digital music collection:
- Use Accurate Replay Gain: Replay Gain is a technique that equalizes the volume levels of different tracks to ensure consistent playback. Using accurate Replay Gain values can result in a more balanced and immersive listening experience, especially when playing back tracks from various albums or artists.
- Utilize CUE Sheets: CUE sheets are metadata files that contain track and index information for an entire album. They allow for precise track boundaries and can be used to split a single large audio file (e.g., FLAC or WAV) into individual tracks. CUE sheets are particularly useful for albums with seamless transitions between tracks.
- Consider Bit-Perfect Ripping: Bit-perfect ripping refers to ensuring an exact replication of the digital audio data from the CD. This involves disabling any audio enhancements or processing on your computer during the ripping process. By doing so, you can capture the purest and most accurate audio representation of the original CD.
- Verify Rips Using AccurateRip: AccurateRip is a database that compares your ripped tracks with a vast collection of verified rips, ensuring the accuracy and integrity of your rips. By verifying your rips against the AccurateRip database, you can have confidence in the quality and accuracy of your digital music collection.
- Create Master-Quality Backups: Consider creating master-quality backups of your ripped files in an uncompressed format, such as WAV. These backups serve as a pristine copy of your music collection, allowing you to create new compressed copies in the future without any further loss in audio quality.
- Invest in a Dedicated Music Server: If you’re truly dedicated to achieving the best possible audio performance, consider investing in a dedicated music server. These devices are specifically designed to store and serve high-quality audio files, providing enhanced audio processing and networking capabilities.
- Explore Hi-Res Audio Formats: In addition to CD-quality audio, consider exploring high-resolution audio formats such as DSD or MQA. These formats offer even higher levels of audio fidelity and are supported by certain devices and music streaming services.
By implementing these advanced tips and techniques, you can elevate your audiophile CD ripping experience to new heights. Experiment with different approaches and find the ones that suit your preferences and meet your desired level of audio quality and convenience.
As you continue your journey, always stay open to new technologies, advancements, and best practices in the world of audiophile CD ripping. The pursuit of the ultimate sound reproduction is a never-ending endeavor, and your dedication to achieving the highest audio quality will be rewarded with a truly immersive and breathtaking music experience.
Now that you’re equipped with these advanced tips, let’s conclude our guide on audiophile CD ripping.
Conclusion
Congratulations! You have now gained a strong understanding of the intricacies of audiophile CD ripping. By following the techniques and tips outlined in this guide, you can ensure that your digital music collection retains the highest possible audio quality and fidelity.
We began by discussing the importance of audiophile CD ripping and the benefits it offers, including the preservation of your music collection and the ability to enjoy high-quality audio on various devices. We then explored various aspects of the process, including the equipment and tools required, the selection of the right CD drive, and the configuration of CD ripping software for optimal results.
We covered the significance of choosing the ideal audio format, adjusting the sample rate and bit depth for optimal audio quality, and handling metadata and album art to enhance organization and visual appeal. Additionally, we provided insights into organizing and managing your ripped files effectively to ensure an enjoyable music library browsing experience. Finally, we discussed advanced tips and techniques for those seeking to take their audiophile CD ripping to the next level.
Remember, the key to achieving exceptional audio quality lies in attention to detail, using high-quality equipment, and careful configuration of your ripping software. Take the time to experiment and fine-tune your settings to match your personal preferences and the capabilities of your audio equipment.
Now that you’re armed with the knowledge and techniques to embark on your audiophile CD ripping journey, it’s time to bring your favorite albums to life in the digital realm. Enjoy the benefits of preserving your music collection, experiencing the highest audio fidelity, and immersing yourself in the extraordinary world of audiophile sound.
Happy ripping and rediscovering the magic of your music!

