Home>Production & Technology>Audiophile>How To Setup Audiophile System
Audiophile
How To Setup Audiophile System
Modified: March 10, 2024
Learn how to set up an amazing audiophile system with our step-by-step guide. Enhance your audio experience with expert tips and recommendations.
(Many of the links in this article redirect to a specific reviewed product. Your purchase of these products through affiliate links helps to generate commission for AudioLover.com, at no extra cost. Learn more)
Table of Contents
Introduction
Welcome to the world of audiophiles, where every note, every nuance, and every detail are cherished and appreciated. As an audiophile, you strive for the highest level of sound quality in your home audio system. You believe that music should be experienced the way it was intended to be heard, with utmost clarity, precision, and depth.
Setting up an audiophile system may seem like a daunting task, but fear not. In this article, we will guide you through the process of setting up your own audiophile system, step by step. Whether you’re a seasoned audiophile or just starting out on your journey, this article will provide you with valuable insights and tips to help you achieve sonic nirvana.
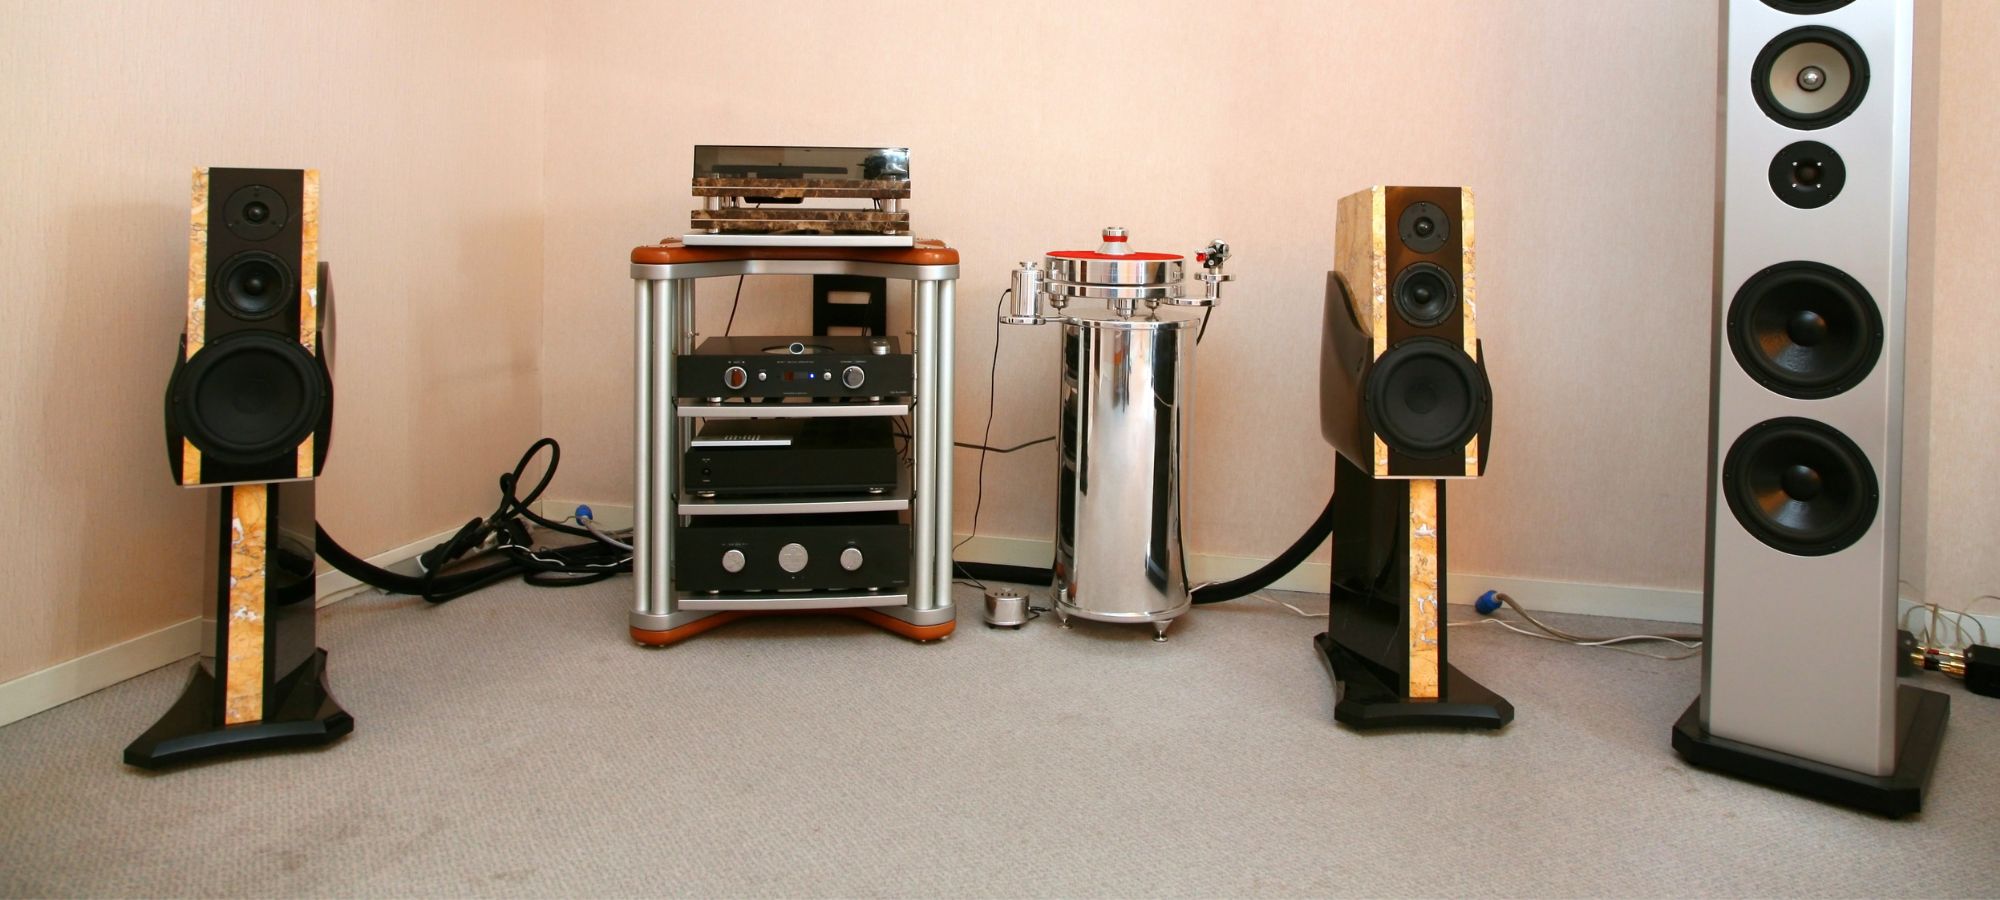
Before we delve into the details, it’s important to understand the key components of an audiophile system. The three fundamental components are the source equipment, the amplifier, and the speakers. Each component plays a crucial role in reproducing high-fidelity sound, and careful consideration should be given to selecting the right equipment for your specific needs and preferences.
Once you have selected the components, the next step is to set up your source equipment. This includes devices such as turntables, CD players, or digital music players. Proper setup ensures optimal performance and prevents any signal loss or interference.
After setting up the source equipment, it’s time to choose the right amplifier. The amplifier serves as the powerhouse of your audio system, translating the low-level signals from the source equipment into powerful and dynamic sound. The choice of amplifier depends on factors such as power output, impedance, and overall sound signature.
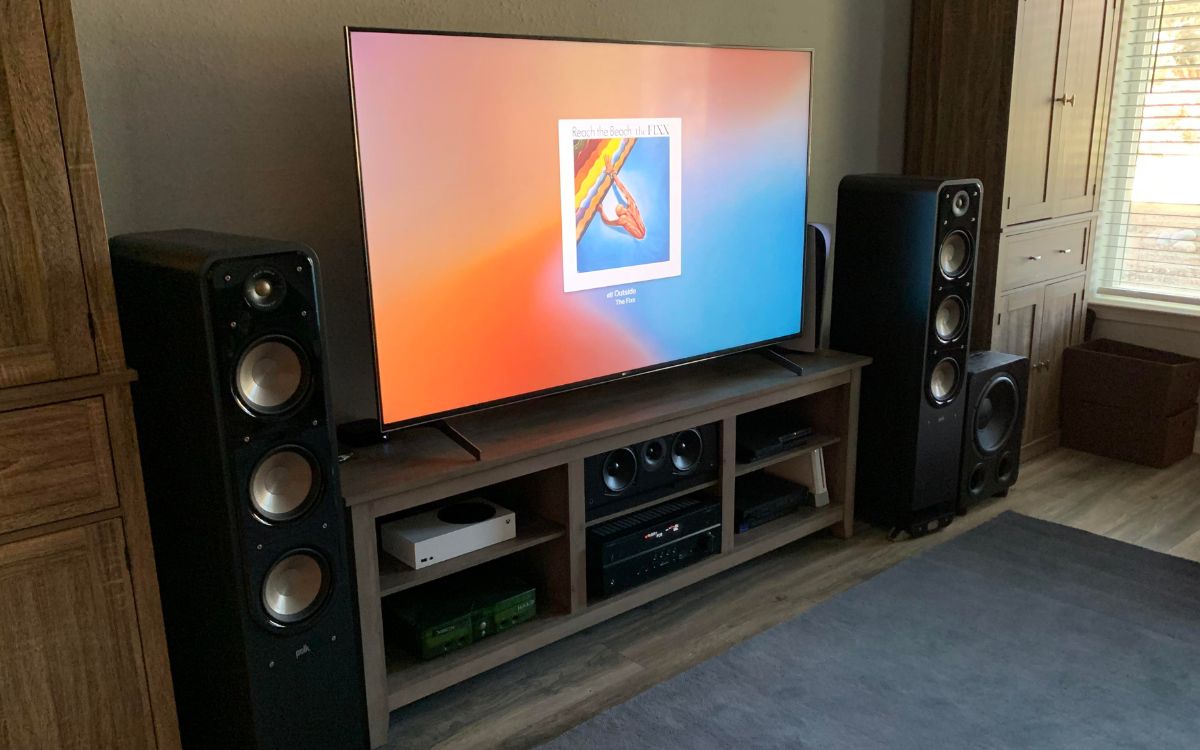
With the amplifier in place, it’s now time to position your speakers for optimal soundstage and imaging. Proper speaker placement can make a significant difference in the overall sound quality and listening experience. We will provide you with guidelines on finding the ideal placement for your speakers based on your room size and listening preferences.
Once the components are set up and positioned correctly, it’s time to connect them using high-quality cables. Proper cable connections ensure minimal signal loss and interference, allowing the audio signals to travel from the source to the amplifier to the speakers with utmost fidelity.
After the initial setup, the next step is to fine-tune your system. This involves adjusting settings, such as tone controls and equalization, to suit your personal preferences and the characteristics of your listening environment. Fine-tuning allows you to make subtle adjustments to achieve the desired sonic balance and enhance your overall listening experience.
As you set up your audiophile system, it’s important to pay attention to cable management. Neatly organizing and routing the cables can help reduce clutter and minimize any interference or signal degradation.
Lastly, we will discuss the importance of room acoustics and how you can optimize your listening environment. Factors such as room size, shape, and furnishings can significantly impact the sound quality. We will provide practical tips on how to improve acoustics in your listening space to enhance your audio experience.
By the end of this article, you will have gained valuable insights into setting up your own audiophile system. Whether you’re an avid music lover or a discerning listener, a well-designed and properly set up audiophile system can elevate your listening experience to new heights.
Step 1: Selecting the Right Components
When it comes to building an audiophile system, selecting the right components is crucial. Each component plays a significant role in determining the overall sound quality and listening experience. Here are some key considerations to keep in mind when choosing your components:
- Source Equipment: The source equipment is where your audio signals originate from. This can include devices such as turntables, CD players, or digital music players. When selecting your source equipment, consider factors such as the format of your music collection, the level of convenience you desire, and your budget. For vinyl enthusiasts, a high-quality turntable and phono preamp might be the ideal choice. Digital music lovers might opt for a high-resolution digital audio player or a computer-based setup.
- Amplifier: The amplifier is responsible for powering and amplifying the audio signal from the source equipment before it reaches the speakers. When choosing an amplifier, consider the power output, impedance compatibility with your speakers, and the overall sonic character you prefer. Solid-state amplifiers provide clean and accurate sound reproduction, while tube amplifiers can add warmth and harmonics to the audio signal.
- Speakers: Speakers are arguably the most critical component of an audiophile system. They translate the electrical signals into audible sound waves. When selecting speakers, consider factors such as the type of driver technology (dynamic, planar magnetic, electrostatic, etc.), the size and layout of your listening room, and your preferred sound signature. It’s essential to audition speakers whenever possible to ensure they meet your expectations in terms of sound quality and overall performance.
- Interconnects and Cables: While not technically components, interconnects and cables play a crucial role in transmitting the audio signal between your source equipment, amplifier, and speakers. High-quality cables with proper shielding and low-resistance conductors can reduce signal loss and interference, resulting in improved audio quality. When choosing cables, consider factors such as the cable length, connectors, and the overall build quality.
- Accessories: In addition to the main components, there are various accessories that can further enhance your audiophile system. These include items like power conditioners, equipment racks, speaker stands, and acoustic treatments. While not essential, these accessories can contribute to improved performance and a more enjoyable listening experience.
When selecting the components for your audiophile system, it’s important to consider your budget and personal preferences. Take the time to research and listen to different options, and if possible, audition them in person. Remember, the goal is to achieve a system that brings you joy and allows you to fully immerse yourself in the music.
Step 2: Setting up the Source Equipment
Once you have selected the source equipment for your audiophile system, it’s time to set it up properly. Proper setup ensures optimal performance and sonic fidelity. Here are some key steps to follow when setting up your source equipment:
- Placement: Start by finding a suitable location for your source equipment. Ideally, it should be placed on a stable surface away from any potential sources of vibration or electromagnetic interference. If you’re using a turntable, it’s important to place it on a level and sturdy platform to prevent vibrations that can affect playback.
- Power and Grounding: Connect your equipment to a reliable power source using high-quality power cables. It’s also recommended to use a power conditioner or surge protector to protect your equipment from electrical surges and fluctuations. Additionally, ensure that your source equipment is properly grounded to minimize the risk of ground loops and electrical noise.
- Analog or Digital Connections: Depending on your source equipment, you will need to establish the appropriate connections. For analog devices like turntables or CD players, use RCA cables to connect the output of the source component to the input of your amplifier or preamp. For digital devices, such as digital music players or computers, use digital interfaces like USB, optical, or coaxial cables to connect to your amplifier or DAC (digital-to-analog converter).
- Calibration and Settings: Take the time to calibrate and adjust the settings of your source equipment to ensure optimal performance. This may include adjusting the tracking force and alignment on a turntable or configuring the output settings on a digital music player. Refer to the user manual of your specific equipment for detailed instructions on calibration and settings.
- Isolation and Damping: To minimize vibrations and resonance, consider using isolation devices or damping materials. These can help reduce the impact of external vibrations on the source equipment, resulting in improved sound quality. Isolation platforms, damping feet, and vibration-absorbing materials can all be utilized to achieve better isolation and damping.
It’s important to note that every source component may have specific setup requirements and considerations. Consult the user manual or manufacturer’s guidelines for detailed instructions on setting up your specific equipment. Additionally, don’t hesitate to seek the assistance of an audio professional or experienced audiophile if you require further assistance.
By properly setting up your source equipment, you will ensure that you are getting the best possible audio quality from your chosen sources. This attention to detail will allow you to fully appreciate the nuances and intricacies of your music collection.
Step 3: Choosing the Right Amplifier
An amplifier is a critical component of any audiophile system, as it plays a crucial role in powering and amplifying the audio signal from your source equipment to your speakers. Choosing the right amplifier is essential to ensure optimal sound quality and compatibility with your system. Here are some factors to consider when selecting an amplifier:
- Power Output: The power output of an amplifier determines its ability to drive your speakers. It is important to match the power requirements of your speakers with the amplifier’s power output. Consider factors such as the sensitivity and impedance rating of your speakers to ensure that the amplifier can provide adequate power.
- Amplifier Type: There are various types of amplifiers available, including solid-state (transistor), tube (valve), and hybrid amplifiers. Each type has its own sonic characteristics. Solid-state amplifiers are known for their clean and accurate sound reproduction, while tube amplifiers can add warmth and harmonics to the audio signal. Consider your personal preferences and the sound signature you desire when choosing an amplifier type.
- Impedance Compatibility: It is crucial to ensure that the amplifier’s output impedance matches the input impedance of your speakers. Mismatched impedance can result in poor sound quality or damage to your equipment. Consult the specifications of both your amplifier and speakers to ensure compatibility.
- Sound Quality: The sound quality of an amplifier can vary depending on factors like circuit design, components used, and overall build quality. It’s recommended to listen to different amplifiers if possible, or read reviews from trusted sources to get an idea of the sound characteristics. Consider your preferred sound signature and the type of music you listen to when evaluating the sound quality of an amplifier.
- Features and Connectivity: Consider the features and connectivity options of the amplifier to ensure it meets your needs. Some amplifiers offer additional features such as tone controls, headphone outputs, or built-in DACs. Evaluate the connectivity options to ensure compatibility with your source equipment and other audio devices you may want to connect to the amplifier.
- Budget: Like any audio component, amplifiers vary in price range. Determine your budget and look for amplifiers that offer the best value for your investment. It’s not necessary to break the bank to find a high-quality amplifier that suits your needs.
When selecting an amplifier, it’s important to strike a balance between technical specifications, sound quality, and personal preferences. Take the time to research and audition different amplifiers to find the one that complements your system and brings out the best in your speakers.
Additionally, if you’re unsure about matching an amplifier with your speakers or need assistance with setup, don’t hesitate to seek advice from an audio professional or experienced audiophiles. Their expertise can help ensure that you make an informed decision and optimize the performance of your amplifier in your specific system.
Step 4: Positioning the Speakers
The positioning of your speakers is crucial to achieving optimal sound quality and an immersive listening experience in your audiophile system. Proper speaker placement can greatly enhance the soundstage, imaging, and overall balance of the audio reproduction. Consider the following steps when positioning your speakers:
- Listening Room: Start by evaluating your listening room. Consider the room size, shape, and furnishings, as they can have a significant impact on the sound quality. Large, open spaces may require different placement strategies compared to smaller, acoustically treated rooms. Take note of any reflective surfaces, such as windows or hard floors, as they can influence the sound characteristics.
- Symmetry: Aim for symmetrical speaker placement in the room. This means positioning the speakers at an equal distance from side walls and ensuring that the distance between the speakers is the same as the distance between each speaker and your listening position. This helps create a balanced soundstage and imaging.
- Toe-In Angle: In most cases, angling the speakers slightly inward towards the listening position can help improve imaging and focus the soundstage. Experiment with different toe-in angles to find the optimal balance between a focused center image and a wide soundstage.
- Distance from Walls: Consider the distance between your speakers and the front and side walls. Placing the speakers too close to walls can result in boomy bass and muddled sound. As a general rule, aim to position the speakers at least a few feet away from the walls to allow for proper bass response and minimize unwanted reflections.
- Listening Triangle: Imagine an equilateral triangle formed by your listening position and the two speakers. This listening triangle is a fundamental concept in speaker placement. Position your speakers at an equal distance from your listening position, and ensure that the distance between the speakers is the same as the distance between each speaker and your listening position.
- Height and Tilt: Consider the height and tilt of your speakers. Ideally, the tweeters should be at ear level when you are in your listening position. Use speaker stands or adjust the height to achieve proper alignment. In addition, experiment with the tilt of the speakers to fine-tune the sound balance and optimize the sweet spot.
It’s important to note that room acoustics and personal preferences can influence the optimal speaker placement. Don’t be afraid to experiment with different positions and angles to find the setup that sounds best to you. Use your ears as the ultimate judge and make adjustments accordingly.
Lastly, consider investing in acoustic treatments for your listening room. These can include diffusers, absorbers, and bass traps, which help control unwanted reflections and standing waves. Acoustic treatments can greatly improve the accuracy and clarity of the sound reproduction in your listening environment.
By taking the time to properly position your speakers and considering the unique characteristics of your listening room, you can maximize the performance of your audiophile system and enjoy a more immersive and engaging listening experience.
Step 5: Connecting the Components
Once you have selected and positioned your components in your audiophile system, it’s time to connect them together to ensure proper signal flow and optimal performance. Here are some key steps to follow when connecting the components:
- Check Compatibility: Ensure that the connectors and cables of your components are compatible with each other. Modern audio equipment typically uses RCA, XLR, or digital interfaces like USB, optical, or coaxial connections. Verify that the inputs and outputs of your components match the corresponding connectors and cables.
- Clean Connectors: Before making any connections, it’s important to ensure that the connectors on your components and cables are clean. Use a soft cloth or an electrical contact cleaner to remove any dust, dirt, or oxidation that may interfere with the signal transmission.
- Signal Flow: Understand the signal flow in your system. Typically, the audio signal flows from the source equipment to the amplifier and then to the speakers. However, the specific routing may vary depending on your setup. Consult the user manuals of your components to determine the optimal signal flow and connection sequence.
- Analog Connections: For analog audio connections, use high-quality cables with proper shielding. Connect the outputs of your source equipment to the inputs of your amplifier or preamp using RCA or XLR cables. Ensure a secure and snug connection, but avoid over-tightening the connectors to prevent damage.
- Digital Connections: For digital audio connections, employ the appropriate interfaces and cables. Connect digital sources like a computer or digital music player to your amplifier or a dedicated DAC using USB, optical, or coaxial cables. Again, ensure a secure connection and be mindful of proper alignment and orientation of the connectors.
- Speaker Connections: Connect your amplifier to your speakers using appropriate speaker cables. Ensure that the polarity of the speaker connections is correct, with the positive terminal of the amplifier connected to the corresponding positive terminal of the speakers. Most speaker terminals are color-coded or marked with a “+” and “-” sign to guide you in this process.
- Power Connections: Connect the power cords of your components to a reliable power source. Use high-quality power cables and, if necessary, a power conditioner or surge protector to protect your equipment from electrical fluctuations or surges.
- Verify Connections: Once all the connections are made, double-check them to ensure they are secure and properly aligned. Loose or incorrect connections can result in signal loss, distortion, or even damage to your equipment.
As you make the connections, be mindful of cable management. Neatly organize and route the cables to minimize tangles and prevent interference. You can use cable ties, cable management sleeves, or even cable raceways to help achieve a clean and organized setup.
Remember, the quality of your cables can impact the signal transmission. While there is no need to splurge on excessively expensive cables, investing in decent quality cables with proper shielding and good conductivity can help preserve the signal integrity and ensure optimal audio performance.
Taking the time to properly connect your components will eliminate potential signal issues and ensure that your audiophile system operates seamlessly. It is worth the effort to double-check and verify your connections to enjoy the full sonic potential of your setup.
Step 6: Fine-tuning the System
After setting up and connecting your audiophile system, it’s essential to fine-tune it to achieve the best possible sound quality and tailor it to your personal preferences. Fine-tuning involves making adjustments to various settings and controls to optimize the overall performance of your system. Here are some key aspects to consider when fine-tuning your system:
- Balance and Equalization: Adjust the balance and equalization settings to achieve a desired tonal balance. Some amplifiers or preamps offer bass, treble, or midrange controls that allow you to fine-tune the frequency response to your liking. Experiment with these controls while listening to familiar music to find the right balance that suits your preferences.
- Listening Position: Pay attention to your listening position and its impact on the sound. Small adjustments in seat positioning or even head tilt can affect the perceived soundstage and imaging. Experiment with different listening positions to find the “sweet spot” with the best balance and depth of sound.
- Room Correction: Consider using room correction software or hardware to address any room resonances, reflections, or standing waves that may negatively impact the sound quality. These tools can help equalize the frequency response, improve imaging, and reduce anomalies caused by the room’s acoustics. Consult the user manual or manufacturer’s guidelines for the specific room correction system you are using.
- Speaker Positioning: Fine-tuning the speaker position can make a significant difference in the sound quality. Small adjustments in toe-in angle, distance from the walls, and height can further optimize the soundstage, imaging, and overall balance of your system. Take the time to experiment with these adjustments to find the position that delivers the best soundstage and sonic performance.
- Volume Levels: When fine-tuning your system, pay attention to the volume levels. Adjust the volume to a comfortable level that allows you to hear the details without causing fatigue or distortion. Keep in mind that the perceived loudness can vary depending on the recording and the dynamics of the music. Experiment with different volume levels to find the optimal balance for your listening sessions.
- Source Selection: Take advantage of different sources to explore the capabilities of your system and enjoy a diverse range of music. Experiment with different formats, resolutions, and genres to fully experience the capabilities of your audiophile system.
Fine-tuning is a continuous process, as your preferences and listening environment may change over time. Regularly revisit and make adjustments to your settings and listening position to ensure that your audiophile system continues to deliver the best possible performance.
Additionally, trust your ears during the fine-tuning process. Every listener has unique preferences and sonic perceptions. The ultimate goal is to achieve a sound signature that brings you joy and enhances your listening experience.
By paying attention to these fine-tuning aspects, you will be able to optimize the performance of your audiophile system and enjoy a customized sound that suits your taste and preferences.
Step 7: Cable Management
Cable management is often overlooked but plays a significant role in ensuring a clean and organized setup for your audiophile system. Proper cable management not only improves the aesthetic appeal of your setup but also minimizes the risk of interference and signal degradation. Here are some key considerations for effective cable management:
- Plan and Organize: Before connecting the components, take the time to plan and organize the cable layout. Evaluate the distance between the components, the location of power outlets, and any potential obstructions. This will help you determine the length and routing of the cables, enabling a tidy and efficient installation.
- Separate Power and Signal Cables: It’s crucial to keep power cables separated from signal cables to prevent electromagnetic interference. Crossings and close proximity between power and signal cables can induce noise and distortion in your audio signal. Whenever possible, run power cables and signal cables on separate paths or use cable management solutions that offer sufficient separation.
- Use Cable Ties and Velcro Straps: Cable ties and Velcro straps are handy tools for bundling and securing cables together. Use them to group cables that run parallel to each other, reducing clutter and minimizing the risk of tangling. Make sure not to over-tighten the ties, as it can potentially damage the cables or restrict proper airflow.
- Label and Tag: To make cable identification easier in the future, consider labeling or tagging each cable. This can be especially helpful if you need to make changes or troubleshoot your setup. Labeling can be done using adhesive labels, color-coded markers, or specialized cable tags available in the market.
- Cable Channels and Raceways: Cable channels and raceways are excellent solutions for concealing cables and maintaining a clean appearance. These channels can be mounted on walls or behind furniture, providing a hidden pathway for cables. Additionally, cable raceways can be used to cover cables that run along baseboards or walls, further improving the aesthetics of your setup.
- Consider Cable Length: Use the appropriate cable length to avoid excessive cable slack. Excessively long cables can create unnecessary clutter and increase the risk of tangling. Conversely, using cables that are too short can lead to strain, tension, or disconnection. Measure and select cable lengths that fit your setup without excessive slack or stress on any of the connectors.
- Regular Maintenance: Periodically inspect and maintain your cable management system. Check for any loose connections, cable wear, or changes in cable routing. Ensure that cables are properly seated and secure. Regular maintenance helps minimize the risk of signal loss, interference, or accidental disconnections.
Remember, effective cable management not only enhances the visual appeal of your setup but also contributes to the overall performance and reliability of your audiophile system. It’s worth investing time and effort into properly organizing and managing your cables to enjoy a clutter-free and optimized audio experience.
Step 8: Room Acoustics
The acoustic characteristics of your listening room can have a profound impact on the sound quality and overall performance of your audiophile system. Proper consideration and optimization of the room acoustics can significantly enhance your listening experience. Here are some key factors to consider when addressing room acoustics:
- Room Size and Shape: The size and shape of your listening room can affect the sound reflections and resonances. Large, open spaces tend to have more reverberation and potential for standing waves, while small rooms may suffer from excessive bass buildup. Ideally, aim for a well-balanced room size and consider adding acoustic treatments to control reflections.
- Reflections and Absorption: Reflections from walls, ceilings, and other surfaces can cause sound distortions and muddiness. Use absorptive materials, such as acoustic panels, foam, diffusers, or bass traps, to reduce reflections and improve clarity. Place these treatments strategically on walls and surfaces where reflections are most prominent.
- Bass Management: Low-frequency standing waves can cause uneven bass response in your listening room. Address this issue by placing bass traps in corners where bass buildup is most likely to occur. Bass traps help in absorbing and diffusing low-frequency energy, resulting in a more even and controlled bass response.
- First Reflection Points: The first reflection points are areas where sound waves directly bounce off surfaces before reaching your ears. Identify these points on the sidewalls, ceiling, and floor in your listening position. Install acoustic panels or diffusers on these points to minimize the impact of these reflections and achieve a more accurate and detailed soundstage.
- Speaker and Listening Position: Experiment with the placement of your speakers and listening position to optimize the interaction between the sound waves and the room. Small adjustments in speaker positioning or your listening position can significantly impact the soundstage, imaging, and overall tonal balance. Room correction software or dedicated acoustic measurements can assist in finding the most suitable positions.
- Consider Room Treatments: Depending on your room’s characteristics, additional room treatments may be needed. This can include diffusers, bass traps, or even installing sound isolation materials, particularly if you have adjoining rooms or noisy surroundings. Seek professional advice or consult with experienced audiophiles to determine the appropriate treatments for your specific room.
- Experiment and Listen: Room acoustics are subjective and can vary from room to room. Experiment with different acoustic treatments and placements to find the best possible sound in your listening environment. Listen to a variety of music tracks and recordings to gauge the impact of the room modifications and make adjustments as needed.
Improving the room acoustics in your listening space may require a combination of techniques, materials, and adjustments. It’s advisable to consult with an acoustic specialist or professional for a more in-depth analysis of your room’s acoustics and personalized recommendations.
Remember, optimizing room acoustics is an ongoing process. As you make changes to your room layout, furniture, or audio system, it’s important to reassess the acoustic treatment and make adjustments accordingly. By addressing room acoustics, you can unlock the full potential of your audiophile system and enjoy a more immersive and accurate listening experience.
Conclusion
Setting up an audiophile system can be a rewarding and enjoyable process. By carefully selecting the right components, setting them up correctly, and fine-tuning the system, you can create a captivating and immersive listening experience that brings your music to life.
Choosing the right components is crucial in achieving the desired sound quality. Consider factors such as source equipment, amplifiers, and speakers that match your preferences and budget. Pay attention to placement, positioning, and connections to ensure optimal performance and eliminate signal loss or interference.
Fine-tuning your system allows you to personalize the sound to your liking. Adjusting settings, optimizing listening positions, and utilizing room correction techniques can further enhance the sonic performance and create a truly immersive experience.
Effective cable management and attention to room acoustics shouldn’t be overlooked. Organizing cables and considering room characteristics can minimize signal degradation and improve overall sound quality.
Remember, setting up an audiophile system is a continuous journey. As your knowledge and preferences evolve, you may choose to upgrade or adjust different components to further refine your listening experience.
Ultimately, the goal of an audiophile system is to create a personal oasis where you can fully immerse yourself in the music and appreciate its intricacies. With careful consideration and attention to detail, you can build a system that brings you closer to the artists, capturing every detail and emotion they intended to convey.
So, go ahead and embark on your audiophile journey. Explore, experiment, and enjoy the breathtaking world of high-fidelity sound that awaits you.