Home>Production & Technology>Audiophile>How To Build An Audiophile Amplifier
Audiophile
How To Build An Audiophile Amplifier
Modified: February 18, 2024
Learn how to build a high-quality audiophile amplifier and enhance your listening experience with our step-by-step guide. Discover the joy of exceptional sound.
(Many of the links in this article redirect to a specific reviewed product. Your purchase of these products through affiliate links helps to generate commission for AudioLover.com, at no extra cost. Learn more)
Table of Contents
Introduction
Welcome to the world of audiophile amplifiers, where the pursuit of sonic perfection meets the art of DIY craftsmanship. Audiophiles are passionate about music and obsessed with obtaining the finest possible sound quality. In their quest for audio nirvana, many audiophiles are turning to building their own amplifiers.
Building an audiophile amplifier allows you to have full control over the components used and the sound characteristics of your system. It gives you the opportunity to tailor the amplifier to your specific preferences, providing a truly personalized listening experience.
In this comprehensive guide, we will take you through the process of building your own audiophile amplifier from start to finish. Whether you are an experienced DIYer or a beginner looking to dive into the world of audio electronics, this guide will provide you with the knowledge and guidance you need to fulfill your audiophile dreams.
We will cover everything from understanding the different types of audiophile amplifiers to selecting the right components for your build. We will delve into the intricacies of building a high-quality power supply and assembling the amplifier circuitry. We will also discuss the importance of proper wiring and connection techniques and guide you through the crucial steps of testing, troubleshooting, and fine-tuning your amplifier for optimal sonic performance.
Throughout this guide, we will provide you with valuable insights and expert tips to ensure that your audiophile amplifier not only sounds superb but also meets your desired aesthetic appeal. So, let’s get started and embark on a journey of DIY audio excellence!
Understanding Audiophile Amplifiers
To fully appreciate the process of building an audiophile amplifier, it’s essential to have a solid understanding of what an amplifier is and its role in high-quality audio reproduction.
An amplifier is a device that takes an electrical signal, such as the output from a CD player or a turntable, and increases its voltage or power level to drive a pair of speakers. In the world of audiophiles, the goal is to have an amplifier that faithfully reproduces the original signal with minimal distortion or coloration.
Audiophile amplifiers are designed with meticulous attention to detail to achieve precise and accurate sound reproduction. They typically have high-quality, low-noise components and sophisticated circuitry to minimize distortion and ensure a transparent and natural sound.
There are different types of audiophile amplifiers, including tube amplifiers, solid-state amplifiers, and hybrid amplifiers. Tube amplifiers, also known as valve amplifiers, are revered for their warm and rich sound signature. They use vacuum tubes to amplify the signal and are known for their musicality and harmonics.
On the other hand, solid-state amplifiers use transistors and other solid-state components to achieve high power output and accurate sound reproduction. They are known for their precise control and excellent transient response. Hybrid amplifiers combine the best attributes of both tube and solid-state amplifiers, offering a balance between warmth and accuracy.
Understanding the different amplifier topologies and their sonic characteristics is crucial in selecting the right amplifier for your build. It’s important to consider factors such as power output, impedance matching, and the type of speakers you will be driving.
Additionally, it’s worth mentioning that audiophile amplifiers often feature advanced features like balanced inputs, dual mono construction, and advanced power supply designs. These features contribute to improved signal integrity and overall audio performance.
By understanding the basics of audiophile amplifiers and their various design approaches, you will be better equipped to make informed decisions when selecting the amplifier architecture and components for your DIY build. This knowledge will ensure that you achieve the utmost audio fidelity and satisfaction from your homemade amplifier.
Selecting the Right Components for Your Amplifier
When it comes to building an audiophile amplifier, the components you choose play a critical role in the overall performance and sound quality of your system. Each component has its own unique characteristics and can significantly impact the sonic signature of your amplifier.
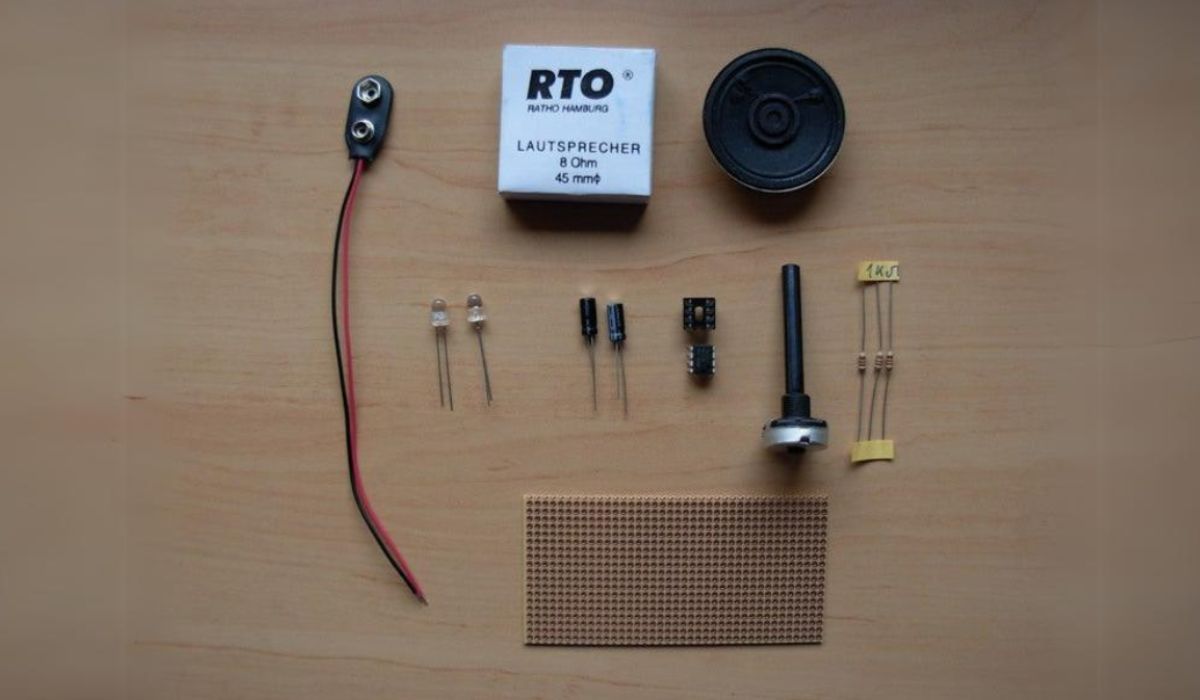
1. Amplifier Circuit Board: The circuit board serves as the foundation for your amplifier build. It houses the various components and provides the electrical connections between them. Look for a high-quality board that has sufficient space for your chosen amplifier architecture and offers good electrical insulation.
2. Power Supply: The power supply is a crucial element in any amplifier. It supplies the necessary voltage and current for the amplifier to operate optimally. Consider using a well-regulated and well-filtered power supply unit or designing your own custom power supply to ensure clean and stable power delivery.
3. Amplification Integrated Circuit (IC) or Discrete Transistors: The amplification stage is responsible for boosting the input signal. You can choose between an integrated circuit (IC) or discrete transistors, depending on your preference. ICs offer convenience and ease of use while discrete transistors allow for more customization and fine-tuning.
4. Passive Components: Passive components, such as resistors and capacitors, play a critical role in shaping the sound of your amplifier. Look for high-quality components with low tolerances and stable characteristics. Consider using audio-grade capacitors and metal film resistors for optimal performance.
5. Output Transformers (if using a tube amplifier): If you are building a tube amplifier, the output transformer is a crucial component. It determines the impedance matching between the tubes and the speakers and influences the overall sound quality. Look for high-quality, well-designed output transformers that match the specifications of your chosen tubes and speakers.
It’s important to research and choose components that are known for their high performance and reliability. Look for reputable brands that have a proven track record in the audio industry. Reading reviews and seeking recommendations from experienced audiophiles can also be beneficial in making informed decisions.
Furthermore, consider the synergistic compatibility between the different components. Ensure that the components are well-matched in terms of impedance and power handling capabilities to avoid any potential issues or compromises in sound quality.
Remember, the components you select will have a direct impact on the overall sonic performance of your amplifier, so choose wisely to achieve the best possible sound reproduction and fulfill your audiophile aspirations.
Building the Power Supply
The power supply is a critical component of any audiophile amplifier. It provides the necessary voltage and current to support the amplifier’s operation and ensure clean and stable power delivery. Building a high-quality power supply is essential for achieving optimal sound quality and preventing unwanted noise and interference.
1. Transformer Selection: The first step in building the power supply is selecting an appropriate transformer. The transformer should match the desired voltage and current requirements of your amplifier. Consider factors such as power output, voltage regulation, and efficiency when choosing a transformer. Opting for a toroidal transformer can minimize electromagnetic interference and provide better sound quality.
2. Rectification: After the transformer, the AC voltage needs to be rectified to DC voltage. This is typically accomplished using rectifier diodes or a bridge rectifier. Ensure that the rectifier is capable of handling the current requirements of your amplifier and choose high-quality diodes for better performance.
3. Filtering: The next step is filtering the rectified DC voltage to remove any residual AC ripple. Capacitors are used for this purpose, and their value and quality are crucial. Opt for high-quality electrolytic capacitors or, for better performance, consider using combination capacitors with low ESR (Equivalent Series Resistance) and high ripple current ratings.
4. Regulation: Voltage regulation is important for maintaining a stable voltage output, regardless of changes in the input voltage or load conditions. This can be achieved using linear or switching voltage regulators. Linear regulators are typically preferred for audiophile applications due to their low noise characteristics. Choose a regulator with sufficient current capacity and low dropout voltage.
5. Grounding and Noise Reduction: Proper grounding techniques are essential to minimize ground-loop noise and reduce interference. Separate the power supply ground from the amplifier signal ground and connect them at a single point. Employing star grounding and utilizing a dedicated ground plane can further reduce noise and improve signal integrity.
6. Heat Dissipation: Power supplies generate heat, so it’s important to provide adequate heat dissipation to prevent component overheating and ensure stable operation. Use heat sinks for power components such as rectifiers, regulators, and power transistors, and ensure proper airflow within the enclosure.
7. Protection Circuitry: Consider incorporating protection circuitry, such as overvoltage and overcurrent protection, to safeguard your amplifier and minimize the risk of damage in case of power supply faults or system malfunctions.
Building a high-quality power supply requires attention to detail and adherence to best practices. Follow the specifications provided by the components’ manufacturers, consult relevant resources, and ensure proper insulation, wiring, and safety precautions throughout the construction process.
Remember, a well-designed and properly built power supply is the foundation of an audiophile amplifier, providing clean and stable power to unleash the full potential of your system while delivering pristine sound quality.
Assembling the Amplifier Circuitry
Now that you have your components selected and the power supply built, it’s time to assemble the circuitry of your audiophile amplifier. This step is where the magic happens, as you bring together the various components to create a functional and high-performing amplifier.
1. Layout Planning: Before you begin assembling the circuitry, carefully plan the layout of your amplifier. Consider factors such as component placement, signal flow, and wiring routes to minimize crosstalk and interference. Ensure that there is enough space between components to avoid heat buildup and to facilitate easy access for future maintenance or modifications.
2. Printed Circuit Board (PCB): If you are using a pre-designed PCB, follow the manufacturer’s instructions for component placement and soldering. Ensure that each component is inserted in the correct orientation and that the solder joints are clean and secure. If you are building a point-to-point wired amplifier, take extra care to keep the wiring neat and organized.
3. Signal Path: Pay close attention to the signal path of your amplifier. Ensure that the input and output connectors are properly connected and that there are no loose connections or shorts. Double-check the wiring of the amplification stage, making sure the signal flows smoothly from input to output without any unnecessary impedance or noise.
4. Resistor and Capacitor Placement: Place the resistors and capacitors as close to their respective components as possible. This helps minimize signal degradation and interference. Use proper lead dress techniques to keep the wire lengths short and to minimize the risk of unintended interactions between components.
5. Tube Socket Installation (if using a tube amplifier): If you are building a tube amplifier, ensure that the tube sockets are securely mounted on the PCB or chassis. Take caution while inserting and removing tubes to avoid damaging the pins. Refer to the tube datasheets for proper pin configurations and thermal considerations.
6. Grounding and Shielding: Proper grounding and shielding techniques are crucial to minimize noise and interference. Connect the ground points of various components to a common ground plane using star grounding or bus bars. Consider implementing shielding for sensitive components or sections of the amplifier to further reduce unwanted noise.
7. Insulation and Protection: Insulate exposed leads and components to prevent accidental short circuits. Use heat shrink tubing, electrical tape, or insulating sleeves where necessary. Consider installing fuses or circuit breakers to protect your amplifier from power surges or component failures.
Throughout the process of assembling the amplifier circuitry, pay close attention to detail and take the necessary precautions to ensure proper insulation, wiring integrity, and safety. Regularly inspect and test the connections to catch any errors or faults early on.
Remember, building the amplifier circuitry requires patience and precision. Take your time, follow the schematic or PCB layout diagrams diligently, and double-check each connection to ensure the best possible signal flow and performance.
Wiring and Connecting the Circuit Components
With the amplifier circuitry assembled, it’s time to focus on wiring and connecting the various components. Proper wiring techniques and connections play a crucial role in ensuring optimal signal flow, minimizing noise, and maintaining the integrity of your audiophile amplifier.
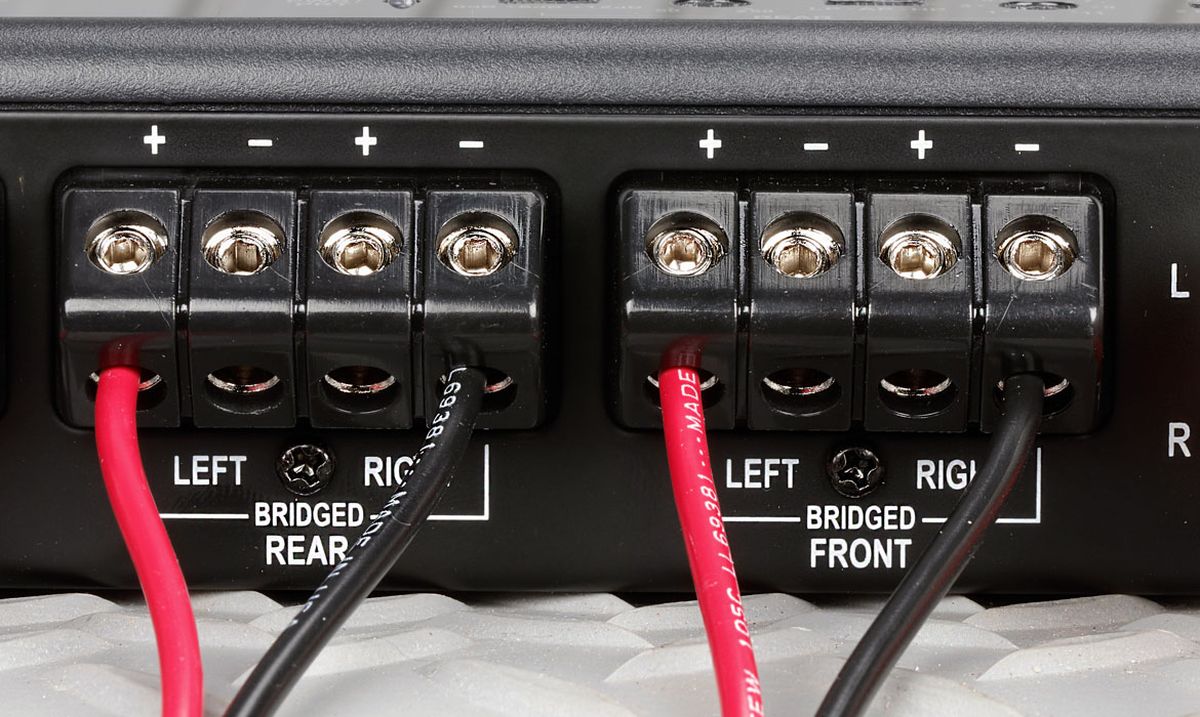
1. Signal Wiring: Start by wiring the input and output connectors of your amplifier. Use shielded cables for the audio signal path to minimize interference and ensure clean signal transmission. Keep the signal wiring as short as possible to reduce the risk of signal degradation and maintain signal integrity.
2. Power Wiring: Take care when wiring the power supply connections. Use appropriate gauge wire to handle the current requirements of your amplifier. Ensure that the power wiring is properly insulated, and the connections are tight and secure. Separate the power supply wiring from the signal wiring to minimize the risk of induced noise and interference.
3. Grounding: Proper grounding is crucial for minimizing ground loops and noise in the amplifier. Connect the ground points of the power supply and signal components to a common ground point, ensuring a solid and low-resistance connection. Use separate ground paths for the power and signal, connecting them at a single point to avoid ground loops.
4. Connection Integrity: Double-check all the connections to ensure they are tight and secure. Loose connections can lead to unstable operation, intermittent signals, or even damage to the components. Use proper crimping, soldering, or terminal connections depending on the requirements of each component.
5. Shielding: Consider implementing shielding techniques to protect sensitive components or sections of the amplifier from electromagnetic interference. Use metal enclosures or copper tape to shield critical circuitry or cable runs, ensuring the best possible signal quality.
6. Testing: After making all the necessary connections, perform a thorough test of the amplifier’s functionality. Ensure that all the inputs and outputs are working properly, and there are no anomalies or abnormalities in the sound. Use a multimeter to measure voltages and currents at various points in the circuit to verify proper operation.
7. Cable Management: Proper cable management is essential for a clean and organized amplifier layout. Use cable ties, wire looms, or cable management accessories to keep the wiring neat and organized. This not only improves the aesthetics but also facilitates easier troubleshooting and maintenance in the future.
Throughout the wiring and connection process, pay close attention to detail and follow best practices. Ensure that the connections are secure, wiring is properly insulated, and the signal path is protected from unwanted interference. By taking the time to wire and connect the circuit components meticulously, you can ensure optimal performance and reliability of your audiophile amplifier.
Testing and Troubleshooting the Amplifier
After completing the wiring and connecting the components of your audiophile amplifier, it’s crucial to thoroughly test and troubleshoot the system to ensure proper functionality and optimal performance.
1. Initial Power On: With caution, power on the amplifier and observe its behavior. Check for any signs of abnormal heat or smoke, indicating a potential problem. Listen for any unusual sounds or hums coming from the speakers.
2. Signal Testing: Connect an audio source to the amplifier and test its response to the input signal. Ensure that it amplifies the signal without introducing any distortion or noise. Use a multimeter to measure the output voltage across the speakers to ensure it matches the expected levels.
3. Functionality Testing: Test all the amplifier’s functions, such as volume control, input selection, and any additional features you have implemented. Verify that each function operates smoothly and accurately.
4. Listening Evaluation: Listen critically to the amplifier’s output using high-quality speakers and a variety of music genres. Pay attention to the overall sound quality, dynamics, detail, and balance. Evaluate the amplifier’s performance against your desired sound signature.
5. Troubleshooting: If any issues arise during testing, it’s important to troubleshoot and identify the root cause. Check for loose connections, faulty components, or incorrect wiring. Use a logic probe, oscilloscope, or multimeter to trace the signal path and identify any problem areas.
6. Component Replacement: If a faulty component is identified, replace it with a suitable replacement. Ensure compatibility with the amplifier’s specifications and adhere to proper handling and soldering techniques.
7. Repeat Testing: After troubleshooting and component replacement, repeat the testing process to ensure that the issue has been resolved and the amplifier is functioning as intended.
Remember to document any adjustments, modifications, or issues encountered during the testing and troubleshooting process. This information will be valuable for future reference and can aid in diagnosing any potential problems that may arise later.
If you encounter persistent issues that are difficult to resolve, don’t hesitate to seek advice from experienced audio enthusiasts or consult professional technicians. Sometimes, a fresh set of eyes and expertise can help identify and rectify complex issues.
By diligently testing and troubleshooting your audiophile amplifier, you can ensure that it performs optimally, delivering the best possible sound quality and providing you with countless hours of immersive audio enjoyment.
Fine-tuning the Sound Quality
Once you have tested and successfully troubleshooted your audiophile amplifier, it’s time to focus on fine-tuning the sound quality to achieve the desired sonic characteristics and maximize your listening experience. Fine-tuning involves adjustments that optimize the amplifier’s performance in terms of tonal balance, imaging, detail retrieval, and overall sound presentation.
1. Equalization: Use an equalizer or tone controls, if available, to adjust the frequency response of your amplifier. Carefully fine-tune the bass, midrange, and treble to achieve a pleasing tonal balance that suits your preference and the characteristics of your listening environment.
2. Speaker Placement: Experiment with the placement of your speakers to optimize soundstage imaging, depth, and clarity. Consider the recommendations provided by the speaker manufacturer and use techniques like the “rule of thirds” for the best positioning. Aim for a balanced and immersive soundstage that enhances the overall listening experience.
3. Burn-in Period: Allow your amplifier to go through a burn-in period, which involves continuous operation at moderate volumes for several hours or days. This process helps condition the components and allows the amplifier to reach its optimal performance. Take note of any changes in sound quality during this period, as the amplifier may improve over time.
4. Mains Power Conditioning: Consider using power conditioning devices or surge protectors to minimize electrical noise and fluctuations. Clean and stable power can significantly impact the sound quality of your amplifier. Experiment with different power cables and connectors to find optimal combinations that yield desirable results.
5. Component Upgrades: Consider upgrading critical components in your amplifier, such as capacitors or resistors, with higher-quality alternatives. These upgrades can often result in improved clarity, dynamics, and overall sound quality. However, be sure to research and consult with experts to ensure compatibility and achieve the desired sonic improvements.
6. Listening Sessions: Engage in critical listening sessions to evaluate and fine-tune the sound quality of your amplifier. Listen to a wide variety of music genres and pay attention to aspects such as instrument separation, soundstage width, detail resolution, and tonal accuracy. Make incremental adjustments based on your listening preferences until you achieve the desired sonic presentation.
7. Feedback and Iteration: Seek feedback from experienced audiophiles or audio forums to gain insights and suggestions for further sound refinement. Exchanging ideas and experiences can provide valuable perspectives and ideas for improving your amplifier’s sound quality.
Remember that fine-tuning is a subjective process, and the goal is to achieve sound reproduction that pleases your ears and meets your personal preferences. Take your time, be patient, and enjoy the journey of continual improvement as you refine the sonic performance of your audiophile amplifier.
Conclusion
Congratulations on completing the construction and fine-tuning of your very own audiophile amplifier! By following this comprehensive guide, you have gained valuable knowledge and achieved a deep understanding of the intricate process involved in building and optimizing a high-quality audio system.
Building an audiophile amplifier is a labor of love that requires meticulous attention to detail, a passion for audio excellence, and a desire to create a personalized listening experience. Throughout the journey, you have learned about the different types of amplifiers, selected the right components, assembled the circuitry, and fine-tuned the sound quality.
Your dedication to the construction process has resulted in a custom amplifier that not only meets your specific preferences but also delivers exceptional sound reproduction. Whether you are a seasoned DIY enthusiast or a beginner in the world of audio electronics, successfully building your own audiophile amplifier is a significant achievement worth celebrating.
As you enjoy the fruits of your labor, continue to explore and expand your knowledge of audio equipment and techniques. Continually seek ways to optimize and improve your system, whether it’s through component upgrades, exploring different signal sources, or experimenting with positioning and room acoustics.
Remember, the journey of audio excellence is a never-ending one. There’s always more to learn, discover, and refine. Embrace the process, experiment with different settings, and trust your ears as you continue to enjoy the immersive and captivating world of high-fidelity sound.
So, sit back, relax, and immerse yourself in the pure joy of music through your own handcrafted audiophile amplifier. Let it transport you to new sonic landscapes, revealing the intricacies and emotions of your favorite songs like never before.