Home>Production & Technology>MIDI>How To Send MIDI Channel 1 To Arduino

MIDI
How To Send MIDI Channel 1 To Arduino
Published: February 21, 2024
Learn how to send MIDI channel 1 to Arduino and unlock the potential of MIDI technology. Discover step-by-step instructions for integrating MIDI with Arduino.
(Many of the links in this article redirect to a specific reviewed product. Your purchase of these products through affiliate links helps to generate commission for AudioLover.com, at no extra cost. Learn more)
Table of Contents
Introduction
Sending MIDI data from a MIDI controller to an Arduino opens up a world of possibilities for creating interactive and responsive music and art installations. By establishing a connection between the MIDI controller and the Arduino, you can harness the power of MIDI signals to trigger various actions and control devices in real time. In this comprehensive guide, we will delve into the intricacies of setting up the Arduino to receive MIDI data from channel 1 and explore the steps involved in configuring the MIDI controller, writing the Arduino code, and testing the connection.
MIDI, which stands for Musical Instrument Digital Interface, is a versatile protocol that facilitates communication between musical instruments, controllers, and computers. It enables the transmission of musical information, such as note events, control changes, and other performance data, making it an indispensable tool for musicians, artists, and technology enthusiasts alike.
The Arduino, renowned for its flexibility and ease of use, serves as an ideal platform for processing incoming MIDI signals and executing customized tasks based on the received data. By integrating MIDI capabilities into an Arduino project, you can seamlessly incorporate musical elements into interactive installations, robotic performances, and a myriad of other creative endeavors.
Throughout this guide, we will navigate through the process of establishing a connection between a MIDI controller and an Arduino, with a specific focus on transmitting MIDI data from channel 1. By following the steps outlined in this tutorial, you will gain the knowledge and skills needed to embark on your own MIDI-based Arduino projects, unleashing your creativity and innovation in the realm of interactive art and music.
With a clear understanding of the immense potential that lies at the intersection of MIDI and Arduino, let's embark on this journey to harness the power of MIDI channel 1 and unlock new dimensions of creativity and expression in our Arduino projects.
Step 1: Setting up the Arduino
To embark on the journey of integrating MIDI channel 1 with an Arduino, the initial step involves setting up the Arduino board to receive and process incoming MIDI data. This process encompasses configuring the necessary hardware and software components to establish a seamless connection between the MIDI controller and the Arduino.
Hardware Configuration
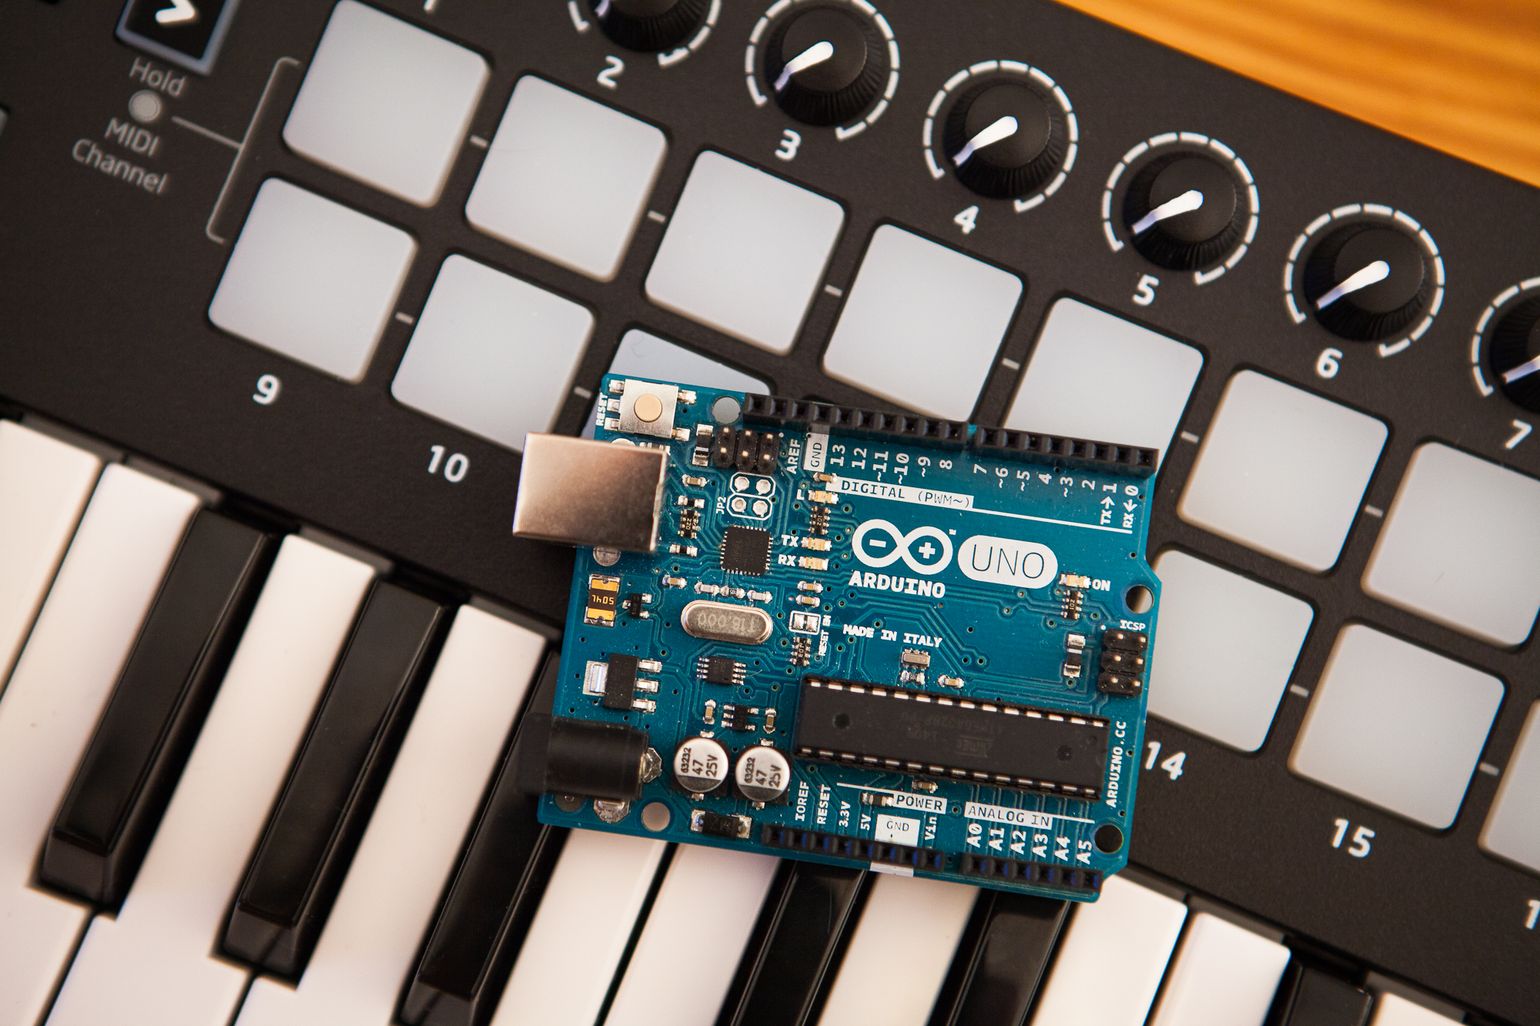
First and foremost, ensure that you have an Arduino board at your disposal. The Arduino Uno, Mega, or Leonardo are popular choices for MIDI projects due to their versatility and compatibility with MIDI communication. Once you have the Arduino board, connect it to your computer using a USB cable to enable communication with the Arduino Integrated Development Environment (IDE).
Software Setup
Next, launch the Arduino IDE on your computer, ensuring that the necessary drivers are installed to facilitate communication between the Arduino board and the IDE. If you are using a Windows-based system, the drivers may be automatically installed upon connecting the Arduino board. For macOS and Linux users, the Arduino IDE typically recognizes the Arduino board without the need for additional driver installations.
MIDI Library Installation
In order to process MIDI data on the Arduino, it is essential to install a MIDI library that enables the Arduino to interpret incoming MIDI messages. The "MIDI Library" by Forty Seven Effects is a widely used and reliable library for handling MIDI communication on the Arduino platform. To install the MIDI library, navigate to the Library Manager in the Arduino IDE, search for "MIDI Library," and proceed with the installation.
Verifying the Setup
Once the MIDI library is installed, it is crucial to verify that the Arduino board is correctly recognized by the Arduino IDE. Select the appropriate board type and port from the Tools menu in the Arduino IDE to ensure that the IDE is configured to communicate with the Arduino board effectively.
By meticulously following these steps, you can lay a solid foundation for integrating MIDI channel 1 with the Arduino, setting the stage for configuring the MIDI controller, writing the Arduino code, and ultimately testing the connection to unleash the full potential of MIDI-based interactions with the Arduino.
With the Arduino board primed and ready to process MIDI data, we are poised to delve into the subsequent steps that will culminate in a seamless integration of MIDI channel 1 with the Arduino, unlocking a realm of creative possibilities and interactive experiences.
Step 2: Configuring the MIDI Controller
Configuring the MIDI controller is a pivotal step in the process of integrating MIDI channel 1 with an Arduino. The MIDI controller serves as the source of MIDI data, transmitting signals that will be received and processed by the Arduino. By meticulously configuring the MIDI controller, you can ensure seamless communication and precise control over the MIDI data sent to the Arduino.
Selecting a MIDI Controller
The first consideration in configuring the MIDI controller is the selection of an appropriate device that aligns with the specific requirements of your project. MIDI keyboards, pad controllers, and knob-based controllers are popular choices, each offering unique capabilities for transmitting MIDI data. When choosing a MIDI controller, factors such as the number of available channels, control options, and compatibility with the Arduino should be taken into account to ensure optimal functionality.
Channel Configuration
In the context of sending MIDI data to the Arduino on channel 1, it is imperative to configure the MIDI controller to transmit data exclusively on channel 1. Many MIDI controllers provide the flexibility to specify the MIDI channel for outgoing data, allowing users to designate channel 1 as the primary channel for transmitting MIDI messages. This channel assignment ensures that the Arduino receives data specifically targeted for channel 1, enabling precise control and interpretation of the incoming MIDI signals.
Control Mapping
Once the MIDI controller is set to transmit data on channel 1, the next step involves mapping the controller's various inputs, such as keys, pads, knobs, or faders, to specific MIDI messages. This mapping process involves assigning MIDI note numbers, control change messages, or other relevant MIDI commands to the physical controls on the MIDI controller. By establishing this correspondence between the physical controls and MIDI messages, you can tailor the behavior of the MIDI controller to align with the requirements of your Arduino project, enabling seamless interaction and manipulation of MIDI data.
Testing and Calibration
After configuring the MIDI controller, it is essential to conduct thorough testing and calibration to ensure that the transmitted MIDI data aligns with the expected parameters. This testing phase involves verifying the functionality of each control on the MIDI controller, confirming the accurate transmission of MIDI messages on channel 1, and identifying any potential issues or discrepancies in the data being sent to the Arduino. Through meticulous testing and calibration, you can fine-tune the MIDI controller to deliver consistent and reliable MIDI data to the Arduino, setting the stage for seamless integration and interaction with the Arduino-based system.
By meticulously configuring the MIDI controller to transmit data on channel 1 and mapping its controls to relevant MIDI messages, you can establish a robust foundation for the subsequent steps of writing the Arduino code and testing the connection. This meticulous configuration process ensures that the MIDI controller becomes a precise and responsive instrument for transmitting MIDI data to the Arduino, enabling a seamless fusion of musical expression and interactive control within your Arduino projects.
Step 3: Writing the Arduino Code
Writing the Arduino code is a pivotal phase in the process of integrating MIDI channel 1 with the Arduino. This step involves crafting the necessary code to receive and interpret incoming MIDI data on channel 1, enabling the Arduino to respond to MIDI messages and execute predefined actions based on the received data. By meticulously crafting the Arduino code, you can harness the power of MIDI communication to create interactive and responsive behaviors within your Arduino projects.
MIDI Library Integration
The first crucial aspect of writing the Arduino code involves integrating the MIDI library into the Arduino sketch. The MIDI library provides a comprehensive set of functions and utilities for handling incoming MIDI messages, allowing the Arduino to parse and interpret MIDI data with precision. By including the MIDI library in the Arduino sketch, you gain access to a wealth of tools for processing MIDI events, note data, and control change messages, laying the groundwork for seamless interaction with the MIDI controller.
MIDI Message Handling
Once the MIDI library is integrated, the next step revolves around defining the necessary logic to handle incoming MIDI messages on channel 1. This entails setting up a MIDI input handler within the Arduino sketch to capture MIDI data arriving on channel 1. By implementing the appropriate event handlers and callback functions, you can capture note events, control changes, and other MIDI messages transmitted on channel 1, enabling the Arduino to respond dynamically to the incoming data.
Action Execution
With the ability to capture and interpret MIDI messages on channel 1, the Arduino code can be tailored to execute specific actions based on the received data. This may involve triggering sound synthesis, activating motors or lights, or manipulating visual displays in response to MIDI note events or control change messages. By mapping the incoming MIDI data to predefined actions within the Arduino code, you can orchestrate a synchronized interplay between the MIDI controller and the Arduino, bringing your creative vision to life through interactive and responsive behaviors.
Real-Time Responsiveness
An essential consideration in crafting the Arduino code is ensuring real-time responsiveness to incoming MIDI data. By implementing efficient and optimized code structures, the Arduino can swiftly process incoming MIDI messages on channel 1, enabling seamless and immediate responses to user interactions with the MIDI controller. This real-time responsiveness forms the cornerstone of creating engaging and dynamic experiences within Arduino projects, fostering a sense of fluidity and interactivity in the interaction between the MIDI controller and the Arduino.
Iterative Refinement
Throughout the process of writing the Arduino code, it is essential to embrace an iterative approach to refinement and optimization. By testing and fine-tuning the Arduino code, you can iteratively enhance its performance, responsiveness, and compatibility with the incoming MIDI data. This iterative refinement process empowers you to craft a robust and reliable codebase that seamlessly integrates with the MIDI controller, culminating in a harmonious fusion of MIDI-based interactions and Arduino-driven functionalities.
By meticulously crafting the Arduino code to integrate the MIDI library, handle incoming MIDI messages, execute predefined actions, and prioritize real-time responsiveness, you can pave the way for a seamless and immersive integration of MIDI channel 1 with the Arduino. This meticulous code crafting process empowers you to unlock the full potential of MIDI-based interactions within your Arduino projects, fostering a dynamic and expressive synergy between the MIDI controller and the Arduino.
Step 4: Testing the Connection
Testing the connection between the MIDI controller and the Arduino is a critical phase in the integration process, serving as a pivotal checkpoint to validate the seamless transmission and reception of MIDI data on channel 1. This testing phase encompasses a series of comprehensive checks and verifications to ensure that the MIDI controller effectively communicates with the Arduino, laying the groundwork for interactive and responsive interactions within Arduino projects.
Hardware Setup Verification
The initial step in testing the connection involves verifying the hardware setup of both the MIDI controller and the Arduino. Ensure that the MIDI controller is connected to the Arduino via the appropriate MIDI interface, such as a MIDI input port or a MIDI shield. Additionally, confirm that the Arduino is powered and properly configured to receive MIDI data, with the necessary connections and components in place to facilitate the communication between the MIDI controller and the Arduino.
MIDI Signal Reception
Once the hardware setup is validated, the next phase revolves around confirming the reception of MIDI signals by the Arduino. This entails sending MIDI data from the controller, such as pressing keys, activating pads, or manipulating control knobs, and monitoring the Arduino's response to the incoming MIDI messages. By observing the behavior of the Arduino in response to the transmitted MIDI data, you can ascertain whether the MIDI signals are successfully received and interpreted by the Arduino, providing crucial insights into the effectiveness of the connection.
Data Parsing and Interpretation
Beyond the reception of MIDI signals, it is imperative to delve into the process of parsing and interpreting the received MIDI data within the Arduino. By examining the parsed MIDI messages and their corresponding actions within the Arduino code, you can gain a deeper understanding of how the Arduino processes and responds to the incoming MIDI data. This analysis enables you to validate the accuracy and precision of the MIDI data interpretation, ensuring that the Arduino effectively translates the MIDI signals into actionable commands and behaviors.
Interactive Feedback
A pivotal aspect of testing the connection involves assessing the interactive feedback loop between the MIDI controller and the Arduino. This entails evaluating the responsiveness and fluidity of the interaction, observing how the Arduino dynamically reacts to user inputs from the MIDI controller. By engaging in interactive exchanges with the MIDI controller and observing the corresponding actions executed by the Arduino, you can gauge the seamless integration and real-time responsiveness of the MIDI-based interactions, fostering a sense of cohesive and immersive engagement within the Arduino project.
Iterative Optimization
Throughout the testing phase, it is essential to embrace an iterative approach to optimization and refinement. By identifying any discrepancies, latency issues, or unexpected behaviors in the MIDI communication, you can iteratively fine-tune the hardware setup, MIDI controller configuration, and Arduino code to enhance the robustness and reliability of the connection. This iterative optimization process empowers you to cultivate a seamless and responsive integration of MIDI channel 1 with the Arduino, fostering a harmonious synergy between the MIDI controller and the Arduino within your creative endeavors.
By meticulously testing the connection between the MIDI controller and the Arduino, you can validate the effectiveness and reliability of the MIDI-based interactions, paving the way for the seamless integration of MIDI channel 1 with the Arduino. This comprehensive testing phase serves as a pivotal milestone in the journey of leveraging MIDI capabilities within Arduino projects, culminating in a dynamic and expressive fusion of musical expression and interactive control within the realm of Arduino-based creations.
Conclusion
In conclusion, the integration of MIDI channel 1 with an Arduino presents a gateway to a realm of creative possibilities, where the fusion of musical expression and interactive control converges within the domain of Arduino-based projects. Through the meticulous process of setting up the Arduino, configuring the MIDI controller, writing the Arduino code, and testing the connection, we have embarked on a journey that encapsulates the essence of innovation, exploration, and artistic expression.
By delving into the intricacies of setting up the Arduino, we laid a solid foundation for processing incoming MIDI data and orchestrating dynamic interactions within the Arduino environment. The hardware and software configuration steps established a robust framework for the Arduino to receive and interpret MIDI signals, setting the stage for seamless integration with MIDI controllers and other musical instruments.
The meticulous configuration of the MIDI controller, with a specific focus on transmitting data on channel 1, exemplified the precision and attention to detail required to ensure seamless communication between the MIDI controller and the Arduino. By mapping the controller's controls to relevant MIDI messages and conducting thorough testing and calibration, we cultivated a responsive and reliable conduit for transmitting expressive musical data to the Arduino, fostering a harmonious synergy between the physical world of musical instruments and the digital realm of the Arduino platform.
The crafting of the Arduino code, enriched by the integration of the MIDI library and the implementation of real-time responsiveness, exemplified the art of transforming MIDI data into actionable commands and dynamic behaviors within the Arduino environment. This meticulous code crafting process empowered us to unlock the full potential of MIDI-based interactions, paving the way for immersive and interactive experiences that transcend traditional boundaries of musical expression and technological innovation.
Through the comprehensive testing of the connection, we validated the seamless transmission and reception of MIDI data on channel 1, affirming the effectiveness and reliability of the integration between the MIDI controller and the Arduino. This testing phase served as a pivotal checkpoint, offering crucial insights into the responsive and interactive feedback loop between the MIDI controller and the Arduino, culminating in a cohesive fusion of musical expression and interactive control within Arduino projects.
In essence, the integration of MIDI channel 1 with an Arduino transcends the realms of technology and art, fostering a dynamic synergy that empowers creators, musicians, and innovators to explore new frontiers of creativity and expression. By harnessing the power of MIDI within the Arduino environment, we have unlocked a world of interactive possibilities, where music, technology, and imagination converge to inspire the next wave of innovative and expressive endeavors.


