Home>Production & Technology>Metronome>How To Make A Metronome With Arduino
Metronome
How To Make A Metronome With Arduino
Published: January 15, 2024
Learn how to create a metronome using Arduino and enhance your musical practice sessions. Discover step-by-step instructions and unleash your rhythm with this DIY project.
(Many of the links in this article redirect to a specific reviewed product. Your purchase of these products through affiliate links helps to generate commission for AudioLover.com, at no extra cost. Learn more)
Table of Contents
Introduction
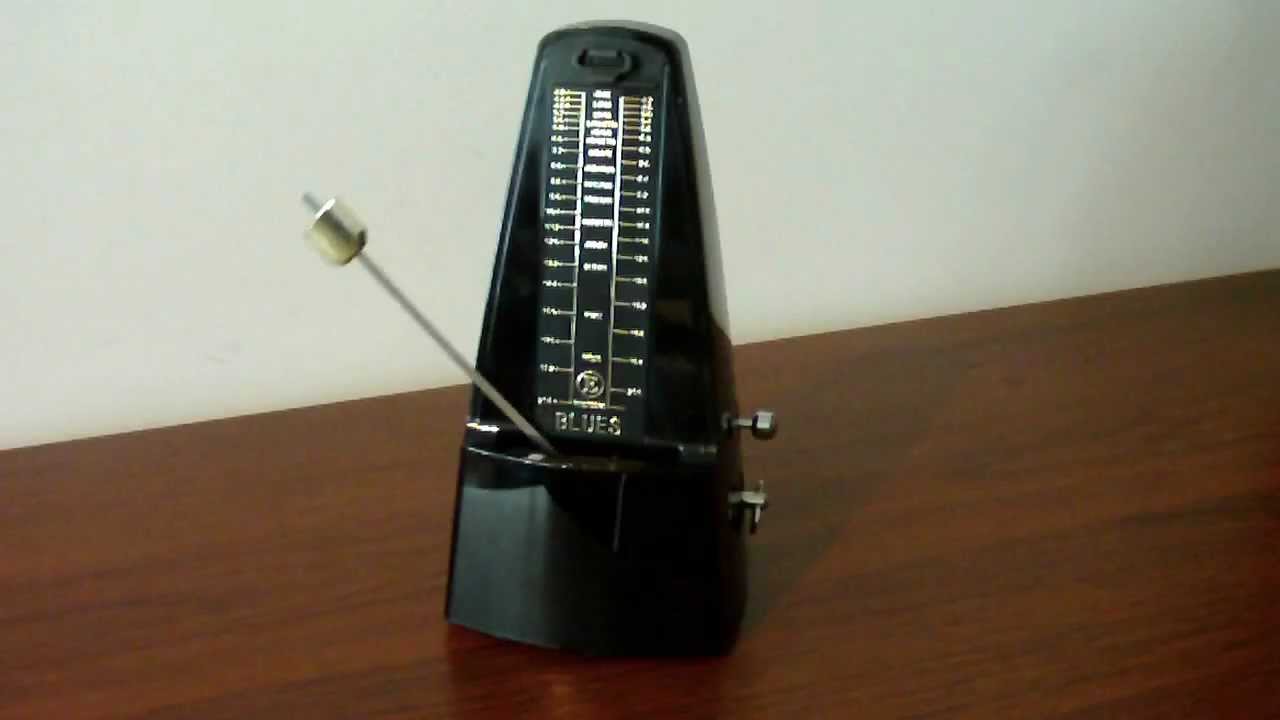
Welcome to the world of music and technology! If you are a musician or simply have a passion for music, you may have come across the term “metronome.” A metronome is an essential tool for musicians, helping them stay in time and develop a strong sense of rhythm. Traditionally, metronomes were mechanical devices that produced regular tick sounds or used a swinging pendulum to provide a visual indication of the tempo.
In today’s digital era, you can create your own metronome using an Arduino board, a buzzer, and some simple coding. Arduino is an open-source electronics platform that allows you to build and program interactive projects, making it a perfect choice for creating a DIY metronome. This article will guide you through the process of making your own metronome with Arduino, opening up endless possibilities for customization and personalization.
Creating a metronome with Arduino not only gives you a fun and educational project, but it also allows you to have a customizable tool that suits your specific needs. You can adjust the tempo, change the sound of the tick, and even add extra features like visual indicators or wireless connectivity. Whether you’re a musician looking for a reliable practice companion or an electronics enthusiast eager to explore Arduino, this project is a great starting point.
In this article, we will walk you through the step-by-step process of setting up the Arduino board, connecting the buzzer, programming the metronome, and testing it. By the end, you will have your very own metronome to help you stay in time and enhance your musical skills.
Materials Needed
Before we dive into the project, let’s gather all the materials you’ll need to create your own metronome with Arduino:
- Arduino Uno board
- Breadboard
- Passive Buzzer
- Jumper wires
- USB cable
- Computer with Arduino IDE installed
The Arduino Uno board is the heart of this project. It is a microcontroller board based on the ATmega328P chip and comes with built-in digital input/output pins, analog pins, and USB connectivity. The breadboard will act as a platform for prototyping and connecting various components.
The passive buzzer is an essential part of the metronome, as it will produce the tick sound at the desired tempo. Make sure you get a passive buzzer, not an active one, as the passive buzzer can be controlled directly by the Arduino.
Jumper wires will be used to make electrical connections between the components, and the USB cable will provide power and allow you to program the Arduino board. Lastly, you will need a computer with the Arduino IDE (Integrated Development Environment) installed. The Arduino IDE is where you will write and upload the code to the Arduino board.
Once you have gathered all these materials, you are ready to move on to the next step and set up your Arduino board for the metronome project.
Step 1: Setting Up the Arduino Board
Before we can start programming our metronome, we need to set up the Arduino board and make sure everything is properly connected. Follow these simple steps to get started:
- Connect the Arduino Uno board to your computer using the USB cable. This will provide power to the board and establish a communication connection.
- Open the Arduino IDE on your computer. If you haven’t installed it yet, you can download it from the official Arduino website.
- In the Arduino IDE, go to “Tools” and select the correct board model. In this case, choose “Arduino Uno”.
- Select the appropriate port for your Arduino board. You can find the port under the “Tools” menu. If you are unsure which port to choose, you can check the port name in the device manager of your computer.
- Now that the board is properly set up, it’s time to connect the buzzer.
That’s it! Your Arduino board is now ready to be programmed and used as the brain of your metronome project. With the board connected and the necessary settings configured, we can move on to the next step of connecting the buzzer.
Step 2: Connecting the Buzzer
Now that we have the Arduino board set up, it’s time to connect the buzzer. The buzzer will be responsible for producing the tick sound that defines the tempo of our metronome. Follow these steps to connect the buzzer:
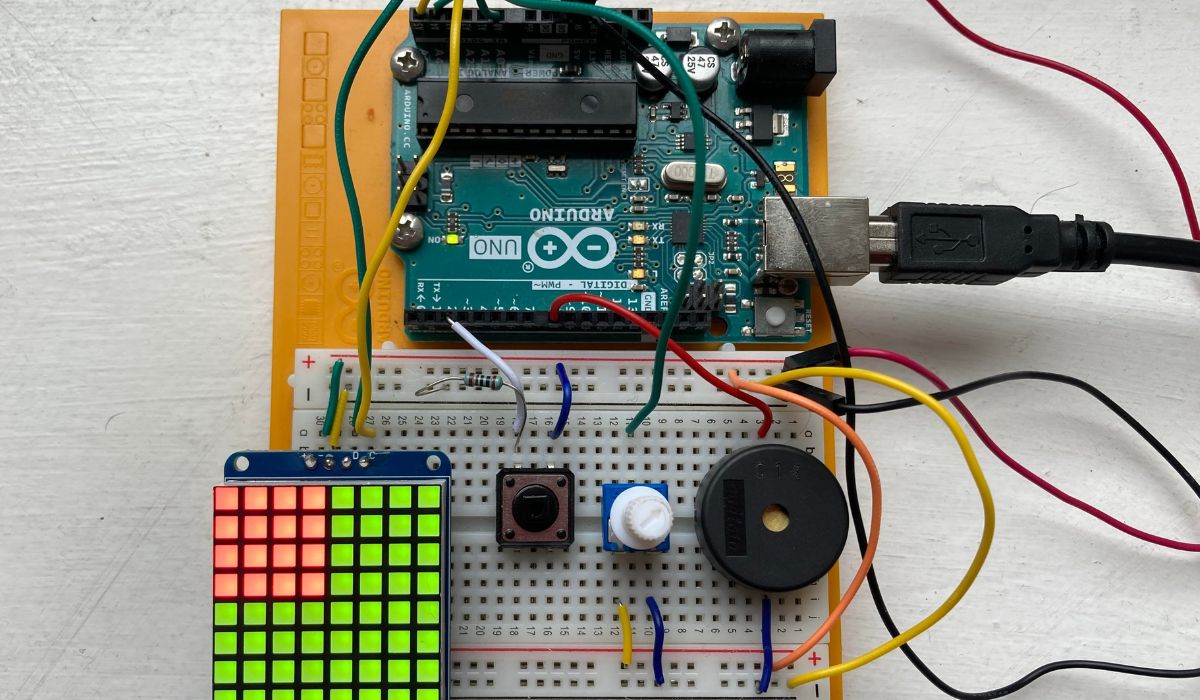
- Take your breadboard and place it on a flat surface. The breadboard will act as the platform for connecting components.
- Connect one leg of the buzzer to any digital pin on the Arduino board. In this example, we will use pin D8.
- Connect the other leg of the buzzer to the ground (GND) pin on the Arduino board.
That’s it! The buzzer is now properly connected to the Arduino board. The signal from the Arduino will control the buzzer, making it emit the tick sound at the desired tempo. With the buzzer connected, we can move on to the next step and start programming the metronome.
Step 3: Setting the Tempo
Now that we have the Arduino board and the buzzer connected, we can proceed to set the tempo for our metronome. The tempo determines the speed at which the tick sound is produced, and it is measured in beats per minute (BPM).
To set the tempo, follow these steps:
- In the Arduino IDE, create a new sketch by clicking on “File” and then “New”.
- Now, we need to define the tempo as a variable. Add the following line of code at the beginning of your sketch:
- This line of code declares a variable named “tempo” and initializes it with a value of 120. You can change this value to your desired tempo.
- Next, we need to calculate the duration of each beat based on the tempo. Add the following line of code after the previous line:
- This line of code calculates the beat duration in milliseconds. The formula divides 60000 (the number of milliseconds in a minute) by the tempo value, giving us the duration of each beat.
c
int tempo = 120;
c
float beatDuration = 60000.0 / tempo;
Voila! You have successfully set the tempo for your metronome. By adjusting the value of the “tempo” variable, you can change the speed of the tick sound.
In the next step, we will dive into the exciting part – programming the metronome logic. Stay tuned!
Step 4: Programming the Metronome
Now that we have the tempo set, it’s time to program the logic for our metronome. The program will control the buzzer to produce the tick sound at the specified tempo. Follow these steps to program the metronome:
- In the Arduino IDE, create a new sketch if you haven’t already done so.
- Declare a global variable to keep track of the timing. Add the following line of code at the beginning of your sketch:
- This line of code initializes the “previousMillis” variable to 0. We will use this variable to track the elapsed time between each tick sound.
- In the `void setup()` function, add the following lines of code:
- This code sets pin D8 as an output pin, which is connected to the buzzer.
- In the `void loop()` function, add the following lines of code:
- This code checks if the elapsed time since the last tick sound is greater than or equal to the beat duration. If it is, the buzzer is turned on for a brief moment and then turned off.
c
unsigned long previousMillis = 0;
c
pinMode(8, OUTPUT); // Set pin D8 as an output pin
c
unsigned long currentMillis = millis(); // Get the current time in milliseconds
if (currentMillis – previousMillis >= beatDuration) {
previousMillis = currentMillis;
digitalWrite(8, HIGH); // Turn on the buzzer
delay(10); // Pause for a short duration
digitalWrite(8, LOW); // Turn off the buzzer
}
Congratulations! You have successfully programmed the logic for your metronome. The program will now create the tick sound at the set tempo, providing a rhythmic reference for your music practice.
In the final step, we will test the metronome to ensure everything is working as expected. Let’s move on!
Step 5: Testing the Metronome
With the metronome programmed and ready to go, it’s time to test it and see if everything is working as expected. Follow these steps to test your metronome:
- Make sure your Arduino board is still connected to your computer.
- Click on the “Upload” button in the Arduino IDE to compile and upload the code to the Arduino board.
- Once the code is uploaded, you should start hearing the tick sound coming from the buzzer. Adjust the tempo value in the code and upload it again to test different tempos.
- Observe the LED on the Arduino board or listen to the tick sound to ensure that the metronome is working at the correct tempo.
While testing the metronome, pay close attention to the timing and sound quality. Ensure that the ticks are consistent and evenly spaced, providing an accurate reference for your musical practice.
If everything is functioning correctly, congratulations! You have successfully created your own metronome using Arduino. You can now use your metronome to practice your instrument, improve your timing, and enhance your musical skills.
Feel free to experiment with different tempos, sounds, and additional features to personalize your metronome further. You can add visual indicators, LCD displays, or even wireless connectivity to control the metronome remotely.
Remember, the key to becoming a proficient musician lies not only in talent but also in practice and discipline. Your homemade metronome will be an indispensable tool to help you achieve your musical goals and stay on rhythm.
Good luck with your musical endeavors, and enjoy your new Arduino metronome!
Conclusion
Congratulations on successfully creating your own metronome using Arduino! You have explored the intersection of music and technology, and now have a powerful tool to enhance your musical practice. Let’s recap what we have accomplished:
Throughout this step-by-step guide, you have learned how to set up the Arduino board, connect a buzzer, set the tempo, program the metronome logic, and test the final product. By following these instructions, you have gained hands-on experience with Arduino programming and have seen how a simple circuit can transform into a functional musical device.
A metronome is an invaluable asset for musicians of all skill levels. It helps develop a strong sense of rhythm, improve timing, and enhance overall musicality. With your DIY Arduino metronome, you have the flexibility to customize the tempo, adjust the sound, and even add additional features to suit your specific needs.
As you continue your musical journey, remember to use the metronome as a guide during practice sessions. Start by practicing with slow tempos to build accuracy and gradually increase the speed as you become more comfortable. Your metronome will be there every step of the way, providing a consistent beat and helping you reach your full potential as a musician.
Beyond the immediate benefits for musicians, this project has also introduced you to the exciting world of Arduino and electronics. The skills you have gained can be applied to a wide range of other projects, from home automation to robotics and beyond. Arduino opens up endless possibilities for creativity and innovation, allowing you to bring your ideas to life.
Now that you have created your own metronome, continue to explore and experiment. Try adding visual indicators, wireless connectivity, or even integrating it into a larger musical setup. Let your creativity guide you as you continue to expand your knowledge and skills.
Remember, practice is the key to progress as a musician. With your Arduino metronome by your side, you are equipped with a versatile tool that will help you refine your timing, develop precision, and unlock your full musical potential. So, keep practicing, keep experimenting, and keep pushing the boundaries of what is possible with Arduino and music!