Home>Production & Technology>MP3>How To Play An MP3 CD

MP3
How To Play An MP3 CD
Modified: January 22, 2024
Learn how to play an MP3 CD on your device with this comprehensive guide. Discover the steps and tips to enjoy your favorite MP3 tracks on the go.
(Many of the links in this article redirect to a specific reviewed product. Your purchase of these products through affiliate links helps to generate commission for AudioLover.com, at no extra cost. Learn more)
Table of Contents
Introduction
Welcome to the world of MP3 CDs! In this digital age, where music is easily accessible through online streaming platforms, MP3 CDs offer a unique and convenient way to enjoy your favorite tunes. Whether you’re a music enthusiast looking to expand your collection or someone who prefers a physical format, MP3 CDs provide a versatile and portable option.
But what exactly is an MP3 CD? How can you create one? And how do you play it? In this article, we will guide you through the process of playing an MP3 CD, from selecting the right CD to troubleshooting common issues.
Before we dive into the details, let’s first understand what an MP3 CD is. Unlike traditional audio CDs that can only store a limited number of tracks, an MP3 CD can hold hundreds of songs in the compressed MP3 format. This means you can create a compilation of your favorite tracks or even entire albums on a single disc. Plus, with the ability to store large amounts of data, MP3 CDs are not limited to audio files – you can also include other types of media such as podcasts, audiobooks, and more.
To play an MP3 CD, you’ll need a few things: a computer with a CD burner, a blank CD-R (or CD-RW) disc, and a compatible playback device. The computer will be used to create the MP3 CD by burning the audio files onto the disc, while the playback device could be a CD player, car stereo, or even a DVD player that supports MP3 playback.
Now that we have a basic understanding of MP3 CDs and the necessary requirements, let’s explore the step-by-step process of playing an MP3 CD. Get ready to embark on a musical journey with the power of MP3 technology!
What is an MP3 CD?
In simple terms, an MP3 CD is a type of compact disc that can store audio files in the popular MP3 format. It allows you to create a compilation of your favorite songs, albums, or even other media files on a single disc, making it a convenient and space-saving option for music enthusiasts.
The primary advantage of an MP3 CD is its storage capacity. Unlike traditional audio CDs that can only hold around 70-80 minutes of music, an MP3 CD can store hundreds of songs, thanks to the MP3 compression algorithm. This compression reduces the file size of audio tracks without significantly compromising sound quality, allowing for much higher storage capabilities.
An MP3 CD can be created by burning MP3 files onto a CD-R (CD-Recordable) or CD-RW (CD-Rewritable) disc using a computer with a CD burner. The process involves selecting the desired audio files and then “burning” them onto the disc, creating a playable MP3 CD.
One of the notable features of MP3 CDs is their compatibility with various playback devices. Most modern CD players, car stereos, DVD players, and even some gaming consoles support MP3 CD playback. This means you can enjoy your music not only on your computer but also on the go or in different settings.
It’s important to note that not all CD players or devices can play MP3 CDs. Older CD players or those specifically designed for audio CDs may not recognize or read MP3 CD formats. Therefore, before creating an MP3 CD, ensure that the devices you plan to use for playback are compatible with MP3 CDs.
Furthermore, an MP3 CD is not limited to solely storing audio files. You can also include other types of media, such as podcasts, audiobooks, or even personal recordings, making it a versatile option for organizing and accessing various forms of multimedia.
Now that we understand what an MP3 CD is and its advantages let’s move on to the process of creating and playing an MP3 CD.
Requirements
Before you can start creating and playing MP3 CDs, there are a few essential requirements you’ll need to fulfill. Let’s take a look at what you’ll need:
- Computer: You will need a computer with a CD burner to create the MP3 CD. Most modern computers come equipped with a CD/DVD drive that can also write to CD-Rs or CD-RWs. Ensure that your computer has the necessary hardware and software to burn CDs.
- Blank CD-R or CD-RW Disc: A blank CD-R or CD-RW disc is required to create the MP3 CD. CD-R discs are write-once and cannot be erased or rewritten, whereas CD-RW discs are rewritable, allowing you to add, remove, or modify files later if needed.
- MP3 Files: Compile a collection of MP3 audio files that you want to include on the CD. These can be individual songs, albums, or various media files like podcasts or audiobooks. Make sure you have the necessary rights to use the files or that they are from legal sources.
- Compatible Playback Device: To play the MP3 CD, you will need a device that supports MP3 CD playback. This could be a standard CD player, car stereo, portable CD player, DVD player, or even gaming consoles. Check the specifications of your device to ensure MP3 CD compatibility.
- Burning Software: Your computer should have CD burning software installed. Popular options include Nero Burning ROM, ImgBurn, or even the native burning capabilities provided by operating systems like Windows or macOS. Ensure that the software can create MP3 CDs specifically.
It’s worth noting that while most modern computers are equipped with CD burners, some newer laptops or devices may not have an integrated CD/DVD drive. In such cases, you can consider using an external CD/DVD drive that connects to your computer via USB.
Now that you have all the necessary requirements in place, you’re ready to move on to the next steps of creating and playing an MP3 CD.
Step 1: Choosing the Right CD
When it comes to creating an MP3 CD, choosing the right type of CD is crucial. The two main options you have are CD-R (CD-Recordable) and CD-RW (CD-Rewritable).
A CD-R is a write-once disc, meaning that once you have burned data onto it, you cannot erase or modify the contents. This type of disc is recommended if you want to create a permanent compilation of songs or files that you don’t plan on changing in the future. CD-Rs are accessible on most CD players and devices that support MP3 CD playback.
On the other hand, a CD-RW is a rewritable disc, allowing you to add, remove, or modify files even after they have been burned onto the disc. This flexibility is useful if you want to create an MP3 CD that can be edited or updated with new songs or files. However, it’s important to note that not all CD players or devices support CD-RW discs, so be sure to check the compatibility of your playback device.
Consider your specific needs and preferences when choosing between CD-R and CD-RW. If you’re looking for a one-time compilation that won’t require any changes, a CD-R will suffice. On the other hand, if you want the flexibility to modify or update the content on the disc, you might opt for a CD-RW.
In addition to the type of CD, it’s important to choose a reliable and reputable brand. Well-known brands like Sony, Verbatim, and Memorex generally offer better compatibility and reliability in terms of playback. Ensure you’re using a high-quality CD to minimize the risk of errors or skipping during playback.
Lastly, make sure you have a sufficient number of CDs based on the size of your MP3 files and how many tracks you want to include. Keep in mind that CD-Rs typically have a capacity of 700 to 800 MB, which can hold roughly 150 to 200 MP3 files, depending on their size. Plan accordingly to avoid running out of storage space or having to split your compilation across multiple discs.
With the right type and quality of CD selected, you’re ready to move on to the next step of creating your MP3 CD.
Step 2: Creating the MP3 CD
Now that you have the right CD and your desired MP3 files at hand, it’s time to create your MP3 CD. This involves the process of burning the audio files onto the CD using your computer’s CD burner and burning software.
Here’s a step-by-step guide to creating an MP3 CD:
- Open your preferred burning software on your computer. Popular options include Nero Burning ROM, ImgBurn, or the native burning capabilities provided by operating systems like Windows or macOS.
- Choose the option to create a new ‘Data’ or ‘MP3’ project, depending on the software you’re using.
- Locate the MP3 files you want to include on your MP3 CD. You can do this by navigating to the folder where your files are stored within the software’s file browser or by dragging and dropping the files into the project window.
- Arrange the MP3 files in the desired order. You can usually do this by dragging and dropping the files within the project window. The playback order of the files on the CD will follow this arrangement.
- Check the available disc space at the bottom of the software’s interface to ensure that your selection of MP3 files fits within the storage capacity of your CD.
- Once you’re satisfied with the selection and arrangement of the files, click on the ‘Burn’ or ‘Start’ button to begin the burning process.
- Wait for the burning process to complete. This may take a few minutes, depending on the number and size of the MP3 files you’re burning. The software will usually display a progress bar or completion notification when the process is finished.
- Eject the CD from your computer’s CD/DVD drive and check that the burned MP3 CD is free from any visible scratches or smudges that could affect playback.
It’s important to note that the specific steps and interface of your burning software may vary. Refer to the software’s user guide or help section if you encounter any difficulties or have questions about the burning process.
Once the MP3 CD is created, you’re ready for the next step: inserting the disc into a compatible playback device.
Step 3: Inserting the MP3 CD
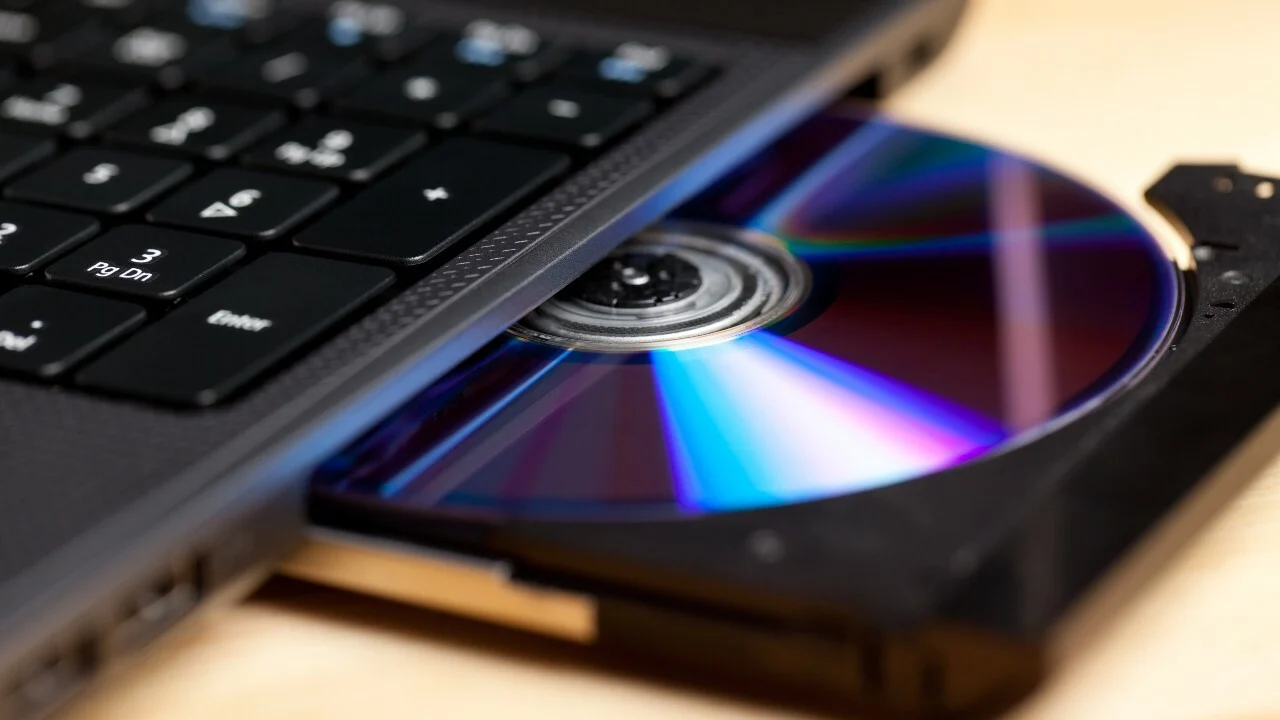
With your newly created MP3 CD in hand, it’s time to insert it into a compatible playback device. This could be a CD player, car stereo, portable CD player, DVD player, or even a gaming console that supports MP3 CD playback.
Follow these steps to insert the MP3 CD:
- First, locate the CD slot or tray on your playback device. The location of the CD slot may vary depending on the device.
- Gently hold the MP3 CD by its edges, making sure to avoid touching the shiny data side of the disc.
- Align the CD correctly with the CD slot or tray, ensuring that it is inserted in the right direction. Most CD slots or trays have small icons or markings indicating the correct orientation.
- Press the CD gently into the slot or tray until you feel slight resistance. Do not force the CD into the device, as this can cause damage to both the CD and the playback device.
- Once inserted properly, the playback device will typically pull the CD in automatically or require a gentle push to fully load the CD into the device.
- Give the device a few moments to recognize and read the contents of the MP3 CD. This process may take a few seconds, depending on the device and the number of files on the CD.
- Once the device recognizes the MP3 CD, it will typically display the title of the disc or the list of tracks on its screen or interface. Use the device’s controls, such as buttons or a touchscreen, to navigate through the tracks and start playing the desired file.
If the playback device does not recognize the MP3 CD or displays an error message, try the following troubleshooting steps:
- Ensure that the MP3 CD is inserted correctly with the shiny data side facing down, as specified by the device.
- Check the compatibility of the playback device to ensure that it supports MP3 CD playback. Refer to the device’s user manual or specifications for more information.
- Inspect the MP3 CD for any visible scratches or smudges. Clean the disc using a soft cloth, wiping from the center to the outer edge, and try again.
- If the CD is still not recognized, try playing it on a different compatible playback device to troubleshoot whether the issue lies with the CD or the original playback device.
Once the MP3 CD is successfully inserted and recognized by the playback device, you can proceed to the next step of choosing the desired track or adjusting playback settings to enhance your listening experience.
Step 4: Choosing a Playback Device
When it comes to playing an MP3 CD, selecting the right playback device is essential to ensure smooth and enjoyable playback. The device you choose will depend on your specific needs and preferences. Here are a few factors to consider when choosing a playback device:
- CD Players: Dedicated CD players are a popular choice for playing MP3 CDs. These devices are designed specifically for audio playback and often offer features like shuffle play, repeat mode, and track navigation. Look for a CD player that supports MP3 CD playback and offers the functions you desire.
- Car Stereos: If you enjoy listening to music while driving, consider a car stereo that supports MP3 CD playback. Many modern car stereos come equipped with this feature, allowing you to enjoy your favorite tunes on the road. Check your car stereo’s specifications or consult with a professional to ensure compatibility.
- Portable CD Players: Portable CD players provide the convenience of on-the-go music listening. Look for a portable CD player that supports MP3 CD playback and offers additional features like anti-skip protection and a long battery life for uninterrupted enjoyment.
- DVD Players: DVD players often have the capability to play MP3 CDs in addition to DVDs. If you have a DVD player at home, check if it supports MP3 CD playback to utilize its functionality for your music collection.
- Gaming Consoles: Some gaming consoles, such as the PlayStation and Xbox, offer the ability to play MP3 CDs. If you already have a gaming console, check its specifications or consult the manufacturer’s website to confirm MP3 CD playback support.
- Computer or Laptop: Your computer or laptop can also serve as a playback device for MP3 CDs. Ensure that your computer has a CD/DVD drive and the necessary software, such as a media player, to play the files. You can connect external speakers or headphones for better audio quality.
Consider your listening environment, whether it’s at home, in the car, or on the go, as well as the features and functionality you require when selecting a playback device. Additionally, check whether the device supports features like playlist creation, customizable equalizer settings, or remote control functionality to enhance your overall audio experience.
Remember to refer to the user manual or consult with the manufacturer if you have any questions about the compatibility or functionality of a specific device.
Once you’ve chosen the right playback device, you’re ready to play your MP3 CD and experience the joy of your carefully curated music collection.
Step 5: Navigating through the Tracks
Once you have inserted the MP3 CD into your chosen playback device, it’s time to navigate through the tracks and find the music you want to listen to. The process may vary slightly depending on the device you are using, but here are some general steps to help you navigate through the tracks:
- On the display of your playback device, you will typically see the name of the MP3 CD or a list of the tracks.
- Use the device’s control buttons, touchscreen, or remote control to navigate through the tracks. Most devices have buttons or a jog wheel that allow you to scroll through the track list.
- Depending on the device, you can often skip to the next or previous track using specific buttons or controls. Look for buttons labeled “Next,” “Previous,” or directional buttons that allow you to move up or down the track list.
- Some devices also provide options for sorting the tracks, such as alphabetically, by album, or by artist. This can make it easier to find specific songs or albums, especially if you have a large number of tracks on the MP3 CD.
- Many playback devices also allow you to create playlists from the tracks on the MP3 CD. This feature lets you customize the order of songs and create personalized playlists for different moods or occasions.
- Experiment with the different features and controls of your playback device to familiarize yourself with its navigation capabilities. Refer to the device’s user manual if you need more specific instructions.
It’s important to note that not all playback devices offer the same level of navigation features. Some simpler devices may only allow you to play the tracks in sequential order without the ability to skip or shuffle. More advanced devices, on the other hand, may offer additional features like shuffle play, repeat mode, or the ability to jump to a specific track number.
Take some time to explore the navigation options of your chosen playback device to fully enjoy your MP3 CD and easily find the music you want to listen to.
Now that you know how to navigate through the tracks on your MP3 CD, let’s move on to the next step: adjusting playback settings to optimize your audio experience.
Step 6: Adjusting Playback Settings
To enhance your listening experience while playing an MP3 CD, it’s important to familiarize yourself with the playback settings of your chosen device. By adjusting these settings, you can optimize the sound quality, customize the audio output, and tailor the playback experience to suit your preferences.
Here are some common playback settings you might find on your device:
- Equalizer: The equalizer allows you to adjust the balance of different audio frequencies, such as bass, treble, and midrange. It lets you fine-tune the sound to match your personal preference or optimize it for specific music genres. Common equalizer presets include “Rock,” “Pop,” “Jazz,” and “Classical,” or you can manually adjust the sliders to create a custom EQ setting.
- Volume Control: Adjusting the volume is an essential setting to ensure your music is played at the desired level. Increase or decrease the volume using the dedicated volume control buttons or adjust it through the on-screen interface of your playback device. Be mindful of the surrounding environment and your hearing health when setting the volume.
- Repeat Mode: Repeat mode allows you to repeat a specific track, a selection of tracks, or the entire MP3 CD. This can be useful if you want to continuously listen to a favorite song or album without interruption.
- Shuffle Play: Shuffle play randomly selects the order in which the tracks are played. It adds an element of surprise to your music listening experience by mixing up the sequence of songs on the MP3 CD.
- Sound Effects: Some devices offer additional sound effects or audio enhancements to enhance the listening experience. This may include effects like surround sound, 3D audio, or virtual soundstaging. Adjust these settings to create a more immersive and dynamic soundstage.
- Display Settings: On devices with a visual display, you may have the option to customize the information shown, such as track name, artist, album, or elapsed time. This allows you to view the details that are most important to you while enjoying your MP3 CD.
Take some time to explore the settings menu or options on your playback device to discover the available features and adjust them to your liking. Experiment with different equalizer presets, shuffle play, or sound effects to find the combination that best suits your audio preferences and the genre of music you’re listening to.
Remember, the playback settings may vary depending on the specific device and brand you are using. Refer to the user manual or consult the manufacturer’s website for more detailed instructions on adjusting settings for your particular device.
Once you’ve adjusted the playback settings to your liking, you’re all set to enjoy your MP3 CD with a customized and optimized audio experience.
Step 7: Troubleshooting Common Issues
While playing an MP3 CD is generally a straightforward process, you may encounter some common issues along the way. Here are a few troubleshooting tips to help you resolve these issues and ensure smooth playback:
- CD Not Recognized: If the playback device does not recognize the MP3 CD, ensure that it is inserted correctly with the data side facing down. Clean the disc, removing any visible scratches or smudges. If the issue persists, try playing the CD on a different compatible device to determine whether the problem lies with the CD or the original playback device.
- Skipping or Stuttering Playback: If the MP3 CD playback skips, stutters, or buffers frequently, it could be due to a scratched or dirty disc. Clean the disc gently using a soft cloth, wiping from the center to the outer edge. Make sure the disc is free from any smudges or fingerprints. If the problem persists, try playing the CD on a different playback device to rule out a device-specific issue.
- Incompatible Device: If you’re experiencing compatibility issues with the playback device, check whether it supports MP3 CD playback. Older or specialized CD players may not be designed to read MP3 CD formats. Refer to the device’s user manual or contact the manufacturer for more information. In such cases, consider using a different device that is compatible with MP3 CDs.
- Incorrect Track Order: If the tracks on the MP3 CD are not playing in the desired order, it could be due to the device’s default playback settings. Check if the device has a “Track Order” or “Playback Order” feature that allows you to adjust the sequence. Alternatively, you can rearrange the track order when creating the MP3 CD to ensure they are played in your preferred sequence.
- Poor Sound Quality: If you’re experiencing poor sound quality, first check the connection between the playback device and the speakers or headphones. Ensure that the cables are securely connected and not damaged. If the issue persists, try adjusting the equalizer settings on the playback device to optimize the sound or consider using external speakers or headphones for better audio output.
- Device Freezing or Not Responding: If the playback device freezes or becomes unresponsive during MP3 CD playback, try restarting the device. If the issue persists, check if there are any firmware updates available for the device and install them if necessary. In some cases, a factory reset may be required to resolve the issue. Consult the device’s user manual or contact the manufacturer for assistance.
If you encounter any other issues that are not covered here, refer to the device’s user manual or contact the manufacturer’s support for further guidance. They will have specific troubleshooting steps and recommendations based on the device’s model and specifications.
By following these troubleshooting tips, you can resolve common issues and ensure a smooth and enjoyable experience while playing your MP3 CD.
Conclusion
Congratulations! You’ve reached the end of this guide on how to play an MP3 CD. We have covered all the necessary steps to successfully create and enjoy your MP3 CD. From choosing the right CD to troubleshooting common issues, you now have the knowledge and confidence to fully immerse yourself in the world of MP3 CDs.
Remember, an MP3 CD offers a convenient and versatile way to enjoy your favorite music and other media files. With the ability to store hundreds of songs on a single disc, you can create personalized compilations or collections without sacrificing audio quality or portability.
Whether you choose to play your MP3 CD on a dedicated CD player, car stereo, portable CD player, or even a gaming console, make sure to adjust the playback settings to optimize your listening experience. Explore the equalizer settings, experiment with shuffle play, and customize the sound effects to suit your preferences and enhance your enjoyment.
If you encounter any issues such as skipping, compatibility problems, or poor sound quality, refer back to the troubleshooting tips provided in Step 7. They will help you resolve common problems and ensure smooth playback.
Now it’s time to gather your favorite MP3 files, select the right CD, and embark on your musical journey with an MP3 CD. Enjoy the convenience, versatility, and high-quality audio that this format has to offer. Let the music play and immerse yourself in the joy of your carefully curated collection!

