Home>Production & Technology>Sound Effects>How To Put Sound Effects On A Youtube Video

Sound Effects
How To Put Sound Effects On A Youtube Video
Modified: January 22, 2024
Learn how to add captivating sound effects to your YouTube videos with our step-by-step guide. Enhance your content with the perfect audio accompaniment.
(Many of the links in this article redirect to a specific reviewed product. Your purchase of these products through affiliate links helps to generate commission for AudioLover.com, at no extra cost. Learn more)
Table of Contents
- Introduction
- Step 1: Choose the Right Sound Effects
- Step 2: Download Sound Effects
- Step 3: Import Video and Sound Effects into Video Editing Software
- Step 4: Arrange the Timeline
- Step 5: Adjust Sound Effects Volume and Timing
- Step 6: Preview the Video with Sound Effects
- Step 7: Export and Upload the Video with Sound Effects
- Conclusion
Introduction
Have you ever watched a YouTube video and been amazed by the immersive sound experience? The perfectly timed sound effects can greatly enhance the overall impact of a video, making it more engaging and captivating for viewers. Whether you’re a vlogger, filmmaker, or content creator, adding sound effects to your YouTube videos can take them to the next level.
In this article, we will guide you through the process of putting sound effects on a YouTube video, step by step. You don’t need to be a professional sound engineer or video editor to achieve incredible results. With the right tools and techniques, anyone can make their videos more dynamic and entertaining.
From choosing the right sound effects to seamlessly integrating them into your video, we will cover all the essential steps to help you create a truly immersive audio-visual experience. So, let’s dive in and unlock the secrets of adding professional sound effects to your YouTube videos!
Before we begin, it’s important to note that the process may vary depending on the video editing software you’re using. However, the general principles and steps discussed in this article can be applied to most popular video editing platforms.
Now, let’s get started on this exciting journey to elevate your YouTube videos with captivating sound effects!
Step 1: Choose the Right Sound Effects
The first step in adding sound effects to your YouTube video is selecting the perfect ones that align with the theme, mood, and content of your video. Sound effects can evoke emotions, set the tone, and enhance the overall storytelling experience.
Here are a few tips to help you choose the right sound effects:
- Identify the purpose: Determine the purpose of the sound effect in your video. Is it to add emphasis, create atmosphere, or enhance a specific action or event? Clearly understanding the role of the sound effect will help you narrow down your options.
- Consider the mood: Think about the mood you want to evoke in your video. Are you aiming for excitement, suspense, happiness, or something else? The sound effect should align with the intended mood and enhance it.
- Match the theme: Ensure that the sound effects you choose are aligned with the theme or topic of your video. For example, if you’re creating a travel vlog, you may want to include sound effects related to nature, transportation, or cultural elements.
- Use reliable sources: Look for reputable websites and libraries that offer a wide range of high-quality sound effects. There are many paid and free options available, such as SoundBible, Freesound, and PremiumBeat.
- Preview and experiment: Take the time to listen to different sound effects and experiment with how they fit into your video. Play around with different combinations to find the perfect match.
Remember, the goal is to enhance the viewer’s experience without overpowering or distracting them from the main content of the video. Carefully selecting the right sound effects will contribute to a more immersive and professional end result.
Now that you have a clear idea of how to choose the right sound effects, let’s move on to the next step: downloading the sound effects you’ve selected.
Step 2: Download Sound Effects
Once you have identified the perfect sound effects for your YouTube video, the next step is to download them onto your computer. This will allow you to have the sound effects readily available for use in your video editing software.
Here’s how you can download sound effects:
- Choose a reliable source: Select a trusted website or sound library that offers a wide variety of sound effects. Ensure that the website provides high-quality files that are compatible with your video editing software.
- Browse or search for the desired sound effect: Navigate the website or library to find the sound effect you want to use. You can either browse through different categories or use the search bar to look for specific sound effects.
- Click on the download button: Once you have found the desired sound effect, click on the download button or link provided next to it. Some websites may offer different file formats, so choose the one that is compatible with your video editing software.
- Save the file: Choose a location on your computer where you want to save the downloaded sound effect. It’s a good idea to create a dedicated folder for all your sound effects for easy access in the future.
It’s worth mentioning that while there are many free sound effects available online, some websites also offer premium sound effects for a fee. Depending on your budget and requirements, you can choose between the two options to find the most suitable sound effects for your video.
Once you have downloaded the sound effects, you’re ready to bring them into your video editing software for further editing and integration. In the next step, we will discuss how to import your video and sound effects into the editing software.
Step 3: Import Video and Sound Effects into Video Editing Software
With your desired sound effects downloaded, it’s time to import them into your video editing software alongside your video footage. This step allows you to have everything in one place for seamless editing and synchronization.
Follow these steps to import your video and sound effects:
- Launch your video editing software: Open the video editing software you’ll be using to create your YouTube video. Popular options include Adobe Premiere Pro, Final Cut Pro, and iMovie.
- Create a new project: Start a new project in your video editing software. Set the project settings according to the desired video resolution, frame rate, and aspect ratio.
- Import your video: Locate the video file on your computer and import it into your project. Depending on the editing software, you can usually do this by clicking on the import button or dragging and dropping the video file directly into the project timeline.
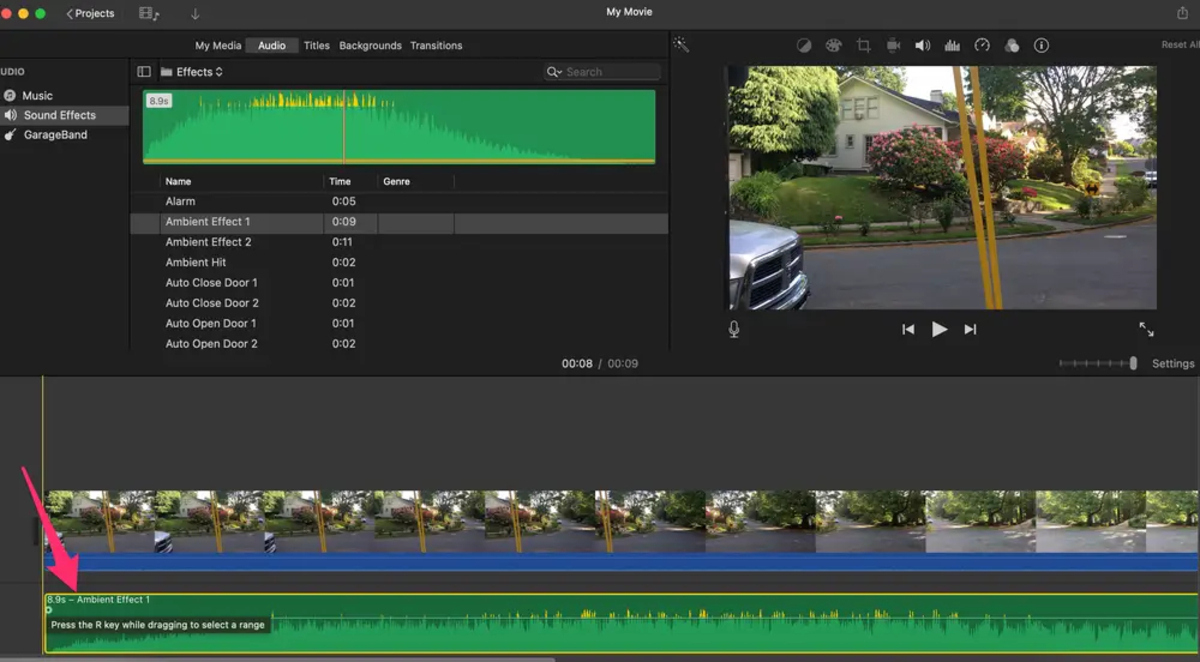
- Import your sound effects: Similarly, import the downloaded sound effects into your project. Most editing software allows you to import audio files in a similar manner to importing video files. Make sure to place the sound effects in a separate audio track or layer for easier manipulation and control.
By importing both the video and sound effects into your editing software, you can easily access and synchronize them for precise editing and timing adjustments. This puts you in full control of the audio-visual elements of your YouTube video.
Now that your video and sound effects are imported, you can move on to the next step: arranging them on the timeline.
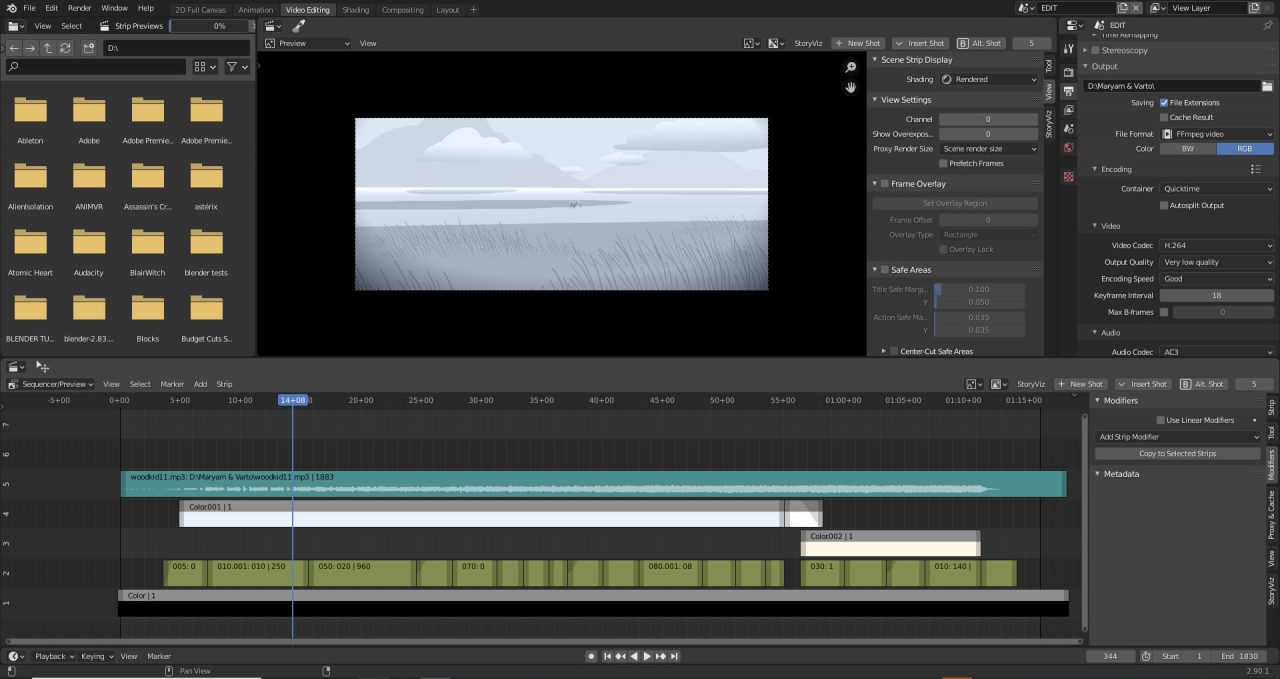
Step 4: Arrange the Timeline
With your video footage and sound effects imported into the video editing software, it’s time to arrange them on the timeline. This step involves organizing the different elements to achieve the desired flow and synchronization of the visuals and sound effects.
Follow these steps to arrange the timeline:
- Sync audio with video: If your video has an accompanying audio track or dialogue, make sure it is synchronized properly. Adjust the placement of the video clips and sound effects on the timeline to align with the desired timing.
- Place sound effects strategically: Identify the specific points in your video where you want to add sound effects. Drag and drop the sound effect files onto the timeline at the respective positions. Use multiple audio tracks or layers if needed to separate different sound effects and maintain clarity.
- Trim and adjust clips: Trim the video clips and sound effects as necessary to ensure they start and end at the desired time. Use the editing software’s tools to adjust the duration and volume levels of the sound effects for optimal balance and impact.
- Add transitions: Consider adding transitions between different video clips or scenes to create seamless transitions. Experiment with different transition effects offered by your video editing software to enhance the overall visual and auditory experience.
As you arrange the timeline, pay attention to the visual storytelling and ensure that the sound effects truly enhance the content of your video. The goal is to create a cohesive and immersive experience for your viewers.
Once you’re satisfied with the arrangement of your timeline, you can move on to the next step: adjusting the volume and timing of the sound effects.
Step 5: Adjust Sound Effects Volume and Timing
Now that you have arranged the timeline and placed your desired sound effects, it’s time to fine-tune their volume levels and timing. This step ensures that the sound effects seamlessly blend with the video footage and create the desired impact.
Follow these steps to adjust sound effects volume and timing:
- Select the sound effect: Click on the sound effect clip on the timeline to select it. This will enable you to modify its properties.
- Adjust volume levels: Use the volume controls or audio mixer in your video editing software to adjust the volume level of the sound effect. Ensure that the sound effect is audible but not overpowering, allowing it to complement the visuals.
- Sync timing: If the sound effect needs to be synchronized with a specific action or event in the video, adjust its timing accordingly. You can drag the sound effect clip on the timeline to align it precisely with the desired moment or use the editing software’s tools to fine-tune the timing.
- Create fade-ins and fade-outs: Consider adding fade-in and fade-out effects to your sound effects. This smooths out any abrupt volume changes and creates a more natural transition between clips.
- Preview and make adjustments: Play the video with the sound effects to preview the impact. If necessary, make further adjustments to the volume levels and timing to achieve the desired result.
By carefully adjusting the volume and timing of your sound effects, you can create a more immersive and professional audio experience. The objective is to ensure that the sound effects enhance the visual elements without overpowering them, resulting in a harmonious integration of audio and video.
Once you are satisfied with the volume and timing adjustments, it’s time to move on to the next step: previewing the video with sound effects.
Step 6: Preview the Video with Sound Effects
Now that you have adjusted the volume and timing of your sound effects, it’s important to preview the video to ensure that the sound effects blend seamlessly and enhance the overall viewing experience. This step allows you to identify any areas that might require further adjustments before finalizing your YouTube video.
Follow these steps to preview the video with sound effects:
- Play the video: Use the playback controls in your video editing software to play the video from the beginning.
- Focus on the sound effects: Pay close attention to how the sound effects integrate with the visuals. Evaluate whether they enhance the intended mood, emphasize important moments, or create the desired impact.
- Take note of any issues: If you come across any areas where the sound effects are too loud, too soft, or out of sync, make note of them for adjustment.
- Make further adjustments if needed: If you identify any issues during the preview, go back to the timeline and make the necessary adjustments to the volume levels, timing, or placement of the sound effects.
- Preview again: Once you have made the adjustments, preview the video again to ensure that the changes have improved the overall audio-visual experience.
Previewing the video with sound effects allows you to fine-tune the final result and ensure that the audio complements and elevates the visuals. This step is crucial in delivering a polished and professional YouTube video.
Once you are satisfied with the preview and have made any necessary adjustments, you are ready to move on to the final step: exporting and uploading the video with sound effects.
Step 7: Export and Upload the Video with Sound Effects
After perfecting the integration of sound effects into your YouTube video, it’s time to export your final edited masterpiece and upload it to your YouTube channel. This step makes your video accessible to a wide audience and allows you to share your creative work with the world.
Follow these steps to export and upload your video with sound effects:
- Select the appropriate export settings: Navigate to the export settings within your video editing software. Choose the desired output format and resolution for your YouTube video. Most video editing software offers specific presets for YouTube uploading to ensure optimal quality and compatibility.
- Specify the file name and location: Give your video a descriptive and memorable file name. Choose a location on your computer to save the exported video file.
- Export the video: Start the export process and wait for your video to be processed and saved. The time it takes will depend on the length and complexity of your video.
- Open YouTube and sign in: Visit YouTube’s website and sign in to your account. If you don’t have an account, create one to start uploading videos.
- Upload the video: Click on the upload button (usually represented by a camera icon) and select the exported video file from your computer. Give your video a compelling title, description, and appropriate tags to optimize its discoverability on YouTube.
- Set privacy and other options: Choose the privacy settings for your video, whether you want it to be public, private, or unlisted. You can also select other options such as adding captions, annotations, or end screens.
- Wait for the upload to complete: Depending on the size and internet connection speed, the upload process may take some time. Ensure that your internet connection remains stable until the upload is completed.
- Publish and promote your video: Once the upload is complete, you can choose to publish your video immediately or schedule it for a future release. Share your video on social media platforms and engage with your audience to maximize its reach.
Congratulations! You have successfully exported and uploaded your YouTube video with captivating sound effects. Sit back and watch as your video attracts views, likes, and comments from your audience.
Remember, the process of adding sound effects to your YouTube videos can be a creative and iterative one. Don’t be afraid to experiment, learn, and refine your techniques as you continue to create captivating content.
Now, go ahead and make your videos stand out with professional sound effects that enhance the overall viewer experience!
Conclusion
Adding sound effects to your YouTube videos is an effective way to enhance the overall viewing experience and captivate your audience. By carefully selecting the right sound effects, downloading them, and integrating them seamlessly into your video, you can take your content to new heights.
In this article, we have guided you through the step-by-step process of putting sound effects on a YouTube video. From choosing the right sound effects that align with your video’s theme and mood to adjusting their volume and timing, every step plays a crucial role in creating a professional and immersive audio-visual experience.
Remember to preview your video with sound effects to ensure they blend seamlessly with the visuals and create the desired impact. If adjustments are needed, go back to the timeline and make the necessary modifications until you achieve the perfect balance.
Once you are satisfied with your edited video, it’s time to export and upload it to your YouTube channel. Use the appropriate export settings to maintain optimal quality, and don’t forget to add a compelling title, description, and tags to maximize your video’s discoverability.
By following these steps and unleashing your creativity, you can elevate your YouTube videos to new heights and engage your viewers on a whole new level. So, go ahead, choose the right sound effects, and let your imagination run wild!
Now, it’s time to bring your videos to life with captivating sound effects. Start exploring the vast world of sound libraries, experiment with different combinations, and unlock the true potential of your YouTube content.