Home>Devices & Equipment>Car Audio>How To Run Two Batteries For Car Audio
Car Audio
How To Run Two Batteries For Car Audio
Modified: January 22, 2024
Learn how to run two batteries for enhanced car audio performance. Discover the best ways to optimize your car audio system with our expert tips and guidance.
(Many of the links in this article redirect to a specific reviewed product. Your purchase of these products through affiliate links helps to generate commission for AudioLover.com, at no extra cost. Learn more)
Table of Contents
Introduction
When it comes to car audio systems, every enthusiast wants to achieve the best possible sound quality. However, high-powered audio systems can put a strain on the car’s electrical system, leading to issues such as dimming headlights, voltage drops, and even battery drain. To overcome these challenges, many car audio enthusiasts opt for a dual battery setup.
In this article, we will explore the benefits of using two batteries for car audio systems and provide step-by-step guidance on how to install and set up a dual battery system for optimal performance.
By having two batteries in your car, you not only increase the available power but also ensure that the electrical demands of the audio system are met without compromising the performance of other car components. Whether you have a powerful subwoofer or an advanced amplifier, a dual battery setup can provide the necessary power to fuel your audio system’s performance.
Furthermore, running your car audio system on a separate battery helps to preserve the primary battery for essential functions like starting the engine. This ensures that you never have to worry about draining the battery and being stranded with a dead car.
Now that we understand the advantages of using two batteries for car audio, let’s dive deeper into the setup process to get your system up and running seamlessly.
Why Use Two Batteries for Car Audio?
Using two batteries for your car audio system offers several key advantages:
- Increased Power: High-powered car audio systems draw a significant amount of electrical current. By having two batteries, you can distribute the load and ensure that your audio system receives a consistent and stable power supply. This helps to prevent voltage drops and improves the overall sound quality.
- Reduced Strain on the Electrical System: Car audio systems, especially those with additional components like amplifiers and subwoofers, can put a strain on the car’s electrical system. By running the audio system on a separate battery, you minimize the risk of overloading the electrical system and protect other critical components, such as the alternator and starter motor.
- Battery Preservation: The primary battery of your car is responsible for starting the engine and powering essential functions. By using a secondary battery for your audio system, you prevent excessive discharging and extend the lifespan of the primary battery.
- Elimination of Voltage Fluctuations: Power fluctuations can affect the performance of car audio systems, causing audio distortion or even system damage. With a dual battery setup, you can create a steady power supply, reducing the chances of voltage fluctuations and ensuring consistent audio quality.
- Improved Battery Life: Car audio systems often demand a lot of power during operation, which can drain a single battery quickly. With two batteries, each battery has a lower workload, improving overall battery life and reducing the frequency of battery replacements.
It is important to note that while a dual battery setup is beneficial for high-powered car audio systems, it may not be necessary for all setups. If your audio system is relatively modest and the stock electrical system can handle the load without issues, a single battery may suffice. However, if you experience dimming lights or notice a strain on the electrical system, considering a dual battery setup is a wise choice.
Setting Up Two Batteries for Car Audio
Setting up a dual battery system for your car audio requires careful planning and installation. Here are the steps to follow:
- Determine the Battery Placement: Find a suitable location in your vehicle to install the second battery. It should be close to the primary battery but well-secured, away from any moving parts or sources of heat.
- Select the Right Battery: Choose a deep-cycle battery for the second battery. Deep-cycle batteries are designed to handle continuous discharging and recharging, making them more suitable for car audio applications than standard automotive batteries.
- Install a Battery Mount: Securely mount the second battery using a battery tray or mount specifically designed for automotive use. This ensures that the battery remains stable and protected.
- Size the Wiring: Select the appropriate-size wiring for connecting the batteries. The wiring should be able to handle the current requirements of your audio system without causing excessive resistance or voltage drops.
- Connect the Batteries: Connect the positive terminal of the primary battery to the positive terminal of the second battery using appropriate-sized battery cables. Similarly, connect the negative terminals.
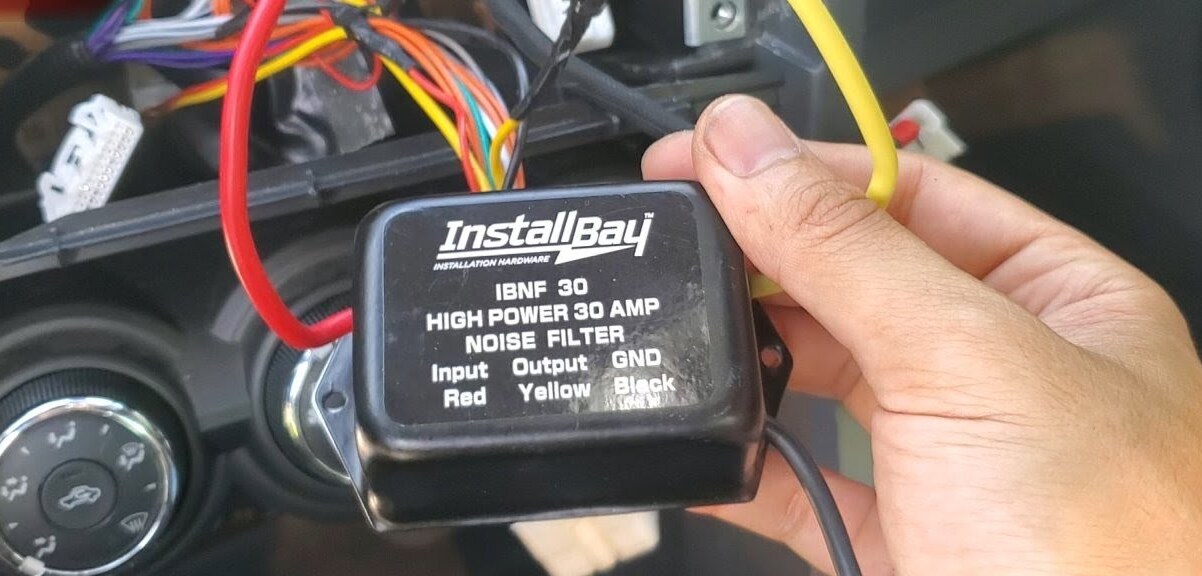
- Install a Battery Isolator: A battery isolator is a device that allows the charging system to charge both batteries while keeping the two electrical systems isolated from each other. Install the battery isolator between the alternator and the two batteries.
- Connect the Audio System: Connect the positive terminal of the second battery to an appropriate power distribution block or distribution panel. From there, connect the audio system’s power wire to the distribution block. Ensure proper grounding for the system as well.
- Test the System: Start the vehicle and check the voltage at both batteries to ensure that they are charging properly. Test the audio system to ensure that it is functioning correctly and receiving sufficient power.
Keep in mind that the installation process may vary depending on the make and model of your vehicle, as well as the specific components of your car audio system. It is recommended to consult the user manuals and seek professional assistance if needed.
When setting up the dual battery system, prioritize safety and ensure that all connections are secure, properly insulated, and protected from potential damage. Taking these precautions will help to ensure the longevity and reliable performance of your car audio system.
Choosing the Right Batteries
When setting up a dual battery system for your car audio, selecting the right batteries is crucial for optimal performance and longevity. Here are some key factors to consider when choosing batteries:
- Battery Type: Opt for deep-cycle batteries rather than standard automotive batteries. Deep-cycle batteries are designed to handle continuous discharging and recharging, making them better suited for the demands of car audio systems.
- Battery Capacity: Consider the capacity, measured in ampere-hours (Ah), of the batteries. The higher the capacity, the more power the battery can hold and deliver. Determine the power requirements of your audio system and choose batteries with sufficient capacity to meet those needs.
- Battery Size: Take into account the available space in your vehicle for battery installation. Measure the dimensions of the battery compartment to ensure a proper fit. Consider compact battery models if space is limited.
- Battery Quality: Invest in batteries from reputable brands known for their reliability and durability. High-quality batteries are more likely to provide consistent power output and have a longer lifespan.
- Battery Maintenance: Consider maintenance requirements. Some batteries may require periodic maintenance, such as checking electrolyte levels and keeping terminals clean. If you prefer a maintenance-free option, select batteries with sealed construction.
- Battery Budget: Set a budget for your battery purchase and choose batteries that provide good value for money. Remember, investing in high-quality batteries may be more expensive initially but can save you money in the long run by providing better performance and durability.
It is also worth noting that for audio systems with higher power demands, it may be necessary to use batteries of the same capacity for each battery in the dual battery setup. This ensures that both batteries share the load evenly and prolongs their lifespan.
Additionally, consult your vehicle’s manufacturer guidelines and specifications to ensure compatibility with the chosen batteries and to understand any specific requirements or recommendations.
By carefully considering these factors, you can choose the right batteries that meet the power requirements of your audio system, fit your vehicle’s constraints, and provide reliable performance for an immersive car audio experience.
Wiring the Two Batteries
Properly wiring the two batteries in your dual battery setup is essential for both safety and optimal performance. Here are the steps to follow when wiring the two batteries:
- Determine Cable Size: Calculate the appropriate cable size based on the power requirements of your car audio system and the distance between the batteries. Selecting the correct cable size helps minimize voltage drops and ensures efficient power transfer.
- Connect the Positive Terminals: Connect the positive terminal of the primary battery to the positive terminal of the second battery using a suitable-sized positive battery cable. Ensure a secure connection by using crimped or soldered connectors.
- Connect the Negative Terminals: Connect the negative terminal of the primary battery to the negative terminal of the second battery using a suitable-sized negative battery cable. Again, ensure a secure connection using crimped or soldered connectors.
- Add Fusible Links: Install fusible links near the positive terminal of each battery. Fusible links act as safety devices that protect against electrical short circuits and excessive current flow. Select the appropriate amperage for the fusible links based on your system’s power requirements.
- Secure and Insulate the Wiring: Ensure that all wiring is properly secured using wire mounts or clamps to prevent movement or damage. Additionally, use heat-shrink tubing or electrical tape to insulate all connections and prevent short circuits or exposed wiring.
It is essential to pay attention to safety precautions when working with the electrical system of your vehicle. Disconnect the negative terminal of the primary battery before starting any wiring work to prevent electrical accidents and protect the vehicle’s systems.
Additionally, refer to the user manuals of your batteries and consult with professionals if needed to ensure proper wiring techniques and adherence to safety standards.
By following these steps and using the correct wiring techniques, you can create a reliable and safe electrical connection between the two batteries in your dual battery setup. This ensures efficient power transfer and promotes the longevity and performance of your car audio system.
Connecting the Batteries to the Car Audio System
Once the two batteries are properly wired in your dual battery setup, the next step is to connect the batteries to your car audio system. Follow these steps to ensure a seamless connection:
- Connect the Positive Terminal: Connect the positive terminal of the second battery to a power distribution block or distribution panel using an appropriately sized power cable. The distribution block serves as a central hub for distributing power to various components of your car audio system.
- Connect the Audio System Power Wire: From the distribution block, connect the power wire of your car audio system to the appropriate terminal. Ensure a secure connection and use crimped or soldered connectors for optimal conductivity.
- Connect the Negative Terminal: Connect the negative terminal of your car audio system to a solid ground point in the vehicle. A dedicated ground point, such as a chassis ground, ensures proper grounding for your audio system.
It is important to use appropriately-sized cables for connecting the batteries and the audio system. The cable size should be able to handle the current requirements of your audio system without causing excessive resistance or voltage drops. Refer to manufacturer guidelines and consult professionals if needed to determine the correct cable size.
Additionally, ensure that all connections are secure, properly insulated, and protected from potential damage. Properly routing and securing the cables helps to prevent them from interfering with other components or being damaged by moving parts.
Before completing the connections, double-check all connections and ensure that the primary battery is properly reconnected. Once all connections are secure, you can proceed to test your car audio system to ensure that it is functioning correctly and receiving sufficient power.
By following these steps and ensuring proper connections, you can create a reliable and efficient electrical link between your dual battery setup and your car audio system. This promotes stable power delivery and enhances the performance of your audio system while protecting the vehicle’s electrical system.
Installing a Battery Isolator
Installing a battery isolator is a crucial step in a dual battery setup for car audio systems. A battery isolator ensures that charging power from the vehicle’s alternator goes to both batteries while keeping the electrical systems separate. Follow these steps to install a battery isolator:
- Select the Right Battery Isolator: Choose a battery isolator that is compatible with your vehicle’s electrical system and the power requirements of your car audio system. Look for reputable brands that offer reliable and efficient battery isolators.
- Locate a Suitable Mounting Location: Find a suitable location in your vehicle to mount the battery isolator. It should be easily accessible and close to the batteries and alternator. Ensure that the mounting location is secure and protected from moisture or excessive heat.
- Disconnect the Battery: Disconnect the negative cable of your vehicle’s battery to prevent any electrical accidents while working on the installation.
- Mount the Isolator: Mount the battery isolator in the chosen location using the appropriate mounting hardware. Follow the manufacturer’s instructions for proper installation and ensure that the isolator is securely attached.
- Connect the Wiring: Connect the wiring according to the manufacturer’s instructions. Typically, the isolator will have different terminals for the batteries and the alternator. Use appropriate-sized cables and connectors to ensure proper connections and minimize power loss.
- Reconnect the Battery: Reconnect the negative cable of the vehicle’s battery after ensuring that all connections are secure and properly insulated.
Once the battery isolator is installed, it will automatically detect when the alternator is charging and distribute the power to both batteries, keeping them properly charged. With a battery isolator in place, you can enjoy the benefits of a dual battery setup without the risk of overcharging or excessive power drain from one battery.
It is important to note that installation procedures may vary depending on the specific battery isolator model and vehicle. Refer to the manufacturer’s instructions and consult with professionals if needed to ensure proper installation and adherence to safety guidelines.
With a properly installed battery isolator, you can ensure efficient charging of both batteries in your dual battery setup and maintain the overall stability and performance of your car audio system.
Testing the Dual Battery Setup
After setting up the dual battery system for your car audio, it is essential to perform thorough testing to ensure everything is functioning correctly. Follow these steps to test your dual battery setup:
- Start the Vehicle: Start the vehicle and allow it to run for a few minutes to ensure that both batteries are receiving charge from the alternator.
- Check Battery Voltage: Use a multimeter to measure the voltage of each battery. The readings should be within an acceptable range, typically around 12.6 to 12.8 volts for fully charged batteries.
- Monitor Voltage Drop: While the vehicle is idling, turn on various components of your car audio system, such as the radio, amplifiers, and subwoofers. Monitor the battery voltage to ensure that it remains stable and doesn’t drop significantly. A voltage drop may indicate inadequate power supply or wiring issues.
- Test Audio System Performance: Listen to your car audio system and make sure that all components are functioning correctly. Check for any audio distortion, abnormal noises, or sudden drops in volume, which may indicate issues with power supply or grounding.
- Observe Charging Behavior: Monitor how the batteries respond during extended use of the car audio system. Make note of any rapid battery drain or excessive heat buildup, as this could indicate a problem with the setup or insufficient power capacity.
- Inspect Connections and Wiring: Visually inspect all connections, cables, and wiring for any signs of damage, loose connections, or overheating. Tighten any loose connections and address any issues promptly to maintain optimal performance.
If any issues or abnormalities are detected during testing, it is advisable to consult with a professional or experienced installer to diagnose and troubleshoot the problem. They can offer expert guidance and help resolve any technical issues that may affect the performance of your dual battery setup.
By thoroughly testing your dual battery setup, you can ensure that it is functioning as intended, providing sufficient power for your car audio system, and preserving the longevity of your batteries.
Maintenance and Troubleshooting Tips
Maintaining and troubleshooting your dual battery setup for car audio is essential to ensure reliable performance and prevent potential issues. Here are some maintenance and troubleshooting tips to keep in mind:
- Regularly Check Battery Voltage: Monitor the voltage of both batteries periodically using a multimeter. If you notice a significant drop in voltage or one battery consistently loses charge faster than the other, it may indicate a problem with the battery or the charging system.
- Inspect Battery Connections: Regularly inspect the battery connections, including terminals and cables, for any signs of corrosion or looseness. Clean the terminals and tighten any loose connections to ensure proper electrical conductivity.
- Keep Batteries Clean: Keep the batteries clean and free from dirt, debris, and moisture. Regularly wipe down the battery surfaces and use a wire brush to remove any corrosion on the terminals.
- Monitor Battery Temperature: Keep an eye on the temperature of the batteries. Excessive heat can damage the batteries and affect their performance. Ensure that the batteries are adequately cooled and not exposed to extreme temperature fluctuations.
- Check Wiring Harnesses: Inspect the wiring harnesses and cables for any signs of damage, such as frayed wires or insulation wear. Address any issues promptly and replace damaged wiring to prevent electrical problems.
- Address Voltage Drop: If you experience voltage drops or notice dimming headlights or audio system issues, check for wiring faults, loose connections, or inadequate cable sizes. Ensure that the wiring is correctly sized and properly connected to minimize voltage drop.
- Test Battery Health: Periodically test the health of your batteries using battery load testing equipment. This test measures the battery’s ability to deliver power under load and helps determine if there are any issues with the battery’s capacity or lifespan.
- Consult a Professional: If you encounter persistent issues or are unsure about any maintenance or troubleshooting steps, it is recommended to consult a professional car audio installer or a qualified technician. They can provide expert advice and assistance in diagnosing and resolving complex problems.
By following these maintenance and troubleshooting tips, you can keep your dual battery setup in optimal condition, ensure consistent power delivery to your car audio system, and prolong the lifespan of your batteries.
Remember, proactive maintenance and timely troubleshooting help prevent larger, more costly problems down the road and ensure that you enjoy the best possible performance from your car audio system.
Conclusion
Setting up a dual battery system for your car audio can greatly enhance the performance and reliability of your audio system. By distributing the power load and ensuring a steady power supply, a dual battery setup helps prevent voltage drops, minimizes strain on the electrical system, and improves audio quality.
Throughout this article, we discussed the benefits of using two batteries for car audio and provided a step-by-step guide on how to set up a dual battery system. We explored the importance of choosing the right batteries, wiring the batteries properly, and connecting them to your car audio system. Additionally, we highlighted the significance of installing a battery isolator to ensure efficient power distribution.
Maintaining and troubleshooting your dual battery setup is also crucial for optimal performance. By regularly checking battery voltage, inspecting connections, and addressing any issues promptly, you can ensure a reliable and long-lasting dual battery system.
Remember to test your system after installation and periodically monitor its performance to detect any potential problems. Seeking professional assistance when needed can provide valuable insights and ensure proper troubleshooting when encountering complex issues.
With a well-designed dual battery system and proper maintenance, you can enjoy a powerful and uninterrupted car audio experience. So, take the time to plan, install, and maintain your dual battery setup for enhanced sound quality and peace of mind on the road.