Home>Production & Technology>Audio Interface>How To Hookup Two Channels Equaliser To Audio Interface
Audio Interface
How To Hookup Two Channels Equaliser To Audio Interface
Modified: February 19, 2024
Learn how to easily hookup a two channels equalizer to your audio interface. Enhance your sound quality with this step-by-step guide.
(Many of the links in this article redirect to a specific reviewed product. Your purchase of these products through affiliate links helps to generate commission for AudioLover.com, at no extra cost. Learn more)
Table of Contents
Introduction
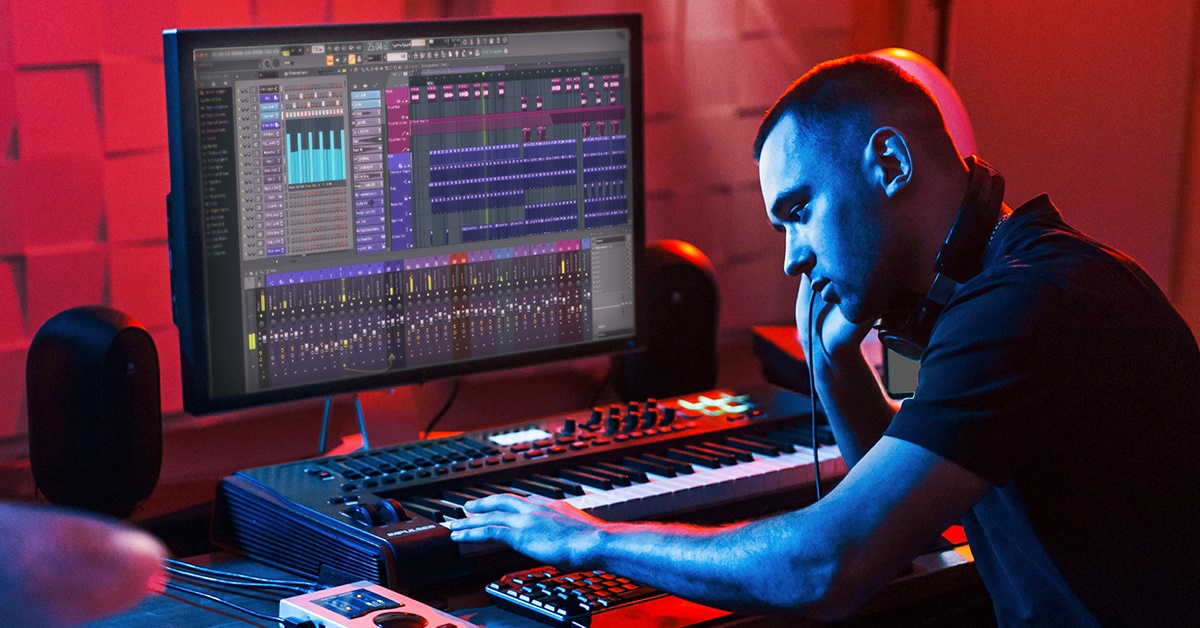
Welcome to the world of audio interfaces and equalizers! If you are passionate about music production or simply want to improve the sound quality of your recordings, understanding how to connect and utilize an equalizer with an audio interface is essential. Whether you are a musician, podcaster, or audio engineer, this guide will walk you through the process of hooking up a two-channel equalizer to your audio interface.
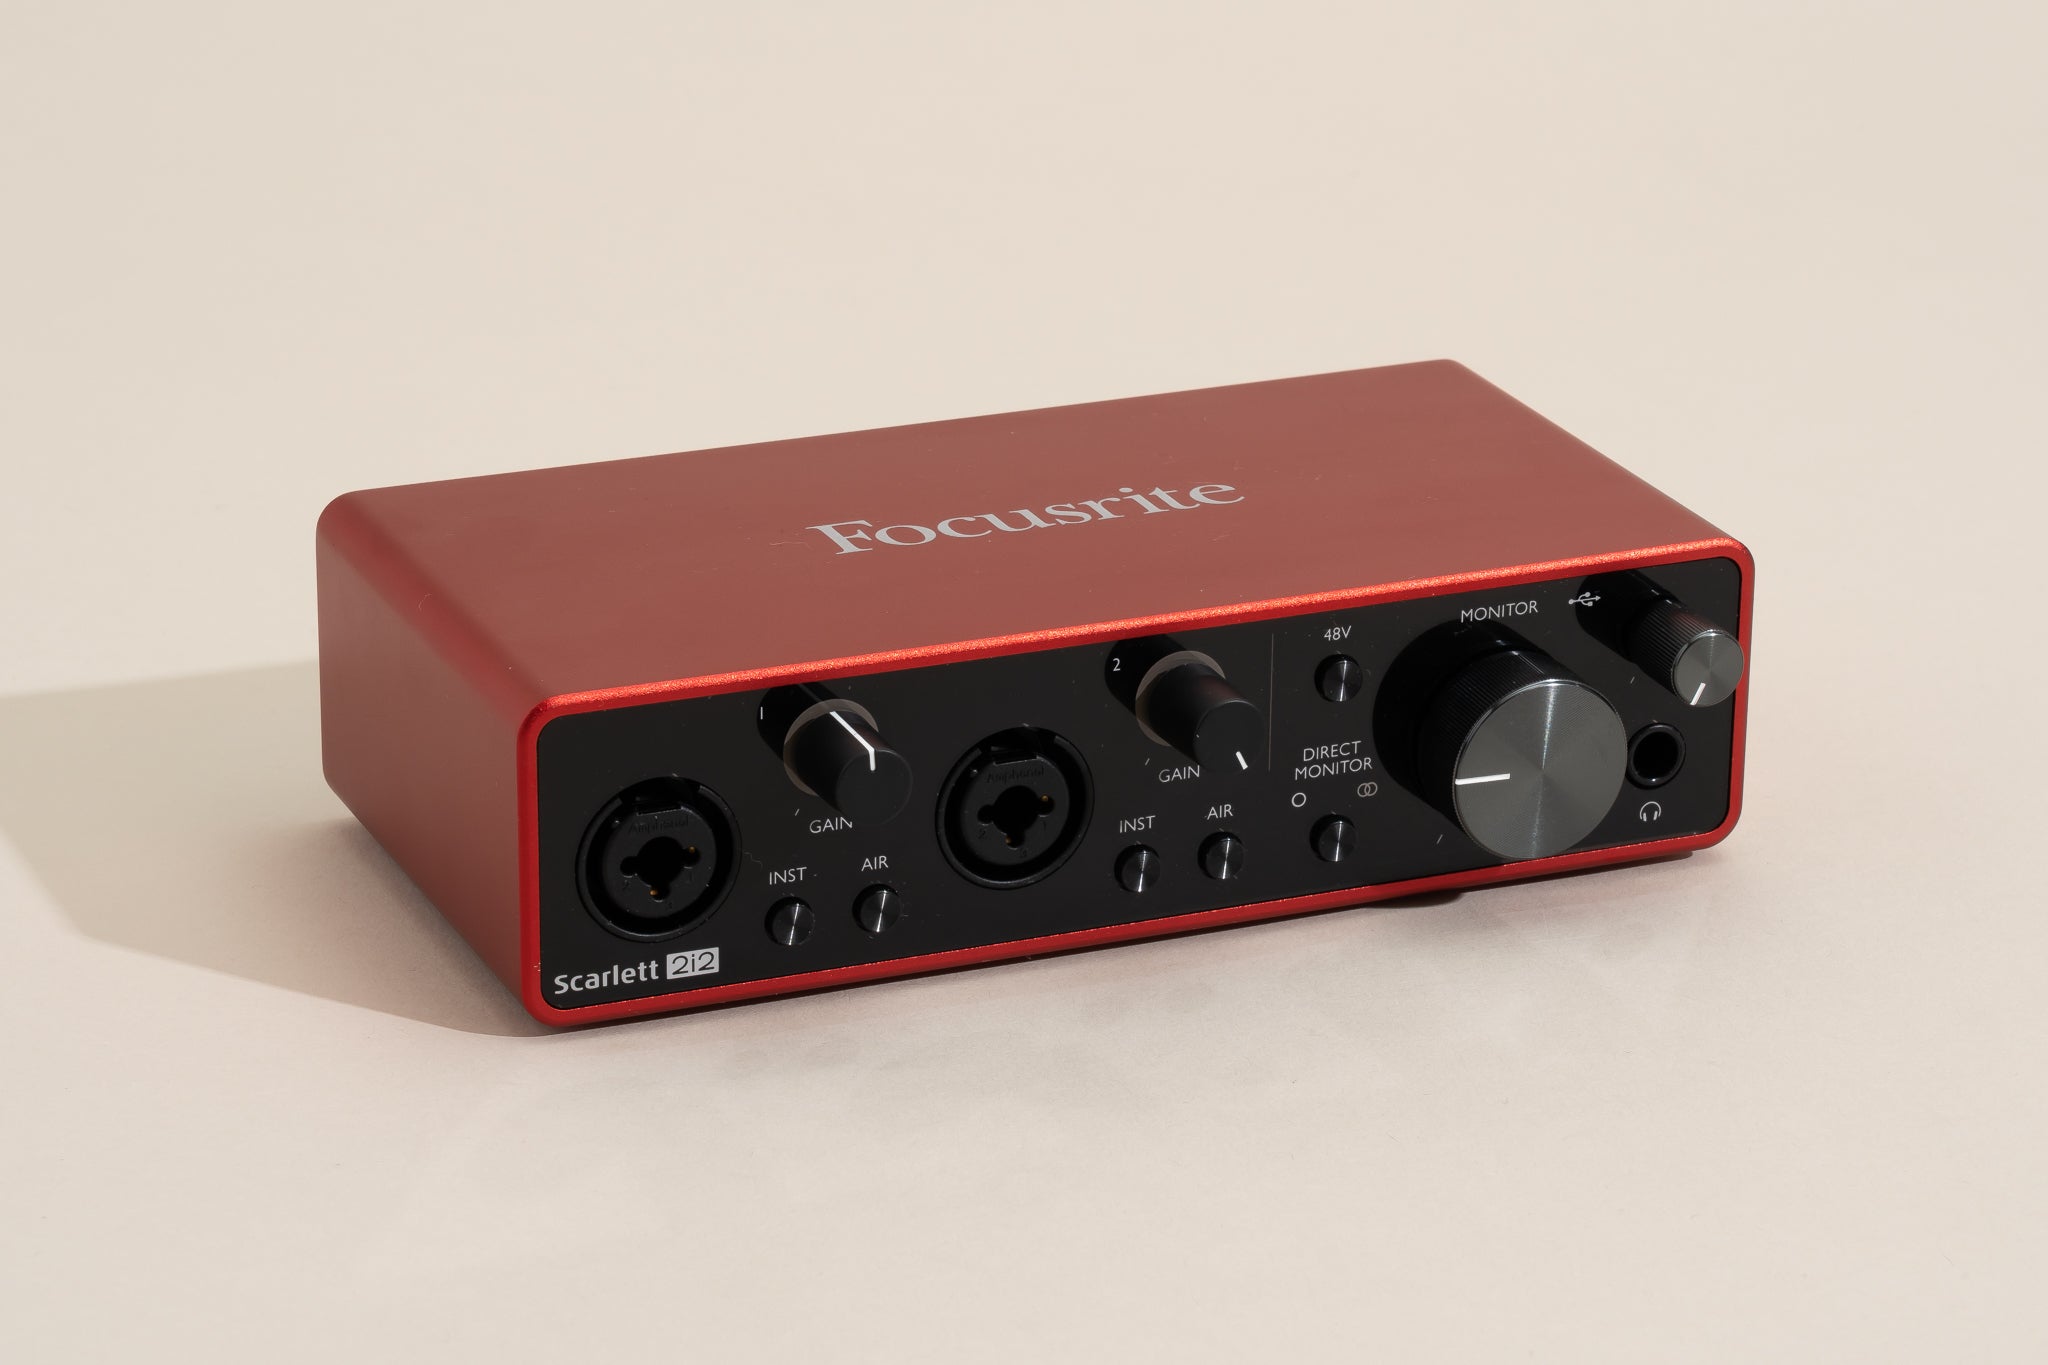
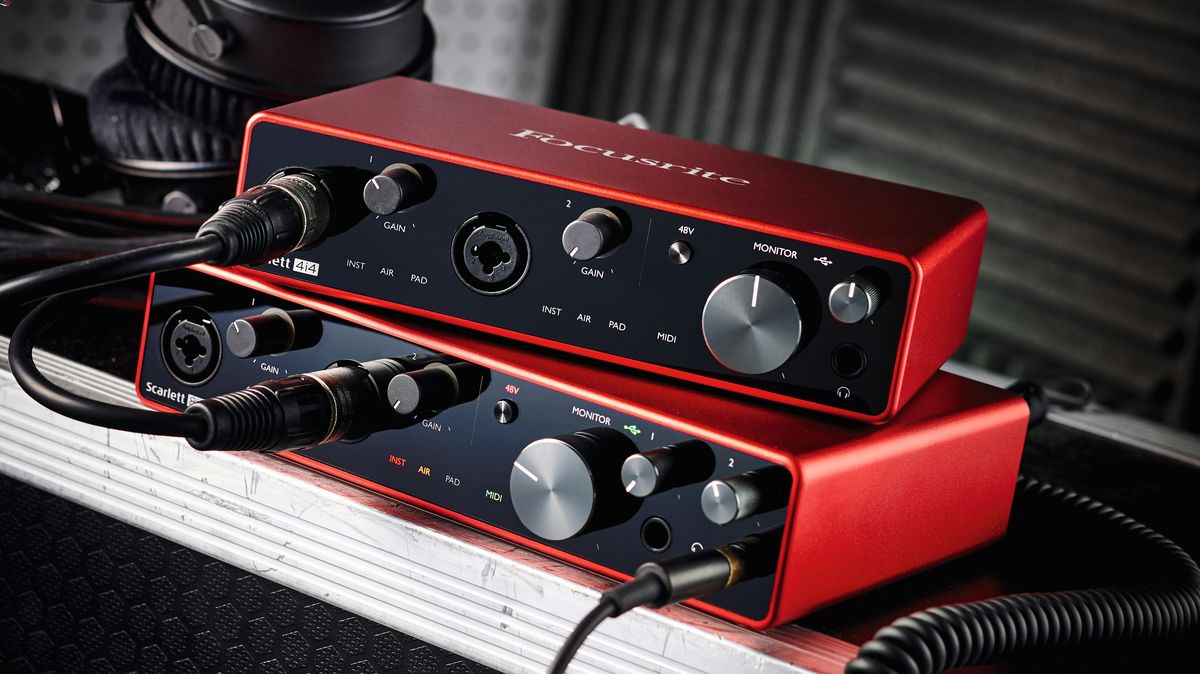
An audio interface is a device that allows you to connect various audio sources, such as microphones, instruments, or synthesizers, to your computer. It serves as the bridge between the analog and digital worlds, converting analog signals into digital data that can be processed by recording software. A typical audio interface has multiple input and output channels, allowing you to record and playback audio in high-quality.
On the other hand, an equalizer is a powerful audio processing tool used to shape the frequency response of an audio signal. It allows you to boost or cut specific frequencies, enhancing the clarity and tonal balance of your recordings. By fine-tuning the equalizer settings, you can remove unwanted resonances, emphasize certain instruments or vocals, and achieve a professional-sounding mix.
In this guide, we will cover everything you need to know about hooking up a two-channel equalizer to your audio interface. We will provide step-by-step instructions on how to connect the equalizer correctly, adjust the settings, and troubleshoot common issues. By the end, you will have the knowledge and confidence to take your audio recordings to the next level.
Now, let’s dive in and explore the fascinating world of audio interfaces and equalizers!
Understanding the Audio Interface
An audio interface is a crucial component of any recording setup. It acts as a bridge between the analog and digital domains, allowing you to capture and playback high-quality audio on your computer. Understanding the key features and functionality of an audio interface is essential before connecting a two-channel equalizer.
At its core, an audio interface serves as an external sound card that connects to your computer via USB, Thunderbolt, or Firewire. It provides a range of inputs and outputs to interface with audio devices such as microphones, instruments, and speakers. The number and type of inputs and outputs vary depending on the model and intended use, so it’s important to choose an audio interface that suits your specific needs.
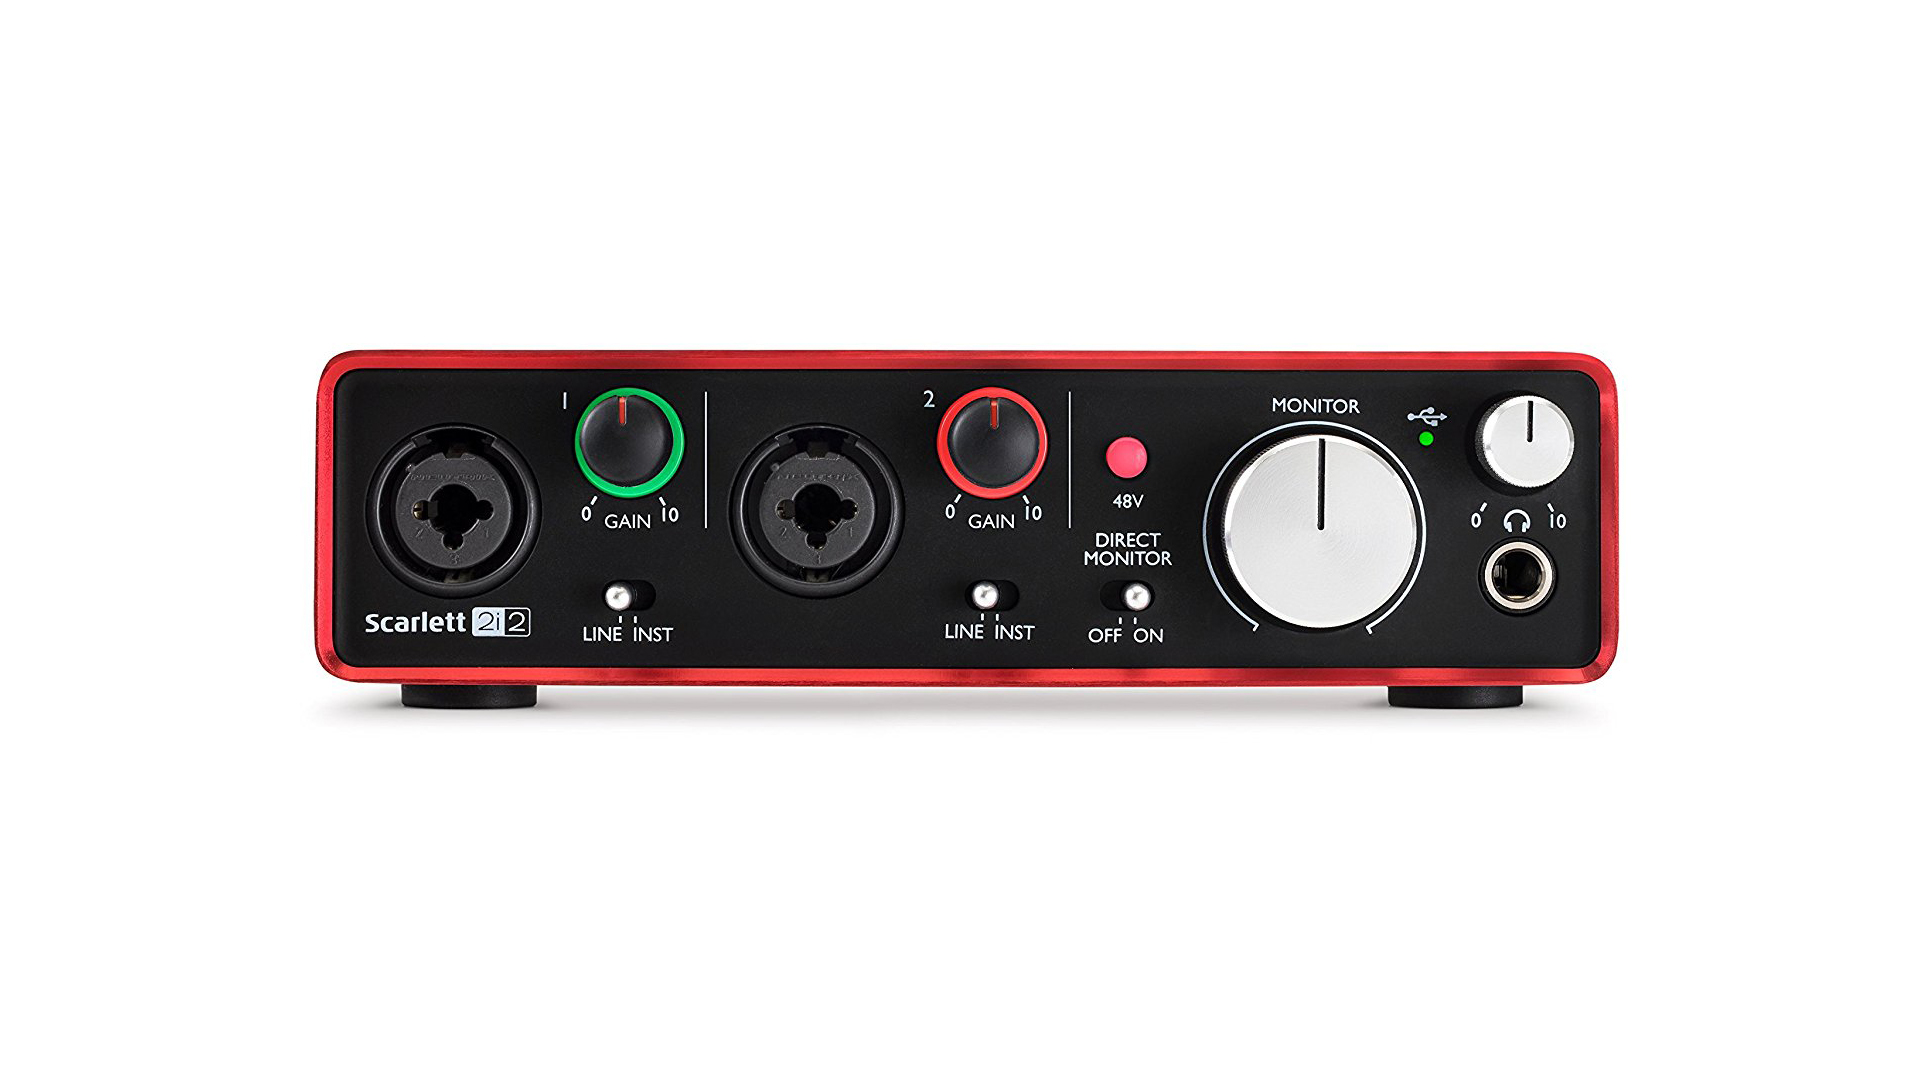
One of the primary considerations when selecting an audio interface is the number of channels it offers. Channels refer to the number of individual audio signals that can be recorded or played back simultaneously. For example, a two-channel interface allows you to record two mono sources or one stereo source at the same time.
In addition to the number of channels, other important features to consider include microphone preamps, sample rate/bit depth, and connectivity options. Mic preamps amplify the microphone signal before it reaches the digital conversion stage, ensuring optimal recording levels and minimizing noise. The sample rate and bit depth determine the audio quality, with higher values offering better fidelity. Connectivity options such as MIDI ports, headphone outputs, and additional line inputs can also be valuable depending on your specific recording needs.
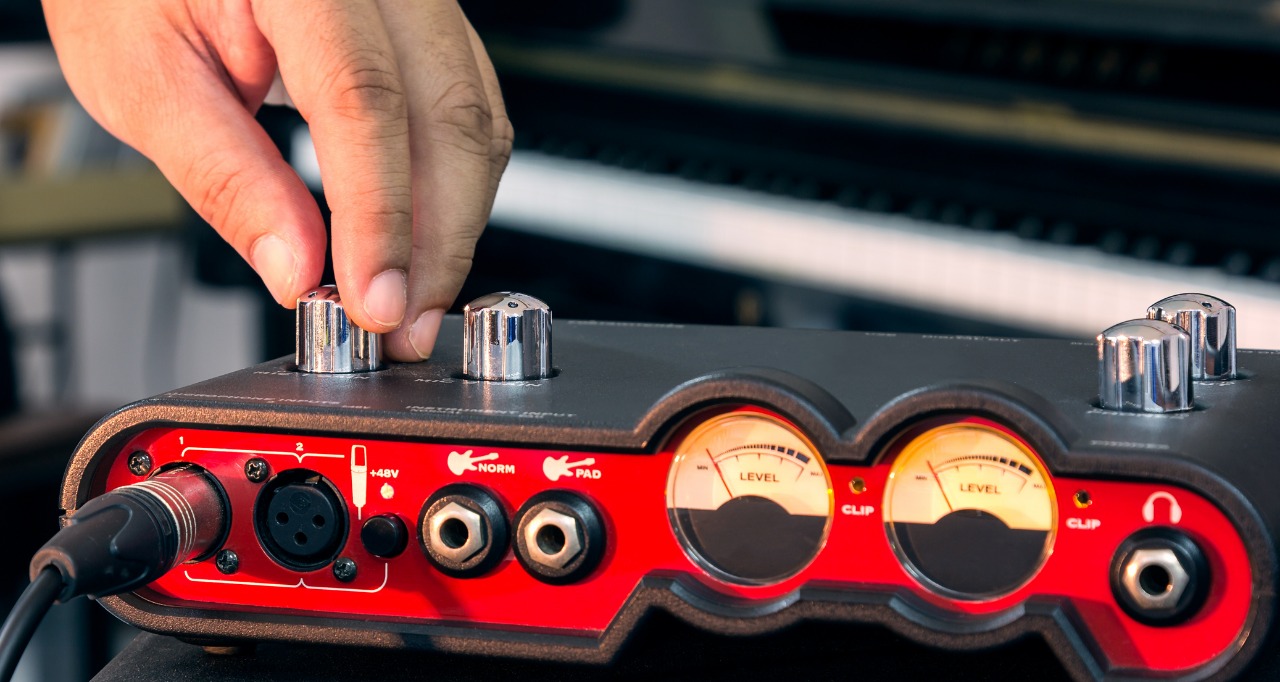
Before connecting a two-channel equalizer to your audio interface, it’s important to familiarize yourself with the inputs and outputs available. Typically, an audio interface will have line-level inputs and outputs, microphone inputs with preamps, headphone outputs, and monitor outputs. Ensure that you have the necessary cables and adapters to connect your equalizer to the correct inputs and outputs on your audio interface.
Understanding the features and capabilities of your audio interface will help you navigate the process of connecting and integrating a two-channel equalizer effectively. Now that we have covered the basics of audio interfaces, let’s move on to understanding the equalizer itself.
Understanding the Equalizer
An equalizer is a powerful tool used to shape the frequency response of audio signals. It allows you to boost or cut specific frequencies, giving you control over the tonal balance and timbre of your recordings. By understanding the different components and controls of an equalizer, you can effectively enhance the clarity and quality of your audio.
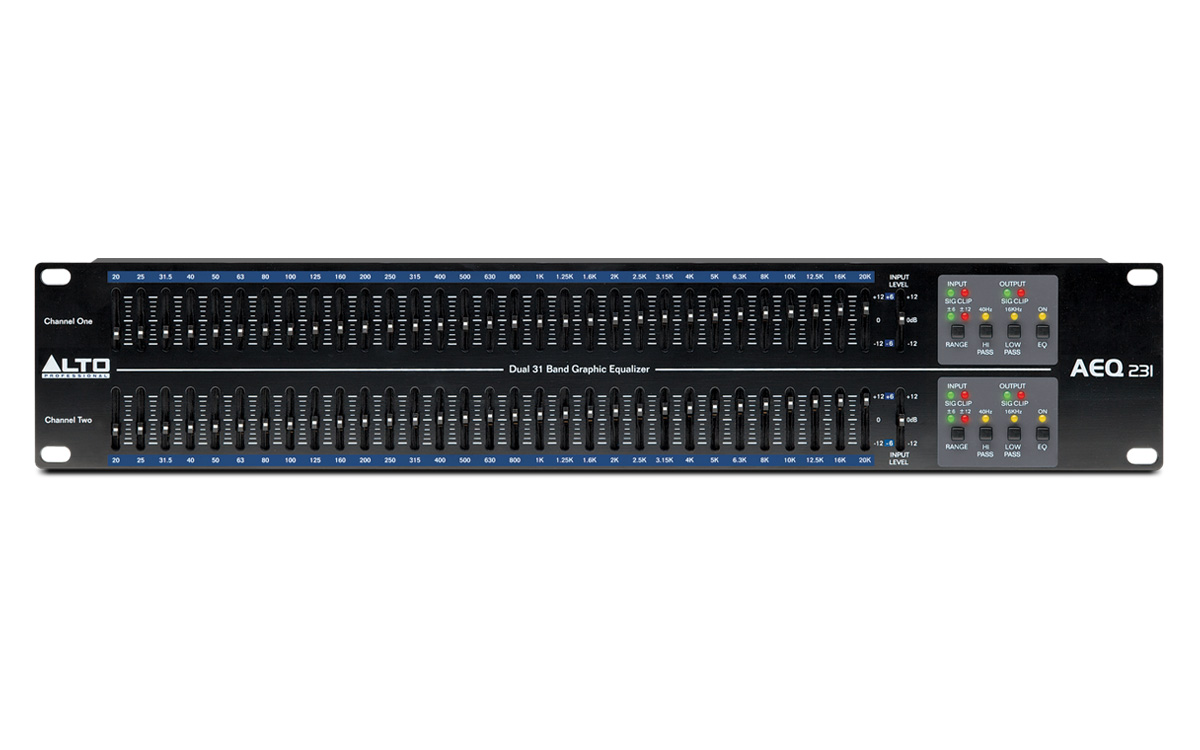
The basic concept behind an equalizer is that it divides the audio spectrum into different frequency ranges, typically divided into bands. Each band corresponds to a specific range of frequencies, such as bass, midrange, or treble. By adjusting the level of each band, you can emphasize or attenuate certain frequencies, enhancing the overall balance of the audio.
Equalizers come in various types, including graphic equalizers and parametric equalizers. Graphic equalizers feature a series of sliders, each representing a specific frequency band. Moving the sliders up or down adjusts the level of that particular frequency range. Parametric equalizers, on the other hand, offer more precise control with adjustable parameters such as frequency, bandwidth, and gain.
Two-channel equalizers are widely used in audio production and recording setups. They typically have separate controls for each channel, allowing you to independently shape the frequency response of two audio signals. This is particularly useful when working with stereo recordings or when you want to treat different instruments separately.
When using an equalizer, it’s important to understand the impact of different frequency ranges on the overall sound. For example, boosting the low frequencies can add warmth and depth to a mix, while cutting high frequencies can reduce harshness or sibilance. It’s crucial to use your ears and rely on your judgment to achieve a balanced and pleasing sound.
It’s worth noting that while an equalizer can be a powerful tool, it should be used judiciously. Overusing or improperly applying equalization can lead to unnatural or unbalanced sound. It’s always best to start with subtle adjustments and make incremental changes until you achieve the desired result.
Now that we have a basic understanding of equalizers, let’s move on to setting up the equipment to connect the equalizer to your audio interface.
Preparing the Equipment
Before you can start connecting your two-channel equalizer to your audio interface, it’s important to gather all the necessary equipment and ensure everything is in proper working order. Taking the time to prepare your equipment will help ensure a smooth and hassle-free setup process.
Here’s a checklist of the equipment you will need:
- Two-Channel Equalizer: Choose a two-channel equalizer that suits your needs and budget. Make sure it has the necessary inputs and outputs, and that it is in proper working condition.
- Audio Interface: Ensure that your audio interface has the appropriate line-level inputs and outputs for connecting the equalizer. Check that it is functioning correctly and has the latest drivers installed.
- Cables and Adapters: You will need cables to connect the equalizer to the audio interface. Depending on the input and output connectors on both devices, you may need XLR cables, TRS cables, or RCA cables. Ensure you have the right adapters if needed.
- Power Supply: Some equalizers may require an external power supply. Check if your equalizer needs one and ensure you have it available.
- Power Cables: Make sure you have the necessary power cables to connect your audio interface and equalizer to a power source.
- Manuals and Documentation: Keep the manuals and documentation for your audio interface and equalizer handy. They can be helpful for reference during the setup process.
Once you have gathered all the necessary equipment, take a few moments to inspect everything and ensure there are no visible damages or faults. Check the connectors and cables for any signs of wear or damage. It’s also a good idea to clean any dusty or dirty connections to ensure optimal signal transfer.
If any of your equipment is not functioning correctly or if you encounter any issues during the inspection, it’s important to address them before proceeding further. Contact the manufacturer or seek professional assistance if needed.
By properly preparing and ensuring the equipment is in good condition, you can set yourself up for a successful connection of your two-channel equalizer to your audio interface. With all the necessary tools at your disposal, you’re ready to move on to the next step: connecting the equalizer to the audio interface.
Connecting the Equalizer to the Audio Interface
Now that you have prepared your equipment, it’s time to connect your two-channel equalizer to your audio interface. The way you connect the equalizer will depend on the specific inputs and outputs available on your devices. Here is a step-by-step guide to help you with the process:
- Locate the line-level inputs and outputs on your audio interface. These are typically labeled as “line in” or “line out”. You may need to consult the manual or documentation of your audio interface to find the exact locations.
- Identify the inputs and outputs on your two-channel equalizer. Look for connectors labeled as “input” or “output” and ensure they correspond to the line-level connections on your audio interface.
- Connect one end of the appropriate audio cables to the output connectors on your audio interface. Use the appropriate cable type, such as XLR, TRS, or RCA. If your audio interface has balanced outputs, use balanced cables for optimal signal quality.
- Connect the other end of the audio cables to the input connectors on your equalizer. Ensure that you connect Left (L) and Right (R) channels correctly.
- If your equalizer requires an external power supply, connect it to a power source following the manufacturer’s instructions. Ensure that the power supply matches the required specifications of your equalizer.
- Power on both your audio interface and your equalizer.
Once you have connected the equalizer to the audio interface, it’s a good idea to double-check all the connections and ensure they are secure. Loose or faulty connections can result in poor audio quality or intermittent signals.
Keep in mind that the specific steps and connectors may vary depending on your audio interface and equalizer models. Always refer to the manuals or documentation provided by the manufacturers for detailed instructions specific to your equipment.
With the equalizer successfully connected to the audio interface, you are one step closer to harnessing its power to shape your audio. Now, it’s time to move on to adjusting the equalizer settings and optimizing the sound coming from your audio interface.
Adjusting the Equalizer Settings
Now that you have connected your two-channel equalizer to your audio interface, it’s time to start fine-tuning the equalizer settings to optimize the sound quality. Adjusting the equalizer settings involves selectively boosting or cutting specific frequencies to achieve the desired tonal balance and clarity in your recordings. Here are some steps to guide you through the process:
- Take a moment to listen to the audio source without any equalization. This will give you a baseline to work from and help you identify any specific areas that may need adjustment.
- Identify the frequencies that need emphasizing or de-emphasizing. For example, if you want to add more warmth to a vocal track, you may want to boost the low frequencies (bass) or if you want to reduce harshness in a guitar track, you may want to cut the high frequencies (treble).
- Start by adjusting the frequency bands on your equalizer. Experiment with boosting or cutting specific frequencies to see how they affect the sound. It’s best to make small adjustments and listen carefully to the changes in the audio.
- Use your ears and trust your judgment. The goal is to achieve a balanced and pleasing sound, so rely on your own perception of what sounds good to you. Don’t be afraid to make multiple adjustments and iterate until you achieve the desired result.
- Pay attention to the interaction between the different frequency bands. Adjusting one band may affect the perception of other frequencies. Take your time to find the right balance of all the frequency ranges.
- Consider the context in which the audio will be heard. If you are mixing for specific playback systems or environments, such as home speakers or headphones, take that into account when making equalizer adjustments.
- Remember to periodically listen to your mix with the equalization applied in the context of the entire production. This will help you gauge how the equalizer settings impact the overall sound and make any necessary adjustments.
Keep in mind that the process of adjusting the equalizer settings can be subjective and may require some experimentation. It’s important to trust your ears and rely on your own taste and judgment. Take the time to explore different settings and listen to how they affect the audio before making final decisions.
Once you are satisfied with the equalizer settings, it’s a good practice to save or document your settings. This will allow you to easily recall and make adjustments in the future, ensuring consistency in your recordings and mixes.
Now that you have adjusted the equalizer settings, it’s time to test and fine-tune the setup to ensure everything is working as expected.
Testing and Fine-Tuning the Setup
After connecting and adjusting the equalizer settings on your audio interface, it’s important to test and fine-tune the setup to ensure optimal sound quality and performance. This process involves actively listening to your audio playback and making any necessary adjustments to achieve the desired results. Here are some steps to guide you through testing and fine-tuning your setup:
- Play a variety of audio sources through your audio interface and equalizer. This can include recorded tracks, live instruments, or vocals. Listen carefully to the sound and take note of any areas that need improvement.
- Pay attention to the overall tonal balance, clarity, and depth of the audio. Are there any frequency ranges that appear too pronounced or lacking presence? Adjust the equalizer settings accordingly to achieve a more balanced sound.
- Test the setup in different listening environments or on different playback devices. This will help you assess how the equalization translates to different systems and ensure consistency in your recordings. Make adjustments as needed to accommodate for different playback scenarios.
- Engage in A/B testing by comparing the audio with and without the equalizer applied. This allows you to hear the difference and determine if the equalization enhances the sound quality. Make tweaks to the settings if necessary to achieve the desired outcome.
- Involve other individuals with a good ear or trusted listeners to provide feedback on the sound. They can offer a fresh perspective and help identify any areas that may require further adjustments.
- Take breaks during the testing process to give your ears a rest. This will help prevent listener fatigue and provide a fresh perspective when evaluating the sound quality.
- Document your settings and any adjustments made during the testing process. This will serve as a reference for future use and allow you to maintain consistency in your recordings.
Testing and fine-tuning your setup is an iterative process that requires patience and careful listening. Don’t be afraid to make subtle adjustments or try different settings to achieve the desired sound. Remember, the goal is to enhance the audio quality and create a pleasing listening experience.
If you encounter any issues during the testing process, such as unexpected audio artifacts or inconsistencies, refer back to the manual or documentation of your audio interface and equalizer for troubleshooting tips. In some cases, you may need to reach out to technical support for further assistance.
With the setup tested and fine-tuned to your satisfaction, you are now ready to proceed with your audio recordings, knowing that you have optimized the sound quality through the integration of your two-channel equalizer.
Troubleshooting Common Issues
While setting up and using a two-channel equalizer with your audio interface can greatly enhance your sound quality, it’s not uncommon to encounter certain issues along the way. Knowing how to troubleshoot and resolve these common issues can help you get back on track quickly. Here are some common issues you may encounter and tips to troubleshoot them:
- No sound or weak signal: If you’re not getting any sound or the signal is weak, check the audio cables and connectors. Ensure they are properly connected and secured. Also, verify if the equalizer and audio interface settings are adjusted correctly. Check the volume levels, mute buttons, and any switches that may affect the audio signal.
- Audio signal distortion: Distorted audio can be caused by various factors. If you experience distortion, first check the gain levels on your audio interface and equalizer. High gain values can result in signal clipping and distortion. Try lowering the gain or input levels to see if it resolves the issue. If distortion persists, you may need to adjust the equalizer settings and attenuate certain frequencies.
- Unbalanced sound: If you notice unbalanced volume levels between the left and right channels, ensure that the cables connecting the audio interface and equalizer are securely plugged in. If you’re using balanced cables, double-check that they are wired correctly. You may also want to ensure that the equalizer’s pan or balance controls are centered or adjusted appropriately.
- Unwanted noise or hum: If you experience unwanted noise or hum in the audio signal, it could be due to poor grounding or interference. Check that all the equipment is properly grounded and that there are no loose connections. Separating audio cables from power cables and other electronic devices can also help reduce interference. In some cases, using balanced cables and ensuring proper shielding can minimize noise and hum.
- Incompatible connectors: If the connectors on your equalizer and audio interface do not match, you may need to use adapters or different cables to make the connection. Verify the types of connectors on each device and consult the manuals or manufacturer’s specifications to determine the appropriate cables or adapters to use.
If you continue to experience issues even after troubleshooting, consult the manuals or documentation provided by your audio interface and equalizer manufacturers. They may have specific troubleshooting steps or offer technical support for further assistance.
Remember to approach troubleshooting with patience and a systematic approach. Check one component or setting at a time and document any changes you make. This will help you track progress and identify the source of the issue more effectively.
By being proactive in troubleshooting common issues, you can ensure that your two-channel equalizer and audio interface setup functions smoothly, allowing you to focus on your audio recordings and achieving the desired sound quality.
Conclusion
Congratulations! You have now reached the end of this guide on how to connect and utilize a two-channel equalizer with your audio interface. By understanding the functionality of both the audio interface and equalizer, preparing the necessary equipment, and making the appropriate connections, you have taken significant steps towards optimizing your sound quality.
An audio interface serves as the foundation for capturing and processing audio signals, while the equalizer allows you to shape the frequency response to achieve a balanced and professional sound. Working together, these tools can greatly enhance the clarity, depth, and tonal balance of your recordings.
Throughout this guide, we have covered the essential aspects of understanding the audio interface, connecting the equalizer, adjusting the settings, testing and fine-tuning the setup, and troubleshooting common issues. By following these steps and using your ears as the ultimate judge, you can achieve remarkable improvements in your audio recordings.
Remember that practice and experimentation are key to mastering the art of equalization. Don’t be afraid to explore different settings and trust your instincts when making adjustments. By actively listening, taking breaks, and involving others for feedback, you can further refine your skills and develop your own unique sound.
As you continue your journey, it’s important to stay up to date with the latest developments in audio technology and techniques. Keep exploring and learning, whether through online tutorials, forums, or collaborating with fellow musicians and audio professionals.
As a final note, always remember that the best results are achieved when the technical aspects of audio engineering are accompanied by your creativity, passion, and personal style. Embrace your unique artistic vision, and let the audio interface and equalizer be the tools that help you bring it to life.
Now, go forth and create music that sounds incredible with your newly acquired knowledge of connecting and harnessing the power of a two-channel equalizer with your audio interface. Enjoy the process, and may your music thrive with impeccable sound quality!