Home>Devices & Equipment>Subwoofer>How To Install Under Seat Subwoofer
Subwoofer
How To Install Under Seat Subwoofer
Published: January 22, 2024
Learn how to easily install an under seat subwoofer in your car and enhance your audio system with powerful bass. A step-by-step guide for all subwoofer enthusiasts.
(Many of the links in this article redirect to a specific reviewed product. Your purchase of these products through affiliate links helps to generate commission for AudioLover.com, at no extra cost. Learn more)
Table of Contents
- Introduction
- Step 1: Gather the Required Tools
- Step 2: Choose the Perfect Subwoofer
- Step 3: Find the Ideal Location under the Seat
- Step 4: Prepare the Wiring
- Step 5: Connect the Subwoofer to the Amplifier
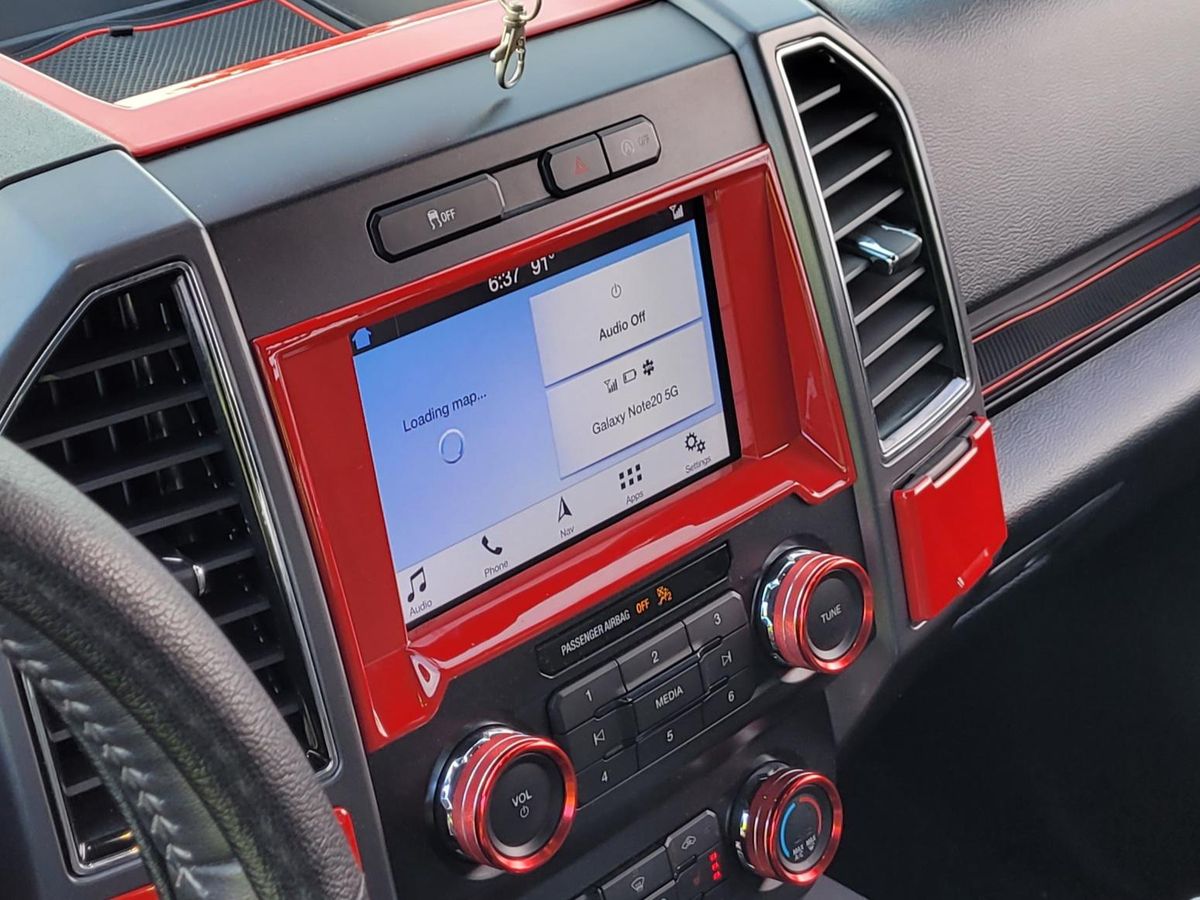
- Step 6: Connect the Amplifier to the Head Unit
- Step 7: Secure the Subwoofer under the Seat
- Step 8: Test the Subwoofer
- Conclusion
Introduction
Subwoofers are an essential component in any audio system, especially for those who appreciate deep, powerful bass. If you want to take your car audio experience to the next level, installing an under seat subwoofer can be a game-changer. These compact subwoofers are designed to fit under the seats of your car, saving space while still delivering impressive low-frequency performance.
Installing an under seat subwoofer may seem daunting at first, but with the right tools and a little know-how, it can be a straightforward process. In this guide, we will walk you through the step-by-step process of installing an under seat subwoofer, ensuring that you achieve optimal sound quality and a seamless integration with your existing car audio system.
Before diving into the installation process, it’s important to gather the required tools. Having the right tools on hand will make the installation smoother and more efficient. Additionally, it’s crucial to choose the perfect subwoofer that suits your audio preferences and fits seamlessly in your car’s interior. We will discuss both of these aspects in the steps to come.
So, whether you’re a DIY enthusiast looking to upgrade your car audio system or a car owner who wants to enhance their driving experience, let’s get started on installing an under seat subwoofer and enjoy the rich, deep bass that will elevate your favorite music to new heights.
Step 1: Gather the Required Tools
Before beginning the installation process, it’s important to gather all the necessary tools to ensure a smooth and successful installation of your under seat subwoofer. Here are the essential tools you’ll need:
- Flexible wire with appropriate gauge: This wire will connect the subwoofer to the amplifier. Make sure to choose a wire with the appropriate gauge to handle the power requirements of your subwoofer.
- Wire cutters and strippers: These tools will help you cut and strip the wires to connect them properly.
- Power drill and drill bits: You’ll need a power drill to create holes for mounting the subwoofer and routing the wiring.
- Socket set and wrench: These tools will be necessary for removing and installing your car seats, if required.
- Tape measure: Use a tape measure to accurately measure the available space under your car seats before selecting a subwoofer.
- Screwdriver set: A set of screwdrivers will come in handy for securing the subwoofer and making any necessary adjustments.
- Electrical tape: Use electrical tape to secure and insulate the wire connections for a reliable and safe installation.
- Zip ties and mounting brackets: These items are useful for tidying up the wiring and securing the subwoofer in place.
Having these tools at your disposal will make the installation process much easier and more efficient. It’s always a good idea to have a well-equipped toolkit on hand when working on car audio installations to ensure a professional-looking and long-lasting result.
Step 2: Choose the Perfect Subwoofer
Selecting the right subwoofer is crucial for achieving the best audio experience in your car. When choosing an under seat subwoofer, there are a few key factors to consider:
- Size and Compatibility: Measure the available space under your car seat to ensure the subwoofer you choose will fit properly. Consider the height, width, and depth of the subwoofer to ensure it doesn’t interfere with seat adjustment or legroom.
- Power Handling: Look for a subwoofer with adequate power handling capabilities. Match the power rating of the subwoofer with an amplifier that can deliver the necessary power without distortion.
- Impedance: Select a subwoofer with an impedance that matches your amplifier. This ensures proper power transfer and prevents damage to both the subwoofer and the amplifier.
- Frequency Response: Consider the frequency range of the subwoofer. A wider frequency response allows for a fuller and more dynamic bass sound.
- Enclosure Type: Subwoofers come in different enclosure types, such as sealed, ported, or bandpass. Each type offers distinct sound characteristics, so choose one that suits your personal preference and the acoustics of your car.
- Build Quality: Look for a subwoofer with a sturdy construction that can withstand the demands of the car environment. High-quality components ensure longevity and optimal performance.
Do some research, read reviews, and listen to demos to get a sense of the subwoofer’s sound quality. It’s also a good idea to consult with audio experts or professionals to ensure you choose a subwoofer that meets your specific needs and preferences. Remember, the perfect subwoofer will deliver deep, powerful bass that enhances your overall audio experience without overpowering the rest of the frequencies.
Once you’ve selected the perfect subwoofer for your car, you’ll be ready to move on to the next step of the installation process.
Step 3: Find the Ideal Location under the Seat
Locating the ideal spot under the seat to install your subwoofer is crucial for both sound performance and practicality. Here are some tips to help you find the perfect location:
- Consider Seat Clearance: Take note of the space available under the seat and ensure that the subwoofer will fit without obstructing the seat movement or causing discomfort to the passengers.
- Avoid Obstructing Ventilation: Avoid placing the subwoofer in a location that blocks important ventilation points or ducts under the seat. This ensures that the subwoofer doesn’t interfere with the cooling of components or cause overheating issues.
- Accessible Wiring: Choose a location that allows for easy and concealed wiring. You’ll need to route the power and audio cables from the subwoofer to the amplifier and head unit, so make sure there’s enough space to hide the wires and keep them organized.
- Avoid High-Risk Areas: It’s important to avoid mounting the subwoofer in areas that are prone to water intrusion or excessive heat. This helps protect the subwoofer from potential damage and ensures its longevity.
- Consider Acoustic Factors: Sound waves interact with the car’s interior, so consider the impact of different seat materials, cushions, and internal dimensions on sound quality. Experiment with the subwoofer placement in different spots to find the location that delivers the best bass response.
Remember that every car is different, so the ideal location may vary depending on the specific make and model. It’s recommended to consult the user manual or seek advice from knowledgeable professionals to ensure the best placement for your under seat subwoofer.
Once you’ve identified the ideal location, you can proceed to the next step and start preparing the wiring for your subwoofer installation.
Step 4: Prepare the Wiring
Properly preparing the wiring is essential for a successful under seat subwoofer installation. Here’s what you need to do:
- Disconnect the Battery: To ensure your safety and prevent any electrical mishaps, disconnect the negative terminal of your car battery before working on the wiring.
- Plan the Route: Determine the best route for running the power cable from the car battery to the subwoofer’s location. Take care to avoid any moving parts or sources of heat that could damage the wiring.
- Measure and Cut the Power Cable: Measure the required length and cut the power cable accordingly. Leave some extra length for flexibility and ensure that the cable is long enough to reach the subwoofer’s location.
Use wire strippers to carefully remove a small portion of insulation from the ends of the power cable. This allows for proper connection to the battery and the subwoofer. Connect the positive end of the power cable to the positive terminal of the car battery. Secure the connection tightly to prevent it from coming loose. Carefully route the power cable from the battery to the location of the subwoofer, making sure to secure it along the way using zip ties or cable clips. Keep it away from any sharp edges or areas that produce heat. Select a suitable grounding point near the subwoofer location. It should be a metal surface with no paint or rust. Strip the ground cable and securely connect it to the chosen grounding point. Run the audio cables from the head unit to the subwoofer location. Make sure to keep them separate from the power cable to avoid any interference or noise.
It’s important to take your time and ensure that all the connections are secure and properly insulated. Double-check your wiring before proceeding to the next steps to avoid any potential issues down the road.
With the wiring prepared, you’re now ready to connect the subwoofer to the amplifier and integrate it into your car audio system.
Step 5: Connect the Subwoofer to the Amplifier
Connecting the subwoofer to the amplifier is a crucial step in the installation process. Here’s what you need to do:
Locate the RCA inputs on your amplifier. These are typically labeled as “subwoofer” or indicated by a specific color, such as red or white. Take one end of the RCA cable and connect it to the RCA input on your amplifier. Ensure a secure connection by gently twisting the connectors until they are snug. Take the other end of the RCA cable and connect it to the RCA output on your head unit. Connect the positive end of the power cable to the positive terminal on the amplifier and the negative end to the negative terminal. Ensure a tight connection by tightening the screws or terminals. Locate the remote wire on the amplifier, which is usually labeled as “remote” or “REM.” Connect one end of the remote wire to the remote input on the amplifier and the other end to the remote output on your head unit. Strip the ends of the speaker wire attached to the subwoofer. Connect the positive (+) terminal on the subwoofer to the positive (+) terminal on the amplifier and the negative (-) terminal to the negative (-) terminal. Ensure all connections are secure by gently tugging on the wires. Make sure there is no exposed wire or loose connections.
Once all the connections are complete, you can proceed to the next step and connect the amplifier to the head unit, allowing the subwoofer to receive the audio signals and produce deep bass sounds.
It’s important to consult the user manuals of your specific amplifier and head unit for detailed instructions on connecting them. Following the manufacturer’s guidelines will ensure that the connections are made correctly and result in optimal performance.
Step 6: Connect the Amplifier to the Head Unit
Connecting the amplifier to the head unit is a crucial step in integrating your under seat subwoofer into your car audio system. Here’s how to do it:
Find the preamp outputs on your head unit. These are usually labeled as “RCA” or “pre-out.” You may have multiple sets of preamp outputs depending on your head unit model. Take the RCA cables and connect them to the preamp outputs on your head unit. Match the colors of the cables with the corresponding inputs. Most often, red is for the right channel and white or black is for the left channel. Take the other ends of the RCA cables and connect them to the corresponding RCA inputs on your amplifier. Take the remote wire that is already connected to your amplifier and connect the other end to the remote output on your head unit. This connection allows the amplifier to turn on and off with the head unit. Ensure all connections are secure by gently tugging on the wires. Make sure there is no exposed wire or loose connections that may cause signal loss or interference.
Once the connections between the amplifier and the head unit are complete, you have successfully integrated your under seat subwoofer into your car audio system. Now, when you adjust the bass settings on your head unit, the amplifier will receive the audio signals and send them to the subwoofer, delivering deep, powerful bass.
If you encounter any issues during the connection process, refer to the user manuals of your specific head unit and amplifier for detailed instructions. Following the manufacturer’s guidelines will ensure that the connections are made correctly and result in optimal performance.
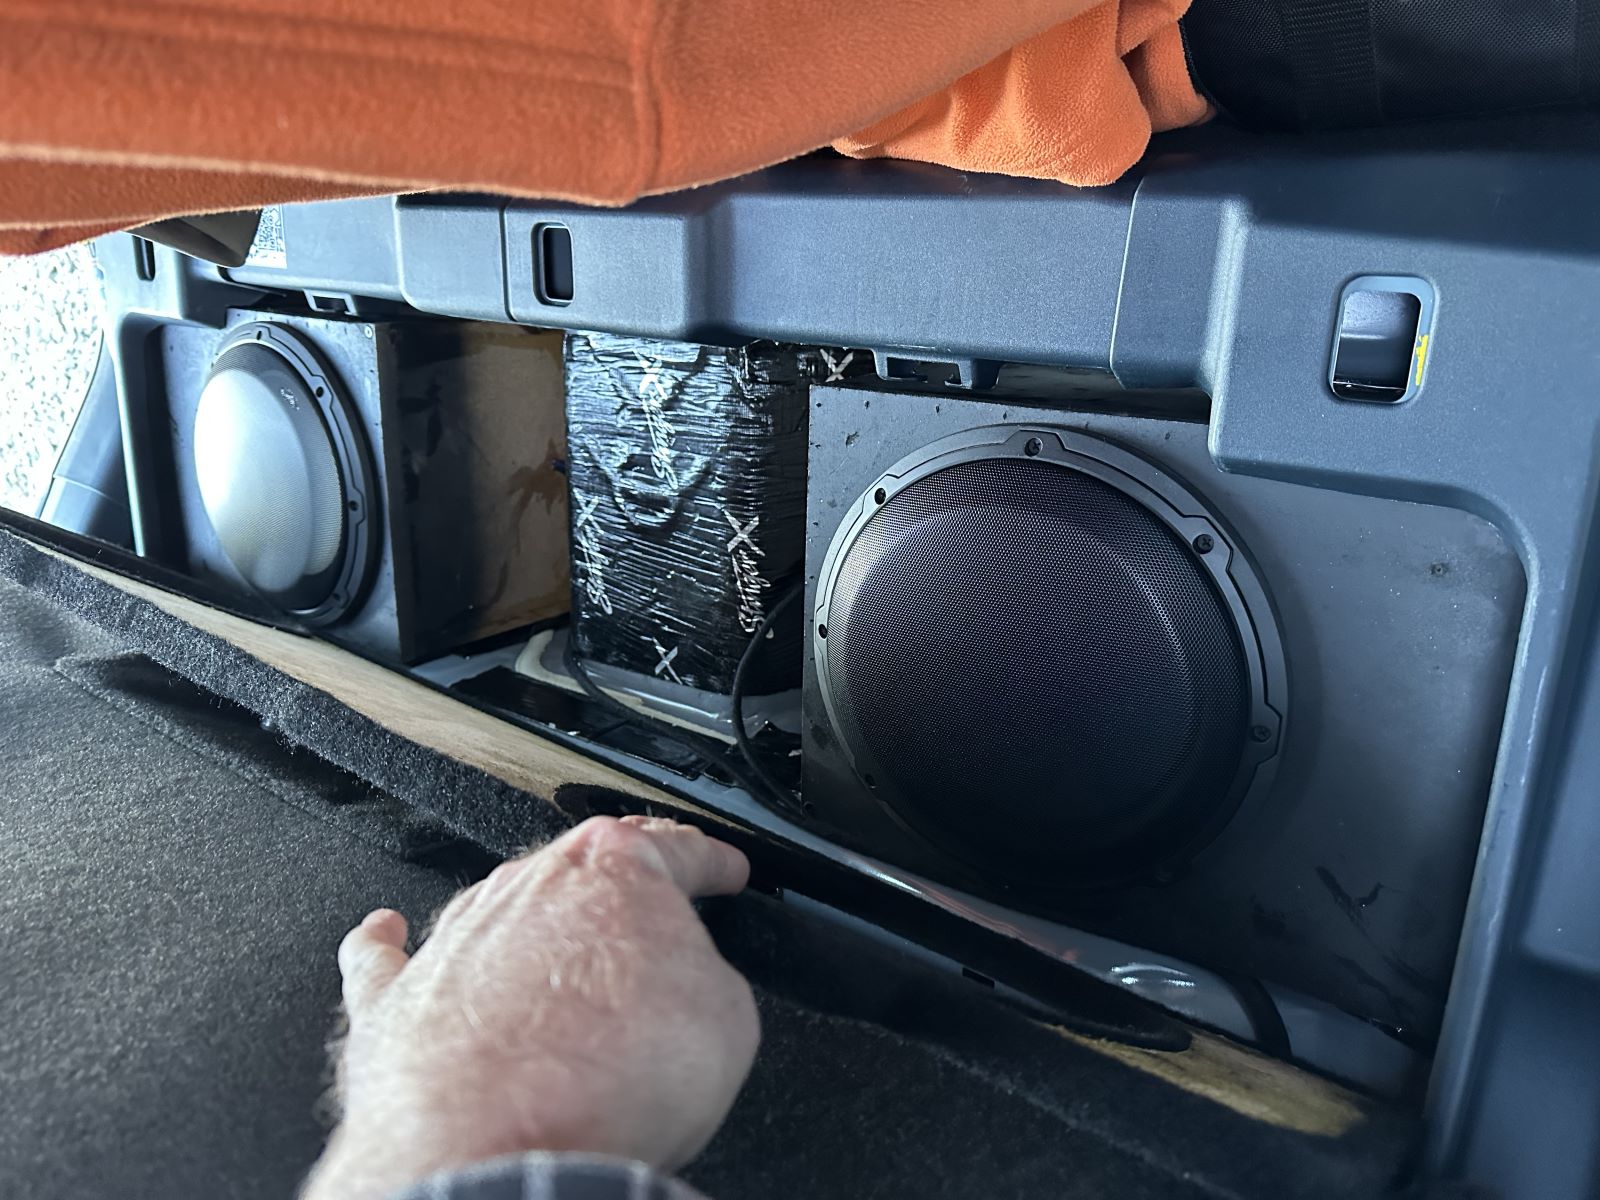
Step 7: Secure the Subwoofer under the Seat
Securing the subwoofer in its designated location under the seat is an important step to ensure it remains stable and properly aligned. Here’s how to secure the subwoofer:
Depending on the subwoofer and your car’s configuration, you may have different mounting options. Some subwoofers come with brackets or mounting screws that allow for easy installation. Others may require custom mounting solutions or adhesive strips. Carefully read the manufacturer’s instructions that came with your specific subwoofer. They will provide guidance on the recommended mounting methods and any specific considerations. Ensure the mounting surface under the seat is clean to provide a solid connection. Remove any debris or obstructions before securing the subwoofer. Place the subwoofer in the intended location under the seat, aligning it with the mounting points or brackets. Use the recommended mounting screws, brackets, or adhesive strips to secure the subwoofer in place. Follow the instructions provided by the manufacturer, ensuring a tight and stable fit. Gently shake the subwoofer to check for any loose or unstable connections. If it moves excessively, adjust the mounting or tighten the screws until it is securely fastened.
Properly securing the subwoofer is crucial to prevent unwanted vibrations or movement that could affect the sound quality or potentially damage the subwoofer or other components. Take your time to ensure a secure installation that will provide long-lasting performance.
Once you are satisfied with the subwoofer’s stability, you can move on to the final step: testing the subwoofer to ensure everything is functioning as expected.
Step 8: Test the Subwoofer
After completing the installation of your under seat subwoofer, it’s important to test it to ensure it is working correctly and providing the desired audio experience. Here’s how to test your subwoofer:
Make sure your car’s audio system is turned on, along with the head unit and amplifier connected to the subwoofer. Set the audio source to a level you’re accustomed to, whether it’s playing music, a movie, or any audio content that includes bass frequencies. Use the bass settings on your head unit or amplifier to adjust the level of bass output. Start with a moderate setting and then fine-tune it to your preference. Take a moment to focus on the quality and impact of the bass produced by the subwoofer. Pay attention to the depth, clarity, and overall balance of the bass in relation to the rest of the audio. Play a variety of music genres to test the subwoofer’s performance across different styles and frequencies. This will help you evaluate its overall versatility and ability to reproduce bass accurately. If necessary, make further adjustments to the subwoofer’s settings, such as the crossover frequency or phase, to optimize its performance and integration with your car’s audio system.
During the testing phase, listen for any distortions, rattling sounds, or imbalances in the bass. If you notice any issues, double-check the connections, ensure the subwoofer is properly secured, and adjust the settings accordingly.
It’s also a good idea to consult the user manual of your under seat subwoofer and refer to any recommended guidelines for testing and adjusting the subwoofer for optimal performance.
With the subwoofer successfully tested and fine-tuned to your liking, you can now enjoy heart-pounding bass and a more immersive audio experience in your car!
Conclusion
Congratulations! You have successfully installed an under seat subwoofer in your car, enhancing your audio system with deep, powerful bass. By following the steps outlined in this guide, you have taken a significant step towards improving your car audio experience.
Throughout the installation process, you have learned how to gather the required tools, choose the perfect subwoofer, find the ideal location under the seat, prepare the wiring, connect the subwoofer to the amplifier, connect the amplifier to the head unit, secure the subwoofer, and test its performance.
Remember, the key to a successful installation is taking your time, following the manufacturer’s instructions, and ensuring all connections are secure and properly insulated. This will ensure optimal sound quality and the longevity of your under seat subwoofer.
With the subwoofer in place, you can now enjoy a more immersive and dynamic audio experience while driving. Feel the depth of the bass and let the music come alive as you cruise down the road.
If you encounter any difficulties during the installation or have any concerns about the performance of your subwoofer, it’s always a good idea to consult professionals or reach out to the manufacturer for further assistance.
Now, sit back, relax, and enjoy your favorite tunes with the added power and richness brought by your new under seat subwoofer. Happy listening!