Home>Devices & Equipment>Subwoofer>How To Install A Subwoofer In Toyota 4 Runner
Subwoofer
How To Install A Subwoofer In Toyota 4 Runner
Published: January 23, 2024
Learn how to easily install a subwoofer in your Toyota 4 Runner and enhance your car's audio system. Find step-by-step instructions and expert tips for a seamless installation.
(Many of the links in this article redirect to a specific reviewed product. Your purchase of these products through affiliate links helps to generate commission for AudioLover.com, at no extra cost. Learn more)
Table of Contents
- Introduction
- Step 1: Gather the necessary tools and materials
- Step 2: Disconnect the battery
- Step 3: Prepare the vehicle for installation
- Step 4: Remove the factory stereo unit
- Step 5: Install the subwoofer wiring
- Step 6: Mount the subwoofer enclosure
- Step 7: Connect the subwoofer and amplifier
- Step 8: Reassemble the stereo unit and interior panels
- Step 9: Test the subwoofer for proper functioning
- Conclusion
Introduction
Are you a fan of deep, immersive bass? Do you want to take your audio experience in your Toyota 4 Runner to the next level? If so, installing a subwoofer can make a world of difference. A subwoofer is a specialized speaker designed to reproduce low-frequency sounds, adding richness and depth to your music. Whether you’re a music enthusiast or enjoy the immersive experience of movies, having a subwoofer can greatly enhance the overall audio quality in your vehicle.
Installing a subwoofer in your Toyota 4 Runner may seem like a daunting task, but with the right tools, materials, and a little guidance, it’s a project that can be accomplished by even the most novice DIY-er. In this comprehensive guide, we will walk you through the step-by-step process of installing a subwoofer in your Toyota 4 Runner, ensuring that you achieve optimal sound quality and a seamless integration with your vehicle’s audio system.
Before we dive into the installation process, it’s important to note that the specific process may vary slightly depending on the model year and trim level of your Toyota 4 Runner. It’s always recommended to consult your vehicle’s owner’s manual or seek professional assistance if you have any doubts or concerns.
So, if you’re ready to elevate your audio experience, let’s gather our tools and materials and get started on installing a subwoofer in your Toyota 4 Runner!
Step 1: Gather the necessary tools and materials
Before diving into the installation process, it’s crucial to gather all the necessary tools and materials to ensure a smooth and efficient installation. Here’s a list of items you’ll need:
- Subwoofer: Choose a subwoofer that fits your budget and audio preferences. Consider factors such as power handling, frequency response, and enclosure type.
- Amplifier: Select an amplifier that matches the power rating of your subwoofer. Ensure it’s compatible with your vehicle’s electrical system.
- Subwoofer enclosure: You can choose between a sealed or ported enclosure, depending on your desired sound quality and bass response.
- Wiring kit: Purchase a wiring kit that includes power cables, ground cables, speaker wire, RCA cables, and fuse holders. Make sure the gauge of the wires matches the requirements of your amplifier.
- Wire crimpers and connectors: These are necessary for securely connecting the wires to the amplifier and subwoofer.
- Wire strippers: Use them to strip the insulation off the wires for proper connections.
- Socket set and screwdrivers: These tools will come in handy for removing panels and securing the subwoofer components.
- Trim removal tools: These will help you safely remove the interior panels without damaging them.
- Electrical tape and zip ties: These items are essential for securing and organizing the wiring.
It’s important to ensure that you have all the necessary tools and materials before beginning the installation process to avoid any delays or complications. Make a checklist and double-check it to ensure you haven’t missed anything. Additionally, it’s always a good idea to have a clean workspace and proper safety gear, such as gloves and eye protection, while working on your vehicle.
Once you have gathered all the required tools and materials, it’s time to move on to the next step: disconnecting the battery.
Step 2: Disconnect the battery
Before you start working on any electrical components of your Toyota 4 Runner, it’s crucial to disconnect the battery to prevent any accidental short circuits or electrical damage. Follow these steps to disconnect the battery:
- Park your vehicle in a safe and well-ventilated area.
- Locate the battery in your Toyota 4 Runner. It is usually located in the engine bay, near the front of the vehicle.
- Put on safety gloves and eye protection to ensure your safety while handling the battery.
- Using a socket set or a wrench, loosen the bolt or screw that holds the negative (-) terminal clamp in place.
- Once the negative terminal clamp is loose, carefully remove it from the battery terminal.
- Repeat the same process for the positive (+) terminal clamp.
- Once both terminals are disconnected, secure the clamps away from the battery posts to prevent accidental reconnection.
By disconnecting the battery, you ensure that there is no power running through the vehicle’s electrical system, minimizing the risk of electrical shock or damage. It’s important to note that some vehicles may have additional steps or precautions when disconnecting the battery. Always consult your vehicle’s owner’s manual for specific instructions pertaining to your Toyota 4 Runner model.
Now that the battery is disconnected, you can proceed to the next step: preparing the vehicle for installation.
Step 3: Prepare the vehicle for installation
Preparing your Toyota 4 Runner for the subwoofer installation ensures a clean and organized workspace, as well as proper access to the necessary components. Follow these steps to prepare your vehicle:
- Clear out any personal belongings from the area where you will be working. This will prevent any damage or loss of items during the installation process.
- Identify the location where you will be installing the subwoofer enclosure. This can be in the trunk or cargo area of your Toyota 4 Runner.
- If there is a carpet or mat covering the area, carefully remove it to expose the floor or frame underneath. This will allow you to properly secure the subwoofer enclosure.
- Inspect the area for any existing wiring or obstacles that may interfere with the installation. Clear away any obstructions or reroute the wiring if necessary.
- Check the dimensions of the subwoofer enclosure and ensure that it will fit in the chosen location without obstructing any other components or vents in your vehicle.
- Prepare the necessary mounting hardware or brackets to secure the subwoofer enclosure in place. This may involve drilling holes or using existing hooks or attachment points.
- If you plan to run the subwoofer wiring along the vehicle’s interior, consider removing some interior panels or trim pieces to access the wiring channels. Use trim removal tools to do this carefully and avoid damaging the panels.
By preparing the vehicle beforehand, you’ll have a clean and organized workspace, making the installation process smoother and more efficient. It’s also essential to ensure that there are no existing obstructions or wiring issues that could interfere with the subwoofer installation.
Now that you have prepared the vehicle, it’s time to move on to the next step: removing the factory stereo unit.
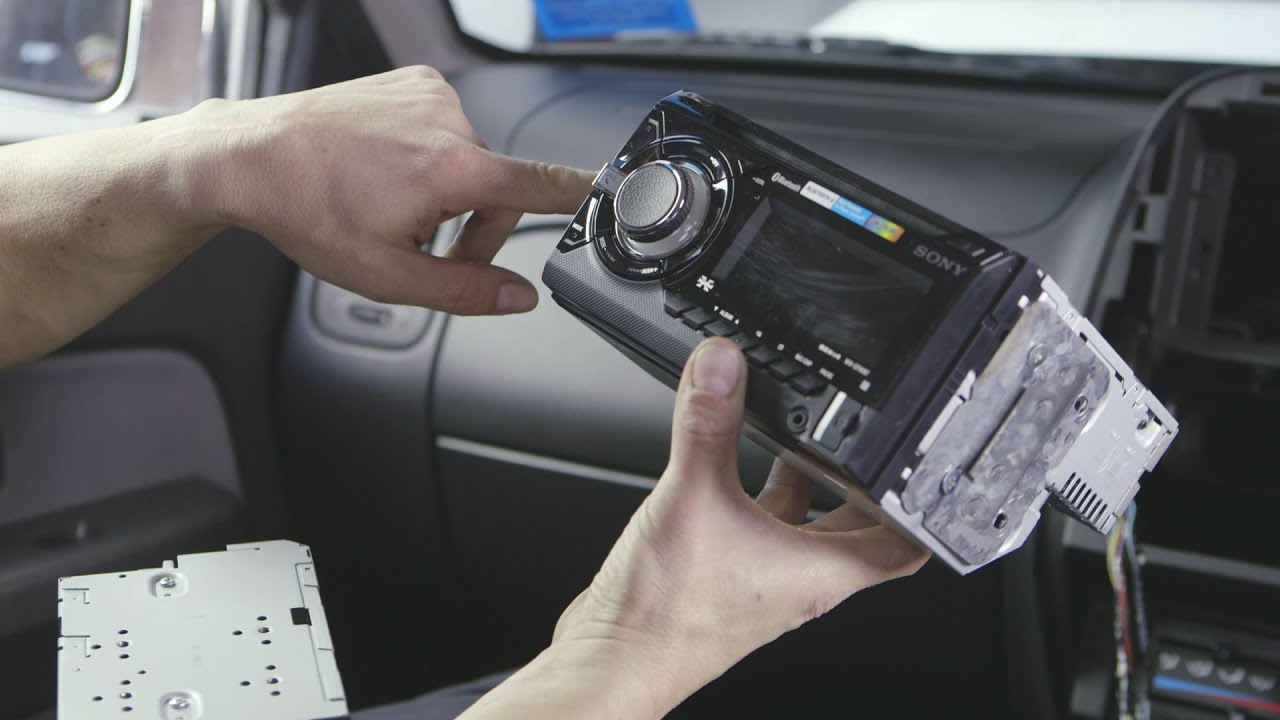
Step 4: Remove the factory stereo unit
To install a subwoofer in your Toyota 4 Runner, you’ll need to remove the factory stereo unit to gain access to the necessary wiring. Follow these steps to remove the factory stereo:
- Start by locating the trim panel or bezel surrounding the stereo unit. This is typically made of plastic and may be held in place by clips or screws.
- Use a trim removal tool to carefully pry off the trim panel. Start at one corner and work your way around, gently releasing the clips that secure it in place.
- Once the trim panel is removed, you will likely see screws or bolts securing the stereo unit to the dash. Use a screwdriver or socket set to remove these screws.
- After removing the screws, carefully pull the stereo unit out of the dash. There may be wiring harnesses and connectors attached to the back of the unit.
- Disconnect the wiring harnesses and antenna lead from the back of the stereo unit. Most wiring harnesses can be disconnected by pressing a tab or lever and pulling the connector apart.
It’s essential to be gentle and patient while removing the factory stereo unit to avoid damaging any components or wiring. Take note of the wiring connections and their locations for future reference when installing the new subwoofer and amplifier.
In some cases, you may need additional accessories, such as a wiring harness adapter or an interface module, to integrate the aftermarket subwoofer with your vehicle’s existing audio system. These accessories can provide plug-and-play compatibility and retain important features like steering wheel controls or factory amplifiers. Consult the instructions that come with the subwoofer or seek guidance from a professional if necessary.
With the factory stereo unit removed, you’re now ready to move on to the next step: installing the subwoofer wiring.
Step 5: Install the subwoofer wiring
Installing the subwoofer wiring is a crucial step in connecting the subwoofer and amplifier to your Toyota 4 Runner’s audio system. Follow these steps to ensure a proper and secure wiring installation:
- Determine the location where you will route the wiring from the subwoofer to the amplifier. This is typically done along the vehicle’s interior, such as underneath the carpet or along the door sills.
- Prepare the wiring by cutting it to the appropriate length, allowing for some slack and flexibility.
- Strip the insulation off the ends of the wires using wire strippers, exposing enough bare wire for a secure connection.
- Using wire crimpers, attach the appropriate connectors to the ends of each wire. This will depend on the connection points on the subwoofer and amplifier.
- Route the subwoofer wiring along the determined path, ensuring that it is secured and out of the way of any moving parts or potential damage.
- If necessary, use zip ties or electrical tape to secure the wiring and keep it neat and organized.
- Connect the wiring to the appropriate terminals on the subwoofer and amplifier. Make sure to match the positive and negative terminals correctly.
- Double-check all connections to ensure they are secure and tight.
When routing the wiring, it’s important to avoid any potential sources of interference, such as power cables or high-voltage areas. Keeping the wiring away from these areas will help prevent any noise or distortion in the audio signal.
Additionally, it’s a good practice to run the power cable separate from the audio signal cables to minimize the risk of interference or noise. Keep them routed on opposite sides of the vehicle and use grommets or protective tubing when passing through metal panels to prevent damage or short circuits.
By following these steps and ensuring proper routing and secure connections, you will have successfully installed the subwoofer wiring in your Toyota 4 Runner.
Now, let’s move on to the next step: mounting the subwoofer enclosure.
Step 6: Mount the subwoofer enclosure
Mounting the subwoofer enclosure securely is essential to ensure optimal performance and prevent any vibrations or unwanted movement. Here’s how you can mount the subwoofer enclosure in your Toyota 4 Runner:
- Choose the location in your vehicle’s trunk or cargo area where you want to install the subwoofer enclosure. Make sure it fits snugly and does not block any other components or vents.
- If needed, mark the desired mounting locations on the floor or frame of the vehicle.
- Using appropriate mounting screws or brackets, secure the subwoofer enclosure in place. Ensure that it is mounted securely and will not move or shift while driving.
- Check for any signs of interference or obstructions that may affect the subwoofer’s performance, such as loose wires or objects that may come into contact with the subwoofer cone.
- Double-check all mounting screws or brackets to ensure they are tightened securely, but be careful not to overtighten and damage the enclosure or the vehicle’s interior.
It’s important to strike a balance between a secure mounting and preserving the aesthetic appearance of your vehicle’s interior. Make sure that the subwoofer enclosure is not obstructing any necessary storage space or creating any safety hazards. Additionally, consider using foam or rubber gaskets between the enclosure and the mounting surface to minimize vibrations and improve sound quality.
Once you have successfully mounted the subwoofer enclosure, you are one step closer to experiencing the enhanced audio performance in your Toyota 4 Runner. The next step is to connect the subwoofer and amplifier.
Step 7: Connect the subwoofer and amplifier
Connecting the subwoofer and amplifier is a critical step in completing the installation process and ensuring proper functionality of your audio system. Follow these steps to correctly connect the subwoofer and amplifier in your Toyota 4 Runner:
- Locate the preamp outputs or low-level outputs on your factory stereo unit or aftermarket head unit. These outputs will provide the audio signal to the amplifier.
- Connect one end of the RCA cables to the preamp outputs on the stereo unit.
- Route the RCA cables from the stereo unit to the trunk or cargo area, where the amplifier is located.
- Connect the other end of the RCA cables to the corresponding inputs on the amplifier. Ensure that the connections are secure and tight.
- Locate the power and ground terminals on the amplifier. These will be labeled and typically require thick-gauge power and ground cables.
- Measure and cut the power and ground cables according to the distance between the amplifier and the vehicle’s battery.
- Strip the insulation off the ends of the power and ground cables, exposing the bare wire.
- Connect the power cable to the positive terminal of the vehicle’s battery. Use an appropriate fuse holder near the battery terminal for safety.
- Connect the ground cable to a solid and clean metal point on the vehicle’s chassis, ensuring a good metal-to-metal connection.
- Double-check all connections to ensure they are secure and properly tightened.
It’s important to ensure that the power cable is routed away from any signal cables to prevent any potential interference or noise in the audio signal. Use zip ties or electrical tape to secure and organize the wiring to avoid any potential hazards or damage.
Once you have completed the connections between the subwoofer and amplifier, you are now ready to move on to the next step: reassembling the stereo unit and interior panels.
Step 8: Reassemble the stereo unit and interior panels
Now that the subwoofer and amplifier are properly connected, it’s time to reassemble the stereo unit and interior panels in your Toyota 4 Runner. Follow these steps to ensure a seamless and tidy reinstallation:
- Reconnect the wiring harnesses and antenna lead to the back of the stereo unit, matching the respective connectors.
- Slide the stereo unit back into the dash opening until it snaps into place. Ensure that it is flush with the surrounding trim.
- Secure the stereo unit by reinstalling the screws or bolts that were removed earlier.
- Take the trim panel or bezel that surrounds the stereo unit and align it with the mounting points on the dash.
- Gently press the trim panel into place, ensuring that all clips engage securely.
- Inspect the interior panels that were removed earlier for any clips, screws, or fasteners that need to be reinstalled.
- Using a trim removal tool, press any clips back into place, and reinstall any screws or fasteners.
- Ensure that all panels and trim pieces fit flush and securely without any gaps.
It’s important to handle the interior panels with care to avoid any damage. Take your time during the reassembly process to ensure that everything is aligned properly and securely fastened.
If you encountered any additional wiring or interface modules during the removal process, now is the time to connect them according to the manufacturer’s instructions. These modules may allow you to retain certain vehicle features or integrate other aftermarket components seamlessly.
Once you have reassembled the stereo unit and interior panels, you’re almost done! The final step is to test the subwoofer for proper functioning.
Step 9: Test the subwoofer for proper functioning
After completing the installation of the subwoofer in your Toyota 4 Runner, it’s crucial to test its functionality to ensure everything is working as expected. Follow these steps to test the subwoofer for proper functioning:
- Reconnect the negative (-) terminal clamp to the battery that was disconnected earlier.
- Ensure that all the other necessary connections, such as the power and ground cables, are securely fastened.
- Turn on your vehicle’s ignition and stereo unit to test the audio system.
- Choose a song or audio source with deep bass to evaluate the performance of the subwoofer.
- Gradually increase the volume and listen for the presence of rich and deep bass from the subwoofer.
- Adjust the subwoofer settings on your stereo unit or amplifier (if available) to achieve the desired level of bass.
- Test the functionality of the subwoofer across various audio sources, such as music, movies, or podcasts, to ensure consistency.
- Listen for any distortions, rattling, or abnormal sounds that may indicate a wiring or speaker issue.
If you encounter any issues during the testing phase, double-check all connections and settings to ensure they are correct. It’s also worth consulting the user manuals for your subwoofer, amplifier, and stereo unit for troubleshooting tips specific to your equipment.
Additionally, pay attention to any warning lights or indicators on your vehicle’s dashboard that may indicate electrical or audio system problems. If you’re unsure about any aspect of the installation or if the subwoofer is not performing as expected, it’s always recommended to seek professional assistance from a qualified car audio technician.
Congratulations! By successfully testing the subwoofer and ensuring its proper functioning, you have completed the installation process. Enjoy the enhanced audio experience in your Toyota 4 Runner!
Disclaimer: The steps outlined in this guide are meant to provide general guidance for installing a subwoofer in a Toyota 4 Runner. It’s always important to consult your vehicle’s owner’s manual and follow any specific instructions or guidelines provided by the manufacturer of your subwoofer, amplifier, and stereo unit. Improper installation or handling of electrical components can result in damage to your vehicle or audio equipment, or even pose safety hazards. If you are unsure about any aspect of the installation, it’s recommended to seek professional assistance.
Conclusion
Congratulations on successfully installing a subwoofer in your Toyota 4 Runner! By following the step-by-step guide outlined in this article, you have transformed your vehicle’s audio system and taken your sound experience to the next level. The deep and immersive bass provided by the subwoofer will enhance your music, movies, and overall driving experience.
Throughout the installation process, you learned how to gather the necessary tools and materials, disconnect the battery, prepare the vehicle, remove the factory stereo unit, install the subwoofer wiring, mount the subwoofer enclosure, connect the subwoofer and amplifier, reassemble the stereo unit and interior panels, and test the subwoofer for proper functioning.
It’s important to remember the significance of attention to detail and proper wiring and connections. A solid and secure installation will ensure the longevity and optimal performance of your subwoofer and audio components.
Now, sit back, relax, and enjoy the immersive audio experience in your Toyota 4 Runner. Feel the deep bass resonating throughout the cabin, bringing your favorite music to life and adding excitement to every drive.
If you have any further questions or encounter any issues with your subwoofer installation, don’t hesitate to consult the user manuals or seek professional assistance. Car audio experts can provide additional guidance and ensure that your subwoofer system is functioning optimally.
Thank you for choosing to enhance your audio experience with a subwoofer in your Toyota 4 Runner. We hope this guide has been informative and helpful in your installation journey. Happy listening!