Home>Devices & Equipment>Turntable>How Do I Get To The Motor On My Marantz 6150 Turntable
Turntable
How Do I Get To The Motor On My Marantz 6150 Turntable
Modified: January 22, 2024
Learn how to access and service the motor on your Marantz 6150 turntable with our step-by-step guide. Get your turntable running smoothly again!
(Many of the links in this article redirect to a specific reviewed product. Your purchase of these products through affiliate links helps to generate commission for AudioLover.com, at no extra cost. Learn more)
Table of Contents
- Introduction
- Step 1: Gather necessary tools and materials
- Step 2: Prepare the workspace
- Step 3: Remove the dust cover
- Step 4: Remove the platter
- Step 5: Locate the motor
- Step 6: Disconnect the motor wiring
- Step 7: Remove the motor
- Step 8: Install the new motor (if applicable)
- Step 9: Reconnect the motor wiring
- Step 10: Replace the platter
- Step 11: Reattach the dust cover
- Conclusion
Introduction
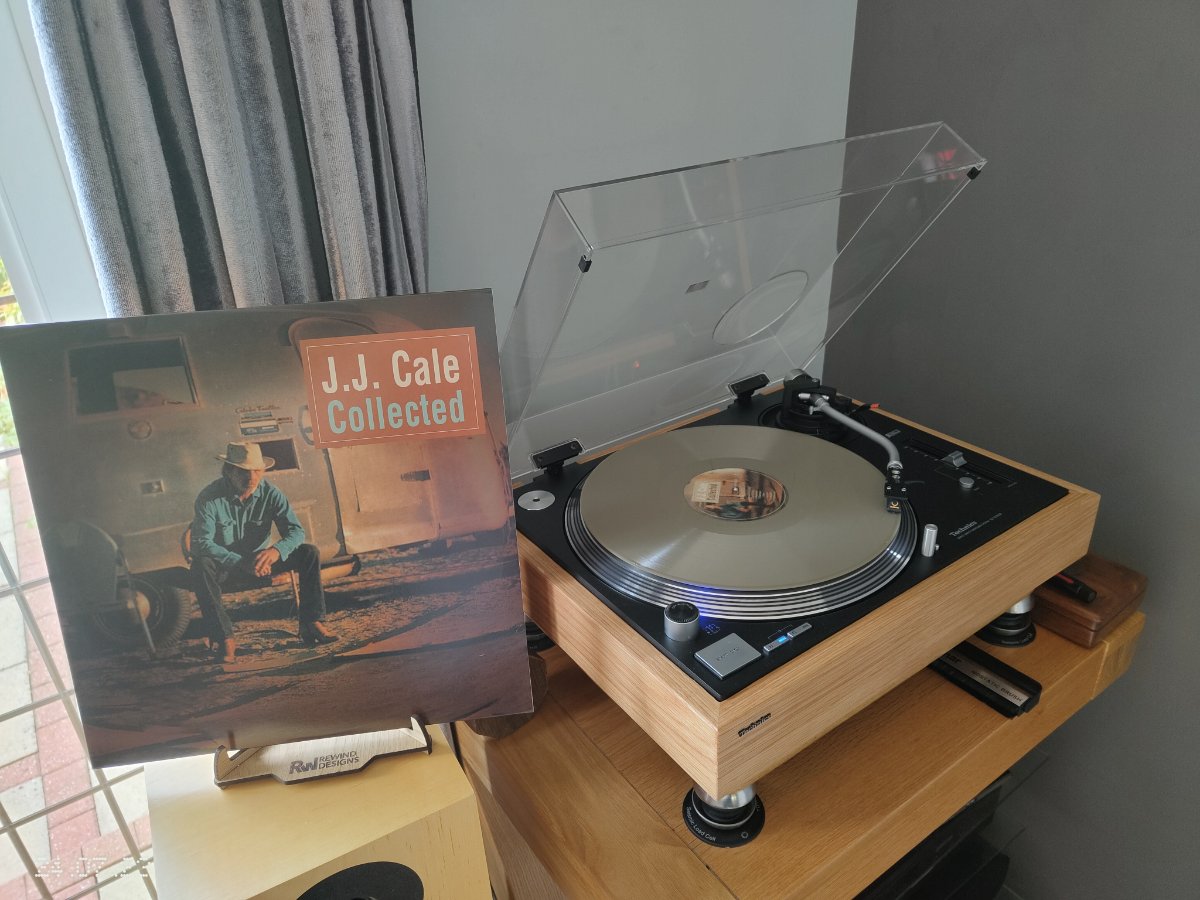
Welcome to the world of turntables, where music comes to life through the beautiful combination of analog technology and timeless vinyl records. If you own a Marantz 6150 turntable, you may find yourself in a situation where you need to access the motor for maintenance, repair, or replacement. Don’t worry, with a little guidance and some basic tools, you can easily access the motor on your Marantz 6150 turntable.
The motor is a critical component of a turntable, responsible for spinning the platter at a consistent speed, ensuring accurate playback of your cherished vinyl records. Over time, the motor can wear out or encounter issues that may require attention. Whether you want to clean the motor, repair a malfunctioning component, or upgrade it to improve performance, accessing the motor will be necessary.
In this article, we will guide you through the step-by-step process of accessing the motor on your Marantz 6150 turntable. We will cover everything from gathering the necessary tools to reattaching the dust cover after the procedure. With our instructions and a little bit of patience, you’ll be able to get to the motor and perform the necessary maintenance or replacement to keep your turntable running smoothly.
Before we dive into the process, it’s important to note that working with delicate electronic equipment requires caution and precision. Make sure to take your time, follow instructions carefully, and if you feel uncomfortable or unsure at any point, it’s always best to seek assistance from a professional technician or turntable specialist.
Now that you have a sense of what lies ahead, let’s gather our tools and prepare for the motor access procedure on your Marantz 6150 turntable.
Step 1: Gather necessary tools and materials
Before diving into the process of accessing the motor on your Marantz 6150 turntable, it’s essential to gather the necessary tools and materials. Having everything prepared ahead of time will help streamline the procedure and ensure you have everything you need on hand.
Here are the tools and materials you will need:
- Screwdriver: A small screwdriver with the appropriate size and type of head to remove screws.
- Tweezers: A pair of tweezers can be handy for handling small components or wires.
- Lint-free cloth: Use a lint-free cloth to wipe away any dust or debris during the process.
- Contact cleaner: If you plan to clean the motor or any electrical connections, having contact cleaner can be beneficial.
- Replacement motor (if applicable): If you are replacing the motor, make sure you have the new motor ready to be installed.
By having these tools and materials ready, you will be well-prepared for the motor access procedure on your Marantz 6150 turntable. Now that you have everything you need, let’s move on to the next step: preparing the workspace.
Step 2: Prepare the workspace
Before diving into the process of accessing the motor on your Marantz 6150 turntable, it’s important to prepare your workspace to ensure a clean and organized environment for the procedure. This will help prevent any accidental damage to your turntable and make the process more efficient.
Follow these steps to prepare your workspace:
- Clean the area: Clear your workspace of any dust, debris, or other objects that could potentially interfere with the procedure. This will help prevent any unwanted particles from entering the turntable during the process.
- Choose a flat surface: Find a flat and stable surface to work on, preferably a table or a dedicated workbench. This will provide a solid foundation for the turntable and make it easier to access the motor.
- Ensure proper lighting: Make sure the workspace is well-lit so that you can clearly see the components and connections inside the turntable. You can use a desk lamp or work under natural daylight if possible.
- Organize your tools and materials: Lay out your tools and materials in a neat and organized manner. This will make it easier to access them during the procedure and help prevent any accidental misplacement or damage.
- Keep a clean towel or mat: Place a clean towel or mat on your workspace to provide a soft surface to place the turntable and prevent any scratches or damage to its surface.
By following these steps, you will create an optimal workspace for accessing the motor on your Marantz 6150 turntable. With a clean and organized environment, you can proceed to the next step: removing the dust cover.
Step 3: Remove the dust cover
Now that you have gathered your tools and prepared your workspace, it’s time to remove the dust cover from your Marantz 6150 turntable. The dust cover protects the delicate components of the turntable and keeps it clean from dust and debris. Removing the dust cover will provide you with better access to the motor and other internal components.
Follow these steps to remove the dust cover:
- Ensure the turntable is turned off: Before proceeding, make sure your turntable is turned off and unplugged from the power source. This will ensure your safety during the procedure.
- Locate the hinges: Look for the hinges that connect the dust cover to the main body of the turntable. They are usually located towards the back of the turntable.
- Release the dust cover: Gently lift the dust cover and locate the release mechanism on each hinge. Depending on your turntable model, the release mechanism may vary. It could be a lever, button, or latch that needs to be pressed or lifted.
- Unlock the dust cover: Use your fingers or a small tool to release the mechanism, allowing the dust cover to detach from the hinges.
- Remove the dust cover: Once the locks are released, carefully lift the dust cover away from the turntable and set it aside in a safe place.
With the dust cover removed, you now have a clearer view of the internal components of your Marantz 6150 turntable. This will make it easier to proceed with accessing the motor in the next steps.
Keep the dust cover in a safe place to prevent it from getting damaged or scratched during the procedure. Now that the dust cover is removed, it’s time to move on to the next step: removing the platter.
Step 4: Remove the platter
With the dust cover removed, it’s time to remove the platter from your Marantz 6150 turntable. The platter is the circular disc that sits on top of the turntable’s spindle and holds the vinyl records during playback. Removing the platter will give you direct access to the motor and other internal components.
Follow these steps to remove the platter:
- Ensure the turntable is turned off: Before proceeding, make sure your turntable is turned off and unplugged from the power source. This will prevent any accidental damage and ensure your safety.
- Remove any accessories: If there are any accessories, such as slip mats or record clamps, on top of the platter, remove them and set them aside.
- Locate the record mat: The record mat is a thin, circular pad that sits on top of the platter. Locate and lift the record mat to expose the platter underneath.
- Grip the platter: Place your hands on opposite sides of the platter and gently grip it firmly. Ensure that your hands are clean to avoid transferring any oils or dirt onto the surface of the platter.
- Turn the platter counterclockwise: While maintaining a firm grip, rotate the platter counterclockwise. The platter should start to loosen and come off the spindle.
- Lift and remove the platter: Once the platter is loose, lift it up and off the turntable, setting it aside in a safe place.
Now that the platter has been removed, you have direct access to the motor and other internal components of your Marantz 6150 turntable. This will allow you to proceed with the next steps in accessing and working on the motor as needed.
Remember to handle the platter with care and avoid dropping or mishandling it, as it can be fragile and easily damaged. With the platter out of the way, you’re ready to move on to the next step: locating the motor.
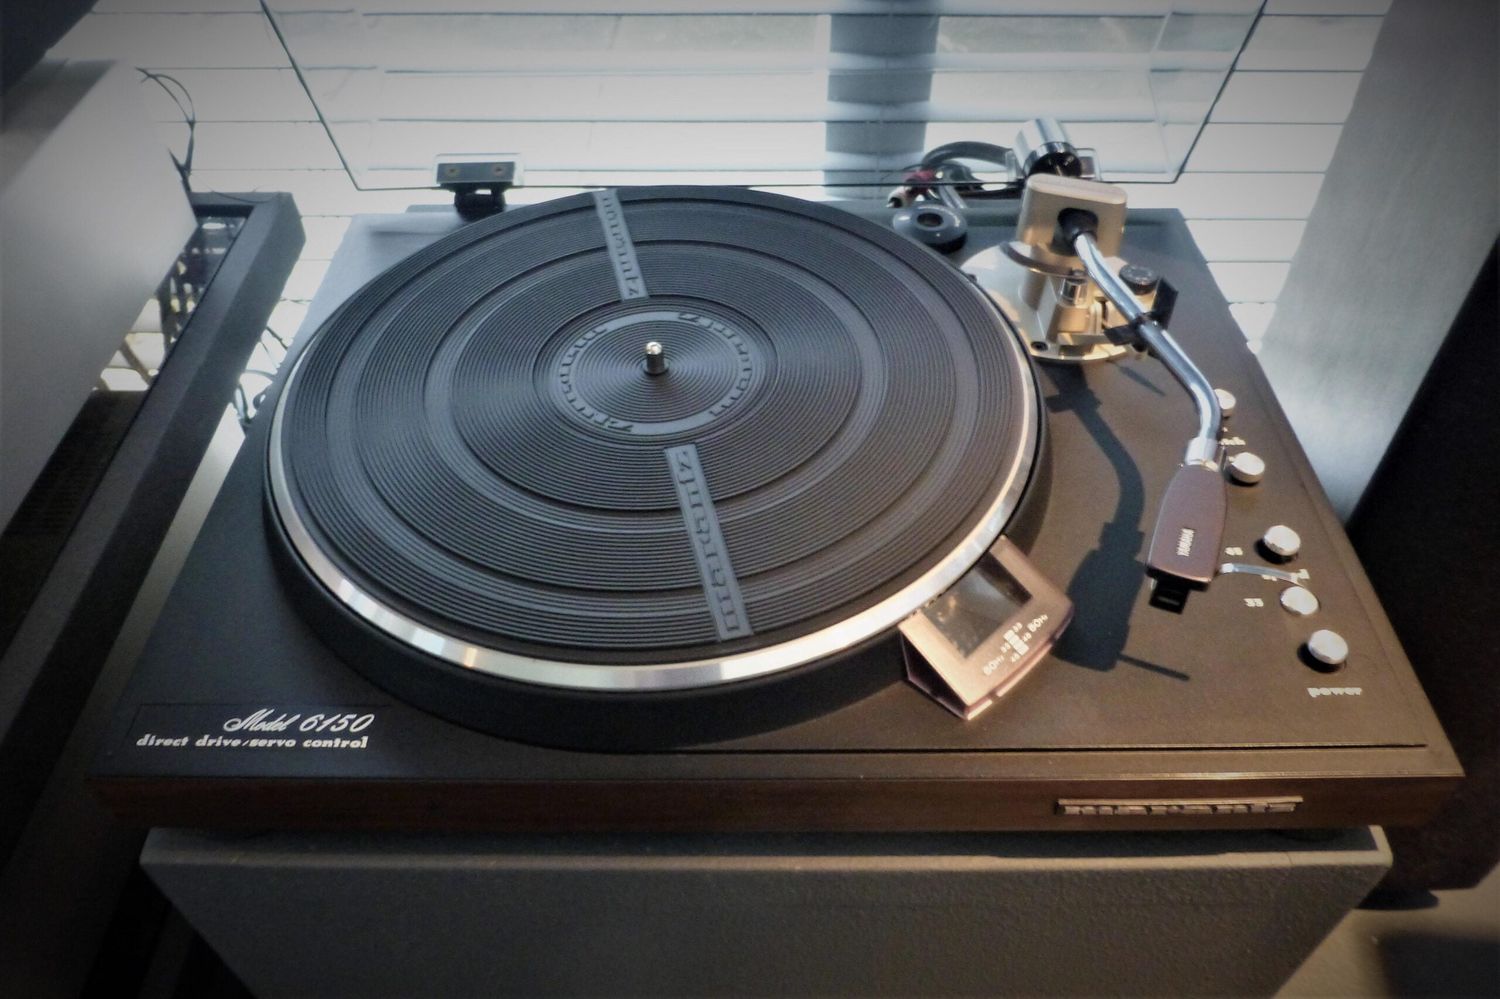
Step 5: Locate the motor
Now that the platter has been removed, it’s time to locate the motor on your Marantz 6150 turntable. The motor is a vital component responsible for spinning the platter at a constant speed for accurate playback. Finding the motor will allow you to proceed with the necessary maintenance or replacement.
Follow these steps to locate the motor:
- Inspect the turntable base: Look at the base of your Marantz 6150 turntable, where the platter used to sit. You should see a rectangular or cylindrical-shaped component, which is the motor.
- Observe the wiring: Take note of any wires connected to the motor. These wires provide power to the motor and may need to be disconnected before proceeding further.
- Familiarize yourself with the motor’s position: Pay attention to how the motor is positioned in relation to other components. This will help you during reassembly if you need to disconnect or remove the motor for maintenance.
The motor on the Marantz 6150 turntable is typically located near the edge of the turntable base, either on the left or right side. It might be partially covered or have a plastic or metal housing around it. Take your time to examine the area and get familiar with the motor’s location and appearance.
Remember, each turntable model may have slight variations in the motor’s design and placement. If you’re having trouble locating the motor or are unsure, refer to the user manual specific to your Marantz 6150 turntable for additional guidance.
With the motor located, you’re now ready to proceed with the next step: disconnecting the motor wiring.
Step 6: Disconnect the motor wiring
Now that you have located the motor on your Marantz 6150 turntable, it’s time to disconnect the motor wiring. Disconnecting the wiring is necessary if you need to fully remove the motor for maintenance or replacement purposes.
Follow these steps to disconnect the motor wiring:
- Ensure the turntable is turned off: Before proceeding, make sure your turntable is turned off and unplugged from the power source. This will prevent any electrical mishaps during the disconnection process.
- Identify the motor wiring: Examine the wires that are connected to the motor. Typically, there will be two wires – one for power and one for ground.
- Use appropriate tools: Depending on the type of connector or wiring setup, you may need to use a small screwdriver or pliers to disconnect the wiring. Be careful not to damage the wires or connectors.
- Disconnect the wires: Gently pull apart the connectors or disconnect the wiring, ensuring a clean break without applying excessive force. Take note of how the wires are connected, as you will need to reconnect them later.
- Secure the disconnected wires: Once the wiring is disconnected, take precautions to secure the loose wires. You can use tape or small zip ties to prevent them from getting tangled or lost during the remainder of the procedure.
By following these steps, you have successfully disconnected the motor wiring on your Marantz 6150 turntable. This will allow you to proceed with removing the motor in the following step if necessary.
Remember to handle the wiring with care and avoid pulling or yanking on the wires, as they can be fragile and easily damaged. With the motor wiring disconnected, you’re ready to move on to the next step: removing the motor if needed.
Step 7: Remove the motor
Now that the motor wiring is disconnected, you can proceed with removing the motor from your Marantz 6150 turntable. Removing the motor allows for more thorough maintenance or replacement if necessary.
Follow these steps to remove the motor:
- Ensure the turntable is turned off: Prior to removing the motor, ensure that your turntable is turned off and unplugged from the power source. This guarantees your safety during the procedure.
- Examine the motor mounting: Take a close look at how the motor is mounted within the turntable. Look for any screws, brackets, or clips that are holding it in place.
- Remove any securing components: If there are screws or brackets securing the motor, use the appropriate tools (such as a screwdriver) to remove them carefully. Set aside the securing components in a safe place for reassembly later.
- Gently lift the motor: Once any securing components are removed, gently lift the motor upward, taking care not to apply excessive force or twist it at an awkward angle. If the motor feels stuck, double-check for any additional connections or obstructions that may need to be detached or removed.
- Set aside the removed motor: Once the motor is successfully detached, set it aside in a safe and clean area, ensuring it won’t be accidentally knocked over or damaged during the remainder of the procedure.
With the motor removed, you now have easy access to clean or inspect the motor, or replace it with a new one if necessary. As you handle the motor, be cautious not to drop or mishandle it, as it can be delicate and sensitive to shock.
Remember to take note of the motor’s position and orientation if it requires reinstallation in the same manner later on. With the motor removed, you can proceed to the next step: installing a new motor (if applicable).
Step 8: Install the new motor (if applicable)
If you are replacing the motor on your Marantz 6150 turntable, this step will guide you through the process of installing the new motor. Installing a new motor can improve performance or address any issues you were experiencing with the previous motor.
Follow these steps to install the new motor:
- Ensure the turntable is turned off: Before proceeding, make sure your turntable is turned off and unplugged from the power source. This will prevent any electrical mishaps during the motor installation.
- Prepare the new motor: If you have a new motor, ensure it is compatible with your Marantz 6150 turntable and has the necessary specifications. Familiarize yourself with its design and any accompanying documentation.
- Position the new motor: Carefully position the new motor in the designated area within the turntable, aligning it properly with any mounting holes or slots. Take care not to twist or force the motor into place.
- Secure the new motor: If the new motor requires any screws, brackets, or clips for mounting, use the appropriate tools (such as a screwdriver) to secure it in place. Follow any manufacturer guidelines or instructions for proper installation.
- Reconnect the motor wiring: If you disconnected the motor wiring during the earlier steps, now is the time to reconnect it. Ensure that the appropriate wires are connected to their respective terminals, following any color-coding or markings.
When installing a new motor, it’s essential to double-check all connections and ensure they are secure. This will prevent any issues or malfunctions once the turntable is in use.
Remember, if you are not comfortable with the installation process or are unsure about any steps, it’s recommended to seek assistance from a professional technician or turntable specialist.
With the new motor successfully installed and the wiring reconnected, you have completed the motor installation process on your Marantz 6150 turntable. You can now move on to the next step: reconnecting the motor wiring.
Step 9: Reconnect the motor wiring
With the new motor installed in your Marantz 6150 turntable, it’s time to reconnect the motor wiring. Properly connecting the wiring ensures that the motor receives the necessary power and enables it to function correctly.
Follow these steps to reconnect the motor wiring:
- Ensure the turntable is turned off: Before proceeding, ensure that your turntable is turned off and unplugged from the power source. This prevents any electrical mishaps during the reconnection process.
- Identify the motor wiring: Examine the wires that were disconnected from the previous motor or the new motor. Typically, there will be connectors or terminals for power and ground.
- Align the connectors or terminals: Match the connectors or terminals on the motor with the corresponding connectors or terminals on the motor wiring. Ensure a proper alignment and make sure the connectors or terminals fit together securely.
- Connect the wiring: Push the connectors together or attach the wiring to the terminals, ensuring a secure connection. You may need to use gentle pressure or a slight twisting motion depending on the type of connectors or terminals.
- Inspect the connection: Double-check that the wires are properly connected, with no loose or exposed connections. Verify that the power and ground wires are connected to their respective terminals.
When reconnecting the motor wiring, it’s important to handle the wires carefully and avoid bending or damaging them. Take your time to ensure a proper and secure connection to prevent any electrical issues or malfunctions.
Once the motor wiring is successfully reconnected, you have completed a crucial step in the access and maintenance procedure of your Marantz 6150 turntable. With the motor wiring now connected, you can proceed to the next step: replacing the platter.
Step 10: Replace the platter
With the motor wiring reconnected, it’s time to replace the platter on your Marantz 6150 turntable. The platter holds your vinyl records and ensures smooth rotation for accurate playback. Reassembling the platter is a straightforward process and will allow you to get your turntable up and running again.
Follow these steps to replace the platter:
- Retrieve the platter: Take the platter that you set aside earlier and ensure it is clean and free from any dust or debris.
- Position the platter on the spindle: Locate the spindle at the center of the turntable base. Gently align the hole in the center of the platter with the spindle, making sure it sits flush and level.
- Press down on the platter: Apply even pressure to the top of the platter and press it down onto the spindle. It should slide down smoothly and sit firmly in place.
- Rotate the platter clockwise: Once the platter is in place, give it a gentle clockwise rotation to ensure it spins freely and is properly seated on the spindle.
- Ensure stability: Check that the platter is stable and does not wobble excessively. If needed, adjust the positioning or alignment until the platter is properly seated.
By following these steps, you have successfully replaced the platter on your Marantz 6150 turntable. The platter is now securely attached and ready for use.
It’s important to handle the platter with care to avoid any accidental damage or mishandling. Take your time to properly align the platter and ensure it spins freely and smoothly once attached.
Now that the platter is in place, you’re ready for the final step: reattaching the dust cover.
Step 11: Reattach the dust cover
With the platter back in place, it’s time to reattach the dust cover to your Marantz 6150 turntable. The dust cover not only protects the internal components but also adds a sleek and finished look to your turntable setup.
Follow these steps to reattach the dust cover:
- Clean the dust cover: Before reattaching the dust cover, ensure it is clean and free from any dust, fingerprints, or smudges. Use a lint-free cloth to wipe it down gently if needed.
- Align the hinges: Position the dust cover over the turntable, aligning the hinges with the corresponding slots or attachment points on the turntable’s main body.
- Lower the dust cover: Slowly lower the dust cover, allowing the hinges to fit into the slots or attachment points. Ensure a smooth and even descent.
- Secure the dust cover: Once the hinges are aligned, secure the dust cover by engaging the locking mechanism. This may involve a lever, button, or latch that needs to be pressed or flipped.
- Test the dust cover: Give the dust cover a gentle lift and ensure it opens and closes smoothly without any resistance. Check that it sits flush and level when closed.
With the dust cover reattached, your Marantz 6150 turntable is now fully assembled and ready for use. The dust cover will keep your turntable protected from dust, dirt, and accidental damage when not in use.
Remember to handle the dust cover with care to avoid any scratches or damage. Take your time to align and secure it properly for a seamless and visually pleasing setup.
Congratulations! You have successfully accessed the motor on your Marantz 6150 turntable, whether for maintenance, repair, or replacement, and have reassembled it to its full functionality.
Now you can enjoy the experience of playing your favorite vinyl records with the confidence that your turntable is in optimal condition.
Conclusion
Congratulations on successfully accessing the motor on your Marantz 6150 turntable! By following the step-by-step guide outlined in this article, you have gained the knowledge and skills required to perform maintenance, repair, or even replace the motor. This not only helps keep your turntable in optimal working condition but also allows you to enhance its performance and extend its lifespan.
Throughout the procedure, you gathered the necessary tools, prepared your workspace, removed the dust cover and platter, located and disconnected the motor wiring, removed the motor (if required), installed a new motor (if applicable), reconnected the motor wiring, replaced the platter, and reattached the dust cover. Each step was designed to guide you through the process efficiently and effectively.
Remember, as you work on your turntable, always prioritize safety and cleanliness. Ensure the turntable is powered off and unplugged, handle components with care, and work in a well-organized and dust-free environment. If you ever feel unsure or uncomfortable during the procedure, don’t hesitate to seek assistance from a professional.
By maintaining and taking care of your Marantz 6150 turntable, you can continue to enjoy the vibrant and immersive experience of listening to vinyl records. As you explore the world of turntables, always remember to follow regular maintenance routines, keep your equipment clean, and seek professional advice or guidance when needed.
Thank you for choosing Marantz, and happy listening!