Home>Events & Info>Playback>How To Speed Up Lightworks Playback

Playback
How To Speed Up Lightworks Playback
Modified: January 22, 2024
Learn how to speed up the playback in Lightworks for smoother editing. Improve your workflow and productivity with these helpful tips and tricks.
(Many of the links in this article redirect to a specific reviewed product. Your purchase of these products through affiliate links helps to generate commission for AudioLover.com, at no extra cost. Learn more)
Table of Contents
Introduction
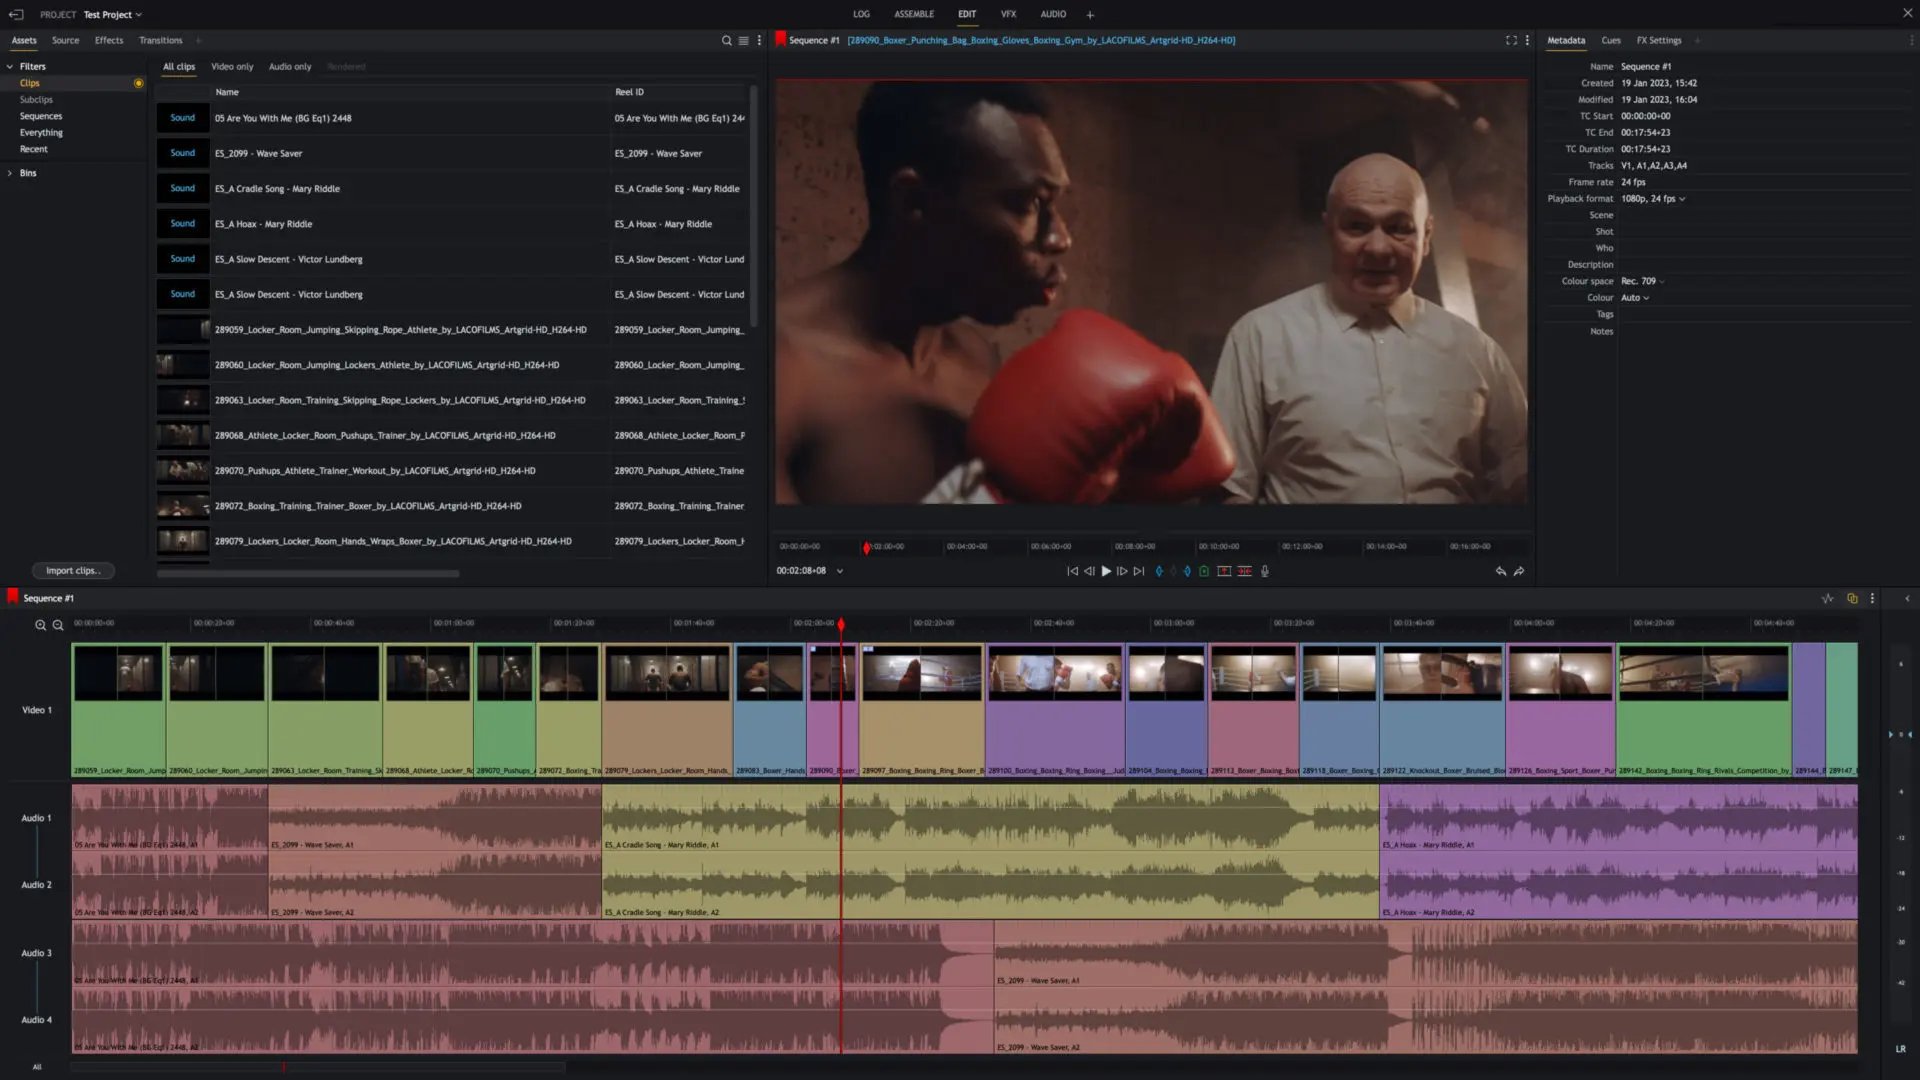
Lightworks is a powerful and feature-rich video editing software that allows users to create stunning visual projects. However, one common challenge that many users face is slow playback, which can hinder productivity and delay project completion. Fortunately, there are several steps you can take to speed up Lightworks playback and optimize your editing experience.
In this article, we will discuss various techniques and strategies to enhance the performance of Lightworks playback. We will provide useful tips on optimizing both software and hardware settings, as well as implementing workflow improvements. By following these recommendations, you can ensure smooth and seamless playback, enabling you to work more efficiently and produce high-quality videos.
Before diving into the practical solutions, let’s briefly go over the system requirements for running Lightworks effectively. This will help you understand the baseline specifications necessary for optimal performance.
System Requirements:
- Operating System: Lightworks is compatible with Windows, macOS, and Linux systems.
- Processor: A multicore processor is highly recommended for smooth playback.
- RAM: Lightworks recommends a minimum of 4 GB RAM, but higher RAM capacity will yield better performance.
- Graphics Card: It is essential to have a supported GPU for accelerated processing.
- Storage: Sufficient free space on your hard drive is necessary to store project files and media.
Now that we have outlined the system requirements, let’s move on to the practical steps you can take to speed up Lightworks playback. By following these guidelines, you can optimize your setup and ensure a seamless editing experience.
System Requirements
Before delving into the various ways to optimize Lightworks playback, it’s important to ensure that your system meets the minimum requirements for running the software effectively. By having the right hardware specifications, you can avoid potential performance issues and enjoy a smoother editing experience.
Here are the recommended system requirements for running Lightworks:
- Operating System: Lightworks is compatible with Windows, macOS, and Linux operating systems. Ensure that you have a supported version installed on your computer.
- Processor: Lightworks recommends using a multicore processor for optimal playback performance. A higher number of cores will allow for smoother handling of video files and effects.
- RAM: It is recommended to have a minimum of 4 GB RAM for Lightworks. However, for better performance, consider increasing it to 8 GB or more, especially when working with high-resolution footage or complex projects.
- Graphics Card: Lightworks utilizes GPU acceleration for faster video processing. Ensure that your system has a supported graphics card with dedicated memory. This will significantly enhance the playback speed and overall performance.
- Storage: Having enough free space on your hard drive is crucial for storing project files and media. High-quality videos can consume a considerable amount of disk space, so make sure you have sufficient storage available.
While these are the recommended system requirements, it’s worth noting that Lightworks can run on systems with lower specifications. However, you may experience performance limitations, especially when working with resource-intensive tasks.
Before proceeding with any optimization techniques, it’s essential to ensure that your system meets or exceeds these requirements. Upgrading your hardware, if needed, will go a long way in improving Lightworks playback speed and overall performance.
Updating Lightworks
Keeping your software up to date is vital for optimal performance and accessing the latest features and bug fixes. Lightworks regularly releases updates, addressing known issues and introducing new enhancements. By updating Lightworks to the latest version, you can ensure a smoother editing experience and potentially resolve any playback issues you may be encountering.
Here’s how you can update Lightworks:
- Launch Lightworks on your computer.
- Go to the “Help” or “File” menu, depending on your operating system.
- Look for the “Check for Updates” or “Update Lightworks” option and click on it.
- Lightworks will connect to the internet and check for any available updates.
- If an update is found, follow the on-screen prompts to download and install it.
- Once the update is complete, restart Lightworks to apply the changes.
It is recommended to regularly check for updates and install them as soon as they are available. This ensures that you have the most stable and optimized version of Lightworks, minimizing any potential playback issues.
Additionally, it’s a good practice to visit the Lightworks website or join their community forums to stay informed about any major updates or announcements. This will help you stay up to date with the latest features and improvements.
By updating Lightworks regularly, you can take advantage of performance enhancements and bug fixes, which can significantly improve playback speed and overall editing experience.
Optimizing Hardware
Optimizing your hardware is essential for achieving optimal performance while using Lightworks. By ensuring that your computer’s hardware meets the software’s requirements and making a few hardware adjustments, you can significantly improve playback speed and overall editing efficiency.
Here are some tips for optimizing your hardware:
- Upgrade your RAM: Lightworks recommends a minimum of 4 GB RAM. However, if you regularly work with high-resolution footage or complex projects, consider upgrading to 8 GB or more. Additional RAM will allow for smoother playback and faster rendering.
- Consider a faster processor: A fast and powerful processor can handle video processing tasks more efficiently. Consider upgrading to a multicore processor with higher clock speeds for smoother playback and quicker rendering.
- Invest in a dedicated graphics card: Lightworks utilizes GPU acceleration for faster video processing. Having a dedicated graphics card with dedicated memory will significantly improve playback performance and allow for real-time effects and transitions.
- Ensure sufficient storage space: Make sure you have enough free space on your hard drive to store project files and media. Insufficient storage space can slow down the system and affect playback speed. Consider upgrading to a larger capacity hard drive or utilizing external storage options.
- Optimize your cooling system: Video editing can be resource-intensive and generate heat. Ensure that your computer’s cooling system is functioning properly and free from dust buildup. Overheating can cause performance issues, so maintaining a cool and well-ventilated system is crucial.
- Check for driver updates: Graphics card drivers and other hardware drivers can affect performance. Keep your drivers up to date by visiting the manufacturer’s website or using driver update software. Updated drivers often include performance improvements and bug fixes.
By following these hardware optimization tips, you can maximize Lightworks’ performance and enjoy seamless playback while working on your projects. It’s important to regularly evaluate your hardware configuration and consider upgrades as necessary to keep up with the demands of video editing.
Adjusting Playback Settings
Customizing the playback settings in Lightworks can have a significant impact on the playback performance and overall editing experience. By adjusting these settings according to your specific needs, you can optimize playback and ensure smoother editing sessions.
Here are some playback settings you can adjust in Lightworks:
- Reduce playback resolution: If you’re experiencing slow playback, consider reducing the playback resolution. By playing back the footage in a lower resolution, such as quarter or half resolution, you can lighten the processing load and achieve smoother playback.
- Disable real-time effects: Real-time effects can be demanding on system resources. If you’re experiencing laggy playback, try disabling real-time effects during editing and enable them during the final rendering process. This will allow Lightworks to focus on smooth playback without the added processing burden of effects.
- Adjust playback frame rate: Lightworks typically matches the project frame rate by default. However, if you are experiencing playback issues, try adjusting the playback frame rate to a lower value. This can help alleviate performance bottlenecks and improve playback speed.
- Enable frame dropping: Enabling frame dropping allows Lightworks to skip frames during playback if necessary. While this may result in some frame loss, it can significantly improve playback speed, especially when working with high-resolution or complex projects.
- Manage audio playback: If you’re not actively working on audio editing, consider muting or disabling audio playback during the editing process. This can reduce the processing load and enhance the overall performance of Lightworks.
- Configure playback hardware: Lightworks provides options to select the hardware used for playback. In the Lightworks settings, go to the “Playback” tab and choose a compatible hardware configuration. Experimenting with different hardware settings may improve the performance and smoothness of playback.
By adjusting these playback settings in Lightworks, you can fine-tune the software to better suit your editing needs and achieve smoother playback. Experiment with different configurations and find the settings that work best for your specific system and project requirements.
Clearing Cache
As you work on projects in Lightworks, the software creates and stores temporary cache files to improve performance and provide quicker access to frequently used data. Over time, these cache files can accumulate and take up valuable storage space, potentially impacting playback speed. Clearing the cache regularly can help optimize Lightworks’ performance and ensure smoother playback.
Here’s how you can clear the cache in Lightworks:
- Open Lightworks on your computer.
- Go to the “Edit” menu and select “Preferences.”
- In the Preferences window, click on the “Cache” tab.
- Click on the “Clear” button to remove the cache files.
- Confirm the action when prompted to delete the cache.
By clearing the cache, you are effectively removing unnecessary temporary files, which can help free up disk space and improve the overall performance of Lightworks. It’s a good practice to clear the cache regularly, especially if you notice any performance issues or if you’re working on large projects with extensive media files.
Furthermore, Lightworks also offers options to adjust the cache size and location. You can customize these settings in the Preferences window under the Cache tab. Consider allocating sufficient disk space for the cache to ensure optimal performance without excessively consuming your storage capacity.
Remember to save your projects before clearing the cache as it will close Lightworks temporarily. After clearing the cache, you can reopen Lightworks and continue working on your projects with enhanced playback performance.
Clearing the cache in Lightworks is a simple yet effective step to optimize performance, free up disk space, and ensure smoother playback. Incorporate this practice into your regular workflow to maintain an efficient editing experience.
Transcoding Media
Transcoding media involves converting the original video files into a different format or codec that is more optimized for editing and playback in Lightworks. This process can significantly improve playback performance and overall editing efficiency, especially for videos with high-bitrate or complex formats.
Here’s how you can transcode media in Lightworks:
- Launch Lightworks on your computer.
- Create a new project or open an existing project.
- Import the original video files into your project.
- Select the video clip(s) you want to transcode.
- Right-click on the selected clip(s), and from the context menu, choose “Create/Edit Proxies.”
- In the Proxies window, select the desired proxy format and resolution. Lightworks recommends using the DNxHD or DNxHR codec as they are optimized for editing.
- Click on the “Start” button to begin transcoding.
- Wait for the transcoding process to complete.
- Once transcoding is finished, you can use the transcoded proxy files for editing and playback in Lightworks.
Transcoding the media files into proxy formats reduces the processing demands on your computer’s resources. The proxy files are lower resolution and bitrate versions of the original files, making them easier to handle during editing. Lightworks automatically switches to the proxy files during playback and editing, ensuring smoother performance even with high-resolution or complex footage.
It’s important to note that the original high-quality files are still linked to your project, allowing Lightworks to render the final output using the original footage. Therefore, you retain the quality of your finished video while benefiting from the improved performance during the editing process.
Transcoding media can be particularly useful when dealing with footage from professional-grade cameras or formats that are not inherently optimized for editing. It enables you to work smoothly with high-resolution videos and complex effects, providing a more efficient editing experience.
Remember to delete the proxy files once your project is complete to free up disk space. You can do this by right-clicking on the clips, choosing “Delete Proxies” from the context menu, and confirming the action.
By transcoding media into proxy formats in Lightworks, you can optimize playback performance and achieve smoother editing sessions, even with higher resolution or intricate footage.
Using Proxy Files
Proxy files are lower-resolution copies of your original video files that are created specifically for editing purposes. They allow for smoother playback and faster editing in Lightworks, especially when working with high-resolution or resource-intensive footage. Using proxy files can significantly enhance your editing workflow by reducing the processing demands on your system and providing real-time playback even with complex projects.
Here’s how you can use proxy files in Lightworks:
- Launch Lightworks and open your project.
- Import your high-resolution video files into your project.
- Select the video clip(s) you want to generate proxy files for.
- Right-click on the selected clip(s) and choose “Make Proxy” from the context menu.
- In the Proxy Options window, select the desired resolution and codec for your proxy files. Lightworks recommends using a lower resolution and a codec optimized for editing, such as DNxHD or DNxHR.
- Click on the “Generate Proxies” button to create the proxy files.
- Wait for the proxy generation process to complete.
- Once the proxy files are generated, Lightworks will automatically switch to using the proxy files for editing and playback.
- While editing, you can work with the proxy files without sacrificing playback speed.
- When it’s time to export your final project, Lightworks will automatically link back to the original high-resolution files for the best quality output.
Using proxy files allows you to work more efficiently and without interruptions while editing. The lower-resolution proxy files are easier to handle for your system, resulting in smoother playback even with demanding footage. It also enables you to work on projects with lower-end hardware configurations that may struggle with high-resolution media.
Remember to delete the proxy files once your project is complete to free up disk space. To do this, right-click on the clips, choose “Delete Proxy” from the context menu, and confirm the action.
Proxy files are a valuable tool in optimizing your editing workflow in Lightworks. They significantly enhance the performance and responsiveness of the software, allowing you to focus on your creative process rather than being hindered by playback issues or system limitations.
Cleaning up Project
Over time, as you work on a project in Lightworks, it’s common for your timeline to become cluttered with unnecessary elements, unused media files, and redundant effects. Cleaning up your project not only helps improve the organization and efficiency of your workspace but can also enhance the overall performance of Lightworks by reducing the processing load. By removing any unused or unnecessary elements, you can ensure smoother playback and a more streamlined editing experience.
Here’s how you can clean up your project in Lightworks:
- Remove unused media: Go through your project and identify any media files that are no longer needed. This could include unused clips, audio files, or images. Remove them from the project to reduce the storage space and improve the performance of Lightworks.
- Delete unnecessary tracks: If you have tracks in your timeline that are no longer required, such as empty audio tracks or unused video tracks, delete them to declutter your workspace. This can help improve navigation and editing efficiency.
- Clean up effects: Review the effects applied to your clips and remove any unnecessary or redundant ones. Sometimes, multiple effects can create conflicts or unnecessarily burden the system. Keep only the effects that contribute to your desired outcome.
- Organize your timeline: Take the time to organize your timeline by grouping related clips, using markers, or color-coding segments. This can make it easier to navigate and edit your project, reducing the chances of errors and improving overall workflow efficiency.
- Check for linked media: Lightworks keeps track of linked media files throughout your project. If there are any missing or unlinked media files, locate and reconnect them to avoid any playback or editing issues.
- Trim excess footage: Review your clips and trim any unnecessary sections to reduce the overall length of your timeline. This can help improve playback speed and make it easier to work with your project.
By cleaning up your project in Lightworks, you can eliminate any unnecessary elements and streamline your editing environment. This not only improves the performance of the software but also enhances your workflow and productivity.
Regularly performing project clean-ups, especially for long or complex projects, is recommended to maintain an organized and efficient editing process. It’s a good practice to clean up as you progress to prevent the accumulation of unnecessary elements and ensure the best possible performance in Lightworks.
Conclusion
Optimizing Lightworks playback is essential for a seamless and efficient editing experience. By following the techniques and strategies outlined in this article, you can significantly improve the performance of Lightworks and enjoy smoother playback for your video projects.
First and foremost, ensure that your system meets the minimum requirements for running Lightworks effectively. Upgrading your hardware, such as increasing RAM capacity or investing in a dedicated graphics card, can provide a substantial boost in performance.
- Regularly update Lightworks to the latest version to benefit from bug fixes and performance enhancements.
- Adjust playback settings, such as reducing the resolution, disabling real-time effects, or enabling frame dropping, to optimize playback performance.
- Clear the cache regularly to free up disk space and maintain Lightwork’s performance.
- Consider transcoding media into proxy files or using pre-generated proxy files to work with high-resolution footage more smoothly.
- Clean up your project by removing unused media, deleting unnecessary tracks, organizing your timeline, and trimming excess footage.
By implementing these strategies, you can optimize Lightworks playback, reduce system resource demands, and enhance your overall editing workflow. Remember to save your projects before making any changes and regularly back up your data to prevent any potential loss.
With smoother playback, faster rendering, and improved performance, you can focus on the creative aspects of video editing, producing high-quality videos without the frustration of laggy or stuttering playback.
Embrace these optimization techniques, experiment with different settings, and find the approach that works best for your specific hardware configuration and editing workflow. By doing so, you can unleash the full potential of Lightworks and create stunning videos with ease.

