Home>Production & Technology>Background Music>How To Add Background Music Lightworks

Background Music
How To Add Background Music Lightworks
Modified: January 22, 2024
Learn how to enhance your videos on Lightworks by adding captivating background music. Follow our easy step-by-step guide to create a perfect audiovisual experience.
(Many of the links in this article redirect to a specific reviewed product. Your purchase of these products through affiliate links helps to generate commission for AudioLover.com, at no extra cost. Learn more)
Table of Contents
- Introduction
- Step 1: Importing your video project
- Step 2: Importing the background music file
- Step 3: Adjusting the audio levels
- Step 4: Trimming the background music
- Step 5: Adding the background music to the timeline
- Step 6: Adjusting the duration and position of the background music
- Step 7: Previewing and adjusting the background music
- Conclusion
Introduction
Adding background music to your videos can greatly enhance the overall viewing experience, evoking emotions, setting the tone, and making the content more engaging. Whether you are creating a personal vlog, a promotional video, or a short film, incorporating the right background music can make a significant difference in capturing the attention of your audience.
In this article, we will explore how to add background music to your videos using Lightworks, a popular video editing software known for its powerful features and user-friendly interface. Lightworks offers a range of tools and functions that allow you to seamlessly integrate background music into your projects, regardless of your experience level.
With Lightworks, you can import music files, adjust audio levels, trim the music to fit your desired duration, and add it to your video timeline. You can also manipulate the position and duration of the background music to ensure it aligns perfectly with your visual content.
Whether you want to create a dramatic effect, add energy and excitement, or create a soothing ambiance, Lightworks gives you the flexibility and control to achieve the desired result. The software supports a variety of audio file formats, allowing you to choose from a vast library of music or use your own compositions.
So, let’s dive into the step-by-step process of adding background music to your videos using Lightworks and unlock the potential to take your videos to the next level.
Step 1: Importing your video project
The first step in adding background music to your video project in Lightworks is to import your video files into the software. To do this, follow these simple steps:
- Launch Lightworks and create a new project by clicking on “Create a new project” or opening an existing project if you have one.
- Once your project is open, click on the “Import” button located in the top toolbar. This will open a file explorer window.
- Navigate to the storage location of your video files and select the ones you want to import. You can select multiple files by holding down the Ctrl key (or Command key on Mac) while clicking on the files. Click on the “Open” button to import the selected files into Lightworks.
- Wait for the files to finish importing. Lightworks will display a progress bar indicating the import status.
- Once the import process is complete, you will see your video files appear in the media bin or the project browser window. You can now start working on your video project.
By importing your video files into Lightworks, you now have access to your footage and can begin the process of adding background music to enhance the overall viewing experience. Now, let’s move on to the next step.
Step 2: Importing the background music file
Once you have your video project set up in Lightworks, the next step is to import the background music file that you want to add to your video. Here’s how to do it:
- In the Lightworks interface, locate the media bin or project browser window where your imported video files are displayed.
- Click on the “Import” button in the media bin or project browser toolbar to open the file explorer window.
- Navigate to the folder where your background music file is stored and select it. You can choose from a variety of audio file formats such as MP3, WAV, or FLAC.
- Click on the “Open” button to import the background music file into Lightworks.
- Wait for the file to finish importing. Lightworks will display a progress bar indicating the import status.
- Once the import process is complete, you will see the background music file appear in the media bin or project browser window, alongside your video files.
By importing the background music file into Lightworks, you are now ready to adjust its audio levels and synchronize it with your video footage. This will help create a harmonious blend of visuals and audio. Let’s move on to the next step to learn how to adjust the audio levels of the background music.
Step 3: Adjusting the audio levels
Now that you have imported the background music file into Lightworks, it’s time to adjust its audio levels to ensure that it complements your video project. Here’s how you can do it:
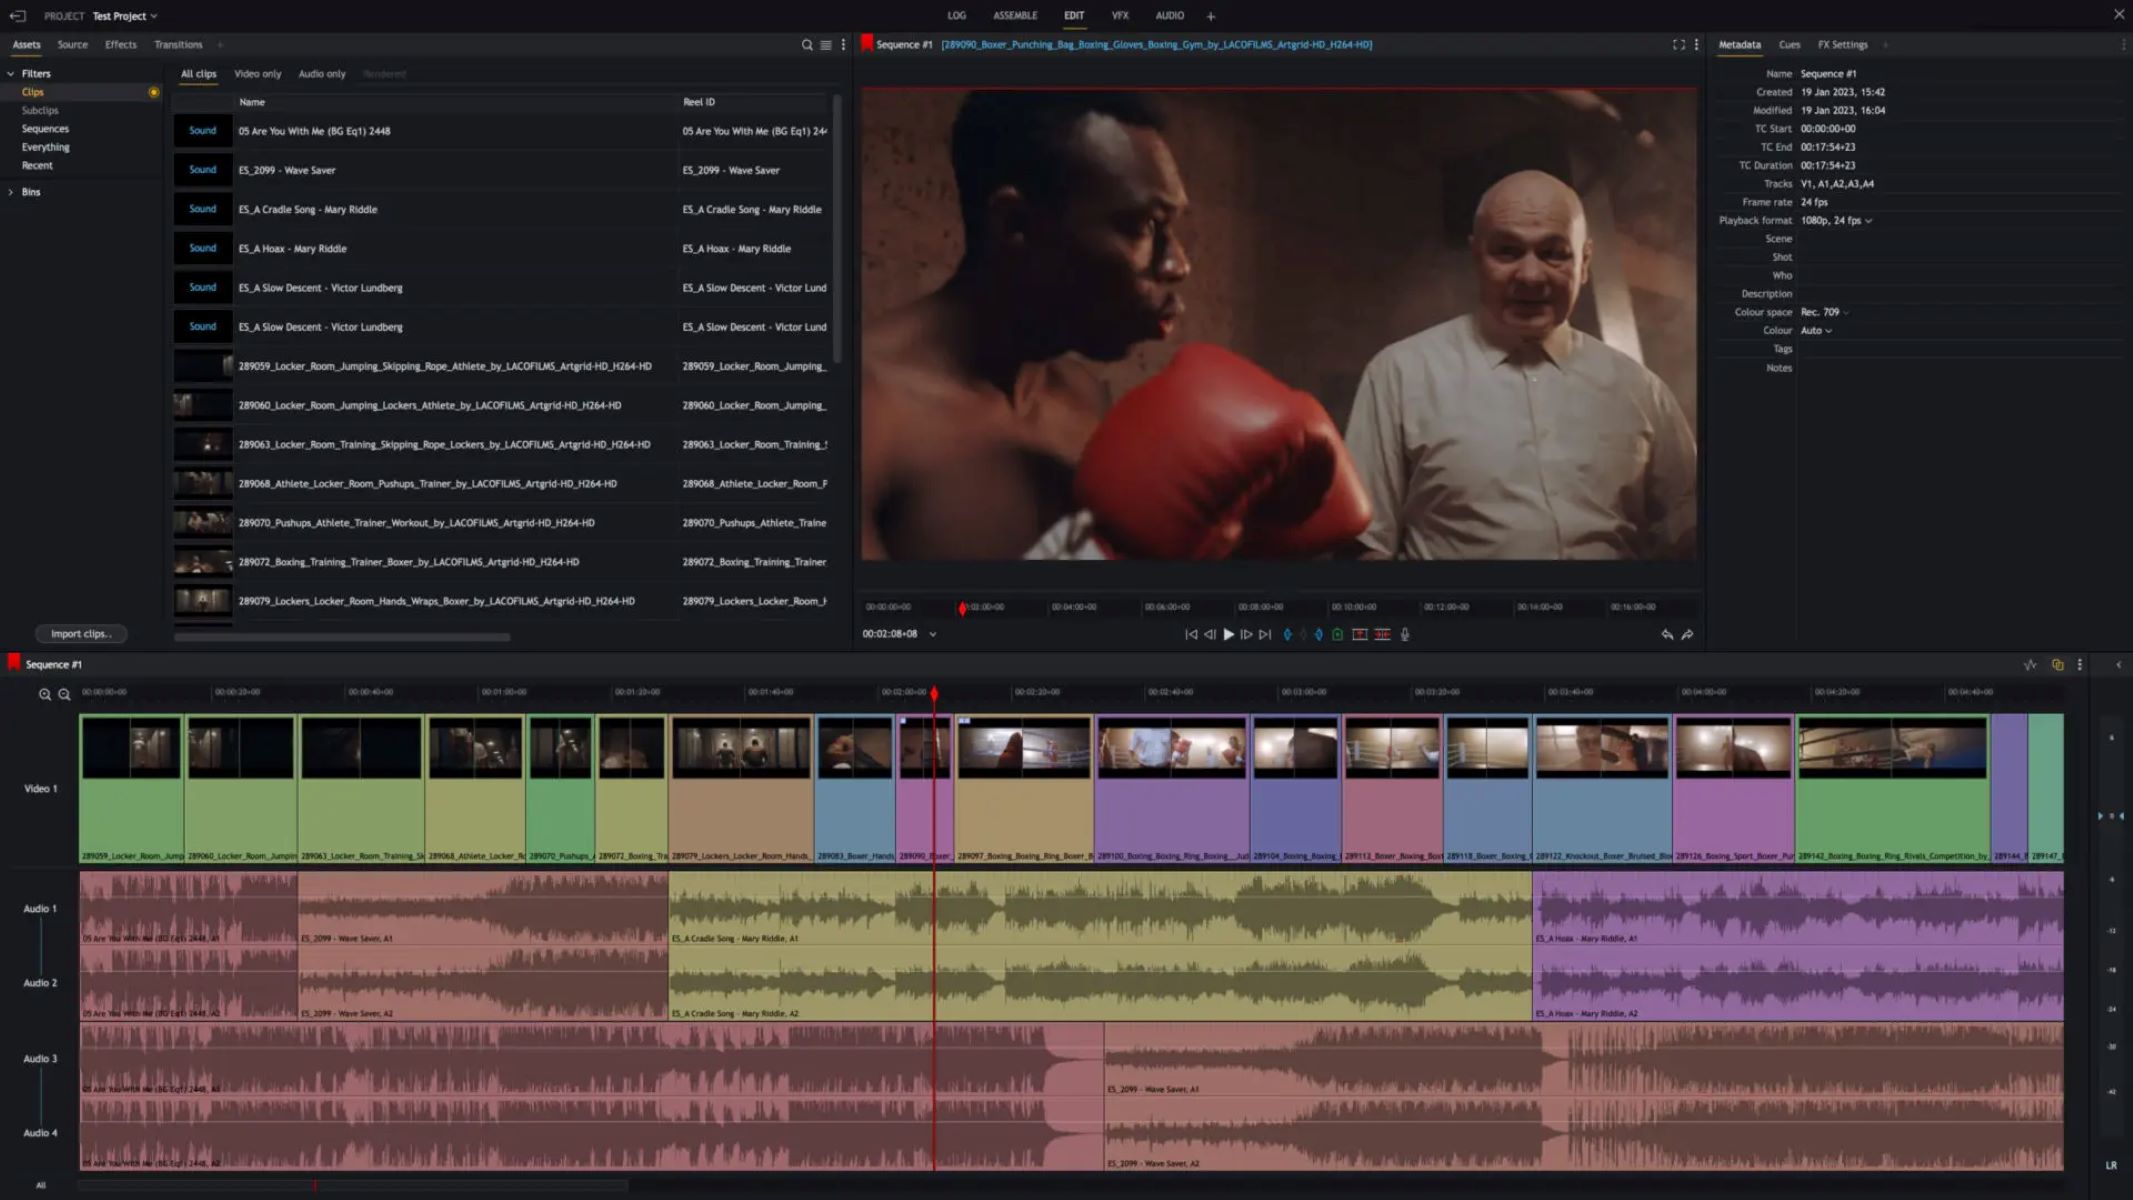
- Locate the audio mixer panel in the Lightworks interface. It is usually displayed on the right-hand side of the screen.
- Select the background music track from the audio tracks listed in the audio mixer panel.
- Adjust the volume slider for the background music track. Increase or decrease the volume level to your desired level. You can listen to the music as you modify the settings to find the perfect balance with your video footage.
- If needed, you can also make use of the mute button to temporarily silence the background music track while making adjustments in other parts of your video project.
Properly adjusting the audio levels ensures that the background music doesn’t overpower the dialogue or other audio elements in your video. It ensures that the music enhances the overall viewing experience without distracting or overpowering the visuals.
Now that you have adjusted the audio levels of the background music, it’s time to move on to the next step, where you’ll learn how to trim the music to fit your desired duration.
Step 4: Trimming the background music
After adjusting the audio levels of your background music, you may need to trim it to fit the desired duration of your video. Trimming allows you to select specific sections of the music track that align with your visual content. Here’s how you can trim the background music in Lightworks:
- Locate the background music track in the timeline or the project viewer window.
- Click and drag the edges of the music track to shorten or lengthen it as needed. This will trim the music to the desired duration.
- Alternatively, you can use the “Split” tool to cut the music track at specific points. This allows you to remove unwanted sections or create seamless transitions between different parts of the music.
- Listen to the trimmed version of the background music track to ensure smooth transitions and a cohesive flow.
Trimming the background music gives you greater control over the pacing and impact of your video. It allows you to synchronize the music with specific scenes or moments, creating a more immersive and engaging experience for your viewers.
Now that you have successfully trimmed the background music, it’s time to add it to the timeline and position it correctly. Let’s move on to the next step.
Step 5: Adding the background music to the timeline
With the background music file imported and trimmed, it’s time to add it to the timeline in Lightworks. The timeline is where you arrange your video and audio tracks to create your final project. Follow these steps to add the background music to the timeline:
- Locate the background music file in the media bin or project browser window.
- Click and drag the background music file from the media bin or project browser onto an empty audio track in the timeline. Alternatively, you can right-click on the background music file and select “Insert” or “Add to Timeline” to place it in the desired position.
- Position the background music track in the timeline according to where you want it to start playing. You can adjust the position by dragging the track left or right.
By adding the background music to the timeline, you have integrated it with your video footage, allowing them to play together seamlessly. The timeline provides a visual representation of the project’s progression, enabling you to see how the different elements come together to create the final product.
Now that you have successfully added the background music to the timeline, let’s move on to the next step, where you’ll learn how to adjust the duration and position of the background music.
Step 6: Adjusting the duration and position of the background music
Once the background music is added to the timeline, you may need to further adjust its duration and position to effectively synchronize it with your video. Lightworks provides various tools and techniques to help you achieve this. Follow these steps to adjust the duration and position of the background music:
- Select the background music track in the timeline by clicking on it.
- To adjust the duration, you can click and drag the edges of the track to shorten or lengthen it. This allows you to precisely control when the background music starts and ends in your video.
- To adjust the position of the background music in the timeline, click and drag the entire track to a new location.
- You can also make use of keyframes to create dynamic changes in the volume or any other audio parameter of the background music. Keyframes allow you to gradually increase or decrease the intensity of the music at specific points in your video.
- Preview your video to ensure that the background music is synchronized with the visuals and transitions smoothly.
By adjusting the duration and position of the background music, you can effectively control its impact, ensuring it enhances the desired scenes and complements the overall tone and mood of your video.
Now that you have successfully adjusted the duration and position of the background music, let’s move on to the final step, where you’ll learn how to preview and fine-tune the background music.
Step 7: Previewing and adjusting the background music
After adding and fine-tuning the background music in Lightworks, it’s crucial to preview the final result and make any necessary adjustments to ensure it aligns perfectly with your video. Follow these steps to preview and fine-tune the background music:
- Play back your video project from the beginning to observe how the background music interacts with the visuals.
- Pay attention to the volume levels of the background music compared to dialogue and other audio elements in your video. Ensure that the music doesn’t overpower or overshadow the main content.
- Listen for any sections where the music may need to be adjusted, such as moments where it doesn’t sync precisely with the visuals or transitions between scenes.
- Make use of Lightworks’ editing tools to fine-tune the background music as needed. This can include adjusting volume levels, adding or removing keyframes, or repositioning the music track in the timeline.
- Continue previewing and adjusting until you are satisfied with the overall blend and impact of the background music in your video.
Previewing and adjusting the background music allows you to ensure that it enhances the storytelling and emotional impact of your video. By closely analyzing the synchronization, volume, and overall flow, you can fine-tune the background music to create a more immersive and engaging experience for your viewers.
Now that you have previewed and adjusted the background music, you are ready to export your video project with the perfectly integrated background music. Experiment with different variations and adjustments to find the balance that best suits your video’s message and style.
Conclusion
Adding background music to your videos can elevate the viewer’s experience by creating a more engaging and captivating atmosphere. With Lightworks, you have the power to seamlessly integrate background music into your video projects with ease. By following the steps outlined in this article, you can import, adjust, trim, and position the background music to align perfectly with your video footage.
Lightworks offers a range of tools and features that allow you to fine-tune the duration, position, and audio levels of the background music. This level of control ensures that the music enhances the storytelling, evokes the desired emotions, and complements the overall tone and mood of your video.
Throughout the process, remember to preview and adjust the background music to ensure it blends seamlessly with your visuals and other audio elements. Pay attention to the volume levels, synchronization, and overall flow to create a cohesive and immersive viewing experience.
With Lightworks, you have the opportunity to tap into your creative vision and take your videos to the next level. Whether you’re creating personal vlogs, promotional videos, or short films, incorporating the right background music can make a significant difference in capturing and retaining the attention of your audience.
So, don’t hesitate to experiment, explore different music choices, and fine-tune the audio elements in your videos. By utilizing Lightworks’ features and following the steps outlined in this article, you can successfully enhance your video projects with seamless and perfectly integrated background music.

