Home>Events & Info>Playback>How To Access Playback Engine Pro Tools
Playback
How To Access Playback Engine Pro Tools
Published: November 7, 2023
Learn how to access the playback engine in Pro Tools and optimize your audio playback. Maximize your efficiency and improve your workflow with this essential guide.
(Many of the links in this article redirect to a specific reviewed product. Your purchase of these products through affiliate links helps to generate commission for AudioLover.com, at no extra cost. Learn more)
Table of Contents
Introduction
Welcome to this comprehensive guide on how to access the Playback Engine in Pro Tools. The Playback Engine is a crucial component of Pro Tools, as it allows you to control and customize the audio playback characteristics. Whether you’re a beginner or a seasoned user, understanding how to access and configure the Playback Engine will enhance your overall audio production experience.
Pro Tools is a leading digital audio workstation used by professionals in the music, film, and television industries. It offers a wide range of features and tools to create, edit, and mix audio content. The Playback Engine, specifically, allows you to determine how Pro Tools interacts with your audio hardware, ensuring optimal performance and playback quality.
In this guide, we’ll walk you through the step-by-step process of accessing and configuring the Playback Engine in Pro Tools. By following these instructions, you’ll have the ability to customize your audio setup according to your specific needs and preferences.
So, whether you’re looking to switch between different audio interfaces, adjust sample rates, or optimize your system’s performance, this guide has got you covered. Let’s dive in and explore how to access the Playback Engine in Pro Tools.
Step 1: Opening Pro Tools
The first step in accessing the Playback Engine in Pro Tools is, of course, opening the software. Locate the Pro Tools application icon on your computer and double-click to launch it. You may find the icon on your desktop, in your Applications folder (on macOS), or in the Start menu (on Windows).
Once Pro Tools is open, you’ll be greeted by the startup screen. Here, you’ll have the option to create a new session, open a recent session, or choose from various project templates. Select the appropriate option based on your workflow and project requirements.
If you already have an existing session that you’d like to work on, simply choose the “Open Recent” option to access a list of your most recently opened sessions. Alternatively, you can use the “Open” function to navigate to a specific session file on your computer.
It’s important to note that accessing the Playback Engine settings does not require a specific session to be open. You can access and adjust these settings at any time, regardless of whether you have a session loaded or not.
After you’ve selected a session or decided to work with a new one, Pro Tools will load the session and you’ll be taken to the main editing and mixing interface. Now, it’s time to move on to the next step and navigate to the “Setup” menu to access the Playback Engine configuration options.
Step 2: Navigating to “Setup” Menu
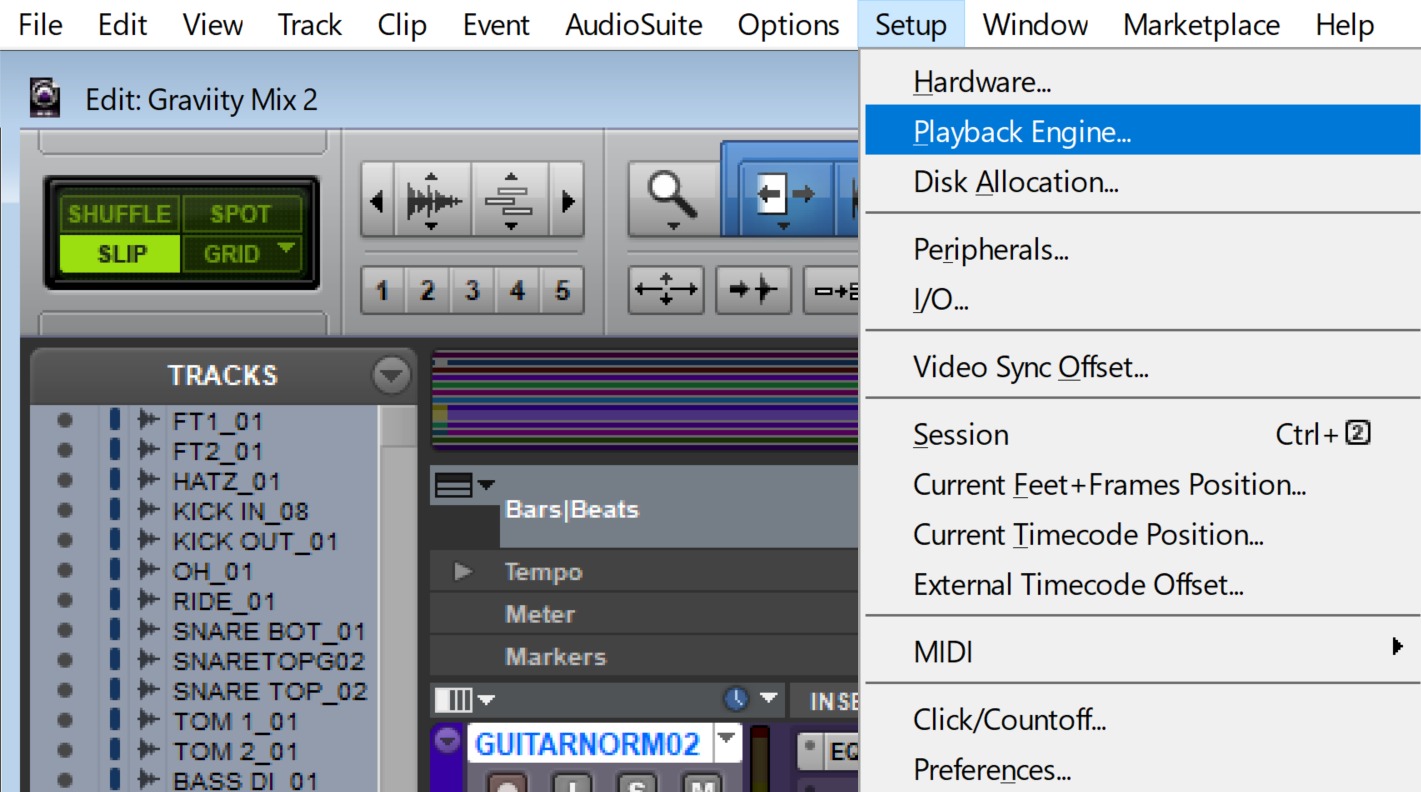
Once you are in the Pro Tools main interface, it’s time to navigate to the “Setup” menu where you can access the Playback Engine options. The “Setup” menu is located in the top menu bar of Pro Tools, alongside other essential options like “File,” “Edit,” and “View.”
To access the “Setup” menu, simply click on it; a dropdown list of various settings and configuration options will appear. Scroll down the list and locate the “Playback Engine” option. Click on it to proceed to the Playback Engine settings.
An alternative method to access the “Setup” menu is by using the shortcut keys. On macOS, you can use the combination of Command + Equals (=) to open the “Setup” menu. On Windows, the shortcut is Control + Equals (=). Repeat the shortcut key combination until you reach the “Playback Engine” option in the dropdown menu.
Upon selecting the “Playback Engine” option, a new window or dialog box will appear, providing you with the ability to choose and customize the settings of the Playback Engine.
Now that you’ve successfully navigated to the “Setup” menu and accessed the Playback Engine options, you can move on to the next step: selecting the desired Playback Engine. Let’s explore this in the following section.
Step 3: Selecting “Playback Engine” Option
After navigating to the “Setup” menu in Pro Tools, you’ll find the “Playback Engine” option. Clicking on this option will open a window or dialog box where you can select the desired playback engine for your audio production needs.
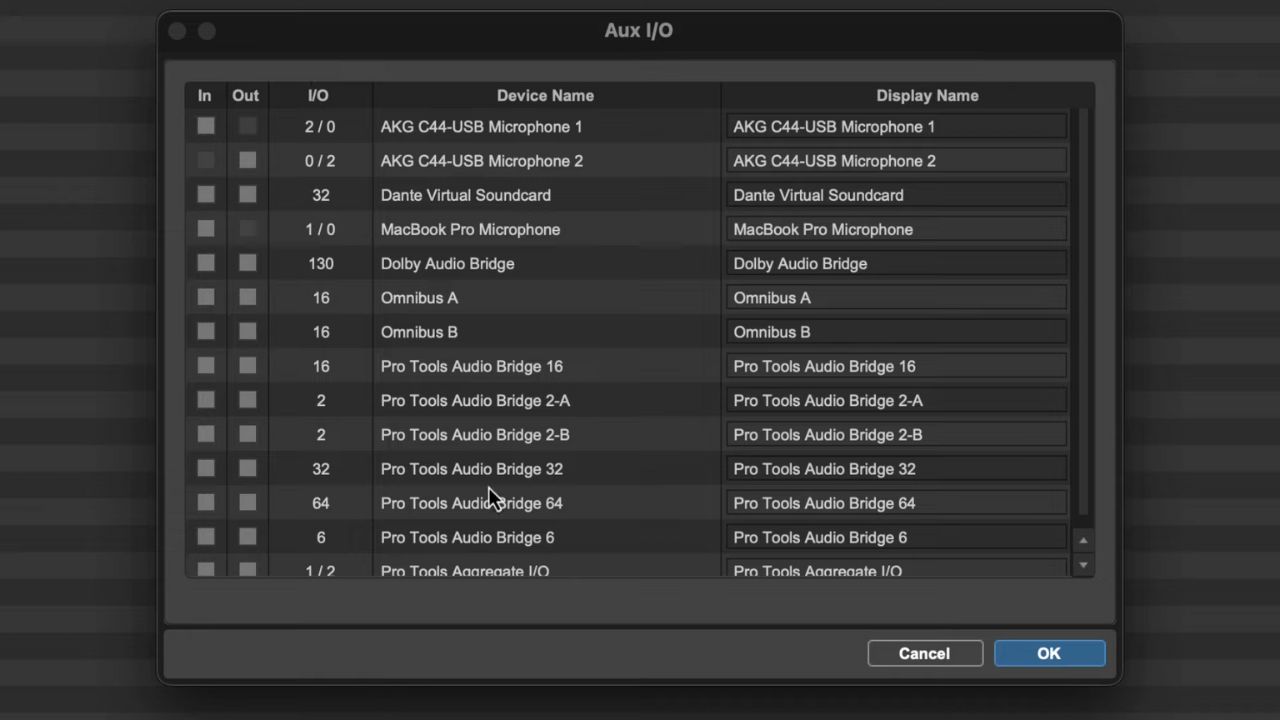
In the Playback Engine window, you’ll see a dropdown menu with a list of available playback engines. The available options may vary depending on your audio hardware and system configuration.
Take a moment to review the available options and choose the playback engine that best suits your needs. The playback engine you select determines how Pro Tools interacts with your audio hardware, including the audio interface and drivers that are currently connected to your computer.
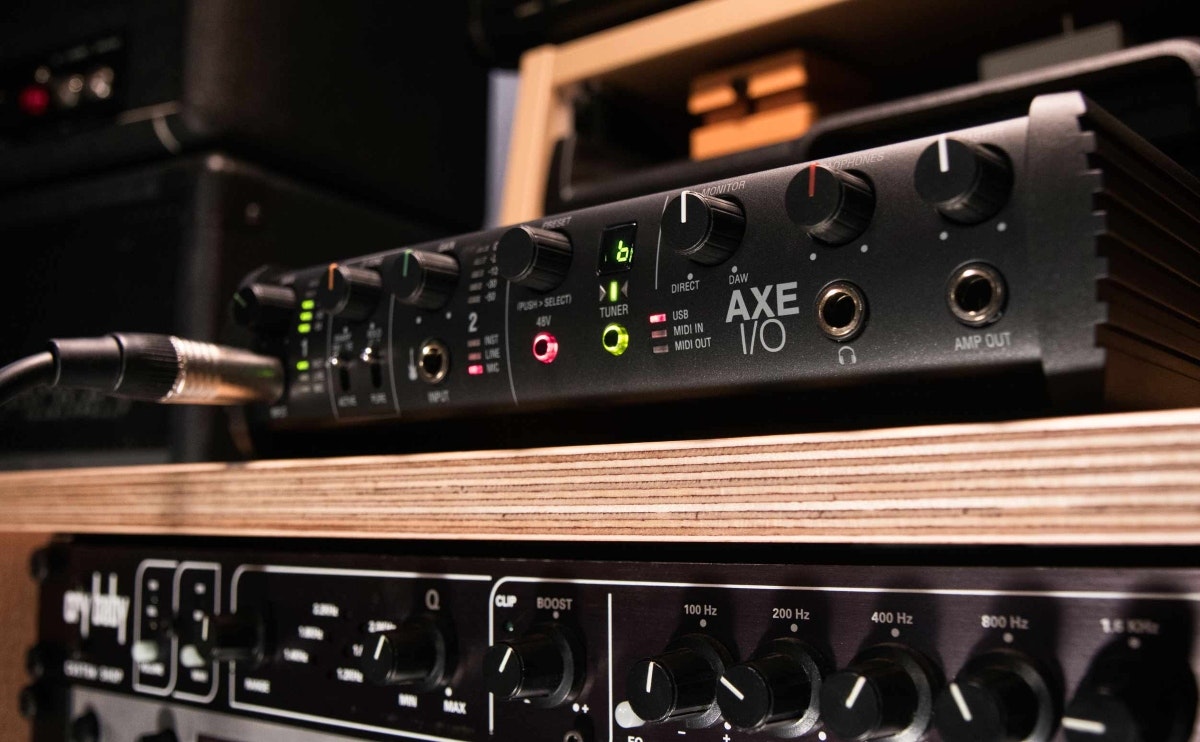
If you’re using an external audio interface, make sure it is properly connected to your computer before selecting the playback engine. This ensures that Pro Tools accurately recognizes and utilizes the capabilities of your audio interface.
It’s important to note that the playback engine you select will affect various aspects of your Pro Tools session, including latency, I/O settings, and CPU usage. Each playback engine has its own set of characteristics and performance capabilities, so it’s recommended to choose one that aligns with your specific workflow requirements.
Once you’ve decided on the playback engine you want to use, simply click on it in the dropdown menu to select it. Pro Tools will automatically apply the changes and update the playback engine settings accordingly.
In the next step, we’ll explore how to adjust the playback engine settings to further customize your audio playback experience in Pro Tools. Let’s proceed to Step 4 to learn more.
Step 4: Choosing the Desired Playback Engine
Now that you have accessed the Playback Engine settings in Pro Tools, it’s time to choose the desired playback engine that best fits your audio production requirements. The playback engine you select will heavily impact the performance, latency, and overall audio playback experience within Pro Tools.
In the Playback Engine window, you’ll find a dropdown menu that lists the available playback engines compatible with your system. These options can include built-in audio hardware, external audio interfaces, or virtual playback engines.
When choosing the playback engine, carefully consider factors such as the number of inputs and outputs you need, the audio file formats you’ll be working with, the desired latency, monitoring options, and any specific features or enhancements offered by the playback engine.
If you’re using an external audio interface, you may find its name listed as a separate option in the playback engine menu. This allows you to take full advantage of the audio quality and capabilities offered by the interface.
Additionally, virtual playback engines like Avid Audio Engine and AAE (Avid Audio Engine) can provide enhanced processing power and flexibility when working with a higher number of tracks or plugins. These virtual engines are especially useful for professional audio engineers or those working on complex audio projects.
To choose the desired playback engine, simply click on the option in the dropdown menu that corresponds to your preferred engine. Pro Tools will automatically apply the changes, and the selected playback engine will become active for your session.
It’s worth noting that you can change the playback engine settings at any time during your session as per your requirements. However, keep in mind that doing so may temporarily interrupt audio playback and cause Pro Tools to reinitialize the audio engine.
Once you have selected the desired playback engine, we can now move on to the next step, where we will explore how to adjust the playback engine settings to further refine your audio playback experience in Pro Tools.
Step 5: Adjusting Playback Engine Settings
After selecting the desired playback engine in Pro Tools, you have the option to further adjust the playback engine settings to optimize your audio playback experience. These settings allow you to fine-tune parameters such as the buffer size, sample rate, and CPU usage.
To access the playback engine settings, look for the relevant options within the Playback Engine window. The specific settings available may vary depending on the playback engine you have chosen.
One important setting to consider is the buffer size. The buffer size determines the amount of audio data that Pro Tools sends to the audio hardware for processing. A smaller buffer size reduces latency but requires more processing power from your computer. Conversely, a larger buffer size increases latency but reduces the strain on your CPU. Experiment with different buffer sizes to find the balance that works best for your workflow.
Another setting to consider is the sample rate. The sample rate determines the number of samples per second that are used to represent the audio. Higher sample rates offer better audio fidelity but require more processing power and storage space. Choose a sample rate that aligns with your project requirements and system capabilities.
Additionally, you may find options to adjust the CPU usage limit. This setting allows you to allocate a specific percentage of your computer’s processing power for Pro Tools. By adjusting the CPU usage limit, you can optimize system performance and prevent audio dropouts or glitches.
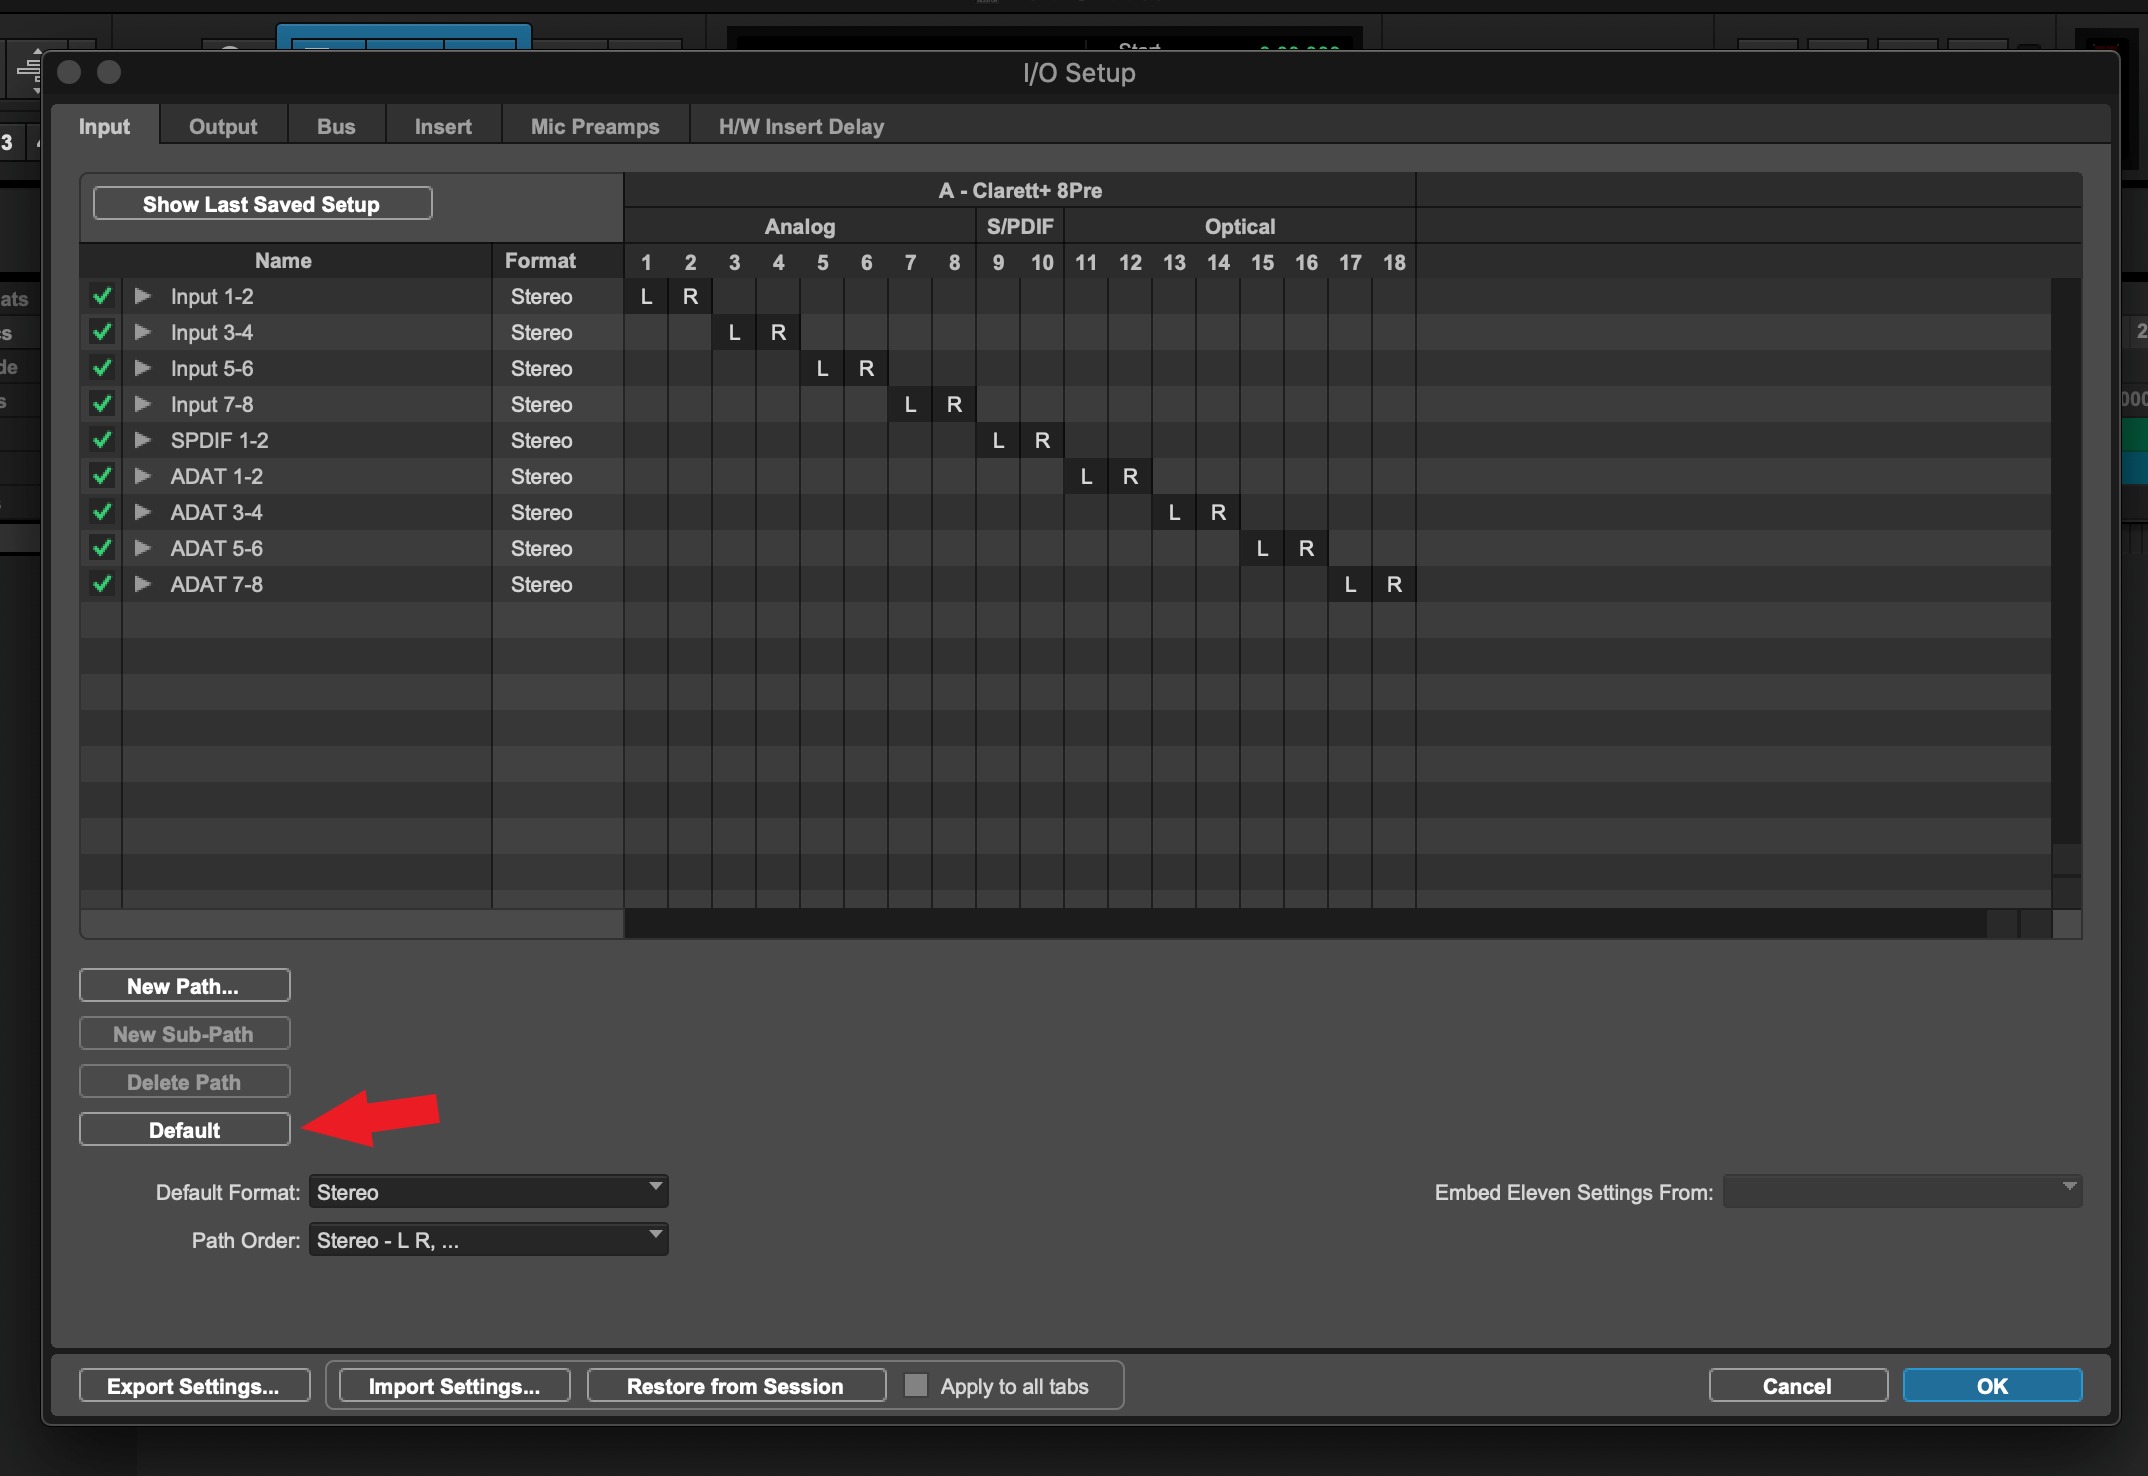
Other playback engine settings may include options for clock sources, synchronization, and I/O settings. These settings are more advanced and may not need adjustment for every user. However, if you require specific routing or synchronization configurations, take the time to explore and configure these settings as needed.
It’s important to note that changing certain playback engine settings, such as the buffer size or sample rate, may require you to close and reopen your session for the changes to take effect. Pro Tools will prompt you with a notification if a restart is required.
Once you have adjusted the playback engine settings to your liking, click “OK” or “Apply” within the Playback Engine window to save the changes. Pro Tools will then implement the selected settings, optimizing your audio playback for the session.
With the playback engine settings adjusted, you’re now ready to confirm the changes and move on to the final step of accessing the playback engine in Pro Tools. Let’s explore this in the next section.
Step 6: Confirming Changes and Closing the Menu
After adjusting the playback engine settings to your desired configuration in Pro Tools, it’s important to confirm the changes and close the Playback Engine window. This ensures that the selected settings are applied and active for your current session.
To confirm the changes you’ve made, look for an “OK” or “Apply” button within the Playback Engine window. Clicking this button will save the settings and apply them to the current session.
Once you’ve confirmed the changes, you can close the Playback Engine window by clicking the “Close” or “X” button in the top-right corner of the window. This will take you back to the main Pro Tools interface, where you can continue working on your audio project.
It’s worth mentioning that if you want to revisit and adjust the playback engine settings at any time, you can simply repeat the steps outlined in the previous sections. The “Setup” menu is always accessible, providing you with the ability to modify playback engine configurations as needed.
Finally, it’s a good practice to regularly save your Pro Tools sessions to preserve your work and ensure that the playback engine settings are saved along with the session. This way, when you reopen a session, the playback engine settings will be retained, saving you the hassle of reconfiguring them each time.
Now that you have successfully accessed, selected, and adjusted the playback engine settings in Pro Tools, you’re equipped with the knowledge to optimize your audio playback experience and tailor it to your specific needs. Enjoy creating and mixing your audio projects in Pro Tools with a customized playback engine configuration!
If you have any questions or encounter any issues while accessing or configuring the playback engine, consult the Pro Tools documentation or reach out to the Avid support team for further assistance.
With that, we conclude this step-by-step guide on how to access the playback engine in Pro Tools. Enjoy your audio production journey!
Conclusion
Accessing and configuring the Playback Engine in Pro Tools is a crucial step in optimizing your audio playback experience. By following the step-by-step instructions outlined in this guide, you have learned how to navigate to the “Setup” menu, select the desired playback engine, adjust the playback engine settings, and confirm the changes.
The Playback Engine allows you to customize various aspects such as buffer size, sample rate, and CPU usage, ensuring that Pro Tools interacts effectively with your audio hardware and delivers optimal performance. By choosing the right playback engine and adjusting the settings to your specific needs, you can enhance the audio quality, reduce latency, and streamline your workflow.
Remember, the playback engine can be adjusted at any time during your Pro Tools session to adapt to changing project requirements or system capabilities. Take the time to experiment with different settings and find the configuration that works best for you.
Now that you are equipped with this knowledge, you can confidently access and configure the Playback Engine in Pro Tools to elevate your audio production capabilities. Enjoy creating, editing, and mixing your audio projects with a customized playback engine setup that meets your exact specifications.
If you encounter any difficulties or have further questions regarding the playback engine or any other aspect of Pro Tools, consult the official Pro Tools documentation or seek assistance from the Avid support team. They are available to provide guidance and help you make the most of your Pro Tools experience.
Thank you for reading this guide, and we hope it has been a valuable resource in understanding how to access the playback engine in Pro Tools. Happy creating!