Home>Instruments>Bass>How To Setup A Bass Guitar

Bass
How To Setup A Bass Guitar
Published: November 29, 2023
Learn how to set up your bass guitar with these easy-to-follow steps. Get the best sound and playability for your bass.
(Many of the links in this article redirect to a specific reviewed product. Your purchase of these products through affiliate links helps to generate commission for AudioLover.com, at no extra cost. Learn more)
Table of Contents
Introduction
Welcome to the world of bass guitar! Whether you’re a beginner or a seasoned musician looking to set up your own instrument, this article will guide you through the process of setting up a bass guitar to ensure optimal playability and sound.
The bass guitar is a vital component in any band or ensemble, providing the foundation and groove that ties everything together. But even the best bass guitarist can be hindered by a poorly set up instrument. That’s why it’s crucial to understand the steps involved in properly setting up your bass guitar.
Setting up a bass guitar involves a combination of adjusting various components, such as the neck, truss rod, action, intonation, and strings. Each of these elements plays a crucial role in the overall playability, tone, and comfort of the instrument.
By following the steps outlined in this guide, you’ll be able to optimize your bass guitar’s performance and enjoy a more enjoyable playing experience. Whether you play rock, jazz, funk, or any other genre, a well-setup bass guitar will help you achieve the desired tones and improve your overall playing ability.
Now, let’s dive into the step-by-step process of setting up your bass guitar. Don’t worry; you don’t need to be a professional luthier to handle these adjustments. With a few basic tools and a bit of patience, you’ll be well on your way to having a perfectly set up bass guitar.
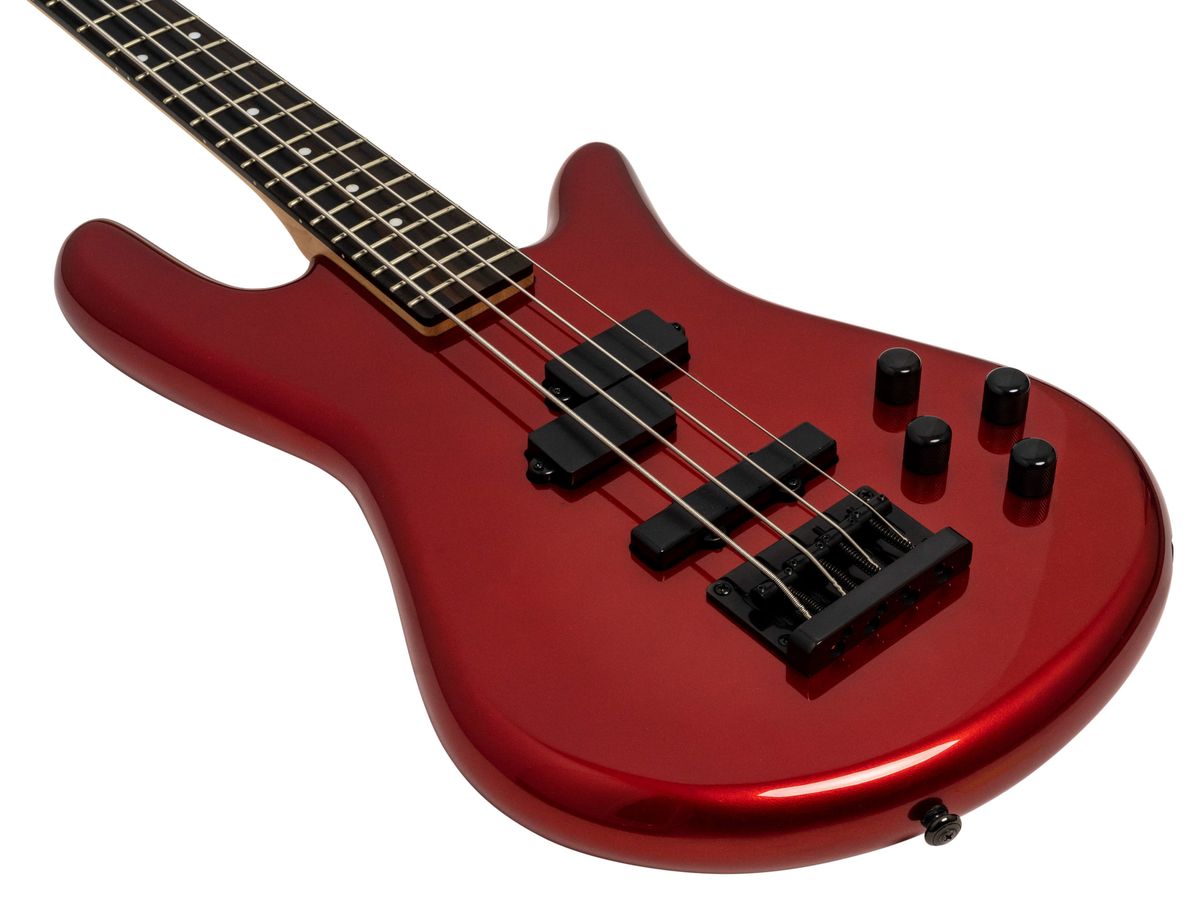
Step 1: Choosing the Right Bass Guitar
Before you can start setting up your bass guitar, it’s important to have the right instrument in your hands. Choosing the right bass guitar involves considering factors such as your playing style, budget, and personal preferences.
When selecting a bass guitar, you’ll come across various types and models, each with its own unique characteristics. The most common types of bass guitars are the four-string, five-string, and six-string basses. The four-string bass is the standard choice and is perfect for most musical genres. The additional strings on the five or six-string basses offer extended range and are ideal for those who want to explore lower or higher notes.
Aside from the number of strings, you’ll also need to decide whether you prefer a fretted or fretless bass. A fretted bass has metal frets on the fingerboard, allowing for precise note placement. On the other hand, a fretless bass lacks these metal frets, which gives you more freedom to slide between notes and produce a smoother, more expressive sound.
When trying out bass guitars, pay attention to the instrument’s weight and balance. A well-balanced bass guitar will feel comfortable and won’t cause strain on your shoulders or back, especially during long playing sessions or live performances.
Another crucial factor to consider is the tone of the bass guitar. Different basses produce distinct tonal qualities due to variations in body construction, pickups, and electronics. Some bass guitars have a bright, punchy sound, while others have a deep, rich tone. Experiment with different bass guitars to find one that suits your musical style and preference.
Lastly, set a budget before shopping for a bass guitar. Like any musical instrument, bass guitars come in various price ranges. It’s essential to find a balance between your budget and the quality of the instrument. Remember that investing in a higher-quality bass guitar will generally result in better playability, durability, and overall satisfaction.
Once you’ve considered these factors and have chosen the right bass guitar for your needs, you’re ready to move on to the next step: setting up the instrument for optimal playability and sound.
Step 2: Setting Up the Bass Guitar
Setting up your bass guitar involves making various adjustments to ensure that it plays comfortably and produces the best possible sound. This step is crucial, as an improperly set up bass guitar can result in discomfort, poor intonation, and diminished tone quality.
Here are the key aspects to focus on when setting up your bass guitar:
- Checking the neck relief: The first step is to check the neck relief, which refers to the slight concave curvature of the neck. You can do this by pressing down the low E string at the first and last frets simultaneously and observing the gap between the string and the middle frets. Ideally, you should see a small gap (around 0.010 – 0.020 inches) between the string and the middle frets. If there’s no gap or too much of it, you may need to adjust the truss rod.
- Adjusting the truss rod: The truss rod is a metal bar inside the neck that allows you to counteract the tension of the strings. Using a truss rod wrench, you can tighten or loosen the truss rod to adjust the neck relief. If the neck is too straight or bowed, you’ll need to make adjustments. Remember to make small adjustments and check the neck relief frequently to avoid over-tightening or damaging the neck.
- Setting the action: The action refers to the height of the strings above the fretboard. A proper action ensures that the strings are neither too high nor too low, resulting in comfortable playing and accurate notes. To adjust the action, locate the bridge saddles and use a screwdriver to raise or lower them. Be sure to maintain an even action across all strings.
- Adjusting the intonation: Intonation refers to the accuracy of each string’s pitch when played at different positions along the fretboard. To check and adjust the intonation, play the open string and then compare the pitch of the 12th fret harmonic with the pitch when fretting the 12th fret. If there is a noticeable difference, use the bridge saddle screws to move the saddle backward or forward until the notes match.
These adjustments may require some trial and error, so it’s important to take your time and make small changes gradually. Remember to recheck and fine-tune your adjustments as you go along.
Once you’ve set up the bass guitar according to your preferences, it’s time to move on to the next step: installing the strings.
Step 3: Adjusting the Neck and Truss Rod
The neck and truss rod are critical components of your bass guitar’s playability and overall performance. Adjusting these aspects will ensure proper neck relief and stability, allowing for comfortable playing and accurate intonation.
Here’s how you can adjust the neck and truss rod of your bass guitar:
- Assess the Neck Relief: Start by examining the neck relief, which is the slight curvature of the neck. Hold down the low E string at the first and last frets simultaneously, then observe the gap between the string and the middle frets. A small gap of around 0.010-0.020 inches is ideal. If there is no gap or the gap is too large, you may need to adjust the truss rod.
- Locate the Truss Rod Adjustment Point: The truss rod is usually accessible through an adjustment point near the headstock or in the soundhole. It can be adjusted with an Allen wrench or a specialized truss rod tool. Check your bass guitar’s manufacturer instructions for the exact location and tool required.
- Determine the Direction to Adjust: Consult your bass guitar’s manual or manufacturer guidelines to know which way to turn the truss rod for adjustment. Turning it clockwise typically tightens the rod, while turning it counterclockwise loosens it.
- Make Small Adjustments: With the appropriate tool, make small adjustments to the truss rod, approximately an eighth of a turn at a time. Allow a few minutes for the neck to settle before assessing the changes. Remember, the goal is to achieve a slight curvature that provides adequate clearance for the strings without causing excessive bowing or backbow.
- Recheck and Fine-Tune: After each adjustment, assess the neck relief again by holding down the first and last frets. Continue making small adjustments until the desired gap is achieved.
It’s essential to exercise caution when adjusting the truss rod as too much force can damage the neck. If you’re unsure or uncomfortable performing this adjustment yourself, it’s best to seek assistance from a professional guitar technician.
Once you’ve adjusted the neck and truss rod to your satisfaction, you can proceed to the next step: setting the action and intonation of your bass guitar.
Step 4: Setting the Action and Intonation
Setting the action and intonation of your bass guitar is crucial for achieving comfortable playability, ensuring proper note accuracy, and enhancing the overall tone of the instrument. A well-adjusted action and intonation will allow for smooth fretting, clear tones, and optimal string response.
Here’s how you can set the action and intonation of your bass guitar:
- Adjusting the Action: The action refers to the height of the strings above the fretboard. Adjusting the action allows you to find the right balance between ease of playing and avoiding excessive string buzz. Use a metric ruler to measure the distance between the bottom of the strings and the top of the 12th fret. For most basses, a general action height of around 2.5-3mm on the E string and 2-2.5mm on the G string is a good starting point. To raise or lower the action, locate the bridge saddles and use a screwdriver or appropriate tool to make the necessary adjustments.
- Setting the Intonation: Intonation ensures that each string plays in tune when fretted at different positions. To adjust the intonation, start by tuning the bass guitar to proper pitch. Play the open string and then the 12th fret harmonic of each string. Use a tuner to check if the pitch matches. If the fretted note is sharp or flat compared to the harmonic, you’ll need to make adjustments. Use a screwdriver or appropriate tool to move the bridge saddle forward or backward until the fretted note matches the harmonic. Repeat this process for each string.
Take your time when adjusting the action and intonation, making small changes and frequently checking the results. Strive for a comfortable action that allows for clean, buzz-free notes and precise intonation across the fretboard.
Remember that personal preference and playing style can influence the desired action and intonation. Experiment with different heights and intonation settings to find what works best for you and the sound you want to achieve.
Once you’ve successfully set the action and intonation, it’s time to move on to the next step: installing the strings on your bass guitar.
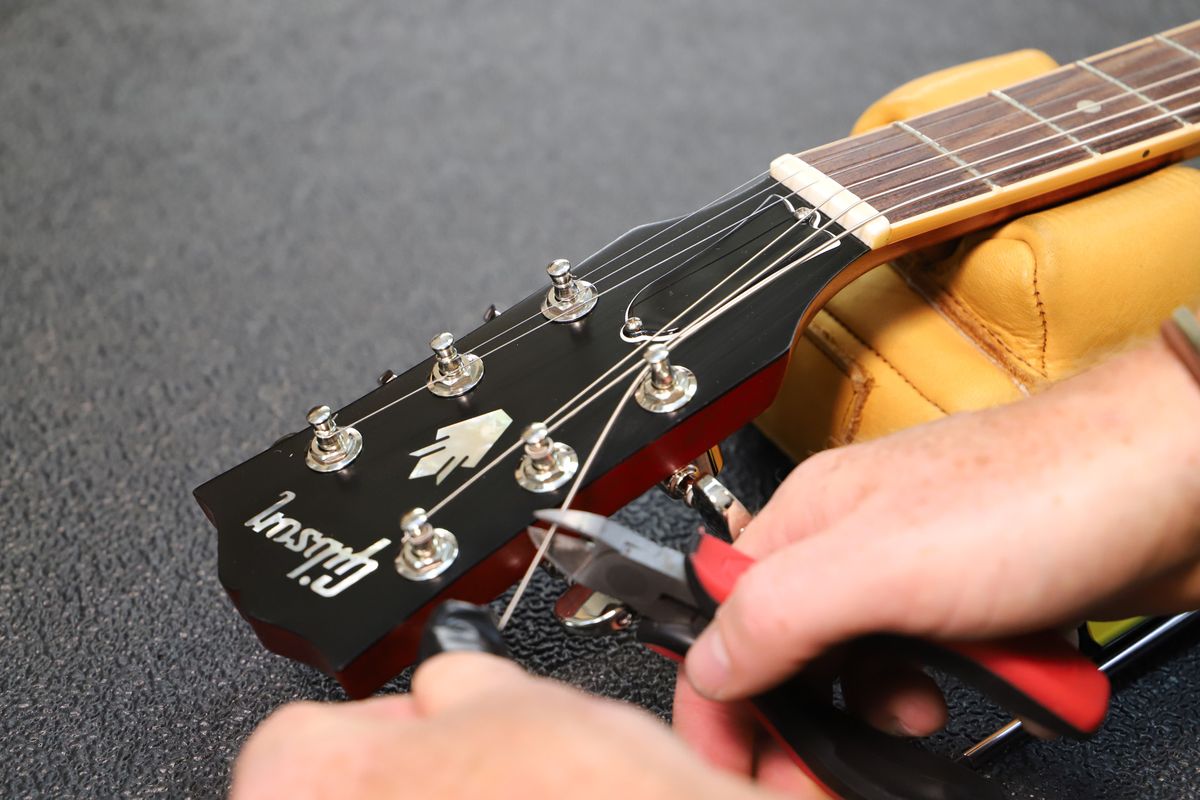
Step 5: Installing the Strings
Installing new strings is an essential part of maintaining your bass guitar’s playability and sound. Over time, strings can become worn, lose their tone, and even break. Installing fresh strings will not only improve the overall performance of your instrument but also enhance the clarity and resonance of your bass guitar’s sound.
Follow these steps to properly install new strings on your bass guitar:
- Gather the necessary tools: Prepare a pair of wire cutters to trim the excess string length, a string winder to expedite the winding process, and a tuner to ensure accurate string pitches.
- Remove the old strings: Start by loosening and removing the old strings one at a time. The tension in the strings can be released by turning the tuning pegs counterclockwise. Unwind the strings until they can be easily slipped out of the tuning pegs and bridge.
- Clean the guitar: Before installing new strings, it’s a good idea to clean the fretboard and body of your bass guitar using a soft cloth. This will help remove any dirt or residue accumulated over time.
- Attach the new strings: Beginning with the lowest-pitched string (usually the E string), place the ball end of the string into the corresponding bridge saddle. Push it firmly into place, ensuring that it is securely seated. Next, thread the opposite end of the string through the appropriate tuning peg, leaving enough slack for winding.
- Wind the strings: With the string securely in place, use a string winder (or your hand) to turn the tuning peg clockwise, winding the string until it is taut. Be careful not to over-tighten, as this can lead to string breakage. Repeat this process for each string, proceeding from the lowest to the highest pitch.
- Tune and stretch the strings: After winding the strings, use a tuner to bring them to pitch. It’s common for new strings to stretch and settle in during the first few hours of playing. To expedite this process, gently tug on each string away from the fretboard to help stretch and stabilize the strings.
- Trim the excess string length: Once the strings are properly tuned, use wire cutters to trim the excess string length near the tuning pegs. Leave a small amount of string remaining for future adjustments if necessary.
Properly installing fresh strings will provide a brighter, more articulate tone and ensure better intonation and playability. Don’t forget to give your strings some time to settle in before making any additional adjustments.
Now that you have new strings on your bass guitar, it’s time to move on to the final step: tuning your instrument for optimal sound.
Step 6: Tuning the Bass Guitar
Tuning your bass guitar is a crucial step in ensuring that each string is at the correct pitch, allowing for accurate playing and harmonious musicality. Keeping your bass guitar in tune is essential for practicing, performing, and playing with others.
Follow these steps to tune your bass guitar:
- Prepare your tuner: Make sure your tuner is properly set up and ready for use. This can be an electronic tuner, a tuner app on your smartphone, or a tuning pedal.
- Tune the lowest string: Start with the lowest-pitched string (usually the E string) and pluck it open. Watch the tuner and adjust the tuning peg as needed to bring the string to the correct pitch. The goal is to match the pitch shown on the tuner.
- Move to the next string: Once the lowest string is in tune, move on to the next string (usually the A string) and follow the same process of plucking the string and adjusting the tuning peg to match the pitch indicated by the tuner.
- Tune each remaining string: Repeat the tuning process for each remaining string, moving from the D string to the G string. Take your time to ensure that each string is properly tuned.
- Double-check the tuning: After tuning all the strings individually, play some open string chords or a simple bass line to ensure that the instrument sounds in tune across different notes and positions on the fretboard. Make any necessary adjustments if you notice any discrepancies.
Remember to periodically check the tuning of your bass guitar, as strings can naturally go out of tune due to factors such as temperature changes, playing intensity, and string stretching. It’s a good habit to tune your bass guitar before every practice session or performance to ensure optimal sound quality.
Now that your bass guitar is in tune, it’s time to move on to the final step: testing and fine-tuning the instrument for optimal playability and sound.
Step 7: Testing and Fine-Tuning
Once you have gone through the previous steps to set up and tune your bass guitar, it’s essential to test the instrument’s playability and sound quality. This final step involves evaluating the adjustments made and making any necessary fine-tuning to ensure optimal performance.
Here are some key aspects to consider when testing and fine-tuning your bass guitar:
- Playability: Test how comfortable and easy it is to play the instrument. Are the strings at a comfortable height (action), allowing for easy fretting and smooth movement across the fretboard? Ensure that there are no issues such as buzzing strings or high action that may hinder your playing experience.
- Tone and Sound Quality: Assess the overall tone and sound of your bass guitar. Does it produce the desired sound for your playing style and musical genre? Experiment with different playing techniques, such as fingerstyle or using a pick, to evaluate the instrument’s tonal versatility. Make any necessary adjustments to the pickup height or tone controls to achieve the desired sound.
- Intonation: Check the intonation of the bass guitar by playing various notes across different positions on the fretboard. Ensure that the pitch remains accurate and in tune at every fret. If you notice any intonation issues, use the bridge saddle adjustments to fine-tune the intonation of each string as necessary.
- String Action: Pay attention to the string action and ensure that it is consistent across all strings. Make any additional adjustments to the bridge saddles to achieve an even and comfortable string height.
- Overall Performance: Test your bass guitar by playing different musical passages, practicing scales, or performing songs that you are familiar with. Evaluate how well the instrument responds to your playing and if it meets your expectations in terms of sound, playability, and overall performance.
While testing and fine-tuning, it’s important to keep in mind that personal preferences and playing style play a significant role. Take the time to listen carefully to the instrument and make small adjustments as needed to achieve your desired sound and playability.
Remember, setting up a bass guitar is not a one-time process. Over time, strings may age, the neck may shift, or your preferences may change. It’s a good practice to periodically reevaluate and make adjustments to ensure that your bass guitar remains in optimal condition.
Congratulations! You have successfully set up and fine-tuned your bass guitar. Enjoy playing and exploring the depths of your instrument for many hours of musical joy!
If you ever need to make further adjustments or encounter any difficulties, don’t hesitate to consult with a professional guitar technician for assistance.
Conclusion
Setting up a bass guitar is an essential process that ensures optimal playability, comfort, and sound. By following the steps outlined in this guide, you can take control of your instrument’s setup and achieve the best possible performance.
Choosing the right bass guitar is the foundation of the setup process. Consider factors such as the number of strings, fretted or fretless, tone, and your budget when making your selection.
Once you have your bass guitar, the step-by-step process begins. Adjusting the neck and truss rod allows for proper neck relief, ensuring comfortable playability. Setting the action and intonation fine-tunes the instrument’s playability and tone, while installing new strings refreshes the sound and responsiveness.
Correctly tuning the bass guitar brings each string to its desired pitch, and a final testing and fine-tuning phase ensures the overall playability and sound quality meet your expectations.
Remember, setting up a bass guitar is not a one-time task. As you progress as a musician and your preferences evolve, periodic re-evaluation and adjustments may be necessary to maintain optimum performance.
By following the steps outlined in this guide, you have taken an important step towards establishing a solid foundation for your bass guitar playing journey. Customizing your instrument to meet your specific needs will enhance your playing experience and allow you to unlock your full potential as a bassist.
Enjoy your newly set up bass guitar and have fun exploring the many possibilities it offers. Whether you’re practicing at home, jamming with friends, or performing on stage, a well-adjusted and finely tuned bass guitar will be your reliable partner in creating captivating basslines and grooves.