Home>Instruments>Synthesizer>How To Use Synthesizer
Synthesizer
How To Use Synthesizer
Modified: February 20, 2024
Learn how to effectively use a synthesizer to create mesmerizing music and unlock your creative potential. Discover tips, techniques, and tricks to master the art of synthesizer production.
(Many of the links in this article redirect to a specific reviewed product. Your purchase of these products through affiliate links helps to generate commission for AudioLover.com, at no extra cost. Learn more)
Table of Contents
Introduction
Welcome to the fascinating world of synthesizers! Whether you’re a musician, producer, or simply someone who appreciates electronic music, understanding how to use a synthesizer can open up a whole new realm of sonic possibilities. A synthesizer is an electronic instrument that generates and manipulates audio signals to create a wide range of sounds, from realistic instruments to otherworldly textures.
In this article, we will guide you through the basics of using a synthesizer, from the initial setup to playing, creating, and editing sounds. By the end, you’ll have the knowledge and confidence to dive into the exciting world of synthesis and unleash your creativity.
Before we dive into the technical details, it’s important to note that there are various types of synthesizers available, including hardware, software, and even mobile apps. While the specific features and controls may vary between different synthesizers, the fundamental concepts and techniques discussed in this article apply to most synthesizers.
Whether you’re a beginner or have some experience with synthesizers, this guide will provide you with a solid foundation to start exploring this powerful instrument. So let’s get started on our journey to unravel the mysteries of the synthesizer and unlock your creative potential.
Getting Started
Before diving into the world of synthesizers, it’s essential to familiarize yourself with a few key terms and concepts. Let’s start by understanding the main components of a synthesizer.
At its core, a synthesizer consists of three main components:
- Oscillators: These generate the initial sound waveforms. They can produce different waveforms like sawtooth, square, triangle, or sine waves, each with its unique tonal characteristics.
- Filters: Filters shape the sound by modifying the frequency content. They can be used to tweak the brightness, warmth, or sharpness of the sound by adjusting parameters such as cutoff frequency and resonance.
- Amplifiers: Amplifiers control the volume or level of the sound. The amplitude envelope, consisting of attack, decay, sustain, and release stages, determines how the sound evolves over time.
Other important components include modulation sources such as LFOs (Low-Frequency Oscillators), which introduce rhythmic or time-based changes to parameters, and modulation destinations like oscillators, filters, or amplifiers that are affected by the modulation sources.
Once you have a basic understanding of the components, it’s time to power on your synthesizer and get it set up for use. Most synthesizers come with a power cable and can be connected to a power outlet. Some synthesizers can also be powered via USB or batteries, depending on the model.
Next, connect your synthesizer to an audio interface or mixer using audio cables. This will allow you to hear and record the sound produced by the synthesizer. Make sure to connect the output of your synthesizer to an input on your audio device.
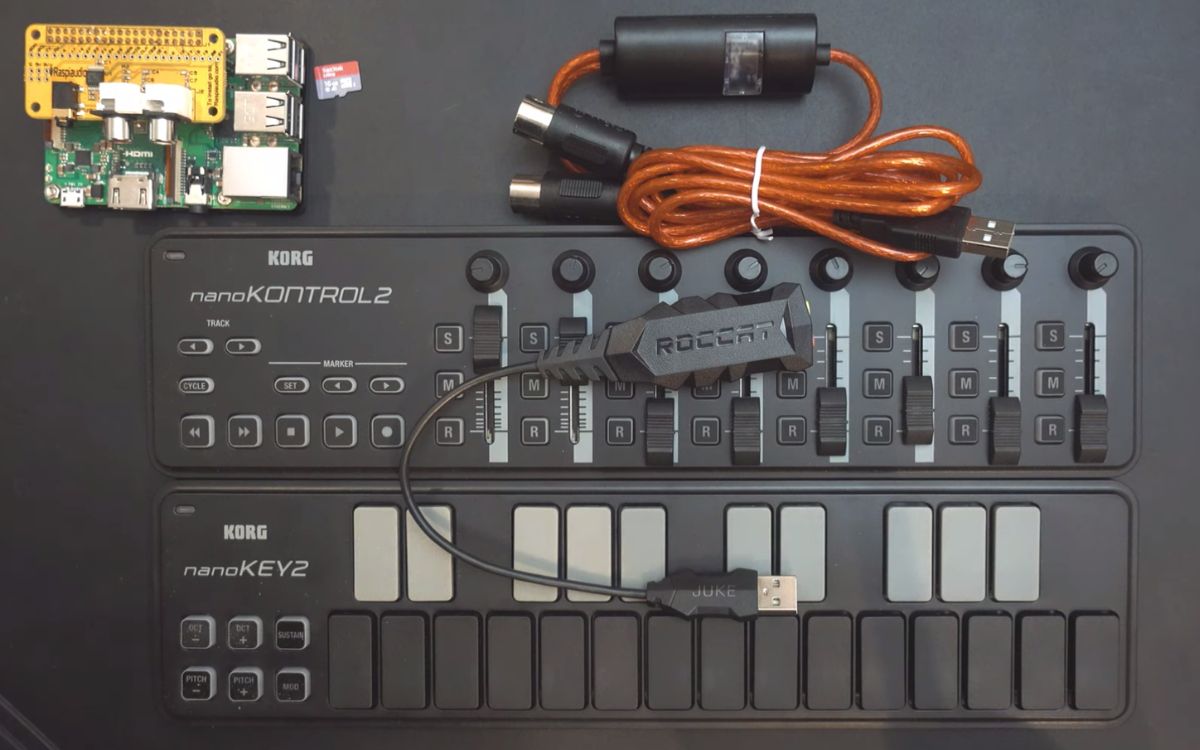
Finally, if your synthesizer supports MIDI (Musical Instrument Digital Interface), you can connect it to your computer or other MIDI-compatible devices using a MIDI cable or USB. MIDI integration allows you to control and sync your synthesizer with other MIDI devices and software.
With your synthesizer powered on and properly connected, you’re ready to explore its interface and start making some sounds. Let’s move on to the next section to see what awaits us in the world of synthesizers.
Understanding the Components
Before we dive deeper into using a synthesizer, let’s take a closer look at the various components that make up this versatile instrument.
1. Oscillators: These are the sound generators of a synthesizer. Oscillators produce different waveforms such as sine, square, sawtooth, or triangle waves. By adjusting the pitch and waveform of the oscillators, you can create a variety of sounds, from simple tones to complex textures.
2. Filters: Filters shape the frequency content of the sound. They can be used to remove or emphasize certain frequencies, giving you control over the timbre and character of the sound. Common types of filters include low-pass, high-pass, band-pass, and notch filters.
3. Amplifiers: Amplifiers control the volume or level of the sound. They determine how the sound evolves over time by shaping the amplitude envelope. The envelope typically consists of four stages: attack, decay, sustain, and release. Adjusting these stages allows you to shape the overall dynamics of the sound.
4. LFOs (Low-Frequency Oscillators): LFOs generate cyclical waveforms at a rate typically lower than what is audible. They can be used to modulate various parameters of the synthesizer, such as pitch, filter cutoff, or amplitude. This adds movement and rhythm to the sound, creating effects such as vibrato, tremolo, or modulation.
5. Modulation Matrix: The modulation matrix allows you to route and control how different parameters of the synthesizer interact with each other. You can route LFOs, envelopes, or other sources to modulate parameters like filter cutoff, oscillator pitch, or even effects parameters. This gives you endless possibilities for shaping and modulating your sounds.
6. Effects: Many synthesizers also include built-in effects such as delay, reverb, chorus, or distortion. These effects can further enhance your sounds and add depth, space, or character to your patches. You can adjust the parameters of these effects to create unique and personalized sounds.
Understanding the various components of a synthesizer is crucial for creating and shaping the sounds you envision. By manipulating these components and exploring their interactions, you’ll be able to unlock the full sonic potential of your synthesizer.
Now that we have a good grasp of the components, let’s move on to the next section, where we’ll learn how to power on and set up your synthesizer for optimal performance.
Powering On and Setting Up
Now that you have your synthesizer connected and ready, it’s time to power it on and get it set up for optimal performance. Follow these steps to ensure a smooth start:
- Powering On: Connect your synthesizer to a power source using the provided power cable. Make sure the power switch is in the off position before plugging it in. Once it’s securely connected, turn on the power switch and wait for the synthesizer to boot up.
- Setting Up Audio Output: Connect your synthesizer to an audio interface or mixer using audio cables. Locate the audio output ports on your synthesizer—these can be mono or stereo outputs—and connect them to the corresponding inputs on your audio device. This will allow you to hear and record the sound produced by the synthesizer.
- Adjusting Audio Levels: Once the audio cables are connected, adjust the audio levels on your synthesizer and audio interface/mixer. Start by setting the volume level of your synthesizer to a comfortable level. Then, adjust the input gain on the audio interface or mixer to ensure a clean and balanced audio signal.
- Configuring MIDI: If your synthesizer supports MIDI, you can integrate it with your computer or other MIDI devices. Connect the MIDI output of your synthesizer to the MIDI input of your MIDI interface or device using a MIDI cable or USB. This will allow you to control and sync your synthesizer with MIDI-compatible software and devices.
- Checking Firmware and Software Updates: It’s important to keep your synthesizer’s firmware and software up to date to ensure optimal performance and access to the latest features. Check the manufacturer’s website for any available updates and follow their instructions to install them, if necessary.
With your synthesizer powered on and properly set up, take a moment to familiarize yourself with the controls and interface. Browse through the various menus and options to understand the available features and settings of your synthesizer.
Now that your synthesizer is powered on and ready to go, let’s dive into the next section where we’ll explore the different sections of the synthesizer interface and how to navigate through them.
Exploring the Synthesizer Interface
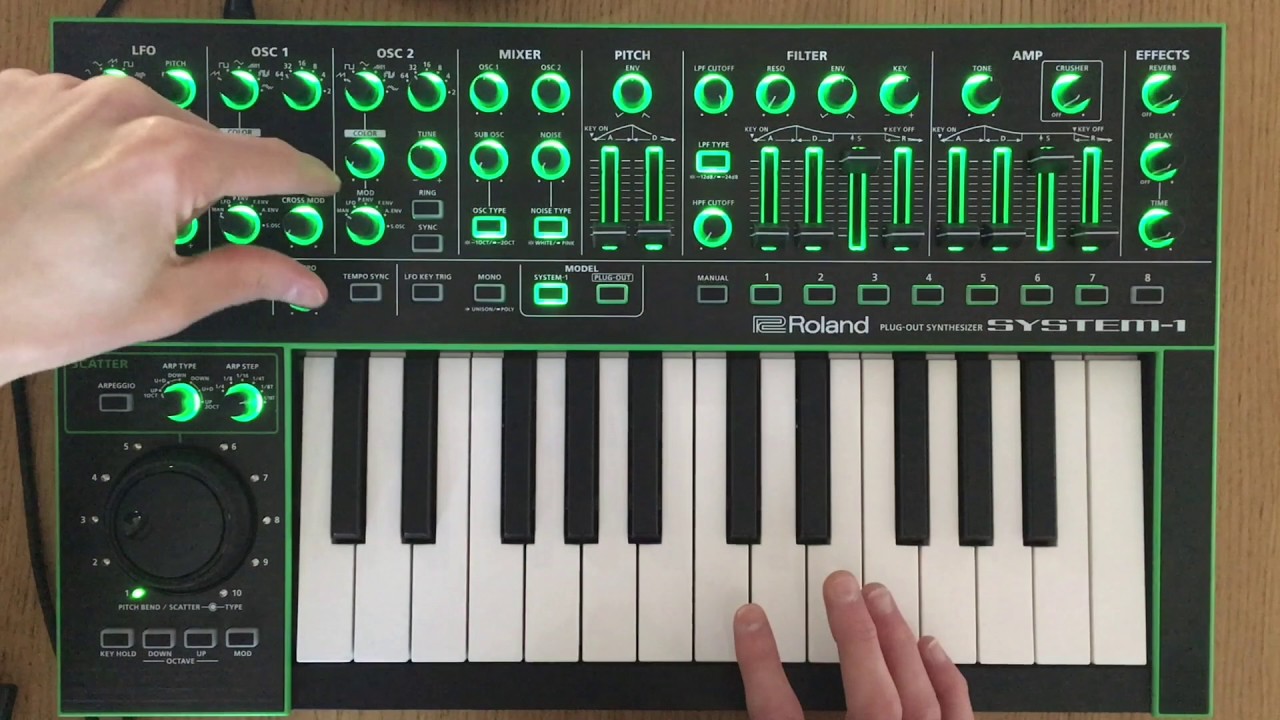
Once your synthesizer is powered on and set up, it’s time to dive into the interface and familiarize yourself with the various sections and controls. While the specific layout may vary depending on your synthesizer model, most synthesizers share similar sections and functions.
1. Oscillator Section: This section controls the sound generation. You’ll find controls for waveform selection, octave range, detune, and fine-tuning. Experiment with different waveforms to shape the basic character of your sound.
2. Filter Section: The filter section shapes the frequency content of the sound. You’ll find controls for cutoff frequency, resonance, and filter type selection. Adjusting these parameters will help you sculpt the tonal quality and timbre of your sound.
3. Amplifier Section: The amplifier section controls the volume and dynamics of the sound. It typically includes controls for envelope shaping, including attack, decay, sustain, and release parameters. Use these controls to shape how the sound evolves over time.
4. Modulation Section: Most synthesizers have a dedicated section for modulation controls. Here, you’ll find parameters for LFO rates, modulation depth, and destinations. Modulation adds movement and variation to your sound by controlling different parameters using LFOs or envelopes.
5. Effects Section: Many synthesizers come with built-in effects like reverb, delay, chorus, or distortion. These effects can be used to add depth, space, or character to your sound. Explore the options available and experiment with different effect settings to enhance your patches.
6. Control Panel and Knobs: These are physical controls or virtual knobs that allow you to fine-tune various parameters. They provide hands-on control over elements like oscillator pitch, filter cutoff, envelope times, and modulation depth. Use these controls to add expressiveness and tailor the sound to your liking.
7. Display: The display provides visual feedback and information about your synthesizer’s settings. It may show the current patch name, parameter values, or menu options. Familiarize yourself with the display and navigation buttons to efficiently navigate through different menus and settings.
Take the time to explore each section of your synthesizer’s interface and understand how the controls interact with one another. Experiment with different settings, and don’t be afraid to go beyond the presets. This will allow you to develop a deeper understanding of your synthesizer’s capabilities and help you create unique and personalized sounds.
Now that you’re familiar with the synthesizer interface, let’s move on to the next section where we’ll learn how to play sounds on your synthesizer.
Playing Sounds
One of the most exciting aspects of using a synthesizer is the ability to play and perform sounds in real-time. Whether you’re a keyboardist or using a MIDI controller, here are some key techniques and concepts to help you unleash your creativity:
1. Keyboard Layout: Most synthesizers have a standard keyboard layout, similar to a piano. This layout consists of white and black keys, spanning multiple octaves. The white keys represent the natural notes (A, B, C, etc.), while the black keys represent the sharps or flats.
2. Octave Shift: Use the octave shift controls to move up or down the keyboard in octaves. This allows you to access a wider range of notes and play higher or lower pitches depending on your musical needs.
3. Playing Chords: Experiment with playing multiple keys simultaneously to create chords. Try different combinations of notes and explore the harmonies they create. By playing chords, you can add depth and richness to your compositions.
4. Velocity Sensitivity: Many synthesizers are velocity-sensitive, meaning that the sound responds to how hard or soft you play the keys. Experiment with varying your finger pressure to control the velocity and dynamics of the sound. This adds expressiveness and a human touch to your performances.
5. Modulation Wheel and Pitch Bend: Synthesizers often incorporate modulation wheels and pitch bend controls. The modulation wheel allows you to introduce real-time modulation effects such as vibrato or tremolo to add movement to your sound. The pitch bend control lets you bend the pitch of the sound up or down, creating expressive pitch variations.
6. Arpeggiator and Sequencer: Many synthesizers feature built-in arpeggiators and sequencers. An arpeggiator creates rhythmic patterns by automatically playing a sequence of notes based on the keys you hold. A sequencer allows you to program and play back sequences of notes or entire compositions. Explore these features to create intricate melodies and patterns.
7. Experimentation and Sound Design: Don’t be afraid to experiment with different parameters and presets. Play around with the oscillator waveforms, filter settings, and envelope controls to sculpt the sound to your liking. The synthesizer is a versatile instrument that allows for endless sonic exploration.
Remember, practice is key when it comes to playing and performing on a synthesizer. Spend time honing your skills, experimenting with different techniques, and developing your own unique playing style. By combining technical proficiency with creative exploration, you’ll be able to create captivating and dynamic performances.
Now that you know how to play sounds on your synthesizer, let’s move on to the next section, which covers creating and editing patches.
Creating and Editing Patches
Creating and editing patches is where the true power of a synthesizer comes to life. With patch creation, you can design and sculpt unique sounds that reflect your artistic vision. Here’s a step-by-step guide to help you get started:
1. Start from a Basic Patch: Begin by selecting a basic patch or initializing a blank sound. This will provide a foundation from which you can build your desired sound. Alternatively, you can start from an existing preset and modify it to suit your preferences.
2. Adjust Oscillator Settings: Experiment with different waveform selections and octave ranges for each oscillator. Tweak the detune and fine-tuning parameters to create variations and add depth to your sound. Consider layering multiple oscillators to create complex and rich textures.
3. Shape the Sound with Filters: Use the filter controls to shape the frequency content of your sound. Adjust the cutoff frequency and resonance to control the brightness, warmth, or sharpness of the sound. Experiment with different filter types to explore various tonal possibilities.
4. Control Amplitude with Envelopes: Utilize the envelope controls to shape the volume and dynamics of your sound. Adjust the attack, decay, sustain, and release stages to control how the sound starts, evolves, sustains, and fades out over time. Play around with these parameters to achieve the desired shape and contour.
5. Add Modulation and Effects: Explore the modulation options available to you, such as LFOs and modulation matrix routing. Modulate parameters like oscillator pitch, filter cutoff, or amplitude to introduce movement and variation to your sound. Additionally, experiment with built-in effects like reverb, delay, or chorus to enhance and shape your patches further.
6. Save and Organize: Once you have crafted a sound that you’re satisfied with, save your patch. Most synthesizers allow you to save and organize patches in banks or categories. Assign clear and descriptive names to your patches for easy recall in the future.
7. Iterate and Experiment: Creating and editing patches is an iterative process. Don’t be afraid to experiment, tweak settings, and push the boundaries of your synthesizer. Combine different techniques, explore unconventional parameter combinations, and trust your ears to guide you towards innovative and unique sounds.
Remember, sound design is a deeply personal and creative process. As you gain experience and familiarity with your synthesizer, you’ll develop your own style and approach to creating and editing patches. Don’t hesitate to explore tutorials, forums, and resources that can inspire and expand your sonic palette.
Now that you have learned how to create and edit patches, let’s move on to the next section where we’ll explore modulation and effects to further enhance your sounds.
Modulation and Effects
Modulation and effects are powerful tools that can transform and elevate your synthesizer sounds. Modulation involves adding movement and dynamic changes to your patches, while effects provide additional audio enhancements. Let’s dive into these aspects and learn how to utilize them effectively:
1. Modulation: Modulation involves altering parameters of your sound over time. It adds movement, rhythm, and variation to your patches. Key modulation techniques include:
- LFO Modulation: Use Low-Frequency Oscillators (LFOs) to modulate parameters like pitch, filter cutoff, or amplitude. This creates rhythmic or cyclic changes, such as vibrato or tremolo, adding depth and animation to your sound.
- Envelope Modulation: Route envelopes to modulate specific parameters. For example, you can use an envelope to shape the filter cutoff or the amplitude of your sound. This allows for dynamic and expressive control over different aspects of the sound.
- Modulation Matrix: Some synthesizers feature a modulation matrix that allows you to assign modulation sources to various destinations. This flexible routing system provides extensive control over your patches, enabling complex modulation combinations and interactions.
2. Effects: Effects allow you to shape and manipulate the sound even further. They provide additional sonic enhancements and creative possibilities. Here are some common effects you may find in a synthesizer:
- Reverb: Reverb simulates the natural acoustics of different spaces, adding depth and dimension to your sound. Adjust parameters like decay time, size, and pre-delay to create various reverb textures.
- Delay: Delay creates echoes of the original sound, adding spaciousness and rhythmic patterns. Control parameters like delay time, feedback, and modulation to craft unique delay effects.
- Chorus: Chorus thickens the sound by adding slight variations in pitch and timing. It creates a sense of movement and richness. Adjust parameters like rate, depth, and feedback to find the desired chorus effect.
- Distortion: Distortion introduces harmonic saturation, overdrive, or fuzz to your sound. It can range from subtle warmth to gritty and aggressive tones. Experiment with different distortion types and parameters to find the desired effect.
Combining modulation and effects allows you to create complex and evolving sounds that capture attention and add depth to your compositions. Remember to experiment with different modulation sources, destinations, and effect settings to craft unique and captivating sounds.
As you explore modulation and effects, it’s important to consider the balance and subtlety of their application. Too much modulation or heavy-handed effects can overpower the sound. Aim for tasteful and creative application, allowing the essence of your original sound to shine through.
Now that you understand the power of modulation and effects, let’s move on to the next section where we’ll learn how to save and load presets on your synthesizer.
Saving and Loading Presets
Presets are pre-designed sounds or patches that come with your synthesizer or ones you create yourself. Saving and loading presets allows you to quickly recall your favorite sounds and streamline your workflow. Here’s how to manage presets on your synthesizer:
1. Saving Presets: Once you have crafted a sound that you’re satisfied with, it’s important to save it as a preset. Most synthesizers provide a dedicated save function or button. Follow these steps to save your presets:
- Select an empty preset slot or choose a category to save your sound.
- Press the save button and follow the on-screen instructions.
- Assign a clear and descriptive name to your preset. Consider including information about the patch’s characteristics, such as its timbre, genre, or your initials.
- Confirm the save action, and your preset will be stored for future use.
2. Loading Presets: Loading presets is an efficient way to access previously saved sounds or explore factory presets. Here’s how to load presets on your synthesizer:
- Navigate through the preset library or categories using the synthesizer’s interface or menu system.
- Select the desired preset and load it. The synthesizer will automatically configure its parameters to match the saved settings.
- Experiment with different presets to discover unique sounds and find inspiration for your compositions.
3. Organizing Presets: As you accumulate more presets, organizing them becomes essential. Most synthesizers provide features for managing presets, such as:
- Bank Management: Grouping presets into banks or categories makes it easier to navigate through your sound library. Create custom banks based on genre, project, or personal preference.
- Preset Renaming: Renaming presets can help you quickly identify specific sounds. Consider using meaningful and descriptive names that reflect the character or intended use of the sound.
- Deleting and Moving Presets: Some synthesizers allow you to delete unwanted presets or rearrange them within banks. Clean up your preset library periodically to remove duplicates or sounds you no longer find useful.
By effectively managing your preset library, you can save time and easily access your favorite sounds, making your creative process more efficient and enjoyable.
Now that you know how to save and load presets, let’s move on to the next section where we’ll explore MIDI integration and its benefits.
MIDI Integration
MIDI (Musical Instrument Digital Interface) integration is a powerful feature found in many synthesizers that allows you to connect and control your synthesizer with other MIDI-compatible devices, such as computers, sequencers, and MIDI controllers. MIDI integration provides a wide range of benefits and opens up new avenues for creativity. Let’s explore the advantages of MIDI integration:
1. External Control: MIDI integration allows you to control your synthesizer remotely using a MIDI controller. Connect your MIDI controller to your synthesizer via MIDI cables or USB, and you’ll be able to play and control the synthesizer’s parameters using the controller’s keys, knobs, sliders, or pads. This provides a more tactile and expressive experience compared to using the synthesizer’s onboard controls.
2. MIDI Sequencing: With MIDI integration, you can synchronize your synthesizer with a sequencer or a DAW (Digital Audio Workstation). This allows you to record MIDI data from the synthesizer and play it back, making it easier to compose and arrange complex musical pieces. You can also use the sequencer to automate parameters on your synthesizer, creating dynamic and evolving sounds.
3. Virtual Instruments and Software: MIDI integration facilitates the use of virtual instruments and software. By connecting your synthesizer to a computer or MIDI-compatible device, you can access a vast library of software-based synthesizers, sample libraries, and effects plugins. This expands your sonic palette and gives you access to a wide range of sounds and textures.
4. MIDI Sync and Clock: MIDI integration allows for precise synchronization between your synthesizer and other MIDI devices. By passing MIDI clock signals, you can sync your synthesizer with drum machines, sequencers, or other MIDI-enabled instruments. This ensures that all devices play in perfect timing, making it easier to create tight and rhythmically accurate compositions.
5. Parameter Control and Mapping: MIDI integration lets you map MIDI messages to specific parameters on your synthesizer. This means you can assign knobs, sliders, or buttons on your MIDI controller to control various parameters such as filter cutoff, resonance, or modulation depth. This provides greater flexibility and control over your sound in real-time performances or while recording in the studio.
Take advantage of MIDI integration to unlock the full potential of your synthesizer and expand your musical possibilities. Experiment with different setups, combinations, and workflows to find a configuration that enhances your creativity and workflow.
Now that you understand the benefits of MIDI integration, let’s move on to the next section, where we’ll cover troubleshooting and provide useful tips to enhance your synthesizer experience.
Troubleshooting and Tips
While using a synthesizer is generally an enjoyable experience, it’s not uncommon to encounter challenges or unexpected issues. Here are some troubleshooting tips to help you overcome common problems and enhance your synthesizer experience:
1. Read the Manual: The first step in troubleshooting is to consult the user manual provided by the manufacturer. Familiarize yourself with the instructions, specifications, and troubleshooting sections relevant to your synthesizer model.
2. Check Connections: If you experience no sound or connectivity issues, double-check all cable connections. Ensure that audio cables, MIDI cables, and power cables are securely plugged in and connected to the appropriate ports.
3. Update Firmware and Software: Keeping your synthesizer’s firmware and software up to date is important for optimal performance and access to the latest features. Check the manufacturer’s website for any available updates and follow their instructions to install them.
4. Reset to Factory Settings: If you encounter persistent issues or want to start fresh, consider performing a factory reset. This restores the synthesizer to its original settings and can resolve software-related issues. Refer to the user manual for instructions on performing a factory reset.
5. Avoid Overloading the Processor: Synthesizers have a limited processing capacity, and using too many oscillators, effects, or polyphony can strain the system. If you experience glitches or audio dropouts, try reducing the complexity of your patches or using fewer voices to lighten the processing load.
6. Experiment with Signal Flow: Take time to experiment with the order of effects and signal routing. Changing the order of effects, putting reverb before or after the filter, or experimenting with parallel processing can yield unique and exciting results.
7. Learn from Others: Engage with synthesizer communities, forums, and online tutorials. Learning from experienced users can provide valuable insights, techniques, and solutions to common problems. Share your experiences and learn from others to expand your knowledge and skills.
8. Explore Beyond Presets: While presets can be a great starting point, don’t shy away from creating your own sounds. Spend time understanding the synthesis principles, experiment with different parameters, and embrace the process of sound design. This will allow you to unleash your creativity and develop a unique sonic identity.
Remember, troubleshooting is part of the learning process with synthesizers. Embrace challenges as opportunities to deepen your understanding and problem-solving skills. With patience and persistence, you’ll be able to overcome difficulties and fully enjoy the vast potential of your synthesizer.
Now that you have some troubleshooting tips and practical advice, you are well-equipped to navigate the synthesizer world confidently. Let your creativity soar as you delve into the realms of sound design, performance, and musical expression!
Conclusion
Congratulations! You have embarked on a thrilling journey into the captivating realm of synthesizers. Throughout this article, we have explored the fundamentals of using a synthesizer, from understanding its components to creating, playing, and editing sounds.
We discussed the importance of familiarizing yourself with the synthesizer’s interface, including the oscillator, filter, and amplifier sections. Additionally, we delved into the exciting world of modulation and effects, where you learned how to add movement, variation, and sonic enhancements to your sounds.
We also covered essential topics such as saving and loading presets to streamline your workflow, MIDI integration to connect and control your synthesizer with other devices, troubleshooting tips for overcoming common issues, and practical advice for sound design and performance.
Remember, mastering the art of synthesizers takes time and practice. Embrace experimentation, explore sound sculpting techniques, and let your creativity guide you as you uncover unique and captivating sounds.
Whether you’re a professional musician, producer, or music enthusiast, synthesizers offer an incredible range of possibilities to enhance your musical journey. Whether you’re creating atmospheric soundscapes, crafting catchy melodies, or pushing the boundaries of electronic music, the synthesizer is a powerful tool that empowers your artistic expression.
Now, armed with a solid foundation of synthesizer knowledge, it’s time to dive deeper into the vast world of sound design and exploration. So, grab your synthesizer, let your imagination run wild, and express your true musicality through the infinite sonic landscapes waiting to be discovered.