Home>Instruments>Synthesizer>How To Use Fl Studio Synthesizer
Synthesizer
How To Use Fl Studio Synthesizer
Modified: February 22, 2024
Learn how to effectively use the synthesizer in FL Studio with our comprehensive guide. Master the art of creating unique and professional electronic music.
(Many of the links in this article redirect to a specific reviewed product. Your purchase of these products through affiliate links helps to generate commission for AudioLover.com, at no extra cost. Learn more)
Table of Contents
- Introduction
- Understanding FL Studio Synthesizer
- Setting Up FL Studio Synthesizer
- Exploring the User Interface
- Loading and Manipulating Sounds
- Understanding Synthesis Techniques
- Creating Basic Sound with Synthesizer
- Applying Effects to Synthesized Sounds
- Advanced Synthesis Techniques
- Modulation and Automation in FL Studio Synthesizer
- Mixing and Mastering Synthesized Sounds
- Troubleshooting and Tips for FL Studio Synthesizer
- Conclusion
Introduction
Welcome to the vibrant world of FL Studio Synthesizer! Whether you’re a music producer, sound designer, or simply a fan of electronic music, exploring the possibilities of synthesizers can be an exhilarating journey. FL Studio Synthesizer, commonly known as FL Studio or FruityLoops, is a powerful digital audio workstation that allows you to create and manipulate sounds using a variety of synthesis techniques.
In this comprehensive guide, we will delve into the fascinating realm of FL Studio Synthesizer, unlocking its potential and equipping you with the knowledge and skills to produce captivating sounds. From understanding the basics of synthesis to applying advanced techniques, we will cover all aspects of using the FL Studio Synthesizer to create unique and impressive soundscapes.
FL Studio Synthesizer offers a vast array of features and options, which can seem overwhelming for beginners. However, with a step-by-step approach, we will demystify the synthesizer’s interface and functionality, making it accessible to users of all levels of expertise.
Throughout this guide, we will also explore various synthesis techniques such as subtractive synthesis, frequency modulation, and wavetable synthesis. You will learn how to create basic sounds and manipulate them using envelopes, filters, and modulation. Additionally, we will cover the application of effects to enhance the sound and the intricacies of modulation and automation, enabling you to add movement and expression to your creations.
Aside from the technical aspects, we will also provide tips and troubleshooting advice to help you overcome common challenges and make the most of your time using FL Studio Synthesizer.
By the end of this guide, you will have a solid understanding of FL Studio Synthesizer’s capabilities, allowing you to experiment, explore, and unleash your creativity through sound synthesis. So, let’s dive in and embark on this exciting journey into the world of FL Studio Synthesizer!
Understanding FL Studio Synthesizer
Before we dive into the intricacies of FL Studio Synthesizer, let’s take a moment to understand what exactly it is and what it can offer to musicians and sound enthusiasts.
FL Studio Synthesizer, developed by Image-Line Software, is a versatile digital audio workstation (DAW) that provides a comprehensive set of tools and features for creating and manipulating sounds. It is widely used in the music production industry and offers a user-friendly interface that caters to both beginners and professionals.
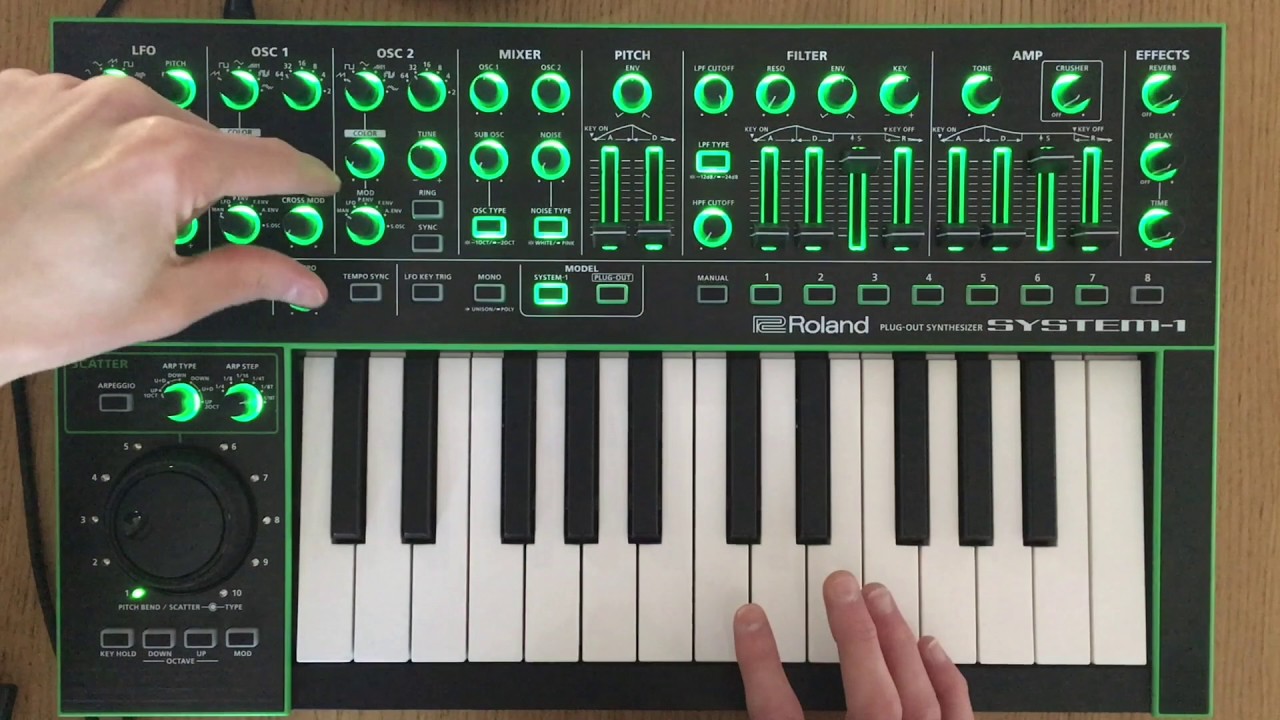
At its core, FL Studio Synthesizer is designed to mimic traditional hardware synthesizers, which are electronic musical instruments capable of generating a wide range of sounds through the manipulation of electronic signals. However, FL Studio Synthesizer takes the concept a step further by offering a virtual environment where users can experiment with different synthesis techniques and effects to create truly unique sounds.
One of the key advantages of FL Studio Synthesizer is its flexibility. It supports multiple synthesis methods, including subtractive synthesis, frequency modulation (FM) synthesis, and wavetable synthesis, among others. This allows users to explore various approaches to sound creation and opens up a world of sonic possibilities.
In addition to its extensive synthesis capabilities, FL Studio Synthesizer also provides a range of built-in effects, such as reverb, delay, and distortion, which can be applied to synthesized sounds to add depth, texture, and character. These effects can be customized and automated to create dynamic and evolving sounds.
FL Studio Synthesizer’s user interface is intuitive and visually appealing, with a modular layout that allows for flexible workflow customization. Its pattern-based sequencer makes it easy to arrange and structure your compositions, while the piano roll editor enables precise control over note placement and performance.
Furthermore, FL Studio Synthesizer supports a wide range of third-party plugins and virtual instruments, expanding its sonic capabilities even further. Whether you’re looking for realistic emulations of classic analog synths or cutting-edge digital instruments, FL Studio Synthesizer has got you covered.
In the next sections, we will explore the different aspects of FL Studio Synthesizer in detail, starting with setting up the software and familiarizing ourselves with its user interface. So, let’s get ready to unleash our creativity and dive deeper into the mesmerizing world of FL Studio Synthesizer!
Setting Up FL Studio Synthesizer
Before we start exploring the vast capabilities of FL Studio Synthesizer, it’s important to ensure that the software is properly set up on your computer. By following the steps below, you’ll be ready to dive into the exciting world of sound synthesis with FL Studio Synthesizer.
- Downloading and installing FL Studio: Visit the official Image-Line website and download the latest version of FL Studio Synthesizer. Once the download is complete, run the installer and follow the on-screen instructions to install the software on your computer.
- Activating your license: If you have purchased a license for FL Studio Synthesizer, you will need to activate it. Launch FL Studio and click on the “Help” menu. Select “About” and then click on the “Unlock FL Studio” button. Enter your license information as prompted to activate your copy of FL Studio Synthesizer.
- Setting up your audio interface: FL Studio Synthesizer relies on an audio interface to communicate with your speakers or headphones. Connect your audio interface to your computer and ensure that it is properly recognized by your operating system. Go to the “Options” menu in FL Studio and select “Audio Settings.” Under the “Audio” tab, choose your audio interface from the list of available devices and configure the sample rate and buffer size according to your preferences.
- Configuring MIDI devices: If you have a MIDI keyboard or controller, you can connect it to your computer and use it to control FL Studio Synthesizer. In the “Options” menu, select “MIDI Settings” and ensure that your MIDI device is recognized by FL Studio. You may need to enable the input and output ports for your MIDI device if they are not automatically detected.
- Choosing your project folder: FL Studio Synthesizer uses a project folder to store your files, samples, and presets. Decide on a location on your computer where you want your project folder to be saved. Once you have chosen the folder, go to the “Options” menu and select “File Settings.” Under the “Project” tab, set the project folder location to the desired path.
By following these steps, you will have successfully set up FL Studio Synthesizer on your computer and configured it to work with your audio interface and MIDI devices. Now you’re ready to dive into the exciting world of sound synthesis and explore the endless possibilities that FL Studio Synthesizer has to offer.
In the next section, we will take a closer look at the user interface of FL Studio Synthesizer, familiarizing ourselves with its various components and features. So, let’s move forward and unleash our creativity with FL Studio Synthesizer!
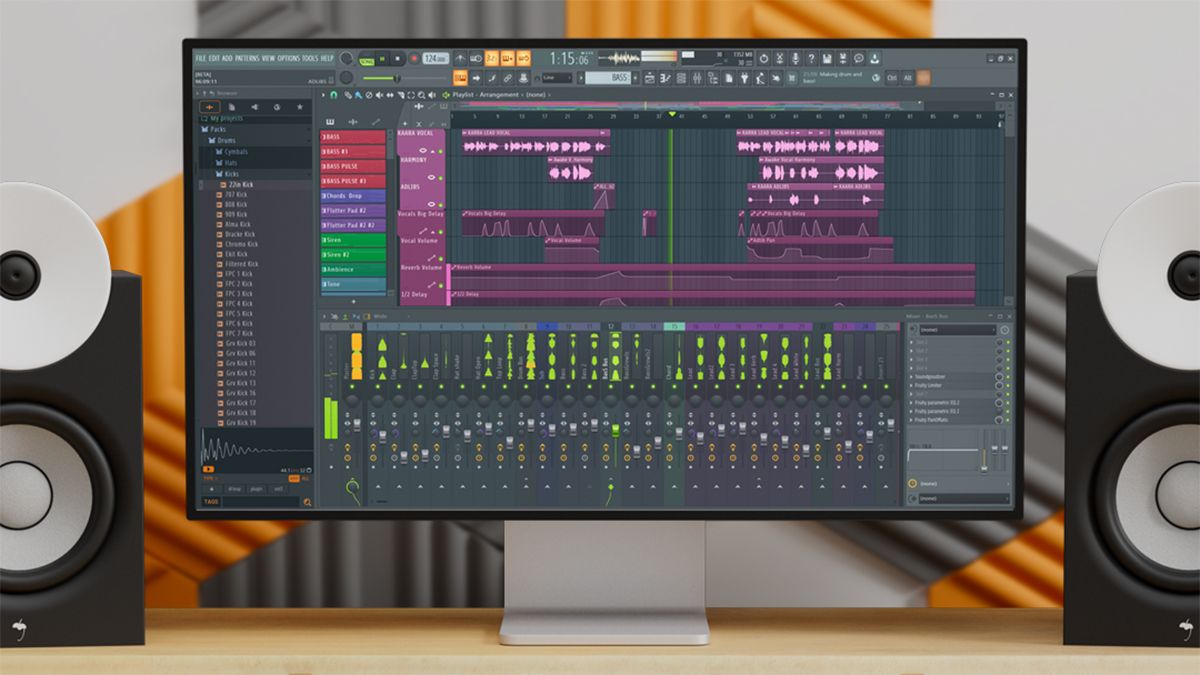
Exploring the User Interface
As you launch FL Studio Synthesizer, you’ll be greeted by its visually appealing and user-friendly interface. Understanding the various components and features of the interface will help you navigate the software effortlessly and efficiently. Let’s take a closer look at the key elements of FL Studio Synthesizer’s user interface:
- Toolbar: Located at the top of the interface, the toolbar provides quick access to essential functions such as saving your project, adding new tracks, and accessing the mixer.
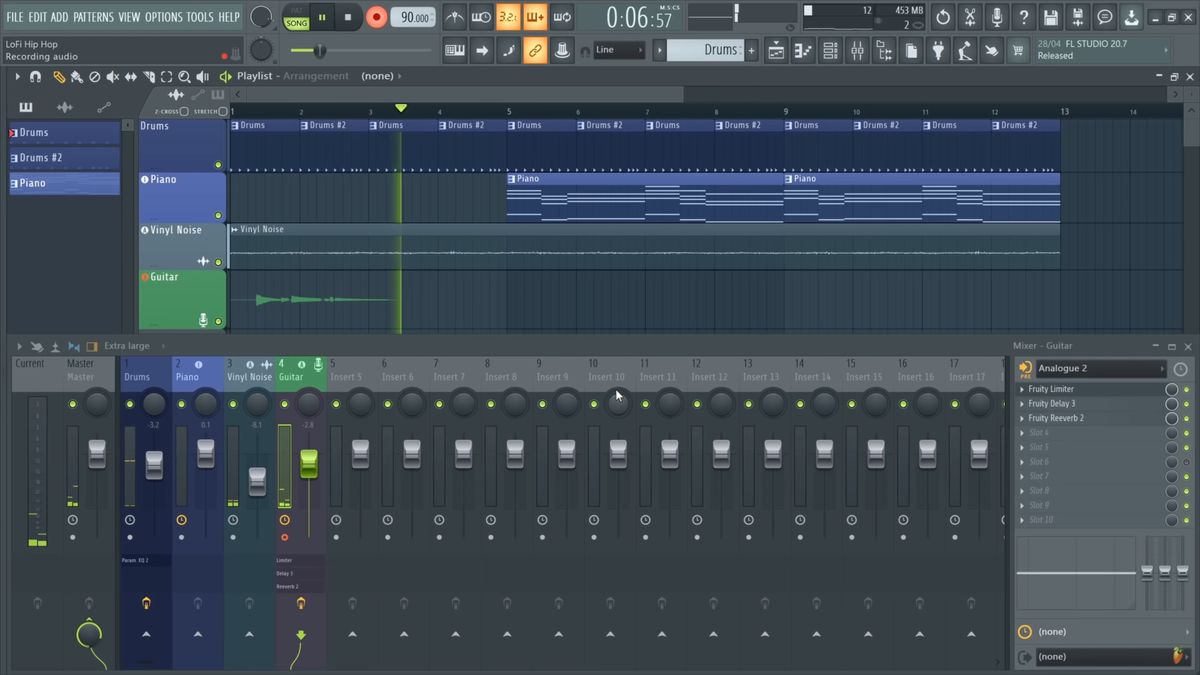
- Channel Rack: The Channel Rack is where you can create and arrange your patterns and sequences. Each channel represents a unique sound or instrument, and you can add and manipulate patterns within the Channel Rack.
- Piano Roll: The Piano Roll is a powerful tool for creating melodies, chords, and note sequences. It allows you to precisely place and edit individual notes, control the pitch and duration, and apply various articulations and effects.
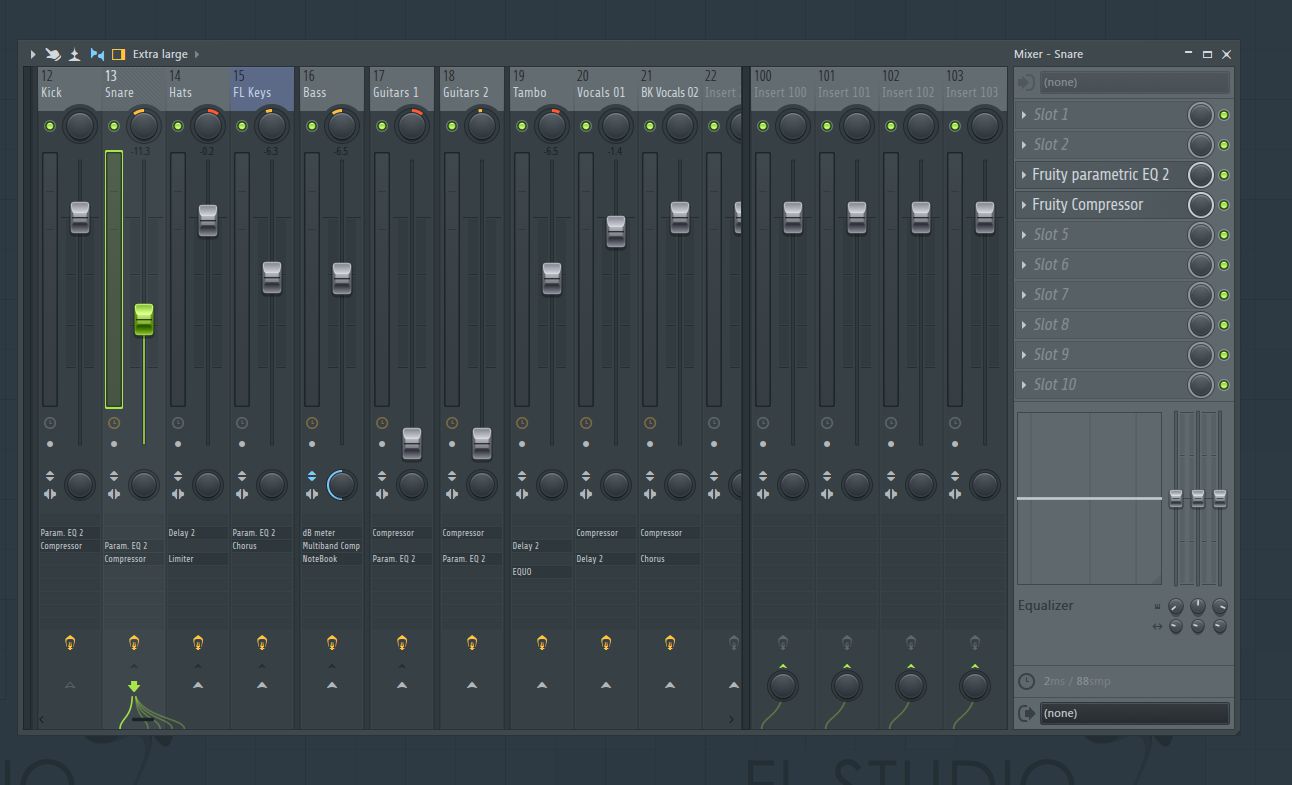
- Mixer: The Mixer is where you can control the volume, panning, and effects of each individual channel. It enables you to blend and balance the sounds together, resulting in a cohesive and polished mix.
- Browser: The Browser provides quick access to your samples, presets, and plugins. It allows you to search, organize, and import various assets into your project, making it easy to find the perfect sound for your composition.
- Playlist: The Playlist is where you arrange and structure your patterns and sequences to create complete compositions. It provides a visual timeline where you can drag and drop patterns, arrange them in different orders, and create variations and transitions.
- Pattern Selector: The Pattern Selector allows you to choose and switch between different patterns within the Channel Rack and Playlist. It provides a quick way to explore different variations and arrangements of your music.
- Transport Panel: Located at the bottom of the interface, the Transport Panel contains controls for playing, stopping, and recording your music. It also displays the current playback position, tempo, and time signature.
These are just the main elements of the FL Studio Synthesizer interface. Depending on your workflow and preferences, you can customize the interface by rearranging windows, adding additional panels, and creating your own custom layouts.
Now that you’re familiar with the user interface, you’re ready to start loading and manipulating sounds with FL Studio Synthesizer. In the next section, we will explore how to import and work with different audio and MIDI files. So, let’s continue our journey into the realm of sound synthesis and creation!
Loading and Manipulating Sounds
FL Studio Synthesizer provides a wealth of options for loading and manipulating sounds, allowing you to unleash your creativity and craft unique sonic textures. In this section, we will explore the various methods of importing audio and MIDI files, as well as how to manipulate and edit them within FL Studio Synthesizer.
Loading Audio Files: To load audio files into FL Studio Synthesizer, you can simply drag and drop them from your computer’s file explorer into the Playlist or directly onto a channel in the Channel Rack. Alternatively, you can use the “File” menu and select “Import” to choose and load audio files. Once imported, the audio files will appear as separate clips in the Playlist, ready for further manipulation.
Loading MIDI Files: FL Studio Synthesizer supports MIDI files, allowing you to import pre-recorded MIDI sequences or create them from scratch using the Piano Roll. To load a MIDI file, go to the “File” menu, select “Import” and choose the desired MIDI file. The MIDI data will appear in the Piano Roll for further editing and arrangement.
Manipulating Audio and MIDI: Once you have loaded audio or MIDI files into FL Studio Synthesizer, you can start manipulating them to fit your creative vision. In the Channel Rack, you can apply various effects and processing to the audio or MIDI channels by adding and configuring plugins in the mixer inserts. This allows you to shape the sound, add effects, and create unique textures.
Editing Audio and MIDI: FL Studio Synthesizer provides powerful editing capabilities for audio and MIDI. In the Playlist, you can use the Slice tool to chop and rearrange audio clips, creating interesting rhythmic patterns. In the Piano Roll, you can edit MIDI notes, adjust their timing and velocity, and apply articulations and expression using the available tools.
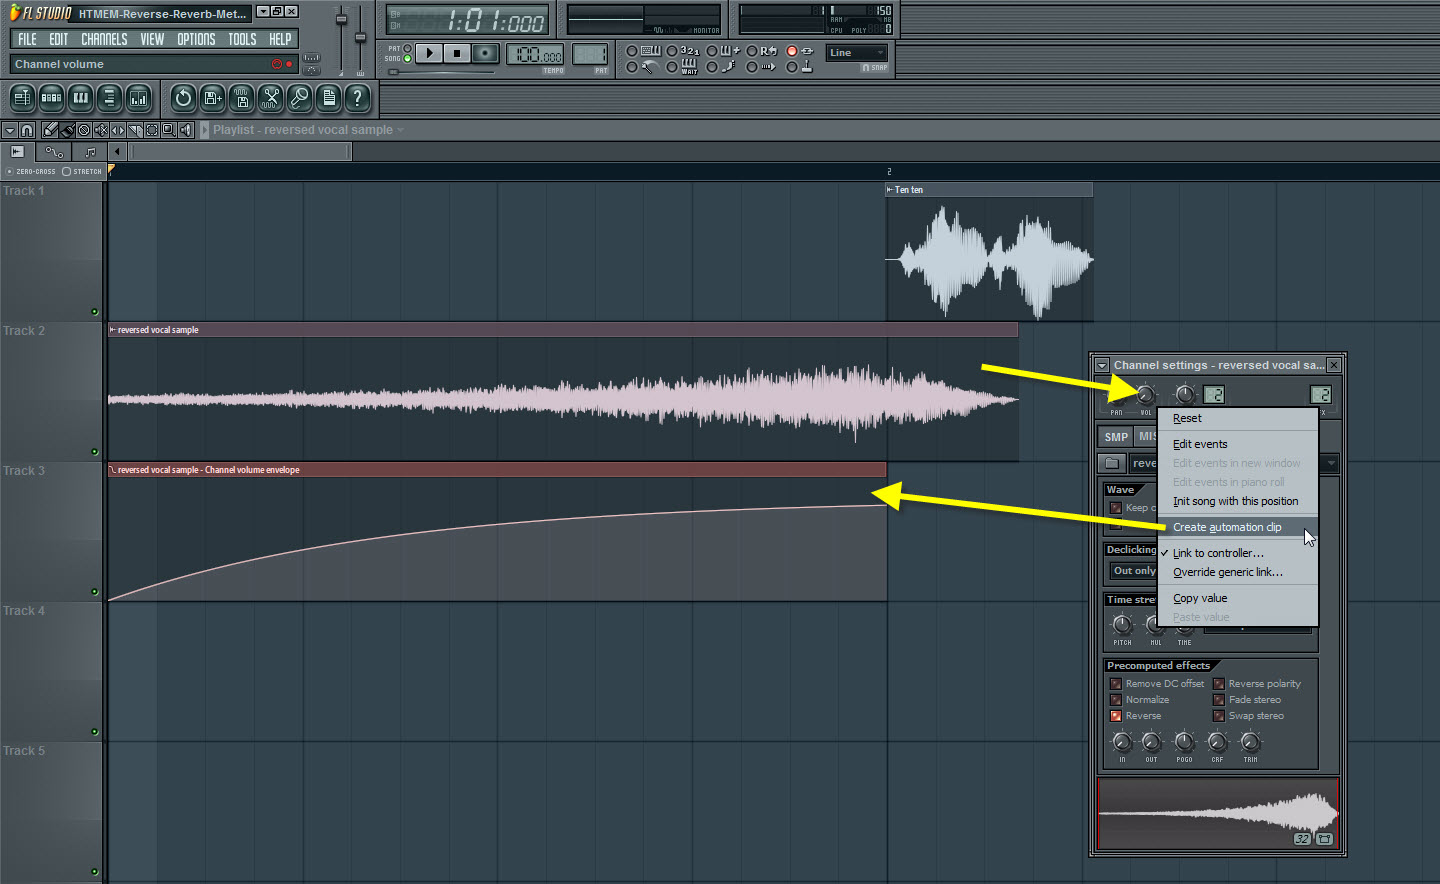
Automation and Control: FL Studio Synthesizer offers extensive automation and control options, allowing you to dynamically adjust various parameters over time. You can create automation clips to control any parameter in the software, from volume and panning to plugin parameters and effects. This enables you to add movement and expression to your sounds and create evolving compositions.
Samplers and Virtual Instruments: FL Studio Synthesizer includes a wide range of samplers and virtual instruments, offering additional creative possibilities. You can load different synthesizers, drum machines, and sample-based instruments into individual channels and manipulate them with various parameters and effects.
By leveraging these features and techniques, you can load and manipulate sounds in FL Studio Synthesizer to create captivating compositions and unique sonic landscapes. In the next section, we will explore the fundamental principles of synthesis, allowing you to craft your own sounds from scratch. So, let’s continue our journey into the realm of sound creation!
Understanding Synthesis Techniques
Synthesis is the art of creating sound from scratch, and understanding the fundamental synthesis techniques is essential for unleashing your creativity in FL Studio Synthesizer. In this section, we will explore the primary synthesis methods and their core principles.
Subtractive Synthesis: Subtractive synthesis is one of the most common and versatile synthesis techniques. It involves starting with a complex waveform, typically generated by an oscillator, and then sculpting the sound by filtering out specific frequencies using a filter. This filtering process allows you to subtract certain harmonic content and shape the overall timbre of the sound.
Frequency Modulation (FM) Synthesis: FM synthesis is based on the interaction between multiple oscillators, where one oscillator modulates the frequency of another. By modulating the frequency of the carrier oscillator with the modulator oscillator, complex and rich harmonics can be generated. FM synthesis is known for its ability to create metallic and bell-like tones.
Wavetable Synthesis: Wavetable synthesis utilizes a series of pre-recorded waveforms, called wavetables, which are scanned or interpolated between to produce evolving sounds. By selecting specific wavetables and manipulating the scanning speed or position, you can create evolving and dynamic textures.
Granular Synthesis: Granular synthesis involves manipulating tiny grains of audio samples to create complex and textured sounds. By dividing an audio sample into small portions and manipulating their pitch, duration, and position, you can create unique and experimental sonic landscapes.
Physical Modeling Synthesis: Physical modeling synthesis simulates the behavior of real-world acoustic instruments by modeling their physical properties such as strings, resonators, and filters. It allows you to create realistic emulations of acoustic instruments or generate unique and unconventional sounds by tweaking the parameters of the physical model.
These are just a few of the many synthesis techniques that you can explore in FL Studio Synthesizer. By understanding the underlying principles and experimenting with different combinations of techniques, you can create a wide variety of sounds, from classic analog-style leads to futuristic and abstract soundscapes.
In the next section, we will delve into the process of creating basic sounds using FL Studio Synthesizer, allowing you to put your newfound knowledge of synthesis techniques into practice. So, let’s continue our journey and embark on the path to sonic creation!
Creating Basic Sound with Synthesizer
Now that we have a grasp of the different synthesis techniques, it’s time to put our knowledge into practice and start creating basic sounds with FL Studio Synthesizer. By understanding the components of a synthesizer and learning how to manipulate them, you can craft your own unique and expressive sounds. Let’s dive into the process of creating basic sounds:
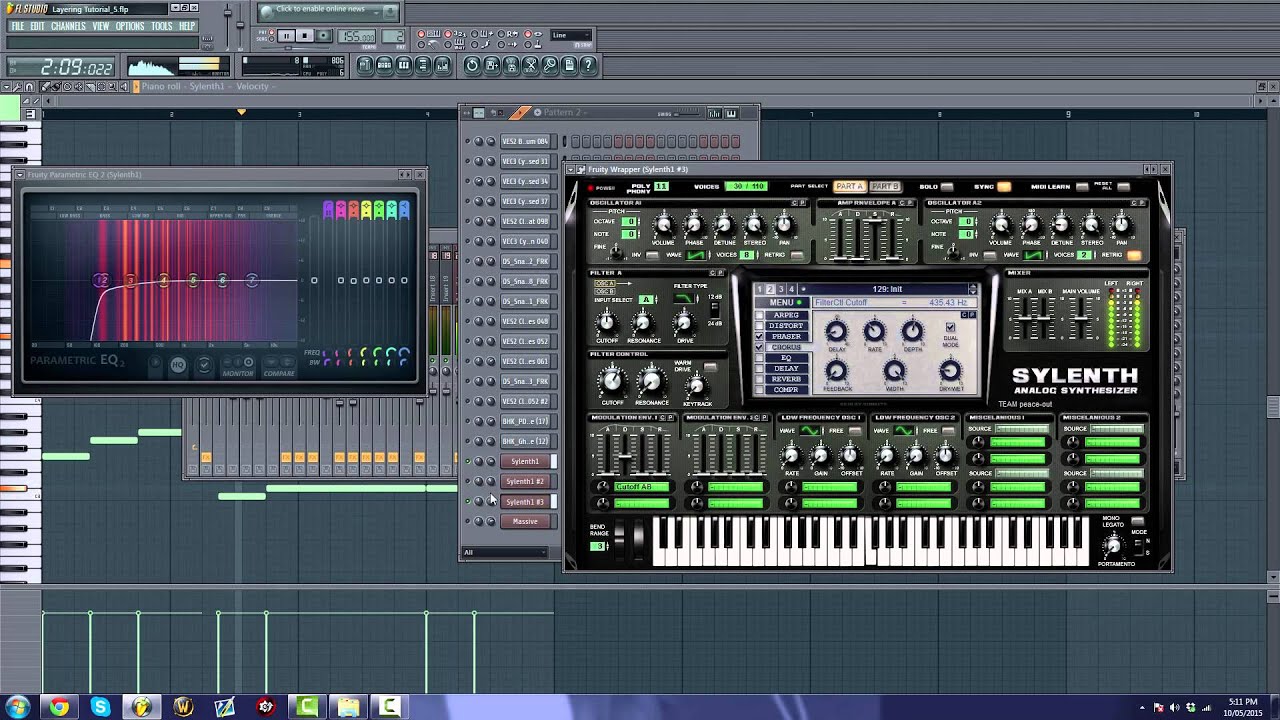
Selecting an Oscillator: The first step in sound creation is choosing an oscillator to generate the initial waveform. FL Studio Synthesizer offers a variety of oscillator types, such as sine, square, sawtooth, and more. Each waveform produces a different timbre and character, allowing you to experiment and find the desired sound.
Adjusting the ADSR Envelope: The ADSR envelope stands for Attack, Decay, Sustain, and Release. It shapes the amplitude contour of a sound, defining how it evolves over time. By adjusting the time and intensity of each stage, you can control the attack, decay, sustain, and release of the sound, adding dynamics and shaping its overall shape.
Applying Filters: Filters help shape the frequency content of the sound by allowing certain frequencies to pass through while attenuating others. FL Studio Synthesizer provides various filter types, including low-pass, high-pass, band-pass, and more. By adjusting the cutoff frequency and resonance, you can sculpt the tone and create a wide range of sounds.
Adding Modulation: Modulation introduces movement and variation to the sound. FL Studio Synthesizer offers modulation sources such as LFOs (Low-Frequency Oscillators), which can be assigned to various parameters like pitch, filter cutoff, or amplitude. By adjusting the modulation rate and depth, you can create subtle or pronounced variations in your sound.
Experimenting with Effects: Effects like reverb, delay, distortion, and chorus can be added to further shape and enhance the synthesized sound. FL Studio Synthesizer comes with a variety of built-in effects that you can use to add depth, space, and character to your sound. Experiment with different effects and their settings to achieve the desired result.
Layering and Blending: To create more complex and rich sounds, consider layering multiple instances of FL Studio Synthesizer together. Each instance can have its own unique settings, allowing you to combine different oscillators, filters, and effects. By blending these layers together, you can create a sonic palette that is truly your own.
By experimenting with oscillator types, adjusting the ADSR envelope, applying filters, adding modulation, and experimenting with effects, you can create a wide variety of basic sounds in FL Studio Synthesizer. Whether you’re aiming for atmospheric pads, punchy basslines, or soaring leads, understanding these fundamental techniques will serve as a strong foundation for your sound design journey.
In the next section, we will explore how to apply effects to synthesized sounds, allowing you to further enhance and shape your creations. So, let’s continue our exploration of FL Studio Synthesizer and unleash your creativity!
Applying Effects to Synthesized Sounds
Applying effects to synthesized sounds is a crucial step in sound design, as it adds depth, texture, and character to your creations. FL Studio Synthesizer offers a wide range of built-in effects that can be used to enhance and shape your synthesized sounds. Let’s explore how to apply effects in FL Studio Synthesizer:
Reverb: Reverb creates a sense of space and adds a natural ambiance to your sounds. FL Studio Synthesizer provides various reverb options, allowing you to simulate different room sizes and environments. Adjust the decay time, pre-delay, and dampening to achieve the desired reverb effect.
Delay: Delay is used to create echoes and repetitions of the sound, adding movement and depth. FL Studio Synthesizer offers different delay types, including simple delay, ping-pong delay, and tape delay. Adjust the delay time, feedback, and wet/dry mix to control the timing and intensity of the echoed sound.
Distortion: Distortion alters the waveform of the sound, adding grit, warmth, and harmonics. FL Studio Synthesizer provides various distortion types, such as overdrive, bitcrusher, and tape saturation. Experiment with the drive, tone, and output level to achieve the desired level of distortion.
Chorus: Chorus adds thickness and movement to the sound by creating multiple copies of it and modulating their pitch and timing. FL Studio Synthesizer offers chorus effects with adjustable rate, depth, and feedback parameters. Use chorus to create spacious and shimmering sounds.
Equalizer: An equalizer is a powerful tool for shaping the frequency content of your synthesized sounds. FL Studio Synthesizer includes a parametric equalizer with adjustable bands for boosting or cutting specific frequencies. Use it to enhance the clarity, balance, and tonal characteristics of your sound.
Modulation Effects: FL Studio Synthesizer also provides modulation effects like phaser, flanger, and tremolo. These effects add movement and modulation to your sounds, creating unique and expressive textures. Adjust the modulation rate, depth, and feedback to achieve the desired effect.
These are just a few examples of the effects you can apply in FL Studio Synthesizer. Experiment with different combinations and settings to find the perfect effects chain for your synthesized sounds. Remember to listen critically and adjust the parameters to achieve the desired result.
In addition to the built-in effects, FL Studio Synthesizer supports third-party plugins, allowing you to expand your sonic palette even further. Explore the vast world of effects plugins available and incorporate them into your sound design process.
Now that you know how to apply effects to synthesized sounds, it’s time to dive deeper into advanced synthesis techniques. In the next section, we will explore advanced synthesis techniques, allowing you to take your sound design skills to the next level. So, let’s continue our journey into the world of FL Studio Synthesizer and unleash your creativity!
Advanced Synthesis Techniques
As you become more proficient with FL Studio Synthesizer, it’s time to explore advanced synthesis techniques that can elevate your sound design capabilities to new heights. These techniques allow for more intricate and complex sounds, giving you the tools to create unique and experimental sonic textures. Let’s dive into some of the advanced synthesis techniques:
Layering and Stacking: Layering involves combining multiple sounds or synthesizers to create a single, rich sound. By layering different sounds with distinct characteristics, you can create complex and evolving textures. Experiment with different combinations, blending the timbres to create unique sonic landscapes.
Sample Manipulation: FL Studio Synthesizer provides the ability to manipulate samples, allowing you to transform and shape them creatively. You can chop samples into smaller fragments, reverse them, pitch-shift them, or apply time-stretching to create intriguing and evolving sounds. Explore the various sample manipulation techniques to unlock endless sonic possibilities.
Granular Synthesis: Granular synthesis involves breaking down sounds into tiny grains and manipulating them individually. FL Studio Synthesizer offers techniques like granular samplers or granular effects, which allow you to stretch, pitch-shift, and manipulate the grains to create intricate and evolving textures. Experiment with grain size, density, and position to craft unique sonic landscapes.
Resynthesis: Resynthesis techniques involve analyzing existing sounds and recreating them using synthesis methods. FL Studio Synthesizer provides tools that can analyze audio files and extract the spectral and timbral characteristics. You can then use this data to create custom presets or manipulate the extracted information to generate new and unique sounds.
Advanced Modulation: FL Studio Synthesizer allows for advanced modulation options, including complex modulation sources like envelopes, step sequencers, or velocity. Explore these options to create evolving textures, rhythmic patterns, and expressive soundscapes. Use modulation to introduce variation, movement, and dynamics to your sounds.
Morphing and Morphable Synthesis: Some synthesizers in FL Studio Synthesizer offer morphing capabilities, allowing you to smoothly transition between different presets or synthesizer configurations. By modulating parameters and using automation, you can create seamless transitions between different timbres, resulting in unique and dynamic sounds.
These are just a few examples of the advanced synthesis techniques available in FL Studio Synthesizer. By mastering these techniques and experimenting with different combinations, you can push the boundaries of sound design and create truly innovative and captivating compositions.
In the next section, we will explore the concepts of modulation and automation, which are key to adding movement, expression, and dynamics to your synthesized sounds. So, let’s continue our exploration of FL Studio Synthesizer’s capabilities and expand your sound design toolkit!
Modulation and Automation in FL Studio Synthesizer
Modulation and automation are essential techniques for adding movement, expression, and dynamic control to your synthesized sounds in FL Studio Synthesizer. These techniques allow you to manipulate various parameters over time, creating evolving textures, rhythmic patterns, and expressive performances. Let’s explore how modulation and automation can enhance your sound design:
LFO Modulation: LFOs, or Low-Frequency Oscillators, are a common modulation source in FL Studio Synthesizer. They generate waveforms at a slow rate, usually below the audible range, which can be used to modulate parameters such as pitch, filter cutoff, or amplitude. By assigning an LFO to a parameter and adjusting the rate, depth, and shape, you can introduce rhythmic variations and cyclic movements to your sounds.
Envelope Modulation: Envelopes play a crucial role in shaping the dynamics of sound over time. FL Studio Synthesizer provides envelope generators that can be assigned to various parameters, allowing you to shape the attack, decay, sustain, and release of the sound. By adjusting the envelope parameters and routing them to different parameters, you can create expressive and dynamic sounds.
Automation Clips: Automation clips are a powerful feature in FL Studio Synthesizer that enable you to control almost any parameter over time. By creating an automation clip, you can draw or record changes to parameters such as volume, panning, filter cutoff, or effect parameters. This allows for precise control and manipulation of your sounds, adding a human-like touch and expression to your compositions.
Modulation Matrix: FL Studio Synthesizer includes a modulation matrix that allows you to route and configure modulation sources to various parameters. This provides a flexible and customizable way to experiment with different modulation combinations, giving you unparalleled control over your sounds. Use the modulation matrix to create complex and evolving sonic textures.
Velocity Sensitivity: FL Studio Synthesizer allows you to use velocity sensitivity to control various parameters based on the strength of the note played. For example, you can adjust the filter cutoff or volume based on the velocity of each note, resulting in dynamic and expressive performances.
Real-Time Controllers: FL Studio Synthesizer can be controlled using external MIDI controllers or your computer’s keyboard and mouse. By assigning parameters to different controllers, you can manipulate and modulate them in real-time, adding a live and interactive element to your performances.
With modulation and automation, you have the power to infuse your synthesized sounds with movement, expression, and dynamics. Whether it’s subtle variations or dramatic transformations, these techniques allow you to create captivating and evolving compositions.
In the next section, we will explore the process of mixing and mastering synthesized sounds, ensuring that your creations sound polished, balanced, and ready for release. So, let’s continue our journey in FL Studio Synthesizer and take your sound design skills to the next level!
Mixing and Mastering Synthesized Sounds
Mixing and mastering are essential steps in the production process that ensure your synthesized sounds sound polished, balanced, and professional. These techniques allow you to refine the individual elements of your composition, as well as the overall sound of your tracks. Let’s explore the process of mixing and mastering synthesized sounds in FL Studio Synthesizer:
Mixing: Mixing involves balancing and adjusting the individual elements of your composition to create a cohesive and balanced final mix. Here are some key steps in the mixing process:
- Adjust the levels and panning of each individual element in the mix to create a balanced stereo image. Use the mixer in FL Studio Synthesizer to control the volume and pan settings for each channel.
- Apply equalization (EQ) to shape the frequency balance of each individual sound. Use FL Studio’s EQ plugins to boost or cut specific frequencies to enhance the clarity and presence of each sound.
- Add compression to control the dynamics of each sound. Compression helps to even out the volume differences between soft and loud parts, resulting in a more consistent and polished sound.
- Add effects like reverb, delay, and modulation to create depth and space in the mix. Use FL Studio Synthesizer’s built-in effects or third-party plugins to enhance the spatial characteristics of your sounds.
- Use automation to control parameters over time. This can be used to create dynamic changes in volume, panning, or effect parameters, adding movement and expression to the mix.
Mastering: Mastering is the final step in the production process, where the overall sound of your tracks is enhanced and refined. Here are some key steps in the mastering process:
- Ensure that the overall volume levels are consistent and optimized for different playback systems. Use FL Studio’s mastering plugins to control the overall loudness of your tracks and achieve a balanced and competitive sound.
- Apply multiband compression to control the dynamics and tonal balance of the entire mix. This helps to ensure that different frequency ranges are balanced and that the overall sound is cohesive.
- Add subtle equalization to shape the tonal balance of the entire mix. Make subtle adjustments to the overall EQ to enhance the clarity and presence of your tracks.
- Add stereo imaging and spatial enhancement techniques to widen the stereo field and create a sense of space and depth in the mix.
- Ensure that the final mix is free from any unwanted artifacts or technical issues. Check for any clipping, pops, clicks, or other artifacts that may have occurred during the production process.
FL Studio Synthesizer provides a range of tools and plugins to assist you in the mixing and mastering process. Experiment with different settings and techniques to find the best sound for your tracks.
In the next section, we will discuss troubleshooting tips and provide additional advice to help you overcome common challenges while working with FL Studio Synthesizer. So, let’s continue our journey and make the most of this powerful sound design tool!
Troubleshooting and Tips for FL Studio Synthesizer
While working with FL Studio Synthesizer, you may encounter some challenges or have questions about specific features or functions. In this section, we’ll provide some troubleshooting tips and useful advice to help you overcome common obstacles and make the most out of your experience with FL Studio Synthesizer:
No Sound Output: If you’re not hearing any sound when using FL Studio Synthesizer, first check your audio settings. Ensure that your audio interface is properly connected and selected in the FL Studio Synthesizer’s settings. Verify that the volume levels are not muted or set too low in both FL Studio and your operating system’s audio settings.
High CPU Usage: FL Studio Synthesizer can be demanding on your computer’s CPU, especially when running multiple instances or using complex plugins. To optimize CPU usage, consider freezing tracks or bouncing MIDI to audio. You can also increase the buffer size in the audio settings to reduce CPU load, but be aware that this may introduce additional latency.
Crashing or Freezing: If FL Studio Synthesizer is crashing or freezing frequently, make sure you’re using the latest version of the software and have installed any available updates. Additionally, check for compatibility issues with any third-party plugins you’re using. Disable or update any problematic plugins that may be causing instability.
Organize Your Workflow: FL Studio Synthesizer offers a multitude of features and options, so it’s crucial to maintain an organized workflow. Use color coding for tracks, group related channels, and name your patterns and channels clearly. This helps you keep track of your work and speeds up your workflow, especially when dealing with complex projects.
Save Regularly: To prevent any loss of your hard work, it’s important to save your progress regularly. Get into the habit of saving your projects at regular intervals, using incremental file names to keep multiple versions. Additionally, consider enabling the auto-save feature in FL Studio Synthesizer’s preferences to ensure your work is automatically saved at set intervals.
Community Support and Resources: FL Studio Synthesizer has a vibrant community of users and extensive online resources. Take advantage of user forums, tutorials, and video courses to expand your knowledge and find solutions to common questions and problems. The official FL Studio website, as well as various user-generated content platforms, provide an abundance of learning materials to support your journey.
Experiment and Have Fun: FL Studio Synthesizer is a powerful tool for sound design and music creation. Don’t be afraid to experiment, try new techniques, and explore different genres. The more you play and experiment with FL Studio Synthesizer, the more you’ll discover and develop your unique style and sound.
By following these troubleshooting tips and helpful advice, you can overcome obstacles and optimize your workflow in FL Studio Synthesizer. Remember to stay curious, persistent, and open to learning to get the most out of your experience with this versatile software.
Now that you have gained valuable insights and recommendations, you have the tools to unleash your creativity and make the most of FL Studio Synthesizer. It’s time to dive back into your projects and continue your exploration and refining of sonic artistry!
Conclusion
Congratulations on completing this comprehensive guide to using FL Studio Synthesizer! Throughout this journey, we have explored the various aspects of this powerful software, from setting it up and understanding its user interface to delving into synthesis techniques, applying effects, and mastering your synthesized sounds.
FL Studio Synthesizer has proven to be a versatile and robust tool for sound design and music production. By understanding the fundamentals of synthesis, exploring advanced techniques, and utilizing modulation, automation, and mixing/mastering principles, you now have the skills to create captivating and professional-level sounds.
Remember, the key to mastery is practice. Continue to experiment, push your boundaries, and embrace your creativity. FL Studio Synthesizer offers endless possibilities, and the more you explore and refine your skills, the more unique and distinctive your sound will become.
Don’t forget to stay connected with the FL Studio community. Engage with fellow producers, share your knowledge, and keep up-to-date with the latest updates and techniques. Collaborating and learning from others will only enhance your growth as a sound designer.
Finally, never be afraid to trust your instincts and explore new territories in your sound design journey. This guide has provided you with a solid foundation, but the true magic happens when you forge your own path and let your creativity soar.
So go ahead, fire up FL Studio Synthesizer, and embark on your musical adventures. Let the soundscapes you create inspire and captivate listeners. The world of sound design awaits you, and with FL Studio Synthesizer as your creative tool, the possibilities are limitless.
Enjoy the process, embrace the beauty of sound, and may your musical endeavors be filled with joy and success. Happy sound designing!