Home>Production & Technology>Acoustic>How To Remove A Pickguard Off An Acoustic Guitar
Acoustic
How To Remove A Pickguard Off An Acoustic Guitar
Published: March 12, 2024
Learn the step-by-step process of removing a pickguard from your acoustic guitar. Discover the best techniques for a clean and safe removal.
(Many of the links in this article redirect to a specific reviewed product. Your purchase of these products through affiliate links helps to generate commission for AudioLover.com, at no extra cost. Learn more)
Table of Contents
Introduction
Removing a pickguard from an acoustic guitar can be a delicate yet rewarding process. Whether you're looking to replace the pickguard with a new design, perform maintenance on the guitar body, or simply change the aesthetic of your instrument, understanding the proper steps is crucial to avoid damaging the guitar's finish.
The pickguard, a protective layer often made of plastic or other materials, serves as a shield against scratches and dings caused by strumming and picking. While it serves a practical purpose, some guitarists prefer the clean look of a pickguard-free acoustic guitar. Whatever your reason for removing the pickguard, it's essential to approach the task with care and precision to ensure the integrity of your instrument.
In this guide, we will walk through the step-by-step process of removing a pickguard from your acoustic guitar. From loosening the strings to cleaning the guitar body, each stage requires attention to detail and a gentle touch. By following these instructions, you can successfully remove the pickguard without causing any harm to your beloved instrument.
So, gather your tools and let's embark on this journey to transform the appearance of your acoustic guitar while maintaining its pristine condition. With patience and the right techniques, you'll soon be admiring the sleek, pickguard-free look of your acoustic guitar.
Tools and Materials Needed
Before embarking on the process of removing the pickguard from your acoustic guitar, it's essential to gather the necessary tools and materials. Having the right equipment at hand will not only streamline the task but also ensure that you can execute each step with precision and care. Here's a comprehensive list of the tools and materials you'll need for this endeavor:
Tools:
- Guitar String Winder: This tool will facilitate the process of loosening the strings, making it easier to remove them from the guitar's bridge pins.
- Guitar Picks: Having a few guitar picks on hand can be helpful for prying the pickguard away from the guitar body without causing damage.
- Small Phillips-Head Screwdriver: You may need this tool to remove any screws securing the pickguard to the guitar body.
- Soft Cloth or Microfiber Towel: Using a soft cloth or microfiber towel will help protect the guitar's finish while handling and cleaning the instrument.
- Adhesive Remover (Optional): If the pickguard is attached with adhesive, having a gentle adhesive remover can aid in loosening the bond without harming the guitar's finish.
Materials:
- Replacement Pickguard (Optional): If you plan to replace the pickguard with a new one, ensure that you have the replacement pickguard ready for installation.
- Rubbing Alcohol: This can be used to clean any adhesive residue left on the guitar body after removing the pickguard.
- Cotton Swabs: These can be useful for applying rubbing alcohol to targeted areas during the cleaning process.
- Guitar Polish (Optional): If you intend to polish the guitar body after removing the pickguard, having guitar polish on hand will help restore the instrument's luster.
By having these tools and materials readily available, you'll be well-prepared to undertake the pickguard removal process with confidence and precision. With the right equipment at your disposal, you can ensure that each step is carried out smoothly and effectively, ultimately leading to a beautifully transformed acoustic guitar.
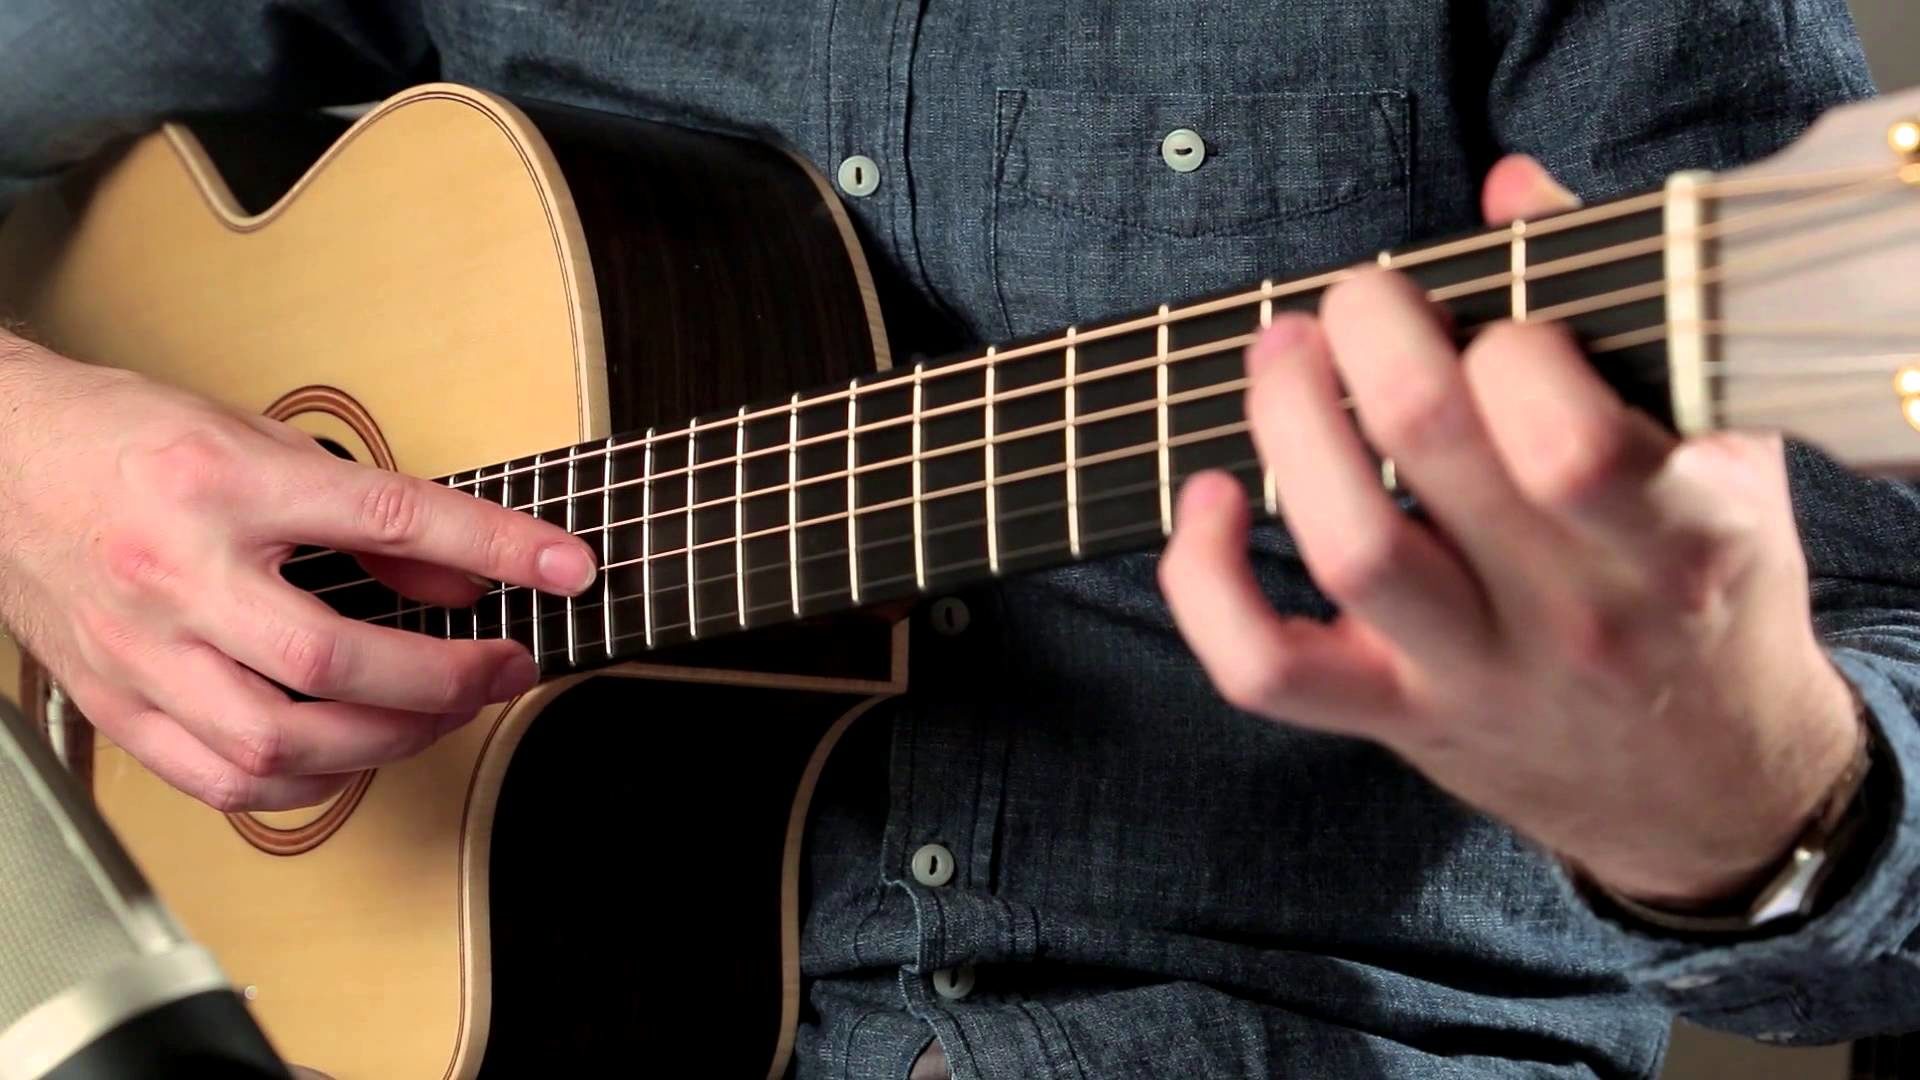
Step 1: Loosen the Strings
The first step in removing the pickguard from an acoustic guitar is to loosen the strings. This process is crucial as it allows for easier access to the pickguard and minimizes the tension on the guitar body during the removal process. Here's a detailed guide on how to effectively loosen the strings:
-
Prepare the Guitar: Find a comfortable and well-lit workspace to begin the process. It's essential to ensure that the guitar is placed securely on a stable surface, such as a padded workbench or a soft cloth to prevent any scratches or damage to the instrument.
-
Use a String Winder: Start by using a guitar string winder to loosen the tension of each string. Place the winder over the tuning peg of the first string and turn it counterclockwise to unwind the string. Repeat this process for each string, gradually reducing the tension across the entire set of strings.
-
Avoid Over-Loosening: While loosening the strings, it's important to exercise caution and avoid over-loosening them, as this can lead to the strings slipping out of their respective bridge pins and causing potential damage to the guitar or injury to the person handling it.
-
Check the Tension: After loosening the strings, gently press down on each string near the soundhole to ensure that the tension has been adequately reduced. The strings should feel noticeably looser and less taut against the fretboard.
By carefully following these steps, you can effectively loosen the strings of your acoustic guitar in preparation for the pickguard removal process. This initial step sets the stage for the subsequent stages of pickguard removal, ensuring that the guitar is in the optimal condition for a smooth and safe transition.
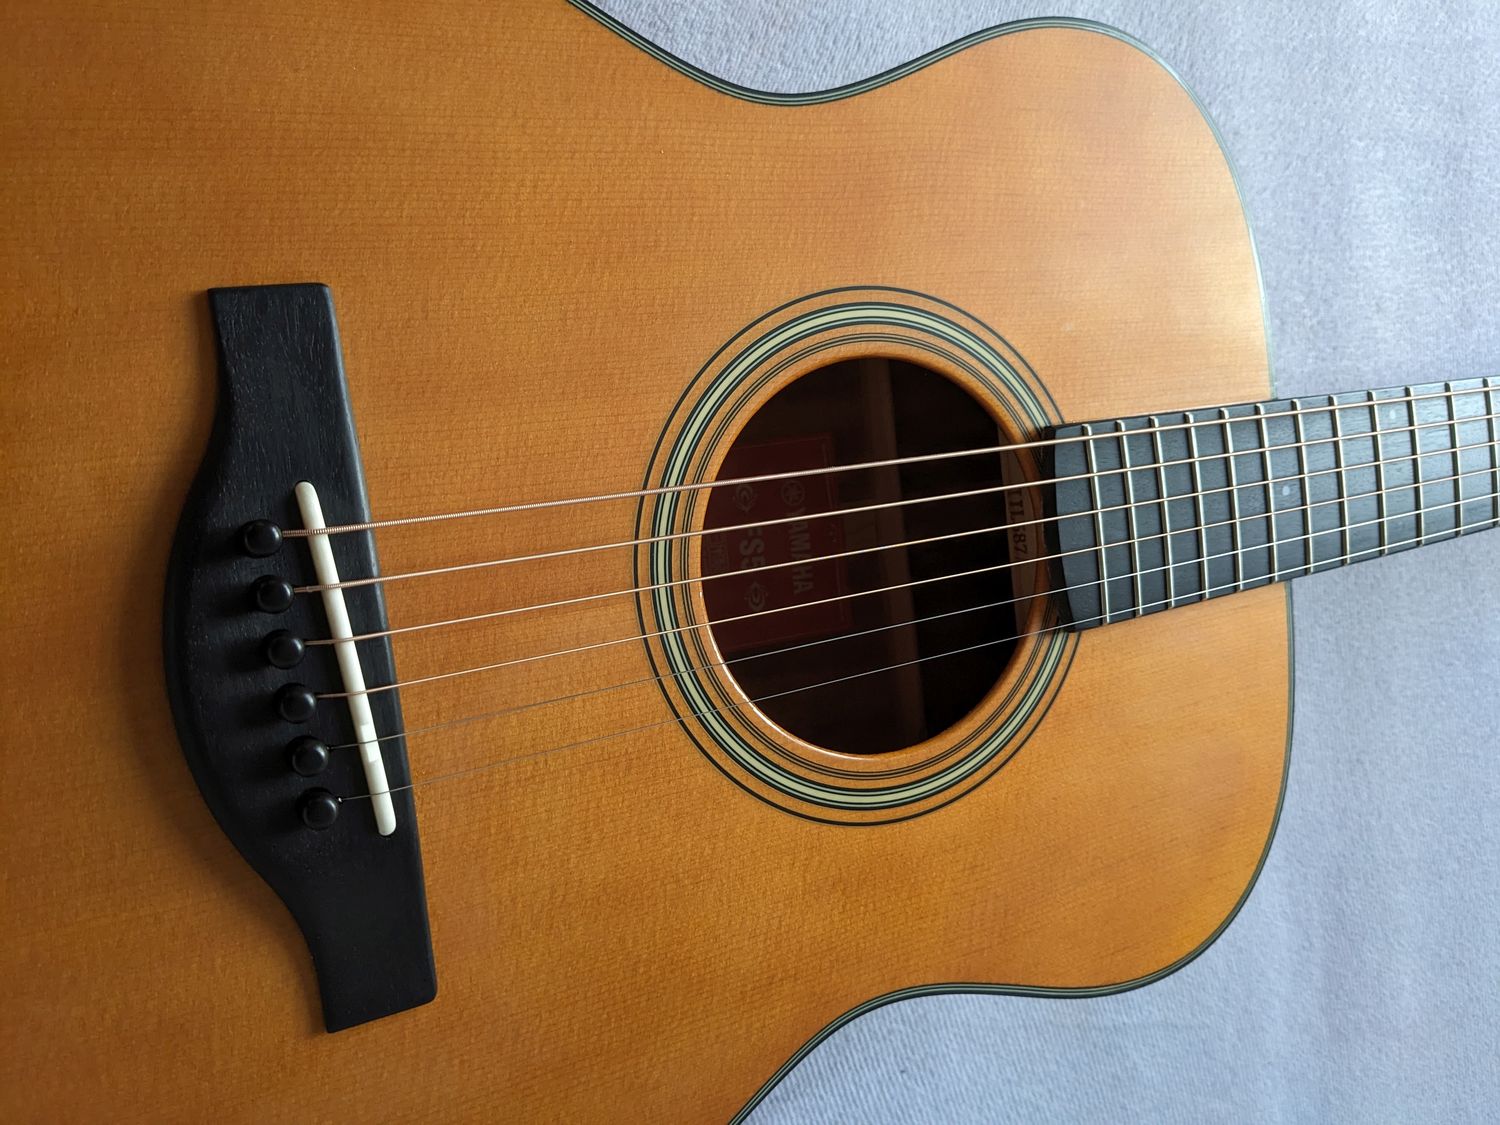
Step 2: Remove the Bridge Pins
Once the strings are loosened, the next crucial step in removing the pickguard from your acoustic guitar is to remove the bridge pins. These small, peg-like components hold the ends of the strings in place at the bridge of the guitar. By carefully extracting the bridge pins, you can release the tension on the strings and create the necessary clearance to access the pickguard. Here's a detailed guide on how to effectively remove the bridge pins:
-
Prepare the Workspace: Ensure that the guitar is securely positioned on a stable surface, providing ample space to work around the bridge area. It's essential to have good lighting and a clear view of the bridge pins and strings.
-
Use a Bridge Pin Puller or Suitable Tool: To remove the bridge pins, you'll need a specialized tool such as a bridge pin puller or another suitable implement. Gently position the tool over the bridge pin, ensuring a firm and secure grip.
-
Apply Even Pressure: With the tool in place, exert even and gentle upward pressure to gradually lift the bridge pin from its slot. It's important to maintain a steady and controlled motion to avoid damaging the bridge or causing the pin to fly out unexpectedly.
-
Remove the Bridge Pins: Carefully extract each bridge pin one at a time, taking note of their original placement to facilitate reassembly later. As you remove the bridge pins, the tension on the strings will be released, allowing them to be safely lifted away from the bridge.
-
Set Aside the Bridge Pins: Once all the bridge pins have been removed, place them in a secure location where they won't roll or get misplaced. Keeping the pins organized will simplify the restringing process once the pickguard removal is complete.
By meticulously following these steps, you can effectively remove the bridge pins from your acoustic guitar, paving the way for the subsequent phase of pickguard removal. With patience and precision, this process can be executed smoothly, ensuring that the integrity of your instrument is preserved throughout the pickguard removal endeavor.
Step 3: Remove the Pickguard
With the strings loosened and the bridge pins removed, you're now ready to tackle the pivotal stage of removing the pickguard from your acoustic guitar. This step demands precision and a delicate touch to ensure that the pickguard is safely detached without causing any damage to the guitar's body or finish. Here's a comprehensive guide on how to effectively remove the pickguard:
-
Assess the Adhesion: Before proceeding, carefully examine the pickguard to determine the method of attachment. Some pickguards are secured with adhesive, while others may be affixed with screws. Understanding the attachment mechanism will inform your approach to safely removing the pickguard.
-
Gently Pry the Pickguard: If the pickguard is attached with adhesive, use a thin, flexible tool such as a guitar pick to gently pry the edges of the pickguard away from the guitar body. Work methodically around the perimeter of the pickguard, applying gentle pressure to gradually loosen its bond with the guitar body.
-
Warmth Application (Optional): In cases where the pickguard is strongly adhered, applying gentle warmth using a hairdryer on low heat can help soften the adhesive, making it easier to detach the pickguard without causing stress to the guitar's finish.
-
Unscrew if Necessary: If the pickguard is secured with screws, carefully remove them using an appropriately sized screwdriver. Keep the screws in a secure place to prevent misplacement. Once the screws are removed, gently lift the pickguard away from the guitar body, taking care not to force or bend it.
-
Patience and Precision: Throughout the process, exercise patience and precision to avoid any sudden or forceful movements that could potentially damage the guitar's finish. By working methodically and attentively, you can safely detach the pickguard from the guitar body.
-
Inspect for Residue: After removing the pickguard, inspect the guitar body for any adhesive residue or marks left behind. If adhesive remains, use a gentle adhesive remover or rubbing alcohol applied to a soft cloth to carefully clean the affected areas, ensuring that the guitar's finish is preserved.
By meticulously following these steps, you can successfully remove the pickguard from your acoustic guitar, paving the way for a transformed aesthetic or maintenance of the guitar body. With a gentle touch and attention to detail, this process can be carried out smoothly, allowing you to achieve the desired outcome without compromising the integrity of your cherished instrument.
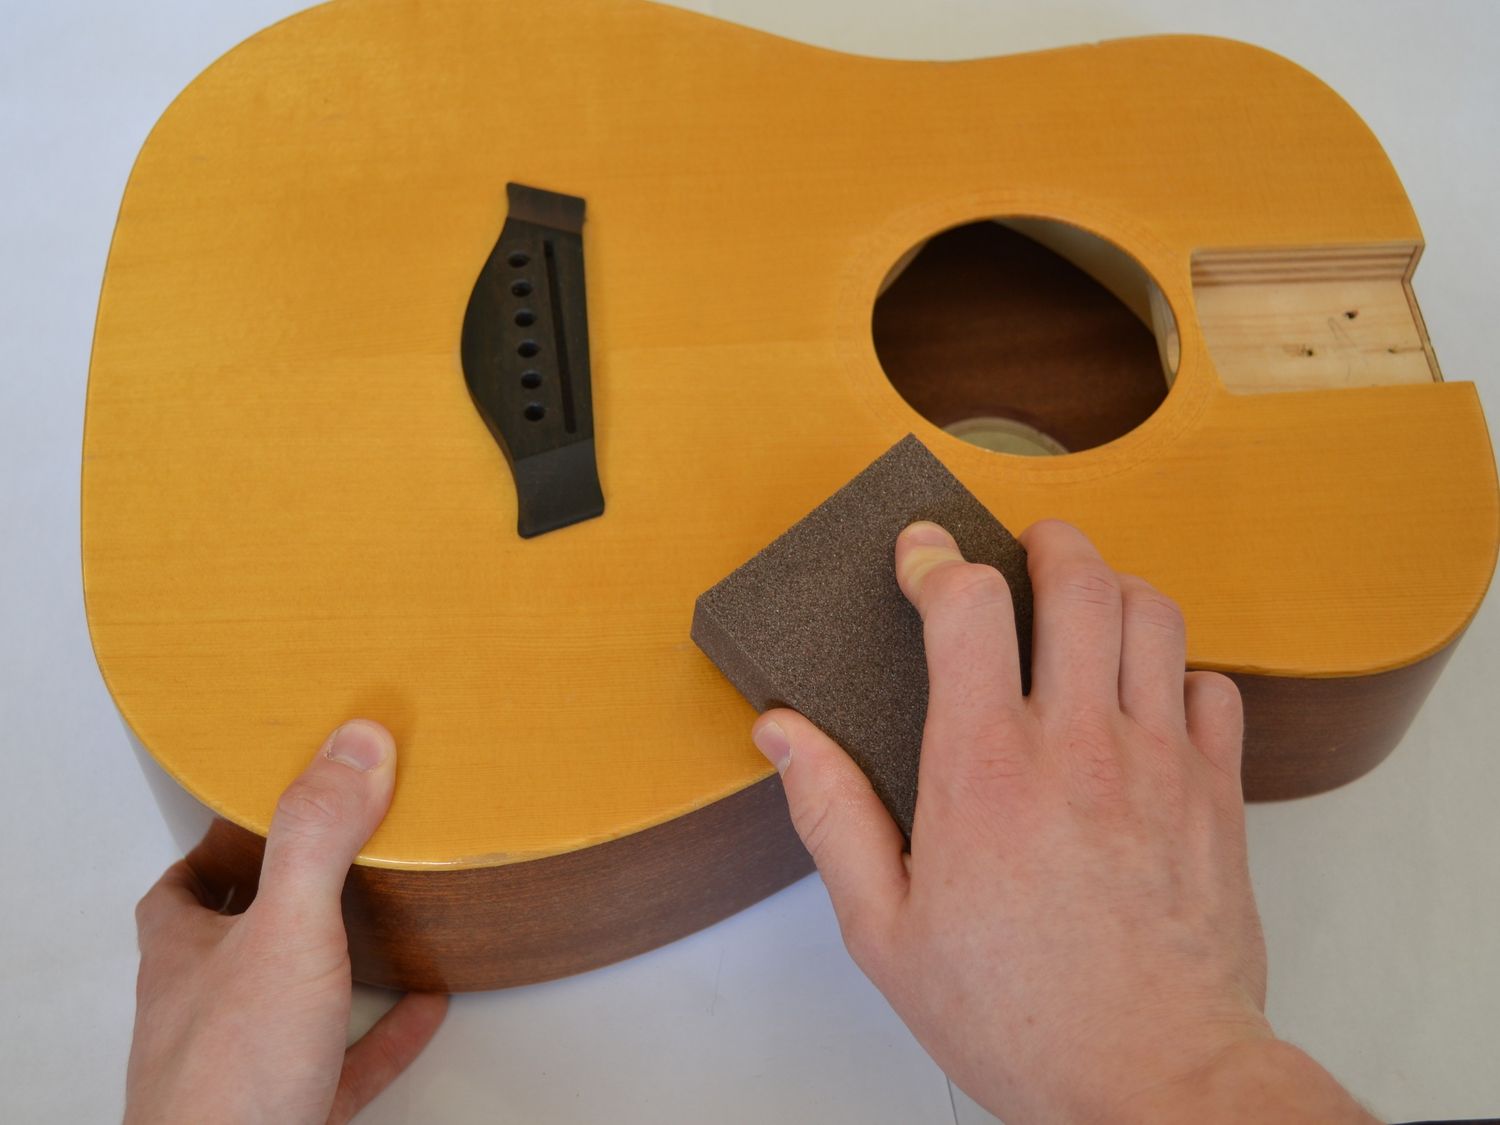
Step 4: Clean the Guitar Body
After successfully removing the pickguard from your acoustic guitar, it's essential to devote attention to cleaning the guitar body. This step not only ensures the removal of any adhesive residue or marks left behind but also presents an opportunity to rejuvenate the instrument's appearance. Here's a detailed guide on how to effectively clean the guitar body:
-
Assess the Guitar Body: Begin by carefully examining the guitar body to identify any residual adhesive, marks, or blemishes resulting from the pickguard removal process. It's important to have a clear understanding of the areas that require cleaning to ensure a thorough and meticulous approach.
-
Prepare the Cleaning Solution: If adhesive residue is present, prepare a gentle cleaning solution by mixing a small amount of mild adhesive remover or rubbing alcohol with water. This solution should be mild enough to effectively lift any residue without causing damage to the guitar's finish.
-
Apply the Cleaning Solution: Dampen a soft cloth or a few cotton swabs with the prepared cleaning solution. Gently dab the affected areas on the guitar body, allowing the solution to work its magic in loosening and lifting any adhesive residue or marks. Exercise caution to avoid excessive saturation, ensuring that the cleaning process is gentle and controlled.
-
Remove Residual Adhesive: With the dampened cloth or cotton swabs, carefully work on the affected areas, applying gentle pressure to lift any residual adhesive. It's important to approach this process patiently, allowing the cleaning solution to effectively dissolve and remove the adhesive without causing any harm to the guitar's finish.
-
Inspect and Repeat as Needed: After the initial cleaning, inspect the guitar body to assess the effectiveness of the process. If any residual adhesive or marks persist, repeat the cleaning steps as necessary, ensuring that the guitar body is restored to its pristine condition.
-
Polish the Guitar Body (Optional): Once the adhesive residue and marks have been successfully removed, consider applying a small amount of guitar polish to a clean, soft cloth. Gently polish the guitar body using circular motions, allowing the polish to enhance the luster and shine of the instrument's finish. This optional step can contribute to the overall rejuvenation of the guitar's appearance, leaving it looking refreshed and immaculate.
By meticulously following these steps, you can effectively clean the guitar body after removing the pickguard, ensuring that any residual adhesive or marks are safely eliminated. This process not only preserves the integrity of the guitar's finish but also presents an opportunity to revitalize the instrument's appearance, leaving it looking as good as new.
Conclusion
In conclusion, the process of removing a pickguard from an acoustic guitar is a meticulous endeavor that demands patience, precision, and a gentle touch. By following the step-by-step guide outlined in this article, you can successfully transform the aesthetic of your acoustic guitar while preserving the integrity of the instrument's body and finish.
The journey begins with gathering the necessary tools and materials, ensuring that you are well-equipped to undertake the pickguard removal process with confidence and precision. From a guitar string winder to adhesive remover, each tool and material plays a crucial role in facilitating a smooth and safe pickguard removal experience.
Loosening the strings and removing the bridge pins are pivotal initial steps that set the stage for the subsequent phase of pickguard removal. By carefully executing these steps, you can effectively reduce the tension on the guitar body and create the necessary clearance to access and remove the pickguard.
The pivotal stage of removing the pickguard demands a delicate approach, especially when dealing with adhesive attachment. Whether gently prying the pickguard or applying gentle warmth to soften the adhesive, each step requires patience and precision to ensure that the pickguard is safely detached without causing any harm to the guitar's body or finish.
Following the successful removal of the pickguard, the focus shifts to cleaning the guitar body, ensuring the thorough removal of any adhesive residue or marks. This meticulous cleaning process not only preserves the pristine appearance of the guitar but also presents an opportunity to rejuvenate the instrument's aesthetic, leaving it looking refreshed and immaculate.
In essence, the journey of removing a pickguard from an acoustic guitar is a transformative process that allows you to customize the appearance of your instrument while upholding its structural integrity. By approaching each step with care and attention to detail, you can achieve the desired outcome, whether it involves a pickguard-free aesthetic or maintenance of the guitar body.
So, as you embark on this endeavor, remember to embrace patience, precision, and a gentle touch. With the right techniques and a steadfast commitment to preserving the beauty of your acoustic guitar, you can successfully navigate the process of pickguard removal, ultimately reveling in the enhanced visual appeal and pristine condition of your cherished instrument.