Home>Production & Technology>Acoustic>How To Steam Off An Acoustic Guitar Bridge

Acoustic
How To Steam Off An Acoustic Guitar Bridge
Published: March 12, 2024
Learn how to safely steam off an acoustic guitar bridge with our step-by-step guide. Discover the best techniques for removing and replacing bridges.
(Many of the links in this article redirect to a specific reviewed product. Your purchase of these products through affiliate links helps to generate commission for AudioLover.com, at no extra cost. Learn more)
Table of Contents
Introduction
When it comes to maintaining and repairing acoustic guitars, the process of removing a stubborn bridge can be a daunting task. Whether you're a seasoned luthier or an avid guitarist looking to tackle a DIY project, understanding how to safely and effectively steam off an acoustic guitar bridge is crucial. The bridge of an acoustic guitar plays a pivotal role in transmitting the vibrations of the strings to the soundboard, ultimately influencing the instrument's tone and resonance. However, over time, the bridge may become firmly adhered to the guitar's top, necessitating its removal for repairs or adjustments.
In this comprehensive guide, we will delve into the intricate process of steaming off an acoustic guitar bridge. By following these step-by-step instructions, you will gain the knowledge and confidence to undertake this delicate task with precision and care. From loosening the strings to reinstallation, each stage of the process will be thoroughly explained, empowering you to navigate this endeavor with ease.
By mastering the art of steaming off an acoustic guitar bridge, you will not only expand your understanding of instrument maintenance but also develop a deeper appreciation for the craftsmanship behind these beloved musical instruments. So, grab your steaming apparatus and let's embark on this journey to unlock the secrets of acoustic guitar bridge removal and restoration.
Tools and materials needed
Before embarking on the process of steaming off an acoustic guitar bridge, it's essential to gather the necessary tools and materials to ensure a smooth and efficient operation. Here's a comprehensive list of items you'll need:
Tools:
- Steam generator: A reliable steam generator is the cornerstone of this operation. It's crucial to invest in a high-quality unit that can produce a consistent flow of steam to effectively soften the adhesive beneath the bridge.
- Adjustable wrench: This tool will come in handy for loosening the bridge pins and adjusting the truss rod if necessary.
- Tweezers or bridge clamp: These tools will aid in carefully removing the bridge once the adhesive has been softened. Tweezers can be used to gently lift the bridge, while a bridge clamp can provide additional support during the removal process.
- Razor blade or thin spatula: A razor blade or thin spatula can be used to carefully separate the bridge from the guitar's top after the adhesive has been softened by the steam.
- Cloth or towel: Having a clean cloth or towel on hand will allow you to wipe away any excess moisture and ensure a dry surface for reinstallation.
Materials:
- Distilled water: Using distilled water in the steam generator is essential to prevent mineral deposits that could potentially clog the unit and affect its performance.
- Protective gloves: It's important to prioritize safety during this process, and wearing protective gloves will shield your hands from the heat and steam.
- Eye protection: Safety goggles or glasses will safeguard your eyes from any potential steam or adhesive splatter during the bridge removal.
- Heat-resistant pad or work surface: Placing a heat-resistant pad or using a designated work surface will protect the guitar's finish and the surrounding area from the steam and heat generated during the process.
By ensuring that you have all the necessary tools and materials at your disposal, you'll be well-prepared to tackle the task of steaming off an acoustic guitar bridge with confidence and precision. With these items in hand, you're ready to proceed to the next stage of the process and begin loosening the strings.
Step 1: Loosen the strings
Before diving into the intricate process of steaming off an acoustic guitar bridge, it is crucial to initiate the procedure by loosening the strings. This initial step serves multiple purposes, including relieving tension on the bridge, facilitating access to the bridge plate, and preparing the guitar for the subsequent stages of the removal process.
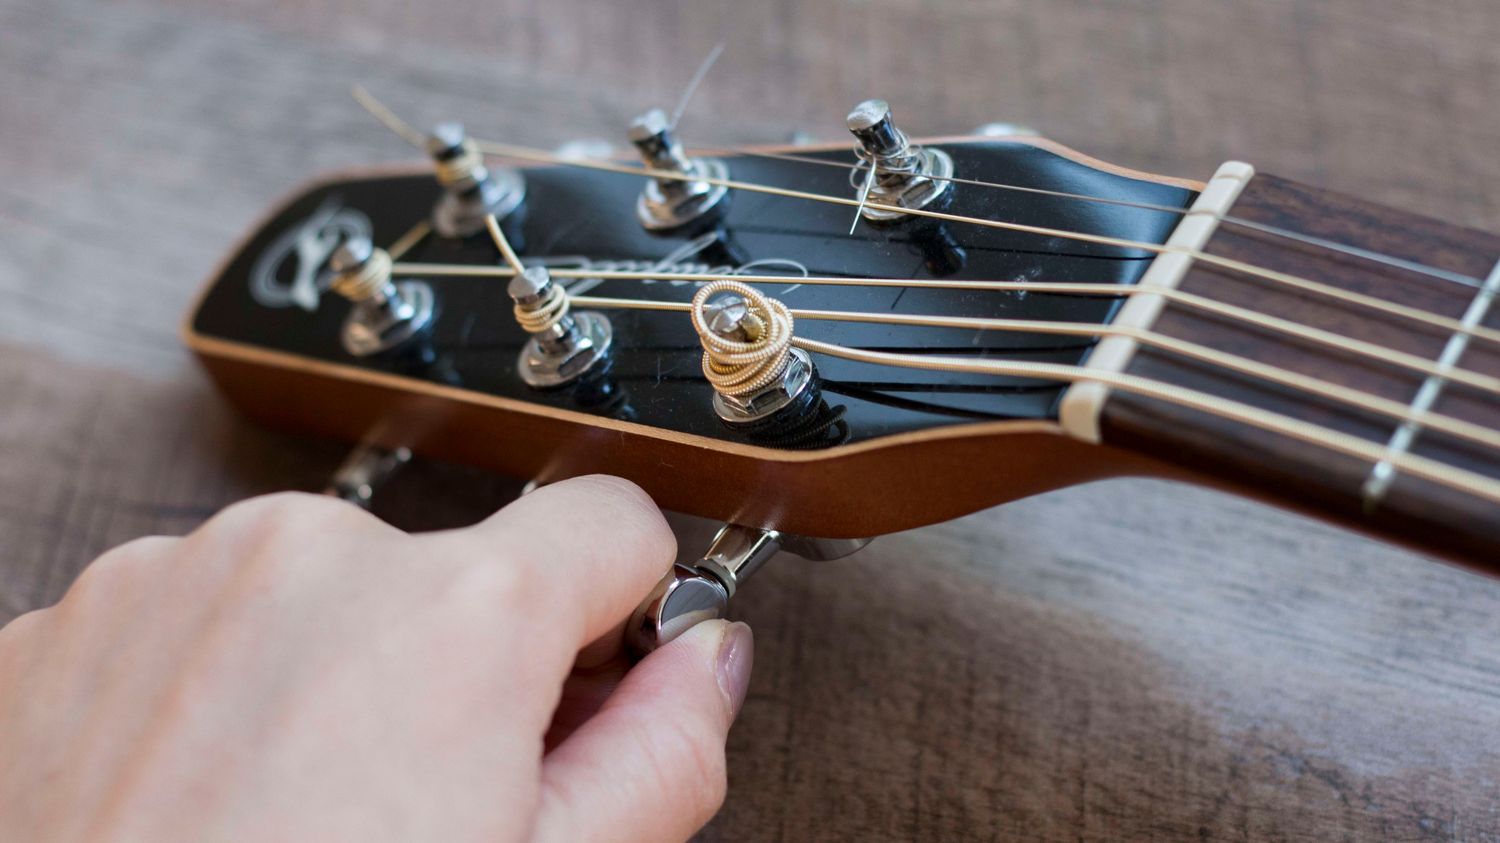
To begin, position the guitar on a stable surface, ensuring that it is securely supported to prevent any accidental movement during the string loosening process. Using an adjustable wrench, carefully turn the tuning pegs for each string in a counterclockwise direction, gradually reducing the tension on the strings. It's important to approach this task with patience and precision, as abrupt or forceful manipulation of the tuning pegs can lead to potential damage to the strings or the guitar's headstock.
As the tension on the strings diminishes, you will notice a slackening of the strings, signifying that they are becoming looser. Continue to rotate the tuning pegs until the strings are sufficiently slackened, allowing for comfortable maneuverability around the bridge area. It's advisable to keep the strings attached to the guitar during this process, as they can serve as a guide for restringing the instrument once the bridge removal and any necessary repairs or adjustments have been completed.
Once the strings have been adequately loosened, take a moment to inspect the bridge area and ensure that the reduced tension has alleviated any strain on the bridge plate and surrounding components. This preparatory step sets the stage for the subsequent phases of the bridge removal process, laying the foundation for a seamless and controlled progression through the remaining steps.
By methodically loosening the strings, you have effectively mitigated the tension on the bridge, creating a conducive environment for the forthcoming stages of the bridge removal process. With the strings now slackened and the guitar primed for the next steps, you are ready to advance to the pivotal stage of preparing the steaming setup, a crucial element in the successful removal of the acoustic guitar bridge.
Step 2: Prepare the steaming setup
With the strings now slackened and the guitar primed for the next steps, it's time to prepare the steaming setup, a critical phase in the process of removing an acoustic guitar bridge. The steaming setup is designed to apply controlled heat and moisture to the bridge area, effectively softening the adhesive beneath the bridge and facilitating its safe removal.
To begin, it's essential to ensure that the work area is well-ventilated and free from any potential hazards. Position the guitar on a stable surface, taking care to protect the instrument's finish by placing a heat-resistant pad or using a designated work surface. This precautionary measure will safeguard the guitar's body from any inadvertent exposure to heat or moisture during the steaming process.
Next, fill the steam generator with distilled water, adhering to the manufacturer's guidelines regarding water capacity and operation. It's imperative to use distilled water to prevent mineral deposits that could compromise the performance of the steam generator. Once the steam generator is filled, ensure that it is securely positioned and ready for operation.
Before initiating the steaming process, don protective gloves and eye protection to safeguard against potential steam or adhesive splatter. Safety should always remain a top priority throughout this operation. With the necessary protective gear in place, activate the steam generator, allowing it to reach the optimal operating temperature and produce a consistent flow of steam.
As the steam generator begins to emit a steady stream of steam, carefully direct the steam nozzle towards the bridge area, ensuring that the steam is applied evenly and thoroughly to the underside of the bridge. It's crucial to maintain a safe distance from the steam source and exercise caution to prevent any accidental contact with the hot steam.
The application of steam serves to gradually soften the adhesive securing the bridge to the guitar's top, preparing it for safe removal. As the steam permeates the bridge area, the adhesive's bond weakens, easing the bridge's detachment from the guitar's body.
Throughout the steaming process, it's important to monitor the application of steam and assess the bridge's responsiveness to the heat and moisture. Patience and attentiveness are key during this phase, as the gradual softening of the adhesive is a pivotal precursor to the successful removal of the acoustic guitar bridge.
By meticulously preparing the steaming setup and methodically applying steam to the bridge area, you have set the stage for the subsequent phase of removing the bridge from the guitar's body. With the adhesive sufficiently softened and the bridge primed for detachment, you are now poised to advance to the pivotal stage of removing the bridge, a decisive step in the restoration and maintenance of acoustic guitars.
Step 3: Apply steam to the bridge
As the steam generator emits a steady flow of steam, it's time to carefully direct the hot vapor towards the underside of the bridge. The application of steam is a critical phase in the process of softening the adhesive that binds the bridge to the guitar's top. This controlled application of heat and moisture serves to gradually weaken the adhesive bond, preparing the bridge for safe removal.
It's essential to approach this step with precision and attentiveness, ensuring that the steam is evenly and thoroughly applied to the entire underside of the bridge. By maintaining a safe distance from the steam source and exercising caution, you can effectively direct the steam towards the targeted area without risking accidental contact with the hot vapor.
As the steam permeates the bridge area, the adhesive begins to undergo a transformative process, gradually losing its firm grip on the guitar's body. This gradual softening of the adhesive is a testament to the efficacy of the steaming process, as the heat and moisture work in tandem to weaken the bond without causing damage to the bridge or the guitar's top.
Throughout the application of steam, it's important to monitor the bridge's responsiveness to the heat and moisture. The gradual softening of the adhesive may become evident as the bridge exhibits subtle signs of loosening or increased flexibility. This visual and tactile assessment allows for a nuanced understanding of the bridge's readiness for removal, ensuring that the adhesive has been sufficiently softened to facilitate a safe and controlled detachment.
Patience is paramount during this phase, as the gradual application of steam is instrumental in achieving the desired outcome of a softened adhesive and a bridge that is primed for removal. By methodically applying steam to the bridge and attentively assessing its response to the heat and moisture, you are laying the groundwork for the subsequent stage of removing the bridge from the guitar's body.
With the adhesive sufficiently softened and the bridge poised for detachment, the meticulous application of steam sets the stage for the pivotal phase of removing the bridge, a decisive step in the restoration and maintenance of acoustic guitars.
Step 4: Remove the bridge
With the adhesive sufficiently softened by the application of steam, the pivotal moment arrives to delicately remove the acoustic guitar bridge from its position on the guitar's body. This phase demands precision, patience, and a meticulous approach to ensure the safe and controlled detachment of the bridge without causing any damage to the instrument.
Using tweezers or a bridge clamp, carefully grasp the bridge, applying gentle and even pressure to lift it from the guitar's top. It's crucial to exercise caution and avoid applying excessive force, as the softened adhesive allows for a more manageable removal process. By maintaining a steady and controlled grip, you can gradually elevate the bridge, taking care to observe any resistance or lingering adhesion.
As the bridge begins to lift, it's essential to proceed with gradual and deliberate movements, allowing the adhesive's weakened bond to release its hold on the guitar's body. This methodical approach minimizes the risk of sudden detachment, ensuring that the bridge is lifted in a controlled manner, free from any abrupt or jarring motions.
In some instances, a razor blade or thin spatula may be utilized to gently separate the bridge from the guitar's top, providing additional support in the removal process. By carefully maneuvering the razor blade or spatula along the underside of the bridge, you can effectively disengage any residual adhesive, facilitating the smooth and precise detachment of the bridge.
Throughout the removal process, it's essential to maintain a keen awareness of the bridge's responsiveness, noting any subtle shifts or movements as it is lifted from the guitar's body. This attentiveness allows for real-time adjustments and ensures that the removal proceeds with the utmost care and consideration for the instrument's integrity.
As the bridge is lifted from its position, take note of any remnants of adhesive or moisture on the guitar's body, promptly addressing any residual traces to prepare the surface for the subsequent steps in the restoration process. Once the bridge has been safely removed, set it aside on a clean, dry surface, ready for the next phase of cleaning and preparation.
By methodically removing the bridge with precision and care, you have successfully navigated a critical stage in the restoration and maintenance of acoustic guitars. With the bridge now detached and the guitar's body primed for the next steps, you are poised to advance to the subsequent phase of cleaning and drying the bridge, a pivotal component in the comprehensive process of bridge removal and restoration.
Step 5: Clean and dry the bridge
With the acoustic guitar bridge successfully removed from the guitar's body, the next crucial step involves meticulously cleaning and drying the bridge to prepare it for potential repairs, adjustments, or reinstallation. This phase is instrumental in ensuring that the bridge is free from any residual adhesive, moisture, or debris, thereby facilitating optimal adhesion and functionality upon reattachment to the guitar.
To commence the cleaning process, carefully inspect the underside of the bridge, paying close attention to any remnants of adhesive or moisture that may have accumulated during the removal. Using a clean cloth or towel, gently wipe the underside of the bridge, methodically removing any traces of adhesive or moisture. It's essential to exercise caution and precision during this step, as thorough cleaning sets the stage for the subsequent drying process.
Once the underside of the bridge has been meticulously cleaned, it's time to facilitate the drying process to ensure that the bridge is free from any residual moisture. Placing the bridge on a clean, dry surface, allow it to air dry naturally, ensuring that it is shielded from any potential contaminants or moisture during this crucial phase. Depending on the ambient humidity and temperature, the drying process may vary in duration, necessitating patience and attentiveness to ensure that the bridge is thoroughly dried.
In some instances, a gentle application of low heat, such as from a hairdryer set to a cool or warm setting, may expedite the drying process. It's important to exercise caution and maintain a safe distance between the hairdryer and the bridge to prevent any potential heat damage. By employing this method, the residual moisture can be effectively evaporated, expediting the drying process and preparing the bridge for the subsequent stages of restoration and reinstallation.
Throughout the cleaning and drying process, it's essential to prioritize the preservation of the bridge's structural integrity and finish, ensuring that it remains free from any damage or alterations. By meticulously cleaning and drying the bridge, you are laying the groundwork for its seamless reintegration into the guitar, setting the stage for the final phase of reinstallation.
With the bridge now meticulously cleaned and thoroughly dried, it is primed for potential repairs, adjustments, or reinstallation, marking a pivotal milestone in the comprehensive process of bridge removal and restoration.
Step 6: Reinstall the bridge
With the acoustic guitar bridge meticulously cleaned and thoroughly dried, the pivotal moment arrives to delicately reattach the bridge to the guitar's body. This phase demands precision, patience, and a meticulous approach to ensure the safe and controlled reinstallation of the bridge without causing any damage to the instrument.
To begin the reinstallation process, carefully position the bridge on the designated location on the guitar's top, aligning it with the pre-existing bridge pinholes. It's essential to approach this step with attentiveness, ensuring that the bridge is centered and properly oriented to facilitate optimal string alignment and intonation.
Once the bridge is positioned correctly, gently press it down, allowing the adhesive to establish a secure bond with the guitar's body. It's crucial to apply even pressure across the surface of the bridge, ensuring that it adheres uniformly to the guitar's top. This methodical approach minimizes the risk of uneven adhesion and promotes a stable and secure attachment.
As the bridge is reattached, it's important to verify that it sits flush with the guitar's body, maintaining a seamless and level profile. This visual assessment allows for real-time adjustments, ensuring that the bridge is affixed with precision and care, ready to fulfill its crucial role in transmitting the vibrations of the strings to the guitar's soundboard.
Once the bridge is securely in place, reinsert the bridge pins, guiding the strings through the bridge and positioning them over the saddle. With the strings in place, gradually tighten the tuning pegs, restoring tension to the strings and bringing the guitar back to playable condition.
As the strings regain tension, monitor the bridge for any signs of movement or instability, ensuring that it remains firmly affixed to the guitar's body. This attentive observation allows for immediate adjustments, guaranteeing that the bridge is securely reinstalled and poised to fulfill its integral function in the instrument's tonal and resonant characteristics.
By methodically reattaching the bridge with precision and care, you have successfully navigated a critical stage in the restoration and maintenance of acoustic guitars. With the bridge now securely in place and the guitar primed for the subsequent steps, you have effectively completed the comprehensive process of bridge removal and reinstallation, culminating in the restoration of the instrument's functionality and sonic capabilities.
Conclusion
In conclusion, the process of steaming off an acoustic guitar bridge is a meticulous and intricate endeavor that demands patience, precision, and a deep understanding of the instrument's construction. By following the comprehensive steps outlined in this guide, you have gained valuable insights into the art of safely removing and reinstalling an acoustic guitar bridge, unlocking the secrets of instrument maintenance and restoration.
From the initial stage of loosening the strings to the delicate process of reattaching the bridge, each step has been carefully crafted to empower you with the knowledge and confidence to navigate this task with expertise. The utilization of a steam generator, protective gear, and specialized tools has been instrumental in ensuring a controlled and effective bridge removal process, safeguarding the integrity of the guitar and its components.
The meticulous application of steam to soften the adhesive binding the bridge to the guitar's top has been a pivotal element in this undertaking, showcasing the harmonious interplay of heat and moisture in achieving a safe and controlled bridge removal. The subsequent cleaning and drying of the bridge have further underscored the importance of meticulous care and attention to detail, setting the stage for its seamless reintegration into the instrument.
As you embark on your journey to master the art of acoustic guitar maintenance and repair, the knowledge and skills acquired through this guide will serve as a valuable foundation for future endeavors. Whether you are a seasoned luthier or an aspiring instrument enthusiast, the ability to confidently address the removal and restoration of an acoustic guitar bridge is a testament to your dedication to the craft.
In the realm of acoustic guitar maintenance, the removal and reinstallation of the bridge stand as a testament to the intricate symbiosis between craftsmanship and artistry. As you continue to explore the nuances of instrument care and repair, may this guide serve as a source of inspiration and empowerment, propelling you towards new heights of expertise and proficiency in the realm of acoustic guitar maintenance.
With the bridge now securely reattached and the guitar poised for renewed musical expression, you have embarked on a transformative journey that celebrates the timeless artistry and enduring legacy of acoustic guitars. As the strings resonate and the melodies reverberate, may the harmonious union between craftsmanship and creativity continue to flourish, enriching the world with the timeless allure of acoustic music.