Home>Production & Technology>Audio Interface>What Is The Best Way To Record With Audio Interface
Audio Interface
What Is The Best Way To Record With Audio Interface
Modified: March 11, 2024
Discover the best way to record with an audio interface. Enhance your audio quality and capture professional-grade sound with our top recommended audio interfaces.
(Many of the links in this article redirect to a specific reviewed product. Your purchase of these products through affiliate links helps to generate commission for AudioLover.com, at no extra cost. Learn more)
Table of Contents
- Introduction
- Understanding Audio Interfaces
- Factors to Consider Before Recording
- Different Types of Audio Interfaces
- Choosing the Right Audio Interface
- Setting Up Your Audio Interface
- Connecting Your Microphone or Instrument
- Configuring Your Digital Audio Workstation
- Adjusting Input Levels
- Monitoring Your Audio
- Recording with Your Audio Interface
- Tips for Getting the Best Sound Quality
- Troubleshooting Common Issues
- Conclusion
Introduction
Welcome to the world of audio interfaces! If you’re a musician, podcaster, or content creator who wants to take their audio recordings to the next level, a good audio interface is an essential piece of equipment. But what exactly is an audio interface, and why do you need one?
An audio interface is a device that connects your instruments, microphones, or other audio sources to your computer, allowing you to record and play back high-quality audio. It acts as an intermediary between your analog audio equipment and the digital world of your computer.
With an audio interface, you can capture sound with greater clarity and accuracy, ensuring that your recordings sound professional and polished. Whether you’re a singer looking to record your vocals, a guitarist aiming to capture your latest riff, or a podcaster seeking clear and crisp audio, an audio interface will be your best friend.
Not only does an audio interface provide a way to connect your gear to your computer, but it also offers a range of features and functionalities that enhance your recording experience. These include preamps, which boost the signal of your microphones or instruments, and converters, which convert analog signals into digital data that your computer can process.
Choosing the right audio interface can be a daunting task, especially with the myriad of options available in the market. But fear not! In this comprehensive guide, we’ll walk you through everything you need to know about audio interfaces, from understanding their different types to setting them up and recording your first masterpiece.
So, whether you’re a beginner venturing into the world of audio recording or a seasoned professional looking to upgrade your setup, read on to discover the ins and outs of audio interfaces and find the best way to record your music, podcast, or any other audio project.
Understanding Audio Interfaces
Before we dive into the world of audio interfaces, it’s important to have a clear understanding of what they are and how they work. Essentially, an audio interface is a piece of hardware that allows you to connect your microphones, instruments, and other audio sources to your computer for recording or playback.
Think of an audio interface as the bridge between the analog world of sound and the digital realm of your computer. It takes the analog signals from your microphones or instruments and converts them into digital data that your computer can process. Likewise, it can convert digital audio files into analog signals for playback through your speakers or headphones.
One of the key components of an audio interface is its converters. These are responsible for analog-to-digital (ADC) and digital-to-analog (DAC) conversion. ADC converts the analog signals from your microphones or instruments into digital data, while DAC converts digital audio files into analog signals for playback. The quality of these converters greatly affects the sound quality of your recordings.
Another crucial feature of audio interfaces is the preamps. Preamps amplify the low-level signals from your microphones or instruments to a level that can be properly recorded or processed by your computer. Good preamps are essential for capturing clean and strong audio signals, ensuring that your recordings have sufficient volume and clarity.
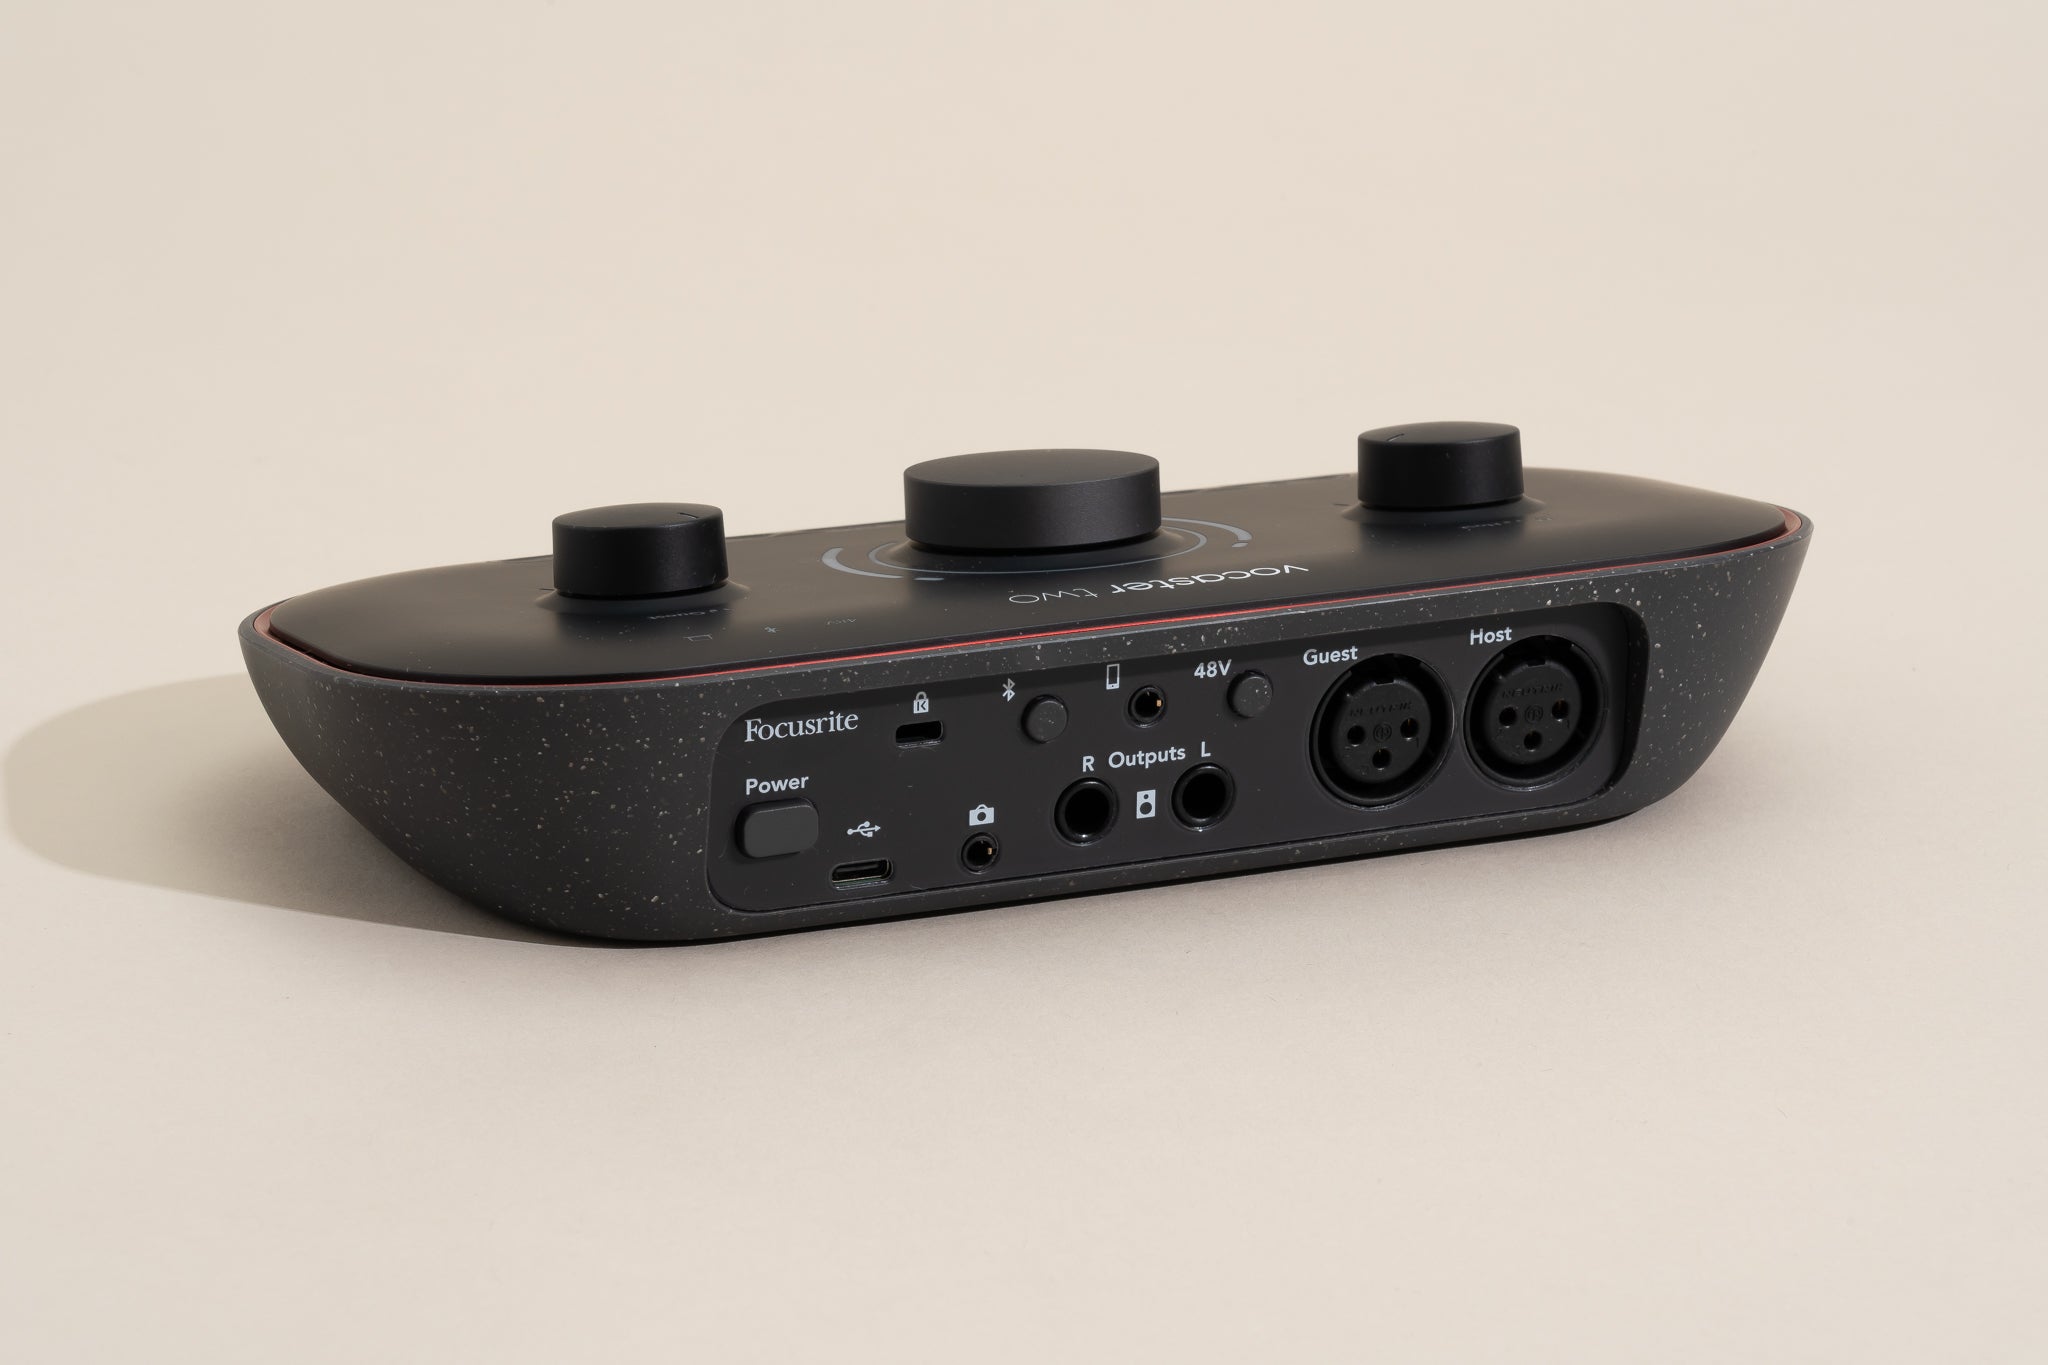
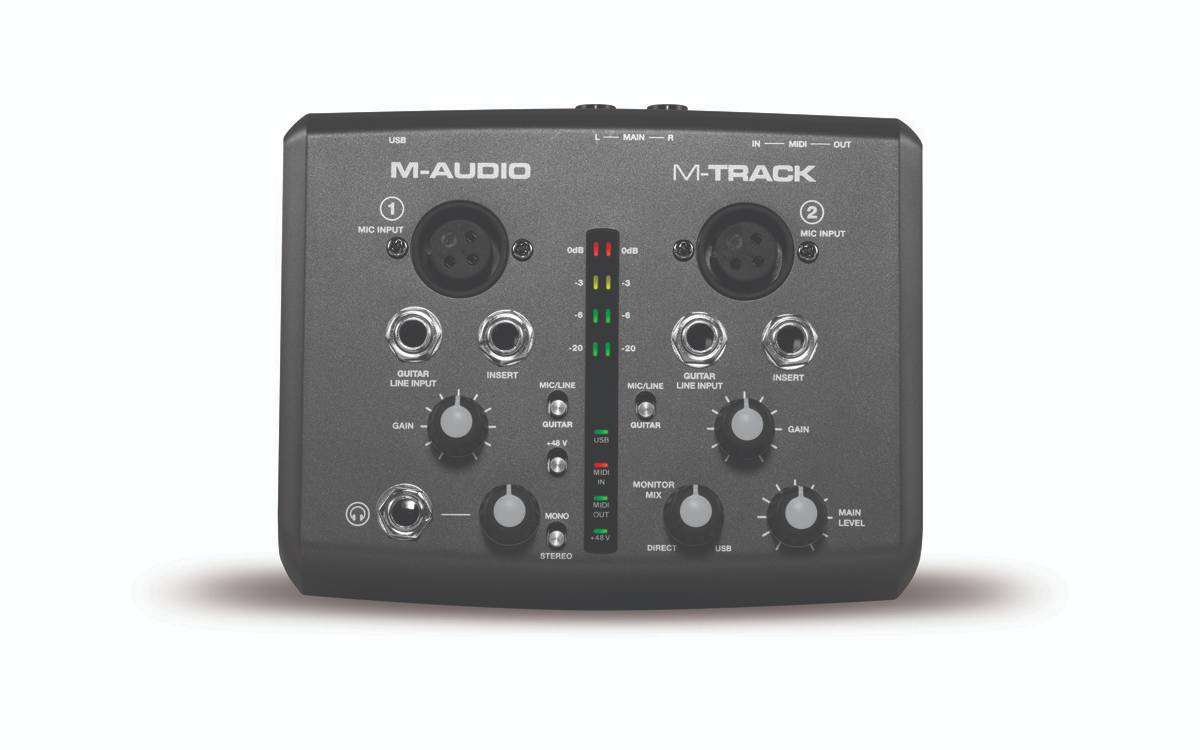
Audio interfaces also come with a variety of inputs and outputs to accommodate different audio sources and playback devices. Common inputs include XLR and 1/4″ jack inputs for microphones and instruments, while outputs can range from headphone outputs for monitoring to balanced line outputs for connecting to studio monitors or speakers.
Many audio interfaces also feature additional controls and features to enhance your recording experience. These can include gain control knobs, phantom power for condenser microphones, direct monitor options for zero-latency monitoring, and MIDI inputs and outputs for connecting MIDI devices.
Understanding the technical specifications of audio interfaces is also important. These include sampling rates (the number of samples taken per second), bit depth (the resolution of each sample), and the overall audio quality. The higher the specifications, the better the audio fidelity.
Now that you have a basic understanding of audio interfaces, let’s explore the factors you should consider before investing in one.
Factors to Consider Before Recording
When it comes to choosing the right audio interface for your recording needs, there are several factors you should consider. Each factor plays a crucial role in determining the quality and suitability of the audio interface for your specific requirements. Let’s take a closer look at these factors:
- Connectivity: The first consideration is the connectivity options provided by the audio interface. Assess the number and type of inputs and outputs it offers. Ensure that it has enough inputs for your microphones or instruments, and check if it has the necessary outputs for your monitoring needs.
- Preamp Quality: The quality of the preamps built into the audio interface is a crucial factor to consider. High-quality preamps will provide cleaner and more transparent amplification of your audio signals, resulting in better recordings. Look for audio interfaces that offer high-quality preamps with low noise and ample gain range.
- Sampling Rate and Bit Depth: The sampling rate and bit depth define the resolution and fidelity of your recordings. Higher sampling rates (e.g., 44.1kHz, 48kHz, 96kHz, or even 192kHz) and higher bit depths (e.g., 16-bit, 24-bit, or 32-bit) allow for more accurate and detailed audio reproduction. Consider your specific audio needs and choose an audio interface that supports the desired sampling rate and bit depth.
- Compatibility: Ensure that the audio interface you choose is compatible with your operating system and digital audio workstation (DAW) software. Check for driver availability and software compatibility to avoid any compatibility issues or limitations.
- Budget: Setting a budget for your audio interface purchase is important. Audio interfaces can vary in price range, depending on their features and capabilities. Determine your budget range and look for options that offer the best value for your money within that range.
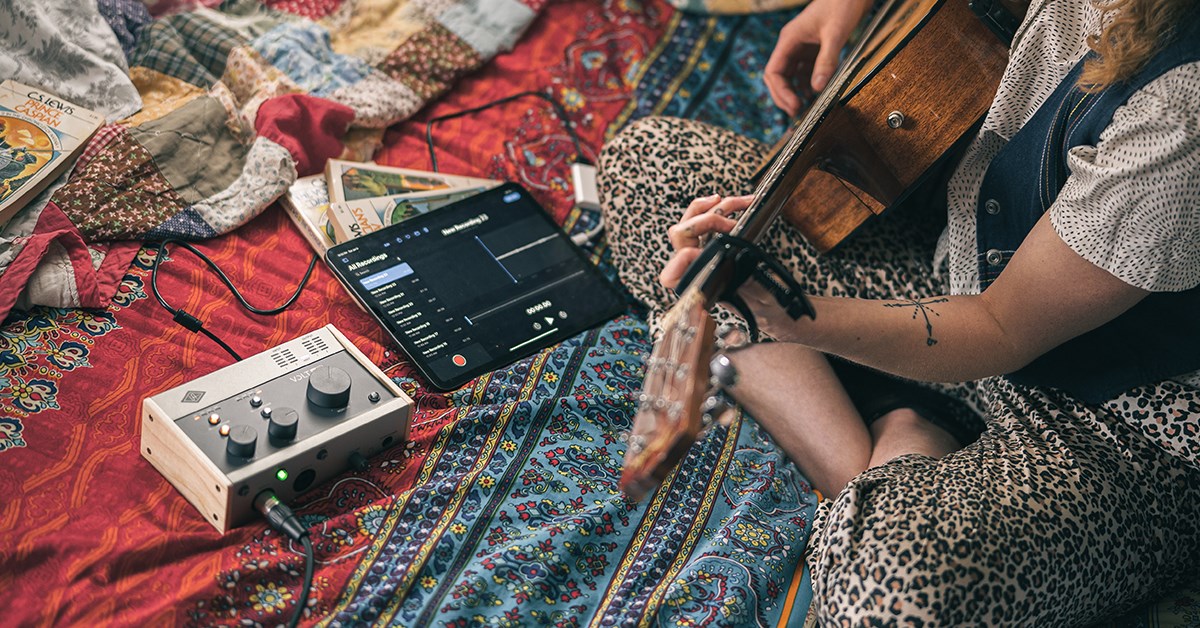
- Portability: If you’re a musician who frequently travels or needs to record on the go, consider the portability of the audio interface. Look for compact and durable options that can easily fit into your backpack or recording setup. USB-powered interfaces are often a good choice for portability.
By considering these factors, you can narrow down your options and find the audio interface that best suits your recording needs. Whether you’re a beginner or a professional, choosing the right audio interface is crucial for capturing pristine audio and enhancing your overall recording experience.
Different Types of Audio Interfaces
Audio interfaces come in several different types, each catering to specific recording needs and preferences. Understanding the different types can help you make an informed decision when choosing the right audio interface for your setup. Let’s explore the various types:
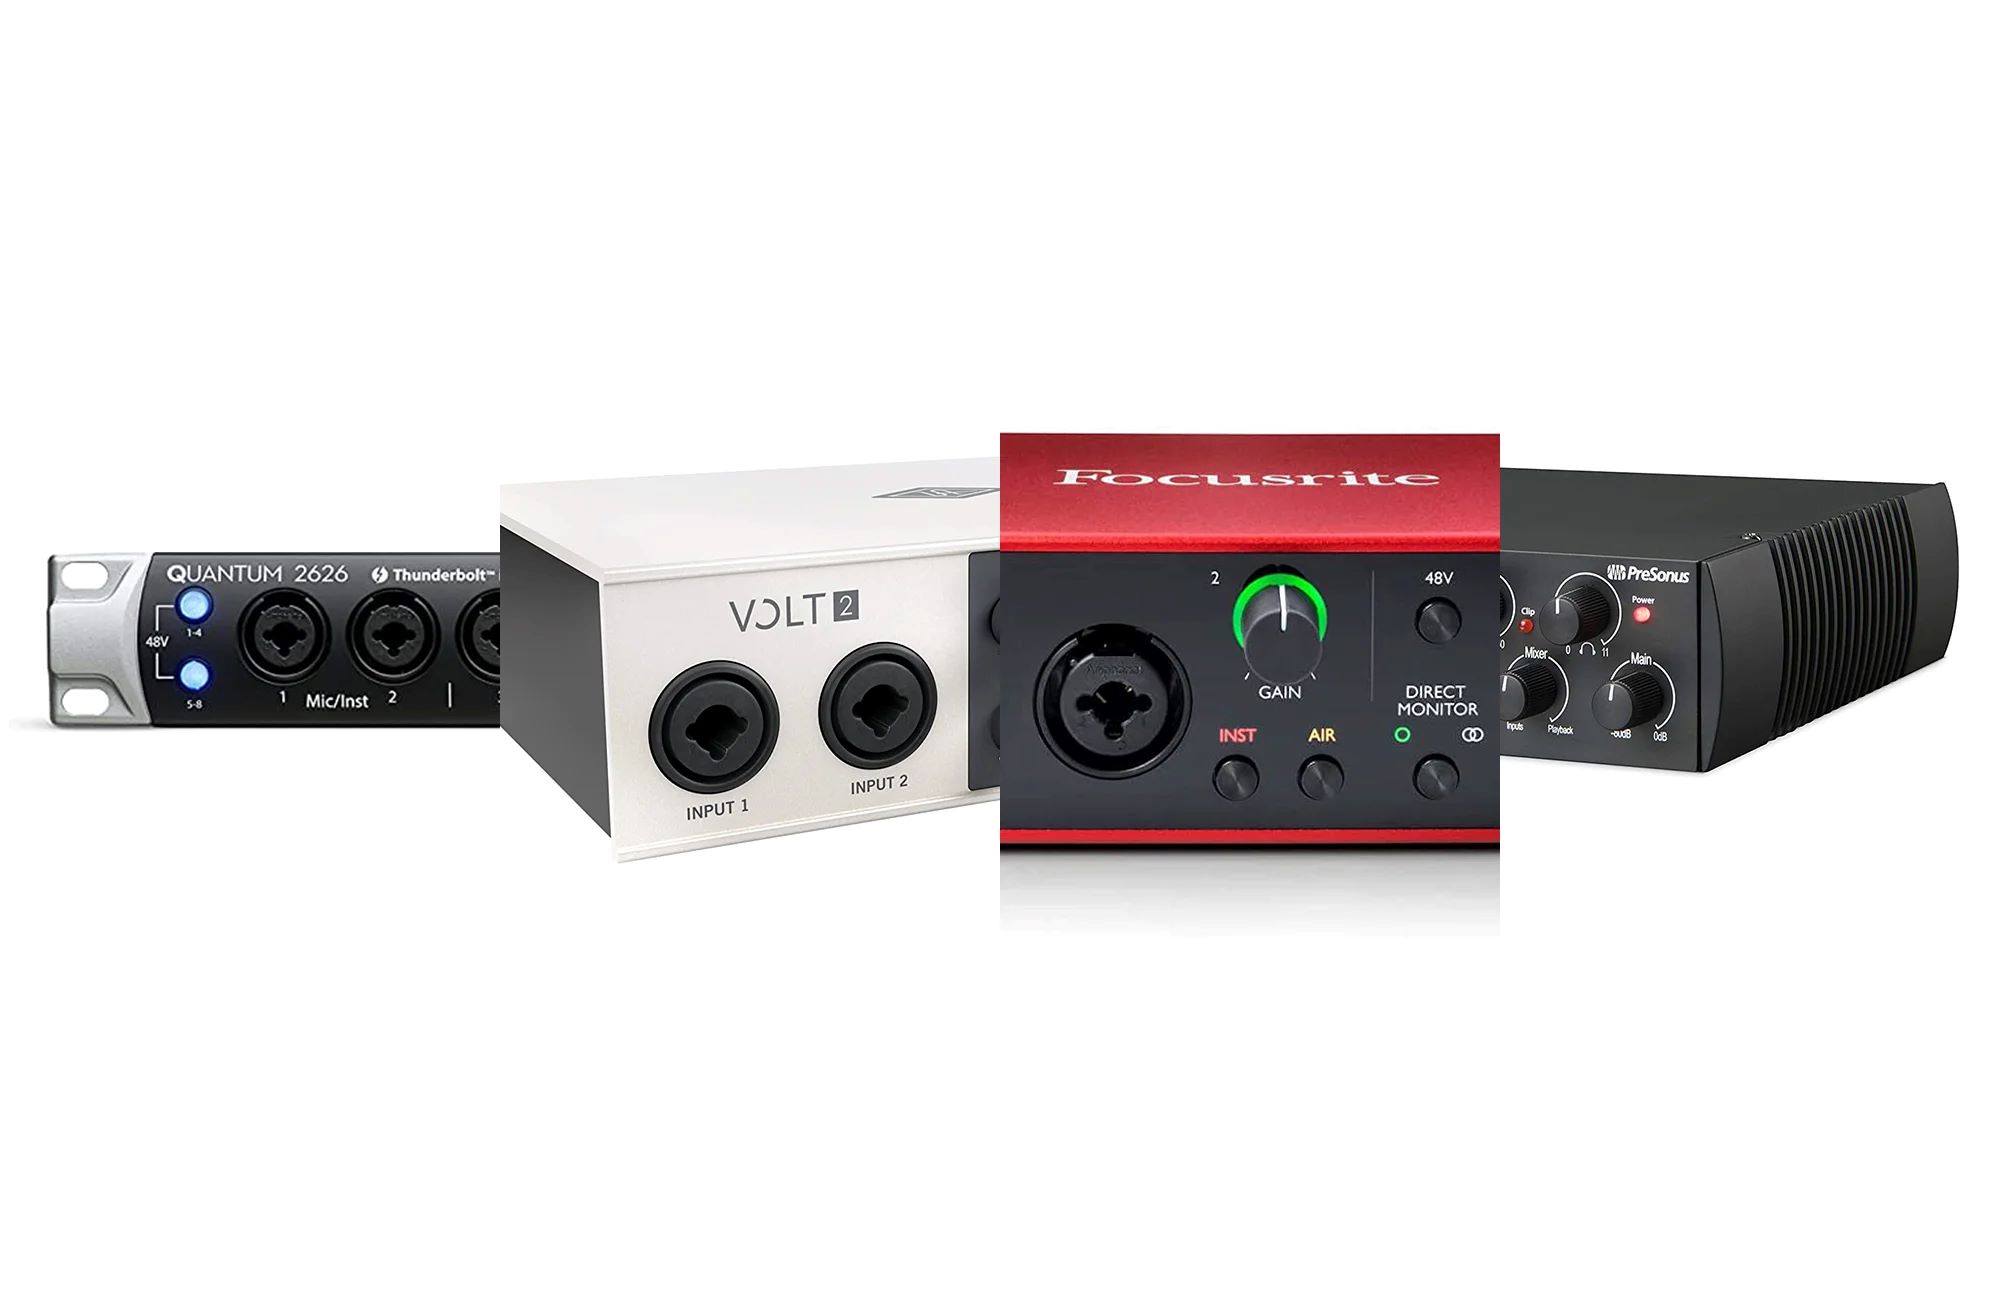
- USB Audio Interfaces: USB interfaces are the most common and widely used type of audio interface. They connect to your computer via a USB port and are typically bus-powered, meaning they draw power from your computer. USB interfaces are popular among beginners and those on a budget, as they offer a good balance between affordability and functionality. They are suitable for a wide range of recording applications, from home studios to podcasting setups.
- Thunderbolt Audio Interfaces: Thunderbolt interfaces are known for their high-speed data transfer capabilities, making them ideal for professional audio production. They offer low latency and high bandwidth, allowing for multiple inputs and outputs. Thunderbolt interfaces are commonly used in professional recording studios and provide excellent audio quality and reliability.
- FireWire Audio Interfaces: FireWire interfaces were previously popular but have become less common in recent years. They offer high-speed data transfer and low latency, making them suitable for multi-channel recording and high-resolution audio projects. However, as newer computers no longer come with FireWire ports, compatibility can be an issue.
- PCIe Audio Interfaces: PCIe interfaces are internal audio cards that are installed directly into your computer’s PCI Express slots. They offer extremely low latency and high channel counts, making them ideal for professional audio production and demanding recording environments. However, they require opening up your computer and are typically used in desktop setups.
- Ethernet Audio Interfaces: Ethernet interfaces connect to your computer through Ethernet cables and offer high-speed audio transfer. They are commonly used in professional audio setups that require long cable runs or networked audio systems. Ethernet interfaces provide low latency and the ability to expand your system by connecting multiple units together.
- Hybrid Audio Interfaces: Hybrid interfaces combine multiple connectivity options, allowing you to choose the connection type that best suits your needs. For example, a hybrid interface may offer USB, Thunderbolt, and PCIe connectivity options, providing flexibility and compatibility with different computer systems.
When choosing an audio interface, consider the type that aligns with your preferred connectivity, recording needs, and budget. Assess your requirements and determine which type of interface will best complement your setup and workflow.
Choosing the Right Audio Interface
Choosing the right audio interface is crucial for achieving high-quality recordings and ensuring a seamless workflow. With the wide range of options available in the market, it’s important to consider several factors to make an informed decision. Here are some key factors to keep in mind when selecting your audio interface:
- Recording Needs: Consider the specific requirements of your recording projects. Determine the number of inputs and outputs you need, whether you require phantom power for condenser microphones, and if you’ll be recording instruments directly or using external preamps. Understanding your recording needs will guide you towards an audio interface that can cater to those needs.
- Audio Quality: Pay attention to the audio quality of the interface. Look for interfaces with high-quality converters, low noise preamps, and transparent signal processing. Reviews and user feedback can help you gauge the audio quality of different interfaces. It’s also worth considering the sampling rate and bit depth supported by the interface to ensure it meets your desired recording standards.
- Compatibility: Ensure that the audio interface is compatible with your computer’s operating system and your preferred digital audio workstation (DAW) software. Check for driver availability and software support to avoid any compatibility issues. Additionally, consider the connectivity options of the interface (USB, Thunderbolt, etc.) and make sure your computer has the corresponding ports available.
- Budget: Set a budget for your audio interface purchase. Determine how much you’re willing to spend and look for interfaces that offer the best value within your budget range. Keep in mind that while more expensive interfaces may offer additional features and higher audio quality, there are often affordable options that can meet your recording needs.
- User-Friendly Features: Consider the ease of use and user-friendly features offered by the audio interface. Look for interfaces with intuitive control layouts, clear signal indicators, and features that enhance your workflow, such as direct monitoring, loopback capabilities, or software integration. These features can make your recording experience more convenient and efficient.
- Future Expansion: Think about your future recording needs and consider if the audio interface allows for expansion. Will you need additional inputs or outputs in the future? Does the interface support daisy-chaining or have expansion options? Planning for future growth can save you from having to upgrade your interface sooner than expected.
By carefully considering these factors, you’ll be able to select an audio interface that best suits your recording needs, budget, and workflow. Take the time to research different models, read reviews, and compare specifications to make an informed decision. Remember, the right audio interface can greatly improve your recording capabilities and take your audio productions to new heights.
Setting Up Your Audio Interface
Once you’ve chosen the right audio interface, it’s time to set it up properly to ensure smooth operation and optimal recording performance. Here are the steps to follow when setting up your audio interface:
- Install Drivers: Before connecting your audio interface to your computer, check if any drivers or software need to be installed. Visit the manufacturer’s website and download the latest drivers and software for your specific operating system. Install them following the provided instructions. These drivers and software ensure that your computer recognizes and communicates effectively with the audio interface.
- Connect the Audio Interface: Connect your audio interface to your computer using the appropriate cable or connection type. USB interfaces are commonly connected via a USB cable, while Thunderbolt or FireWire interfaces may require specific cables. Make sure to use high-quality cables to minimize noise interference. If your interface requires external power, ensure it is properly connected to an outlet or power source.
- Check Input and Output Routing: Open your digital audio workstation (DAW) software and navigate to the audio settings or preferences. Select your audio interface as the input and output device. Verify that the input and output routing is correctly configured, ensuring that your desired inputs and outputs are assigned and recognized by the DAW.
- Set Sample Rate and Buffer Size: Determine the desired sample rate and buffer size for your recordings. These settings can impact latency and audio performance. Generally, higher sample rates and smaller buffer sizes provide lower latency but may require more processing power. Adjust these settings in your DAW audio preferences according to your specific needs.
- Configure Monitoring: Decide how you want to monitor your audio. Most audio interfaces offer options for direct monitoring, which allows you to monitor your input signals without latency. Enable direct monitoring if desired, or configure your DAW for software monitoring if you prefer to monitor through your DAW while recording.
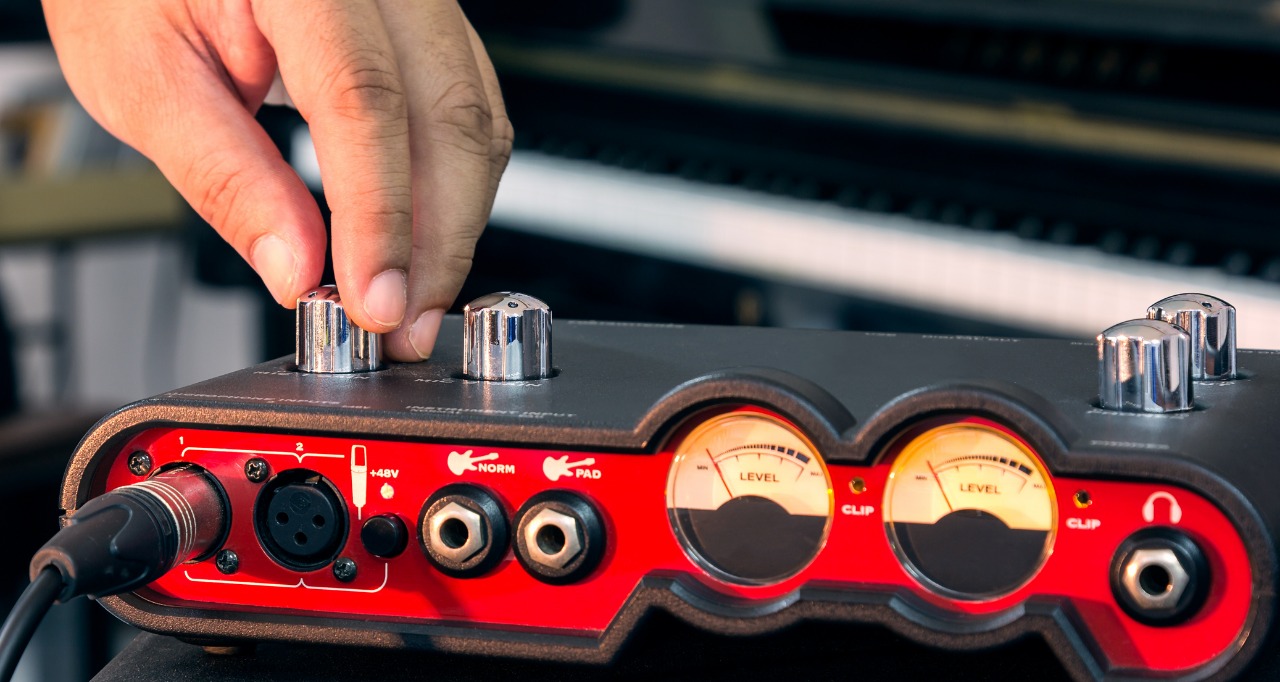
- Set Input Levels: Adjust the input levels of your microphones or instruments using the gain controls on the audio interface. Aim for a healthy signal level without clipping. Consider using a test tone or sound source to set appropriate input levels and avoid distortion in your recordings.
- Test and Verify: Before recording, perform a test recording and playback to ensure that everything is working properly. Check that all inputs and outputs are functioning as expected, and listen for any unwanted noise or issues. Make any necessary adjustments to the settings or connections if required.
By following these steps, you’ll have your audio interface properly set up and ready for recording. Remember to consult the user manual and any specific instructions provided by the manufacturer to ensure you are correctly configuring and utilizing the features of your specific audio interface model.
Connecting Your Microphone or Instrument
Once your audio interface is set up, it’s time to connect your microphone or instrument to capture your audio sources accurately. Here’s how to connect your microphone or instrument to your audio interface:
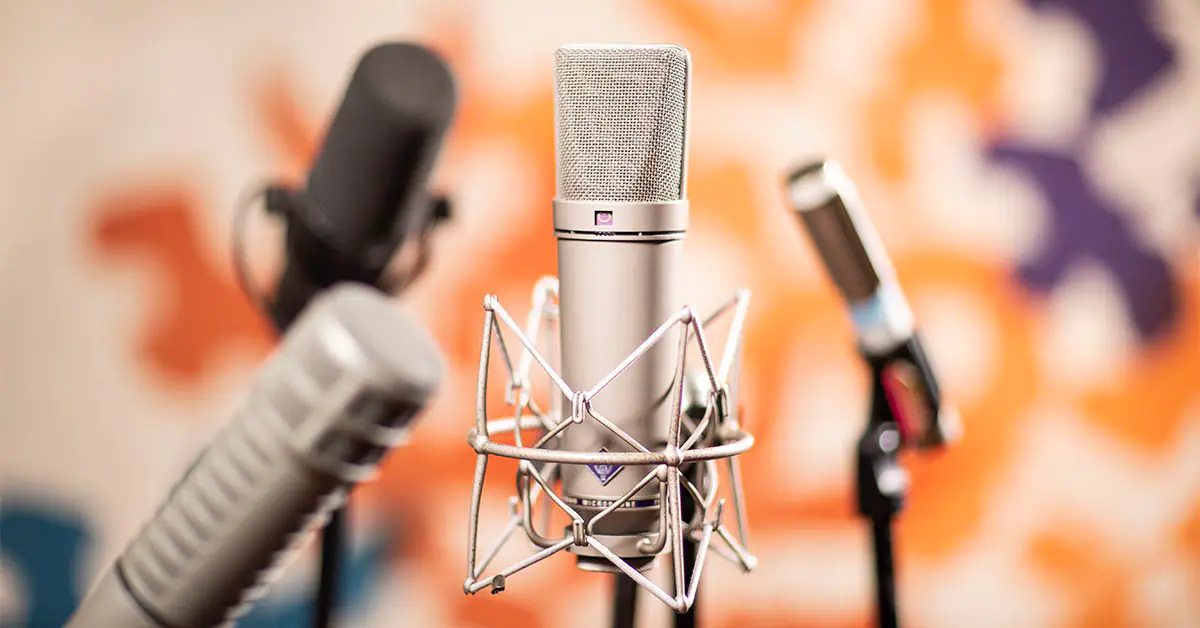
- Microphone Connection: For connecting a microphone to your audio interface, you’ll typically use an XLR cable. Plug one end of the XLR cable into the microphone’s output, and the other end into one of the XLR inputs on your audio interface. Make sure to securely connect the cables to avoid any unwanted noise or disconnections.
- Instrument Connection: If you’re connecting an instrument, such as a guitar or keyboard, you’ll typically use a 1/4″ instrument cable. Plug one end of the instrument cable into the output jack of your instrument and the other end into one of the 1/4″ instrument inputs on your audio interface. Again, ensure a secure connection to prevent any noise or loss of signal.
- Phantom Power: If you’re using a condenser microphone that requires phantom power, make sure to engage the phantom power option on your audio interface. Phantom power supplies +48V of power to the microphone via the XLR cable. This is necessary for the microphone to function properly and is typically indicated by a switch or button on the interface.
- Input Gain: Adjust the input gain on the audio interface for your microphone or instrument. The gain control allows you to boost or attenuate the input signal level. Start with a lower gain setting and gradually increase it until you achieve an optimal signal level. Avoid overdriving the input, as it can lead to distortion.
- Monitoring: Decide whether you want to monitor your audio directly from the audio interface (if it has a dedicated headphone output) or through your digital audio workstation (DAW) software. If monitoring through the interface, connect your headphones to the headphone output, and adjust the headphone volume to a comfortable level. If monitoring through your DAW, configure your software to enable monitoring through your preferred output device.
- Test and Adjust: Before diving into your recording, perform a sound check to ensure that your microphone or instrument is properly connected and the levels are set correctly. Speak or play your instrument at the desired intensity and check the input meter on your audio interface or DAW to make sure the levels are within an appropriate range.
By following these steps, you’ll be able to connect your microphone or instrument to your audio interface properly. Remember to always handle your gear with care and ensure all connections are secure to avoid any audio issues or signal interruptions while recording.
Configuring Your Digital Audio Workstation
Configuring your digital audio workstation (DAW) is an essential step in the recording process. It allows you to optimize your software settings and ensure that your audio interface is properly integrated. Here’s how you can configure your DAW:
- Selecting Your Audio Interface: Open your DAW software and navigate to the audio settings or preferences. Locate the section where you can select your audio interface as the input and output device. Choose your audio interface from the available options to establish the connection between your interface and the DAW.
- Setting Sample Rate and Buffer Size: In the audio settings or preferences of your DAW, you’ll find options for setting the sample rate and buffer size. The sample rate determines the number of samples taken per second, while the buffer size affects the delay or latency during recording and playback. Adjust the sample rate and buffer size according to your desired balance between audio quality and latency.
- Enabling Input and Output Channels: Ensure that the input channels of your audio interface are properly enabled in the DAW. Typically, you’ll have the option to enable or disable specific input channels. Enable the channels you plan to use for recording. Similarly, check that the output channels are correctly assigned to your desired playback devices, such as speakers or headphones.
- Monitoring Settings: Configure the monitoring settings in your DAW. If you prefer direct monitoring through your audio interface, disable software monitoring in your DAW. This allows you to monitor the incoming audio signal in real-time without any latency. On the other hand, if you prefer to monitor through your DAW software, ensure that the monitoring settings are enabled and routed to the appropriate output channels.
- Input and Output Routing: Verify that the input and output routing is correctly configured in your DAW. Check that the audio interface inputs are assigned to the corresponding tracks in your project. Similarly, ensure that the output channels are routed to the appropriate destinations for monitoring or playback. Adjust the routing as necessary to match your desired setup.
- Assigning MIDI Devices: If you’re using MIDI devices, such as keyboards or controllers, make sure to assign them properly in your DAW. Locate the MIDI device settings or preferences and select your MIDI device from the available options. This allows your DAW to recognize and communicate with your MIDI devices for recording and playback.
- Testing and Verifying: After configuring the settings, perform a test recording and playback to ensure that everything is working as expected. Check that the audio is being recorded and played back through the correct channels, and listen for any unexpected noise or issues. Make any necessary adjustments to the settings or routing if required.
By following these steps, you’ll have your digital audio workstation properly configured to work seamlessly with your audio interface. Remember to consult the user manual or online resources specific to your DAW to ensure you understand the configuration process and take advantage of all the features and settings available.
Adjusting Input Levels
Properly adjusting the input levels on your audio interface is crucial for capturing clean, balanced, and distortion-free recordings. Here’s a step-by-step guide on how to adjust the input levels:
- Set a Reference Level: Choose a reference level that represents the average loudness of your audio source. This will serve as a guide for setting the input levels. It’s typically recommended to aim for a peak level between -12 dB and -6 dB to leave enough headroom for unexpected loud peaks without clipping.
- Perform a Sound Check: Start by playing or performing at the expected intensity to get a sense of the audio source’s average level. Observe the input meters on your audio interface or in your digital audio workstation (DAW) to gauge the input level range.
- Adjust the Gain: Begin with the input gain control on your audio interface set to its lowest setting. Gradually increase the gain until the input meters reach your desired reference level. Monitor the sound through headphones or your studio monitors to ensure there is no audible distortion or clipping.
- Monitoring Levels: Pay attention to both the input level meters and your audio output. Ensure that the input level stays within a suitable range without consistently hitting the maximum levels (0 dB) to avoid clipping. At the same time, check that the output level from your DAW is at a comfortable listening level, neither too low nor too loud.
- Microphone Techniques: If you’re recording vocals or acoustic instruments with microphones, consider microphone techniques to achieve the desired sound and tonal balance. Experiment with microphone placement, distance, and angle to capture the best possible sound before adjusting the input levels.
- Recording Dynamics: Different sources and styles of music may have varying dynamic range requirements. For instruments or vocals with wide dynamic range variations, consider using compression or other dynamic range processors to control the levels more effectively during recording. This can help balance the quieter passages with the louder parts, ensuring a consistent and controlled performance.
- Monitoring and Adjusting: While recording, continuously monitor the input levels and sound quality. Make adjustments as needed to achieve an optimal balance between capturing enough signal without overloading the input. Stay attentive to sudden changes in dynamics or unexpected volume spikes to avoid clipping or distortion.
Remember that the ideal input level setting may vary depending on the specific recording situation and the characteristics of the audio source. It’s always a good practice to err on the side of caution and leave some headroom to preserve the integrity of the audio and avoid any unwanted distortion. With patience and practice, you’ll develop a better understanding of how to adjust the input levels for optimal recording results.
Monitoring Your Audio
Proper monitoring of your audio during recording is essential to ensure accurate and high-quality recordings. By monitoring your audio, you can detect any issues or anomalies in real-time and make necessary adjustments. Here are some key considerations for monitoring your audio:
- Headphones or Studio Monitors: Choose between using headphones or studio monitors for monitoring your audio. Both options have their advantages and considerations. Headphones provide an isolated and detailed listening experience, allowing you to hear subtle nuances in your recordings. Studio monitors, on the other hand, provide a more natural and balanced sound representation that mimics how your recordings will sound in a room.
- Quality and Calibration: Ensure that your headphones or studio monitors are of good quality and accurately calibrated. Poor-quality or uncalibrated monitoring devices can introduce inaccuracies or coloration to your audio, leading to misleading recordings. Invest in high-quality headphones or monitors and regularly calibrate them to ensure accurate sound reproduction.
- Monitoring Environment: Pay attention to the environment in which you are monitoring your audio. Reduce any background noise or distractions that may interfere with your ability to accurately assess the sound. Consider proper acoustic treatment in your recording space to minimize reflections and improve the accuracy of what you are hearing.
- Volume Levels: Maintain an appropriate volume level while monitoring your audio. Avoid excessively high volume levels that may cause ear fatigue or mask subtle audio details. Similarly, avoid monitoring at very low volumes, as this may result in inaccurate judgment of the audio balance and dynamics. Find a comfortable listening level that allows you to assess the intricacies of your recordings without sacrificing your hearing health.
- Panning and Stereo Imaging: Pay attention to the stereo imaging and panning of your recorded audio. Ensure that instruments or vocals are appropriately placed in the stereo field, creating a balanced and coherent soundstage. This is particularly important if you’re recording in a multi-microphone setup or using stereo recording techniques.
- Listening for Artifacts and Distortions: While monitoring, listen for any artifacts, distortions, or anomalies in your audio. These can include unwanted background noise, clipping, digital distortion, or frequency imbalances. If you detect any issues, investigate and troubleshoot the problem promptly to ensure clean and artifact-free recordings.
- Comparing to Reference Tracks: Use reference tracks as a point of comparison to assess the quality of your recordings. Choose tracks that are well-produced and similar in genre or style to your recordings. A/B listen to your recordings alongside the reference tracks to identify any areas for improvement and to ensure that your audio meets the desired standards.
- Monitoring During Playback: Monitoring is not limited to the recording stage. It’s equally important to monitor your audio during playback and editing. Listen critically to your mixes, paying attention to the tonal balance, dynamics, and overall clarity. This allows you to make informed decisions and adjustments to achieve the desired final sound.
By implementing these monitoring practices, you can ensure that you capture and evaluate your audio accurately. Clear and precise monitoring enables you to make informed decisions throughout the recording and production processes, resulting in high-quality and professional-sounding recordings.
Recording with Your Audio Interface
Now that you have your audio interface set up and properly configured, it’s time to start recording. Whether you’re capturing vocals, instruments, or any other audio source, here are some important steps to follow when recording with your audio interface:
- Selecting a Recording Software: Choose a recording software, also known as a digital audio workstation (DAW), that suits your needs and preferences. Popular options include Pro Tools, Logic Pro, Ableton Live, and Reaper. Install the software and ensure it is compatible with your operating system and audio interface.
- Create a New Project: Open your recording software and create a new project. Set the project settings such as sample rate, bit depth, and session length according to your desired recording specifications. Consider using the same settings as your audio interface for consistency.
- Configuring Tracks: Create audio tracks in your recording software for each audio source you’ll be recording. Ensure that each track is routed to the correct input of your audio interface. Set the recording mode to “arm” or “record-ready” for the desired tracks to enable recording.
- Sound Check: Perform a sound check by playing or performing at the intended level to ensure proper input levels and audio quality. Monitor the input levels on your audio interface or within your recording software to ensure that the levels are within an appropriate range without clipping or distortion.
- Take Multiple Recordings: When ready, hit record in your recording software and start your performance or recording. Take multiple recordings or “takes” to allow for different versions or variations of the same part. This gives you the flexibility to choose the best takes during the editing and mixing stages.
- Fine-Tuning During Recording: Make necessary adjustments during the recording process if needed. This could include adjusting microphone positions, instrument settings, or fine-tuning performance details. Pause the recording if you need to make any major changes or modifications before continuing.
- Monitor and Listen: Monitor your audio as you record to ensure the sound quality is consistent and meets your expectations. Listen for any technical issues, such as unwanted noise, pops, or clicks, that may affect the quality of your recordings. Address any issues promptly to maintain the integrity of your audio.
- Organize Your Takes: Once you’ve completed your recordings, organize your takes within your recording software. Label and categorize each take accordingly to make it easier to review and select the best performances during the editing phase.
- Save and Backup: Regularly save your recordings and backup your project files to prevent any loss of data. Consider saving multiple versions of your project at different stages to allow for easy access and retrieval if needed. A reliable backup strategy will safeguard your hard work and prevent any potential data loss.
By following these steps, you’ll be able to record your audio efficiently and effectively with your audio interface. Remember to take your time, experiment, and strive for the best performances that capture your artistic vision. With practice and experience, you’ll develop the skills needed to achieve professional-quality recordings.
Tips for Getting the Best Sound Quality
When recording with your audio interface, getting the best sound quality is key to creating professional-sounding recordings. Here are some helpful tips to ensure optimal sound quality:
- Use High-Quality Cables: Invest in high-quality cables to connect your microphones, instruments, and audio interface. Good cables minimize signal loss and interference, resulting in cleaner and more accurate recordings.
- Position Microphones Properly: Experiment with microphone placement to achieve the best sound. Consider factors such as proximity, angle, and distance to find the sweet spot for capturing your audio source. Pay attention to the microphone’s polar pattern and adjust accordingly to get the desired sound.
- Control Acoustic Reflections: Reduce unwanted reflections and reverberations in your recording environment. Use acoustic treatment such as diffusers, absorbers, and bass traps to create a more controlled and balanced acoustic environment, resulting in cleaner recordings.
- Consider Room Tone: Be mindful of the room tone or ambient noise in your recordings. Background noise can affect the overall sound quality. Minimize extraneous noises by choosing a quiet recording location or using noise reduction techniques during post-production.
- Optimize Input Levels: Keep an eye on your input levels to avoid clipping or distortion. Aim for a healthy signal level without consistently hitting the maximum levels. Find the optimal balance between capturing enough signal and preserving headroom for a dynamic and clean recording.
- Use Pop Filters and Windscreens: If you’re recording vocals, use pop filters to minimize plosive sounds caused by hard consonants like “p” and “b”. Windscreens can help reduce wind noise or unwanted breath sounds during vocal recordings or outdoor recordings.
- Experiment with Microphone Techniques: Explore different microphone techniques to capture your audio source in unique ways. Techniques such as close-miking, stereo techniques, or using multiple microphones on different instruments can add depth and dimension to your recordings.
- Apply Proper Gain Staging: Pay attention to gain staging to maintain a healthy signal-to-noise ratio. Ensure that each component in your recording chain, such as the microphone, preamp, and audio interface, is set to an appropriate level to avoid introducing excessive noise and maintain a clean audio signal.
- Consider using External Preamps: If your audio interface allows for it, consider using external preamps to enhance the sound quality. External preamps can provide additional warmth, depth, or character to your recordings, especially for vocals or instruments that require specific sonic qualities.
- Experiment and Trust Your Ears: Don’t be afraid to experiment and trust your ears when making decisions about sound quality. Use reference tracks as a guide and listen critically to your recordings. Make adjustments as needed to achieve the desired sonic outcome.
By following these tips, you’ll be able to achieve the best sound quality when recording with your audio interface. Remember that sound quality is a result of the combined efforts in capturing, processing, and mixing your audio. Consistently strive for excellence and always be open to learning and refining your skills as an audio engineer or producer.
Troubleshooting Common Issues
While recording with an audio interface, you may encounter some common issues that can impact your workflow and sound quality. Here are some troubleshooting tips to help you resolve these issues:
- No Sound: If you’re not getting any sound from your audio interface, check the following: ensure that your audio interface is properly connected to your computer, confirm that the input and output settings are correctly configured in your recording software, and check that your monitoring devices (headphones or speakers) are properly connected and powered on.
- Latency: Latency can manifest as an audible delay between when you play or sing and when you hear the sound in your headphones or monitors. To reduce latency, adjust the buffer size in your recording software settings. Setting a smaller buffer size generally reduces latency, but it may increase the strain on your computer’s processing power.
- Crackling or Popping Sounds: If you’re hearing crackling or popping sounds during recording or playback, it could be due to buffer underruns or CPU overloads. Increase the buffer size in your recording software settings to alleviate the strain on your computer’s CPU. If the issue persists, consider closing unnecessary applications or processes running in the background that may be taxing your computer’s resources.
- Unstable Connections: If you experience intermittent or unstable connections with your audio interface, check the cables and connections for any loose or faulty connections. Try using different cables or ports to rule out any issues with the physical connections. Additionally, ensure that you have the latest drivers and firmware installed for your audio interface to ensure compatibility and stability.
- Unwanted Noise: If you’re experiencing unwanted noise in your recordings, it could be due to electrical interference or improper gain staging. Ensure that all your equipment is properly grounded and that cables are away from power sources or other potential sources of interference. Additionally, check the gain settings on your audio interface and adjust them appropriately to avoid introducing excess noise or distortion.
- Driver Issues: If you’re experiencing issues with your audio interface not being recognized by your computer, it could be due to driver compatibility issues. Make sure you have the latest drivers installed from the manufacturer’s website. If the problem persists, consider uninstalling and reinstalling the drivers, and ensure that your operating system is up to date.
- Audio Dropout: Audio dropouts occur when there are interruptions or brief losses of audio during recording or playback. To prevent audio dropouts, make sure your computer meets the minimum system requirements for your recording software and audio interface. Close any unnecessary applications or processes running in the background that may be taxing your computer’s resources. Additionally, ensure that your hard drive has enough free space to handle the recording and playback of audio files.
- Limited Track Count: If you’re reaching the maximum track count of your recording software and want to expand your recording capabilities, consider using external hardware devices, such as a digital mixer or additional audio interfaces, to increase the number of available inputs and outputs. This can help you overcome track limitations and accommodate larger recording projects.
These troubleshooting tips should help you resolve common issues that may arise when using an audio interface. Remember to consult the user manual for your specific audio interface and recording software for more in-depth troubleshooting steps and support. In case you encounter persistent issues, don’t hesitate to reach out to the manufacturer’s customer support for further assistance.
Conclusion
Congratulations! You’ve reached the end of this comprehensive guide to recording with an audio interface. Armed with this knowledge, you’re now better equipped to make informed decisions, troubleshoot common issues, and achieve the best sound quality in your recordings.
Throughout this guide, we covered a range of topics, including understanding audio interfaces, choosing the right one for your needs, setting it up correctly, and recording with optimal sound quality. We discussed the importance of connectivity, preamp quality, and compatibility when selecting an audio interface. We also explored how to connect your microphone or instrument, configure your digital audio workstation, adjust input levels, and monitor your audio effectively.
Remember, achieving professional-sounding recordings takes time, practice, and experimentation. Don’t be afraid to try different techniques and explore new possibilities to enhance your recordings. Trust your ears, trust the process, and continuously strive for improvement.
As you embark on your recording journey, ensure you keep these key points in mind: choose high-quality equipment, strive for proper gain staging, optimize your monitoring, and troubleshoot any issues that arise. By implementing these strategies, you’ll be able to capture and produce high-quality audio recordings that showcase your talent and creativity.
Lastly, remember that your audio interface is just one piece of the puzzle. Pair it with a comfortable recording environment, good microphone technique, and solid post-production to achieve great results. Continuously learn and stay up to date with the latest recording techniques and technologies as the field of audio engineering evolves.
Now go forth, armed with your newfound knowledge, and create the best recordings you’ve ever made! Whether it’s music, podcasts, voiceovers, or any other audio project, your audio interface will be your faithful companion in delivering professional and captivating sound.