Home>Production & Technology>Audio Interface>How To Record Guitar In Fl Studio Using An Audio Interface
Audio Interface
How To Record Guitar In Fl Studio Using An Audio Interface
Published: February 4, 2024
Learn how to record guitar in FL Studio using an audio interface. Enhance your music production skills with the help of this step-by-step guide.
(Many of the links in this article redirect to a specific reviewed product. Your purchase of these products through affiliate links helps to generate commission for AudioLover.com, at no extra cost. Learn more)
Table of Contents
- Introduction
- What is an Audio Interface?
- Choosing the Right Audio Interface for Recording Guitar in FL Studio
- Setting Up Your Audio Interface with FL Studio
- Configuring Audio Settings in FL Studio
- Connecting Your Guitar to the Audio Interface
- Recording Guitar in FL Studio
- Tips for Getting a Great Guitar Tone in FL Studio
- Troubleshooting Common Issues
- Conclusion
Introduction
An audio interface is an essential tool for musicians and producers who want to record high-quality audio on their computers. It serves as the bridge between your instrument or microphone and your digital audio workstation (DAW), allowing you to capture and process audio signals with minimal latency and maximum clarity.
Recording guitar in FL Studio, one of the most popular DAWs for music production, requires a reliable audio interface to achieve professional results. In this article, we will explore the world of audio interfaces and provide you with practical tips on choosing and using the right interface for recording guitar in FL Studio.
Whether you’re a seasoned guitarist or a beginner looking to capture your musical ideas, having a dedicated audio interface will drastically improve the quality of your recordings. Not only will you experience lower latency and better sound reproduction, but you’ll also have access to a range of features and connectivity options.
In the following sections, we’ll guide you through the process of selecting the right audio interface for your needs, setting it up in FL Studio, configuring the audio settings, and connecting your guitar. We’ll also offer tips for getting a great guitar tone and troubleshoot common issues that may arise during the recording process.
By the end of this article, you’ll have a solid understanding of audio interfaces and how to effectively record guitar in FL Studio. So let’s dive in and unleash your creativity!
What is an Audio Interface?
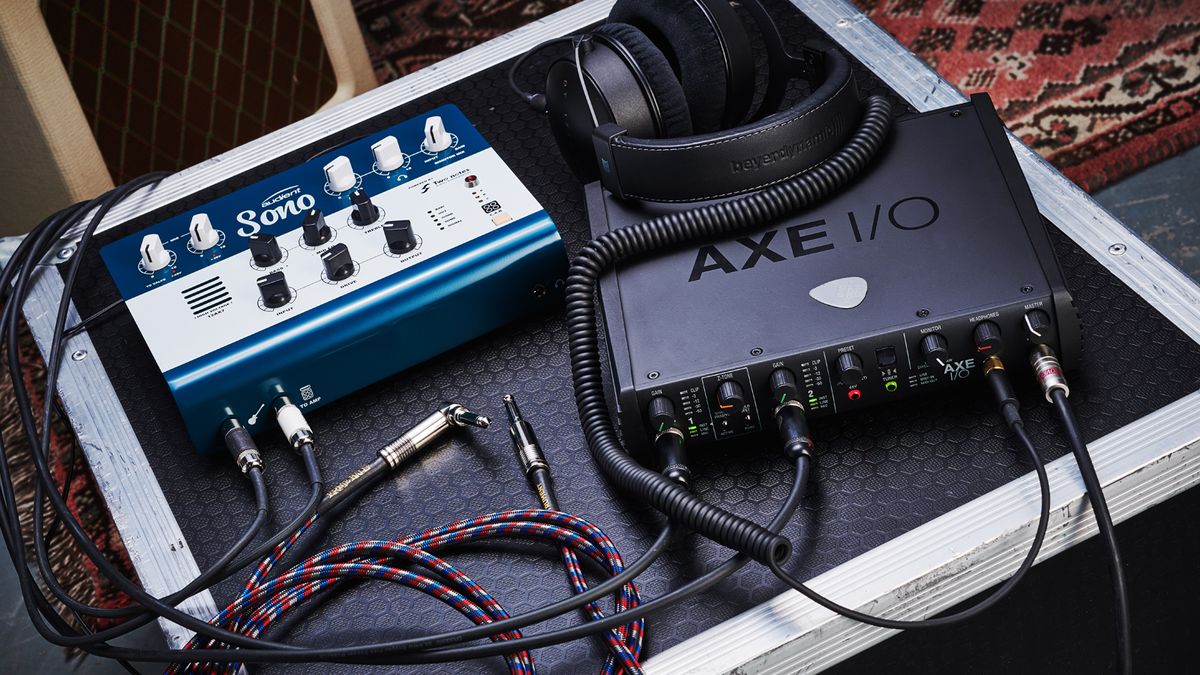
An audio interface is a hardware device that connects to your computer and acts as a bridge between your instruments or microphones and your digital audio workstation (DAW). It converts analog audio signals into digital data that can be processed and recorded on your computer. Audio interfaces come in various shapes and sizes, offering different features and connectivity options to suit different recording needs.
Audio interfaces typically have inputs for connecting microphones, instruments such as guitars or keyboards, and line-level sources, such as mixers or synthesizers. They also have outputs that allow you to connect studio monitors or headphones for monitoring the recorded audio. Some audio interfaces also include additional features like MIDI inputs and outputs, digital inputs and outputs, and onboard DSP for processing the audio signals.
The main advantage of using an audio interface is its ability to provide higher audio quality and lower latency compared to the standard built-in audio inputs and outputs on your computer. They are designed with higher quality preamps and converters, which capture the audio signal with greater accuracy and fidelity. This can make a significant difference in the final recording quality and overall sound experience.
In addition to improved audio quality, audio interfaces offer more control and flexibility in recording and monitoring your audio. They often come with dedicated software control panels that allow you to adjust input gain levels, monitor the signal with zero-latency, and route the audio to different outputs or effects processors. This level of control is crucial for musicians and producers who require precision and customization in their recording workflows.
Overall, an audio interface is an essential tool for anyone looking to record high-quality audio on their computer. Whether you’re a professional musician, a home studio enthusiast, or a podcaster, investing in a good audio interface will greatly enhance your recording capabilities and elevate the overall sound of your productions.
Choosing the Right Audio Interface for Recording Guitar in FL Studio
When it comes to recording guitar in FL Studio, choosing the right audio interface is crucial for achieving the best possible sound quality and performance. Here are some factors to consider when selecting an audio interface for your guitar recordings:
- Input options: Look for an audio interface that offers suitable input options for your recording needs. For recording guitar, it’s essential to have at least one dedicated instrument-level input, preferably with a high impedance option for authentic guitar tone. Additionally, having microphone inputs can be beneficial if you plan to record vocals or mic up your guitar amplifier.
- Sample rate and bit depth: The sample rate and bit depth determine the quality and resolution of your audio recordings. Higher sample rates (such as 24-bit/96 kHz) offer better audio fidelity, but they may require more processing power from your computer. Choose an audio interface that supports your desired sample rate and bit depth.
- Preamp quality: The preamps in your audio interface are responsible for amplifying the weak guitar signal to a suitable level for recording. Look for an interface with high-quality preamps that provide clean, transparent sound with minimal noise and distortion. Good preamps can make a noticeable difference in the overall sound quality of your recordings.
- Connectivity: Consider the connectivity options provided by the audio interface. USB interfaces are the most common and offer easy compatibility with most computers. However, if you have a Thunderbolt-enabled computer, a Thunderbolt interface may offer even lower latency and higher bandwidth. Make sure the interface you choose is compatible with your computer.
- Budget: Set a budget for your audio interface purchase. Determine how much you’re willing to spend and find an interface that offers the best balance between price and features. There are many great options available in different price ranges, so it’s possible to find a suitable interface that meets your requirements.
It’s often helpful to read reviews and compare specifications of different audio interfaces before making a decision. Consider your specific recording needs and prioritize the features that are most important to you. Keep in mind that the audio interface you choose should not only meet your current requirements but also be able to accommodate future expansion as your recording setup evolves.
Remember, the right audio interface will not only provide better sound quality but also offer a seamless and intuitive recording experience in FL Studio. Take your time in researching and selecting an audio interface to ensure that you make an informed decision that will benefit your guitar recordings in the long run.
Setting Up Your Audio Interface with FL Studio
Once you’ve chosen the right audio interface for your guitar recordings, the next step is to set it up properly in FL Studio. Here’s a step-by-step guide to help you get started:
- Install the drivers: Before connecting your audio interface to your computer, make sure to install the necessary drivers. These drivers allow your computer to recognize and communicate with the interface. You can typically find the drivers on the manufacturer’s website or included in the product package.
- Connect the audio interface: Use the provided USB or Thunderbolt cable to connect your audio interface to your computer. Ensure that the connection is secure and that the interface is powered on.
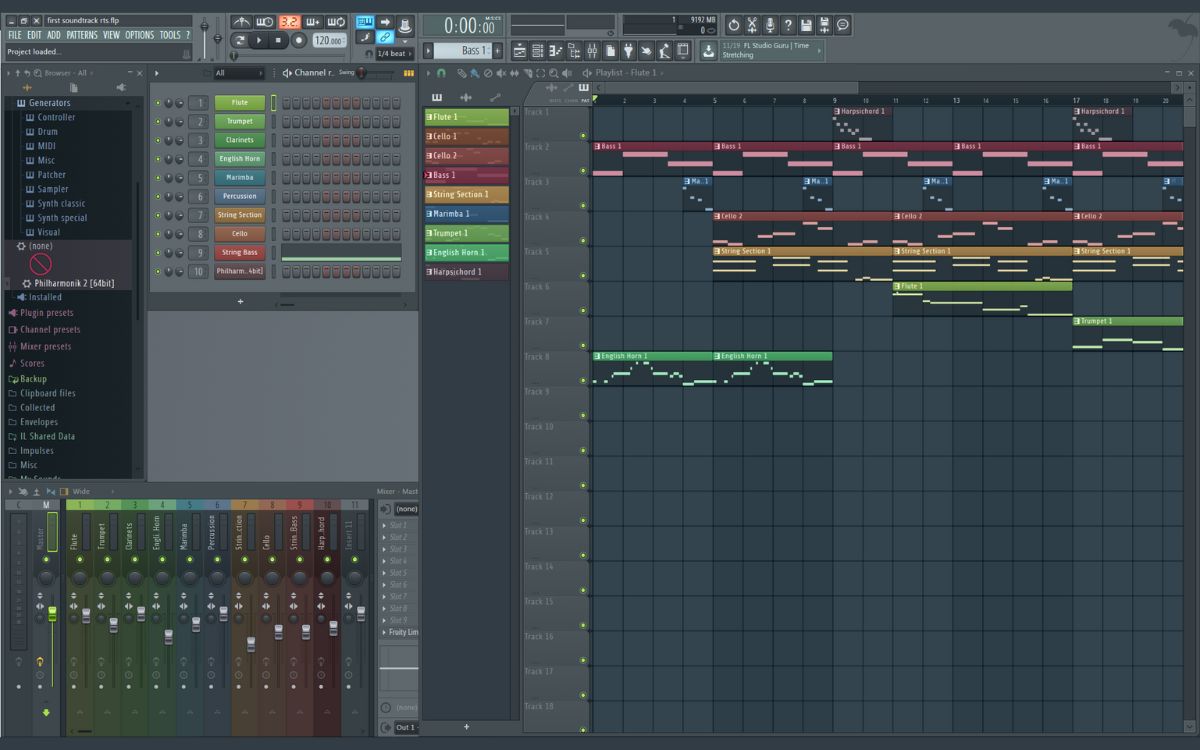
- Launch FL Studio: Open FL Studio on your computer. Once it’s up and running, go to the “Options” menu and select “Audio Settings.”
- Select the audio interface: In the Audio Settings window, click on the “Device” drop-down menu and select your audio interface from the list. FL Studio will now use your interface for audio input and output.
- Configure buffer size: Adjust the buffer size setting to achieve the desired latency. A smaller buffer size will result in lower latency but may require more processing power from your computer. Experiment with different buffer sizes to find the optimal balance between latency and performance.
- Set sample rate and bit depth: Ensure that the sample rate and bit depth settings in FL Studio match the settings of your audio interface. Make sure they are consistent to avoid any mismatches or audio quality issues.
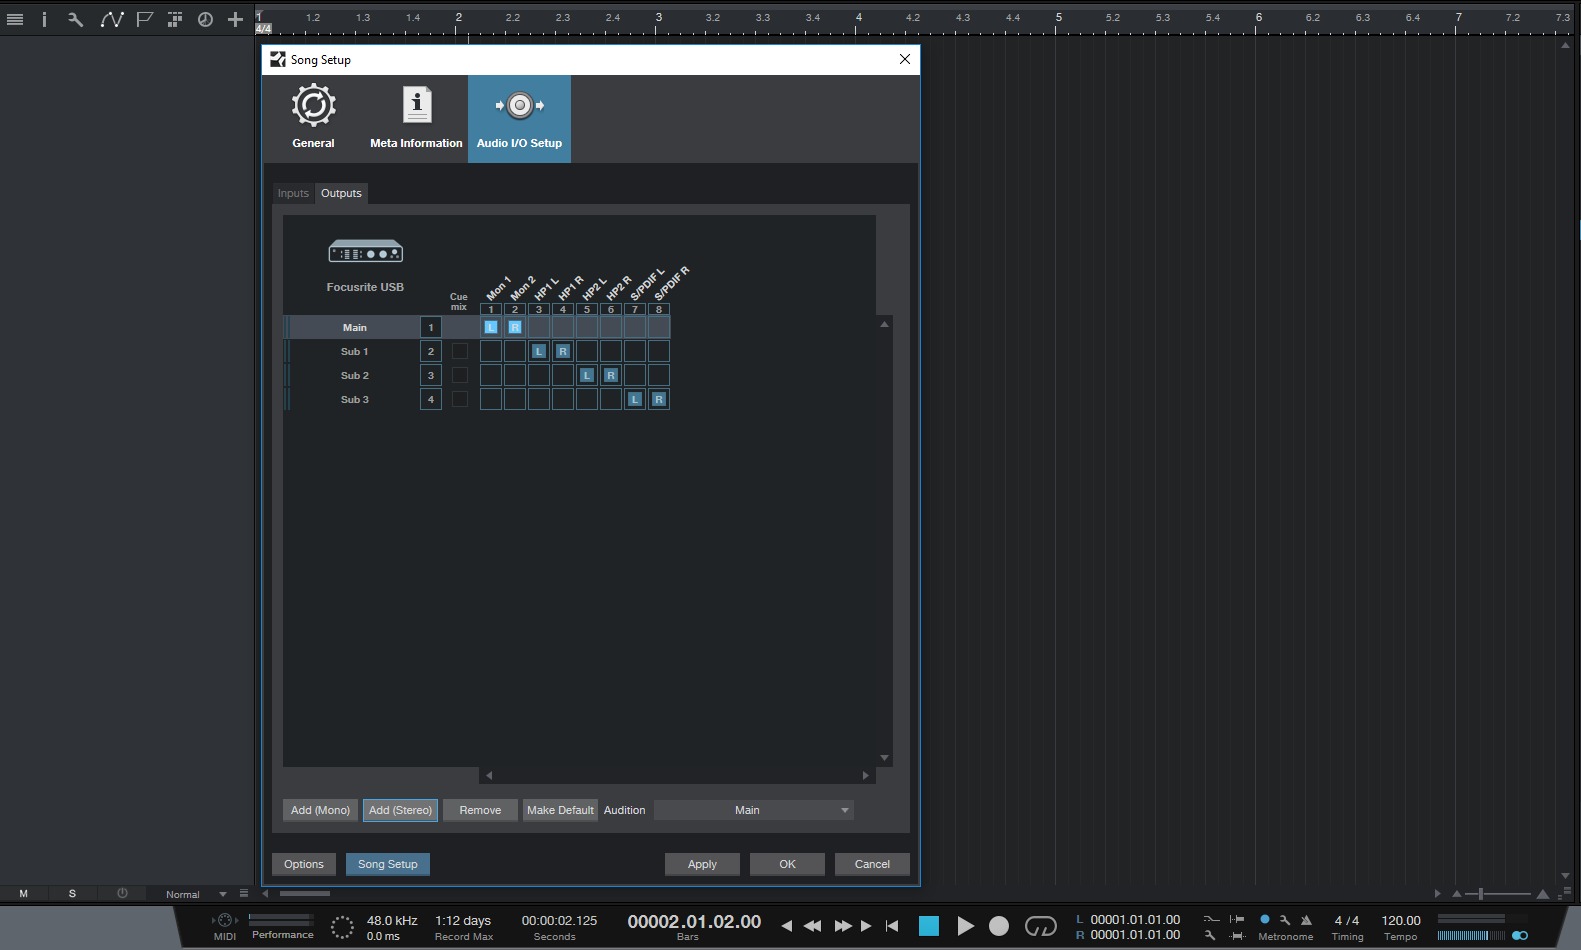
- Select input and output: In the “Audio Settings” window, select the appropriate input and output channels for your audio interface. If you’re recording guitar, choose the instrument input as your input source. For monitoring, select the appropriate output channels for your studio monitors or headphones.
- Test the setup: To ensure that your audio interface is working correctly, play your guitar or an audio track in FL Studio and monitor the sound through your chosen output channels. If you can hear the sound without any issues, your audio interface setup is complete.
It’s worth mentioning that the setup process may vary slightly depending on the specific audio interface model and FL Studio version you’re using. Therefore, it’s important to refer to the interface’s user manual and FL Studio documentation for detailed instructions tailored to your specific setup.
Once you’ve set up your audio interface in FL Studio, you’re ready to start recording and unleash your creativity. Remember to regularly update your audio interface drivers and FL Studio software to ensure compatibility and access to the latest features and improvements.
Configuring Audio Settings in FL Studio
Configuring the audio settings in FL Studio is essential to ensure optimal performance and sound quality during your guitar recording sessions. Here are some key settings to consider:
- Buffer size: The buffer size determines the amount of audio data that is processed at a time. A smaller buffer size results in lower latency but may require more processing power from your computer. Adjust the buffer size based on your computer’s capabilities and your desired balance between latency and performance.
- Sample rate and bit depth: Set the sample rate and bit depth in FL Studio to match the settings of your audio interface. These settings determine the audio quality and resolution of your recordings. Higher sample rates and bit depths offer better fidelity but require more processing power and storage space.
- Driver type: FL Studio offers different driver types, including ASIO (Audio Stream Input/Output) and FL Studio ASIO. ASIO drivers are recommended for low-latency performance. If your audio interface has ASIO drivers available, select them for the best recording experience.
- Input/output settings: Configure the input and output settings in FL Studio to match your audio interface’s inputs and outputs. Select the appropriate input channels for your guitar and the outputs for your studio monitors or headphones.
- Monitoring options: FL Studio provides various monitoring options to help you listen to your recordings during the recording process. You can enable or disable “Input Monitoring” to hear the direct input signal without latency. You can also choose between “Auto,” “Mix,” or “IN” monitoring mode to control the balance between direct input and playback.
- Latency settings: Adjust the latency settings in FL Studio to achieve the desired balance between audio quality and latency. Lower buffer sizes or sample rates can reduce latency, but they may put more strain on your computer’s resources. Experiment with different settings to find the optimal latency for your recording setup.
- Real-time recording options: FL Studio offers real-time recording options such as audio warping and time stretching to manipulate the timing and tempo of the recorded guitar. Familiarize yourself with these options and adjust them according to your needs before recording.
- Plugin optimization: If you plan to use plugins or virtual instruments during your recording session, be mindful of the CPU usage. Lowering the buffer size can reduce latency but may increase CPU load. Consider freezing tracks or using smart disable on plugins to optimize CPU usage.
Remember, the specific steps and options may vary slightly depending on your version of FL Studio. Therefore, it’s important to consult the FL Studio documentation or user manual for detailed instructions tailored to your setup.
By configuring the audio settings properly in FL Studio, you’ll ensure smooth recording and playback experiences, as well as maximize the overall sound quality and performance of your guitar recordings.
Connecting Your Guitar to the Audio Interface
Connecting your guitar to the audio interface is a crucial step in setting up your recording session. Follow these steps to ensure a proper connection:
- Select the appropriate input: Look for the dedicated instrument or Hi-Z input on your audio interface. This input is specifically designed to handle the signal from electric guitars or basses. Make sure your audio interface offers a high impedance input option for capturing the authentic tone of your instrument.
- Use an instrument cable: Connect your guitar to the audio interface using a quality instrument cable. Plug one end of the cable into the output jack of your guitar and the other end into the instrument input of your audio interface. Ensure that the connection is secure to avoid any audio interruptions or buzzing noises.
- Set the input level: Adjust the input gain knob or control on your audio interface to achieve an optimal recording level. Start with a conservative setting and gradually increase the gain until the signal from your guitar is strong enough without distorting or clipping. Monitoring the input meter in FL Studio can help you find the right level.
- Check the audio input: Open FL Studio and go to the mixer view. Select the channel corresponding to your guitar’s input. Make sure the channel is armed for recording, and check that the audio input is routed correctly to the corresponding mixer track.
- Test the signal: Play your guitar and monitor the input levels in FL Studio. Ensure that the signal registers in the input meters and that you can hear the sound through your studio monitors or headphones connected to the audio interface.
Remember, it’s essential to have a clean and reliable connection between your guitar and the audio interface to capture the best possible sound. Avoid using adapters or connectors that may introduce noise or signal degradation. Additionally, regularly check your cables for any signs of wear and replace them as needed to maintain optimal signal quality.
Once you’ve successfully connected your guitar to the audio interface, you’re ready to start recording your guitar tracks in FL Studio. Enjoy the excitement of capturing your musical ideas and crafting awesome guitar-driven compositions!
Recording Guitar in FL Studio
Now that you have your audio interface properly set up and your guitar connected, it’s time to start recording your guitar in FL Studio. Follow these steps to get started:
- Create a new track: In FL Studio, go to the playlist or mixer view and create a new audio track for recording your guitar. Right-click on an empty track slot and select “Insert > Audio Clip” or “Insert > Audio Recording.” This will create a track that is ready to record your guitar audio.
- Arm the track for recording: Enable the record button (usually a red circle) on the guitar track to arm it for recording. This allows FL Studio to capture the incoming audio from your guitar.
- Set the recording preferences: Right-click on the record button of the guitar track and select “Audio Settings.” In the Audio Settings window, configure the recording preferences such as sample rate, bit depth, and file format. Set these preferences according to your desired recording quality.
- Start recording: Press the record button on the transport panel or use the assigned keyboard shortcut to start recording. Play your guitar as you normally would, and FL Studio will capture the audio in real-time.
- Monitor the recording: Watch the input levels to ensure they’re hitting the desired range without clipping or distorting. Monitor the recorded audio through your studio monitors or headphones to ensure the sound is being captured accurately.
- Stop and review the recording: When you’re finished playing, press the stop button on the transport panel to stop the recording. You can now review and edit the recorded guitar audio by selecting the clip and opening it in the playlist or audio editor. Trim, slice, or apply any additional processing or effects to achieve your desired guitar sound.
Recording guitar in FL Studio allows you to capture your performances, experiment with different tones, and create captivating guitar parts for your music productions. Remember to experiment with mic placements, amp simulators, and effects to shape the guitar sound to suit your artistic vision.
It’s also worth mentioning that FL Studio offers various recording options, such as loop recording and MIDI recording for virtual instruments. Explore these options to enhance your recording workflow and unleash your creativity.
By following these steps and experimenting with different recording techniques, you’ll be able to capture amazing guitar performances and bring your musical ideas to life in FL Studio.
Tips for Getting a Great Guitar Tone in FL Studio
Getting a great guitar tone in FL Studio is crucial for creating captivating and professional-sounding recordings. Here are some tips to help you achieve an exceptional guitar tone:
- Experiment with amp simulators: FL Studio offers a variety of amp simulation plugins that can emulate the sound of classic amps and cabinets. Spend time exploring different amp simulators to find the one that suits your desired tone. Adjust parameters like gain, EQ, and cabinet selection to shape the sound to your liking.
- Combine multiple amp and effect plugins: Don’t be afraid to layer different amp simulators and effects to create unique and complex guitar tones. Experiment with combinations of distortion pedals, modulation effects, and reverbs to achieve the desired sonic character.
- Utilize cabinet impulses: Enhance the realism of your guitar tone by using cabinet impulses or IR (impulse response) loaders. These allow you to simulate the sound of different speaker cabinets and microphone placements. Experiment with different impulses to find one that complements your guitar sound.
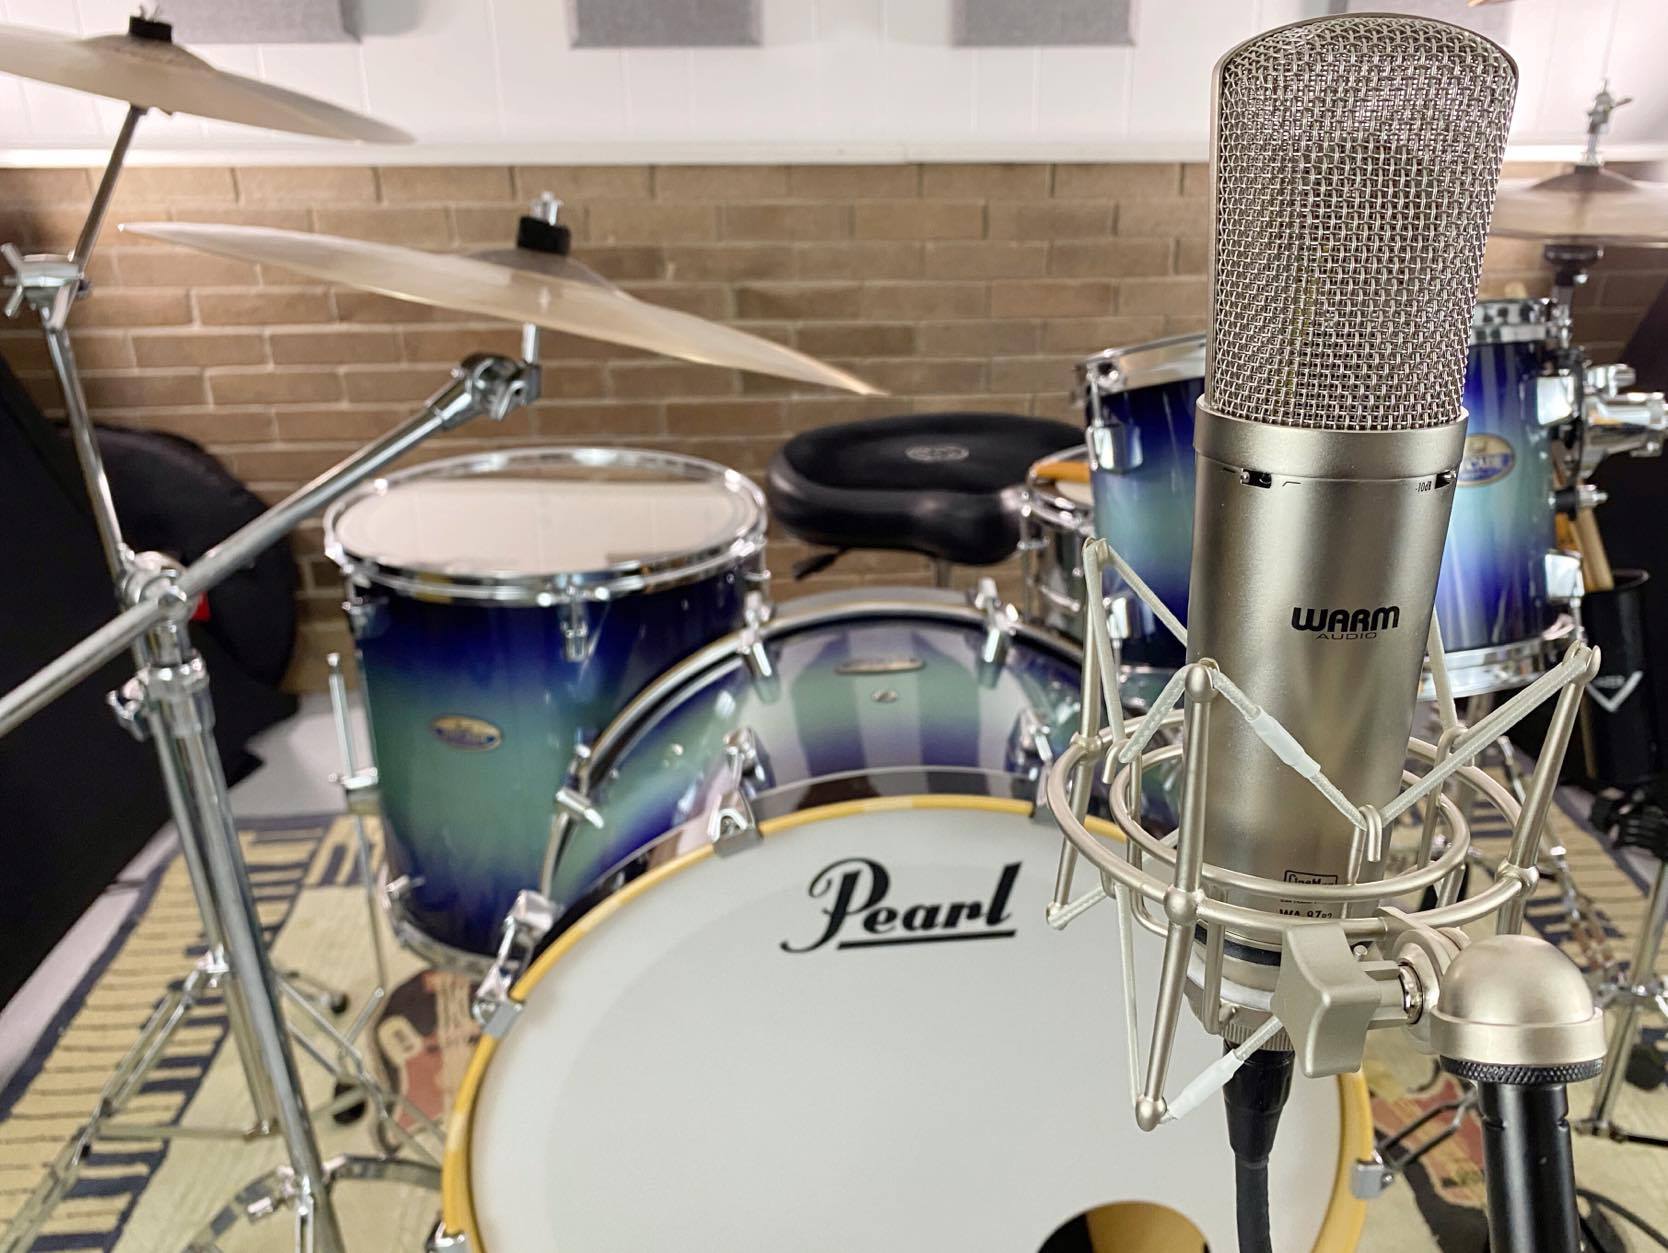
- Adjust microphone placement: If you’re using amp simulation plugins, experiment with virtual microphone placement. Moving the virtual microphone closer to or farther from the guitar cabinet can drastically affect the tone and dynamics of the recorded sound. Use your ears and experiment with different positions to find the ideal placement for your desired guitar tone.
- Add modulation effects: Modulation effects like chorus, flanger, and phaser can add depth and character to your guitar tone. Experiment with different modulation settings and intensities to find the right balance between subtle enhancement and bold sound shaping.
- Use EQ to sculpt the tone: Take advantage of the EQ plugins in FL Studio to shape the frequency response of your guitar. Use boosts and cuts to emphasize or attenuate specific frequencies, depending on the sound you’re aiming for. Be mindful of frequency clashes with other instruments in your mix to maintain a balanced sound.
- Layer multiple guitar tracks: Layering multiple guitar tracks can add depth and richness to your recordings. Experiment with recording multiple takes of the same part and panning them left and right to create a stereo guitar sound. This technique can make your guitar recordings sound wide and immersive.
- Experiment with different playing techniques: Don’t underestimate the impact of your playing technique on the guitar tone. Explore different playing styles, dynamics, and pick attack to bring out different characteristics of your instrument. Varying your playing technique can add expressiveness and uniqueness to your guitar recordings.
Remember, achieving a great guitar tone is a subjective process, and what works for one style or genre may not work for another. Trust your ears and be open to experimentation. Don’t be afraid to break the rules and find your own signature guitar sound in FL Studio.
By incorporating these tips and techniques, you’ll be able to sculpt incredible guitar tones that bring your music to life and captivate your listeners in FL Studio.
Troubleshooting Common Issues
While recording guitar in FL Studio, you may encounter some common issues that can hinder your workflow. Here are a few troubleshooting tips to help you overcome these challenges:
- Latency: Experiencing noticeable delay between playing your guitar and hearing the playback can be frustrating. To reduce latency, try lowering the buffer size in your audio interface settings. Keep in mind that reducing the buffer size too much may result in audio dropouts or glitches, so find a balance that works for your system.
- Noise and interference: If you notice unwanted noise or interference in your guitar recordings, ensure that all cables are properly connected and in good condition. Using high-quality cables and shielding them from power sources or other electronics can help minimize noise. Additionally, make sure your audio interface is grounded properly and that you’re using good quality power sources and balanced connections wherever possible.
- Clipping and distortion: When recording guitar, it’s important to ensure that the input gain is set at an appropriate level to avoid clipping and distortion. Adjust the input gain on your audio interface to capture a clean and strong signal without overloading. Monitor the input levels in FL Studio to ensure they stay within the optimal range.
- Misconfigured settings: Double-check your audio interface and FL Studio settings to ensure they are properly configured. Verify that your audio interface is selected as the input and output device in FL Studio’s audio settings. Also, confirm that the sample rate and bit depth settings match between the interface and FL Studio to avoid any compatibility issues.
- Driver updates: Outdated audio interface drivers can lead to compatibility issues and performance problems. Regularly check for driver updates from the manufacturer’s website and install the latest versions to ensure smooth operation. Keeping your audio interface firmware up to date is also recommended.
- System resources: Recording guitar alongside other resource-intensive processes may strain your computer’s resources and cause performance issues. Close unnecessary applications and processes running in the background to free up CPU power and RAM. If you continue to experience performance issues, consider upgrading your computer’s hardware or optimizing your FL Studio project by freezing tracks or bouncing them to audio.
If you encounter other specific issues or problems during your guitar recording sessions in FL Studio, consulting the FL Studio documentation, online forums, or reaching out to the FL Studio community can provide additional guidance and solutions.
Remember, troubleshooting is an essential part of the recording process. By addressing and resolving common issues, you can ensure a smooth and uninterrupted guitar recording experience in FL Studio.
Conclusion
Recording guitar in FL Studio using an audio interface opens up a world of possibilities for musicians and producers. With the right gear and knowledge, you can capture high-quality guitar performances and create stunning musical compositions. In this article, we explored the importance of choosing the right audio interface, setting it up properly, and configuring the audio settings in FL Studio.
We discussed the crucial steps involved in connecting your guitar to the audio interface and provided tips for achieving a great guitar tone. From experimenting with amp simulators and effects to utilizing cabinet impulses and fine-tuning EQ settings, these tips can help you shape your guitar sound to perfection.
Additionally, we shared troubleshooting advice to overcome common issues such as latency, noise interference, clipping, and misconfigured settings. By following these troubleshooting tips, you can ensure a smooth and uninterrupted recording experience.
Remember, recording guitar in FL Studio is a combination of technical expertise and artistic expression. Take the time to explore different techniques, experiment with various settings, and develop your unique guitar sound. Let your creativity guide you in transforming your guitar recordings into captivating musical creations.
Now, armed with the knowledge and tips provided in this article, go forth and unleash your guitar prowess in FL Studio. Capture the magic of your playing, refine your guitar tones, and create music that truly resonates with your audience. Happy recording!